Introduction
Welcome to the Cuisinart Air Fryer + Convection Toaster Oven user manual. This appliance is designed to provide versatile cooking options, combining the functions of an air fryer, convection oven, and toaster oven. It features 8 cooking functions: Air Fry, Toast, Convection Bake, Bake, Convection Broil, Broil, Grill, and Warm. Please read these instructions thoroughly before operating the appliance to ensure safe and efficient use.

Image: Front view of the Cuisinart TOA-70 Air Fryer + Convection Toaster Oven in Navy Blue.
Important Safeguards
When using electrical appliances, basic safety precautions should always be followed to reduce the risk of fire, electric shock, and/or injury, including the following:
- Read all instructions.
- Do not touch hot surfaces. Use handles or knobs.
- To protect against electrical shock, do not immerse cord, plug, or non-removable parts of the appliance in water or other liquids.
- Close supervision is necessary when any appliance is used by or near children.
- Unplug from outlet when not in use and before cleaning. Allow to cool before putting on or taking off parts.
- Do not operate any appliance with a damaged cord or plug, or after the appliance malfunctions or has been damaged in any manner.
- The use of accessory attachments not recommended by Cuisinart may cause injuries.
- Do not use outdoors.
- Do not let cord hang over edge of table or counter, or touch hot surfaces.
- Do not place on or near a hot gas or electric burner, or in a heated oven.
- Extreme caution must be used when moving an appliance containing hot oil or other hot liquids.
- To disconnect, turn any control to OFF, then remove plug from wall outlet.
- Do not use appliance for other than intended use.
- Always ensure the appliance is placed on a stable, heat-resistant surface.
Product Overview
Components and Accessories
Your Cuisinart Air Fryer + Convection Toaster Oven comes with several accessories to enhance your cooking experience:
- Air Fry Basket: For air frying foods, allowing hot air to circulate evenly.
- Baking Pan/Drip Tray: Collects drips during air frying, baking, or broiling. Can also be used for baking.
- Oven Rack: Supports baking pans, dishes, or items for toasting.
- Grill/Griddle Plate: Reversible plate for grilling or griddling.
- Pull-out Crumb Tray: Located at the bottom, slides out for easy cleaning of crumbs.
- Oven Light: Illuminates the interior for monitoring cooking progress.
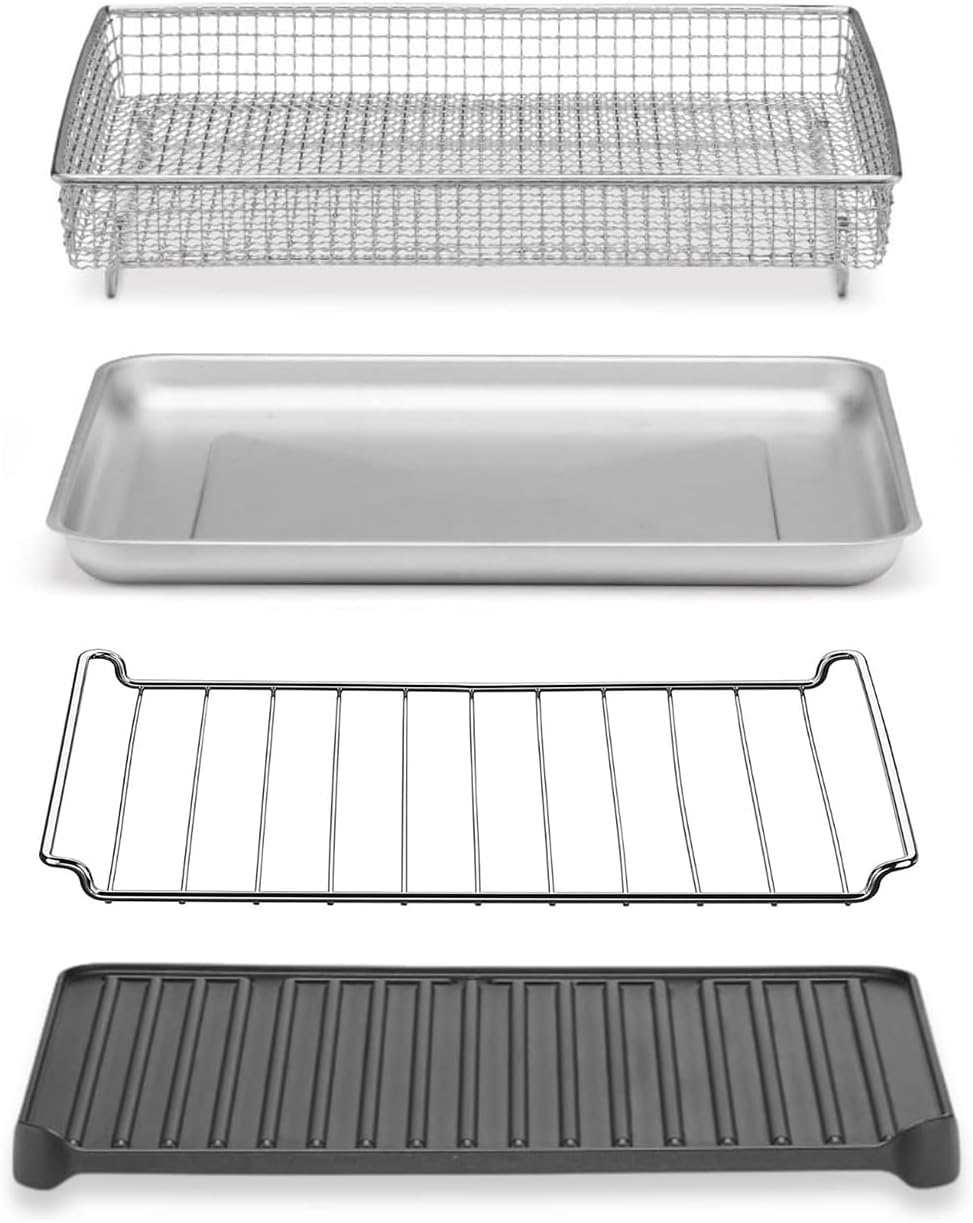
Image: Included accessories: Air Fry basket, baking pan, oven rack, and grill plate.
Control Panel
The appliance features intuitive dials for precise control over cooking functions:
- ON/OVEN TIMER Dial: Sets cooking time for oven functions (up to 60 minutes) and includes an 'ON' position for continuous operation.
- TEMPERATURE Dial: Adjusts the cooking temperature from Warm to 450°F.
- FUNCTION Dial: Selects one of the 8 cooking modes: Air Fry, Toast, Convection Bake, Bake, Convection Broil, Broil, Grill, Warm.
- ON/TOAST TIMER Dial: Specifically for toasting, sets toast shade and acts as a timer.
- Power Button: Turns the unit on or off.
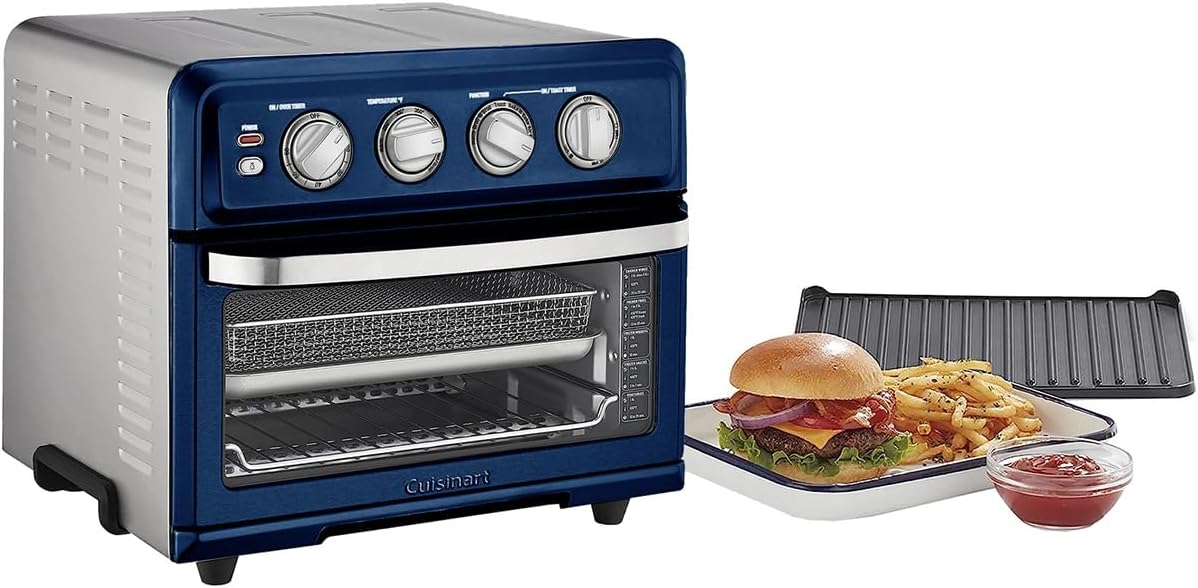
Image: Close-up of the control panel with various dials and buttons.
Setup
Before First Use
- Unpack the oven and remove all packaging materials and promotional labels.
- Clean the interior with a damp cloth and mild liquid soap. Dry thoroughly.
- Wash all accessories (Air Fry basket, baking pan, oven rack, grill plate, crumb tray) in warm, soapy water or in the dishwasher. Rinse and dry thoroughly.
- Place the oven on a flat, stable, heat-resistant surface, ensuring at least 4 inches of clearance on all sides for proper ventilation.
- Plug the power cord into a standard electrical outlet.
Operating Instructions
General Operation
- Place food on the appropriate accessory (oven rack, baking pan, or Air Fry basket) and insert into the oven.
- Turn the FUNCTION dial to your desired cooking mode.
- Turn the TEMPERATURE dial to the desired temperature.
- Turn the ON/OVEN TIMER dial to the desired cooking time or to the 'ON' position for continuous cooking. For toasting, use the ON/TOAST TIMER dial.
- The oven will begin cooking. The oven light will illuminate when the door is opened.
- When the timer expires, the oven will automatically shut off. If using the 'ON' position, manually turn the timer dial to 'OFF' when cooking is complete.
Cooking Functions
This appliance offers a variety of cooking methods:
- Air Fry: Ideal for achieving crispy results with little to no oil. Use the Air Fry basket.
- Bake: For traditional baking of cakes, cookies, and casseroles. Use the baking pan or an oven-safe dish on the oven rack.
- Convection Bake: Uses a fan to circulate hot air for faster, more even baking.
- Broil: For browning the top of foods or cooking thin cuts of meat. Use the baking pan to catch drips.
- Convection Broil: Combines broiling with convection for enhanced browning and faster cooking.
- Grill: Use the reversible grill/griddle plate for grilling meats and vegetables.
- Toast: For toasting bread, bagels, and waffles. Use the oven rack and the ON/TOAST TIMER dial.
- Warm: Keeps cooked food warm without further cooking.

Image: Capacity illustration showing the oven can toast 6 slices of bread, bake a 12-inch pizza, or air fry 3 pounds of chicken wings.
Care and Maintenance
Proper cleaning and maintenance will ensure the longevity and optimal performance of your appliance.
Cleaning
- Always unplug the oven and allow it to cool completely before cleaning.
- Exterior: Wipe the exterior with a clean, damp cloth. Avoid abrasive cleaners that may damage the finish.
- Interior: The interior features a nonstick coating for easy cleaning. Wipe with a damp cloth and mild liquid soap. For stubborn stains, use a non-abrasive liquid cleanser or spray foam cleaner. Do not use steel wool pads or abrasive cleaners.
- Accessories: The Air Fry basket, baking pan, oven rack, grill plate, and crumb tray can be washed in warm, soapy water or in the dishwasher. Ensure they are thoroughly dry before storing or reusing.
- Crumb Tray: Regularly pull out the crumb tray from the bottom of the oven and discard accumulated crumbs. Wipe clean and replace.
Storage
Ensure the oven is clean and dry before storing. Store in a cool, dry place. Do not wrap the power cord tightly around the appliance; coil it loosely.
Troubleshooting
If you experience any issues with your Cuisinart Air Fryer + Convection Toaster Oven, please refer to the following common problems and solutions:
- Appliance does not turn on: Ensure the power cord is securely plugged into a working electrical outlet. Check if the timer dial is set to a cooking time or 'ON'.
- Food is not cooking evenly: Ensure food is arranged in a single layer in the Air Fry basket or on the baking pan. For convection functions, avoid overcrowding. Rotate food or accessories halfway through cooking if necessary.
- Smoke or odor during first use: A small amount of smoke and odor is normal during the initial use as protective oils burn off. This should dissipate quickly. Ensure adequate ventilation.
- Excessive smoke during cooking: This may indicate food residue or grease buildup. Clean the interior and accessories thoroughly. Reduce the amount of oil used for air frying.
- Toast is too light/dark: Adjust the toast shade selector on the ON/TOAST TIMER dial.
If the problem persists, please contact Cuisinart Customer Service for assistance.
Specifications
| Feature | Specification |
|---|---|
| Model Number | TOA-70 |
| Power | 1800 Watts |
| Functions | Air Fry, Toast, Convection Bake, Bake, Convection Broil, Broil, Grill, Warm |
| Temperature Range | Warm - 450°F |
| Capacity | 6 slices of bread, 12-inch pizza, 3 lbs chicken wings, 4 lbs chicken |
| Dimensions (D x W x H) | 12.25" x 15.75" x 13.75" |
| Weight | 23.1 pounds |
| Material | Stainless Steel |
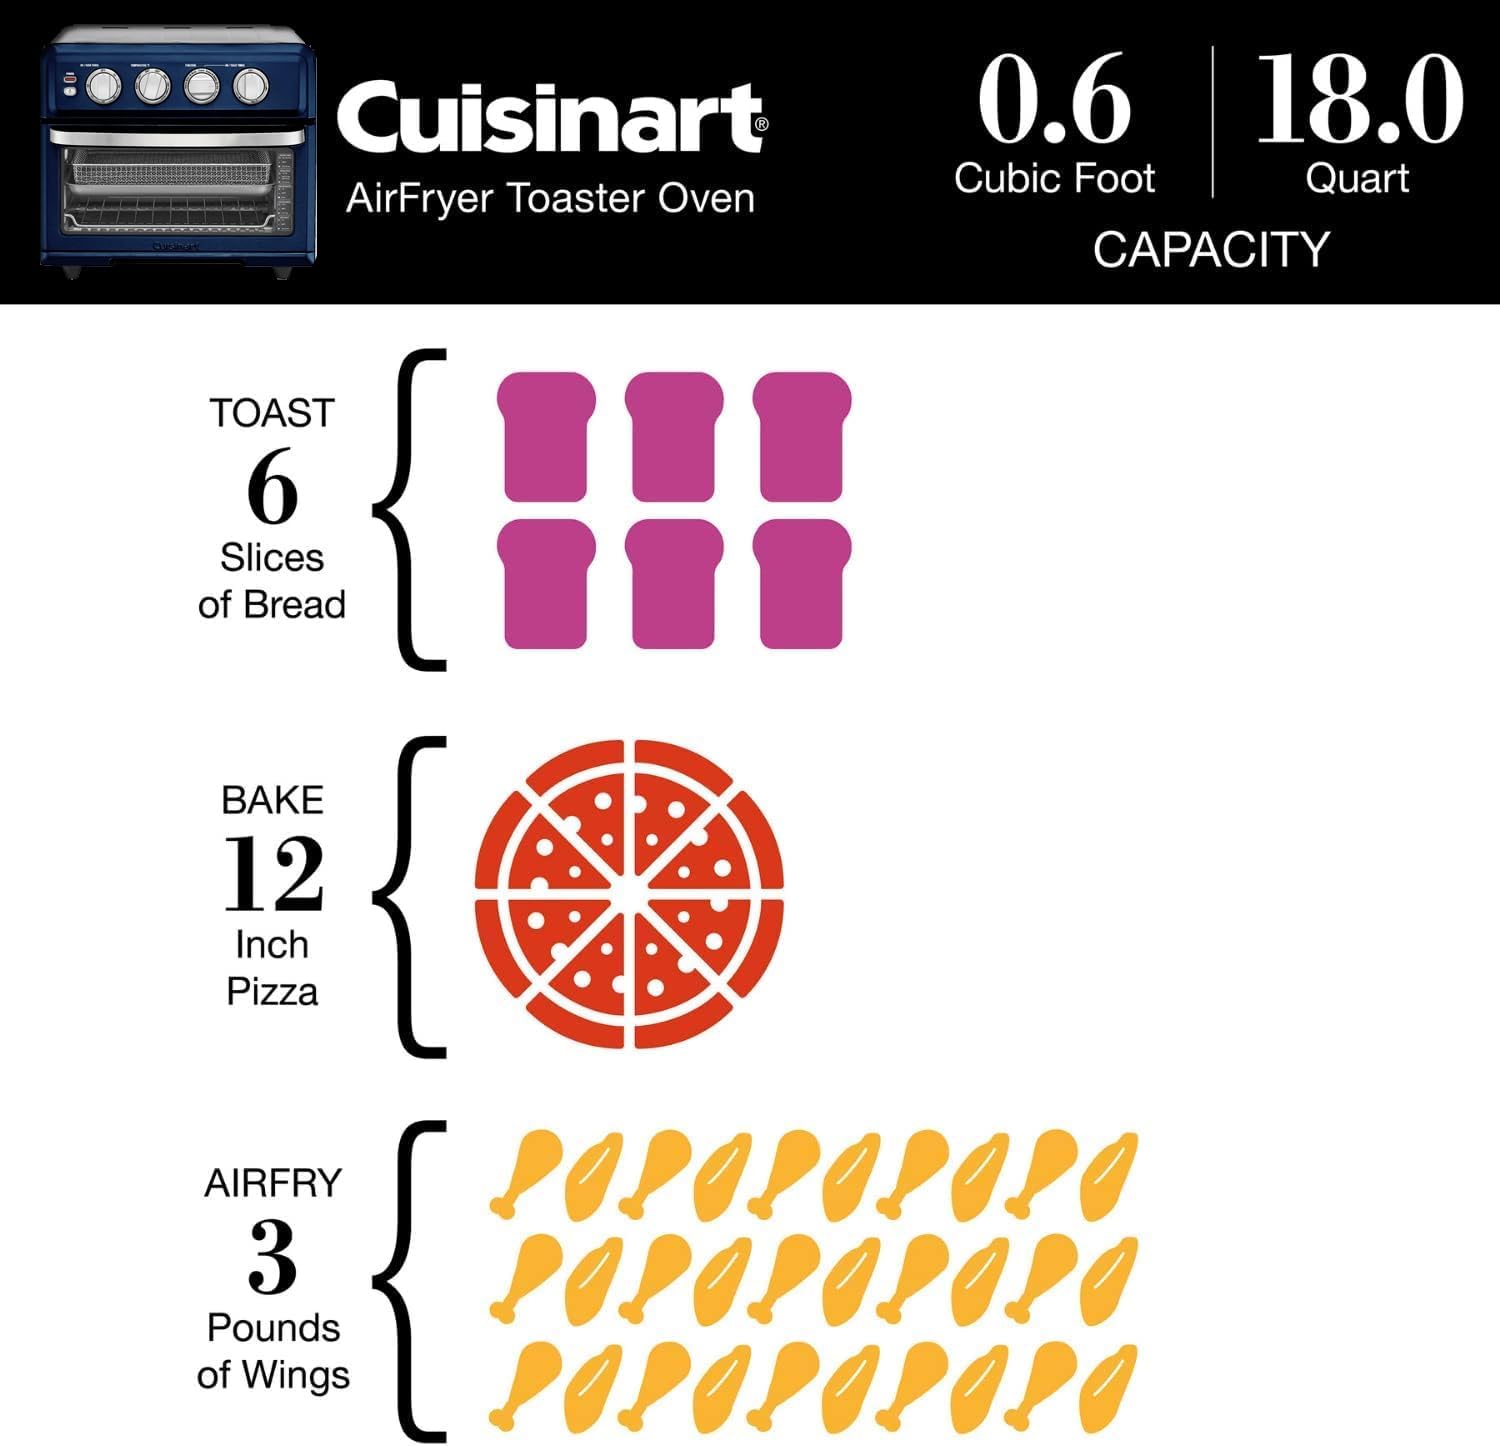
Image: Product dimensions for the Cuisinart TOA-70.
Warranty and Support
Your Cuisinart Air Fryer + Convection Toaster Oven is covered by a Limited 3-Year Warranty from the date of purchase. This warranty covers defects in materials and workmanship under normal home use.
For warranty claims, troubleshooting assistance, or to purchase replacement parts, please refer to the official Cuisinart website or contact Cuisinart Customer Service directly. Keep your proof of purchase for warranty validation.
For further information, visit the Cuisinart Store.