1. Introduction
This manual provides essential information for the safe and effective operation, maintenance, and troubleshooting of your Milwaukee M18 BLSAG125X-0 125mm 18V Angle Grinder. This powerful cordless angle grinder is optimized for cutting applications, delivering 11,000 RPM and power comparable to an 800W corded grinder. It is the most compact and lightweight cordless angle grinder in its series. Key features include kickback protection to safeguard the user, an integrated FIXTEC system for tool-free disc changes, a 125mm protective guard with a quick-adjust clip, and a removable dust filter to extend motor life. Its compact handle design and lock-off function enhance safety. The brushless motor, REDLITHIUM battery, and REDLINK electronics ensure power, battery life, and durability. It is part of the M18 battery system, compatible with all Milwaukee M18 batteries. Please read this manual thoroughly before using the tool.
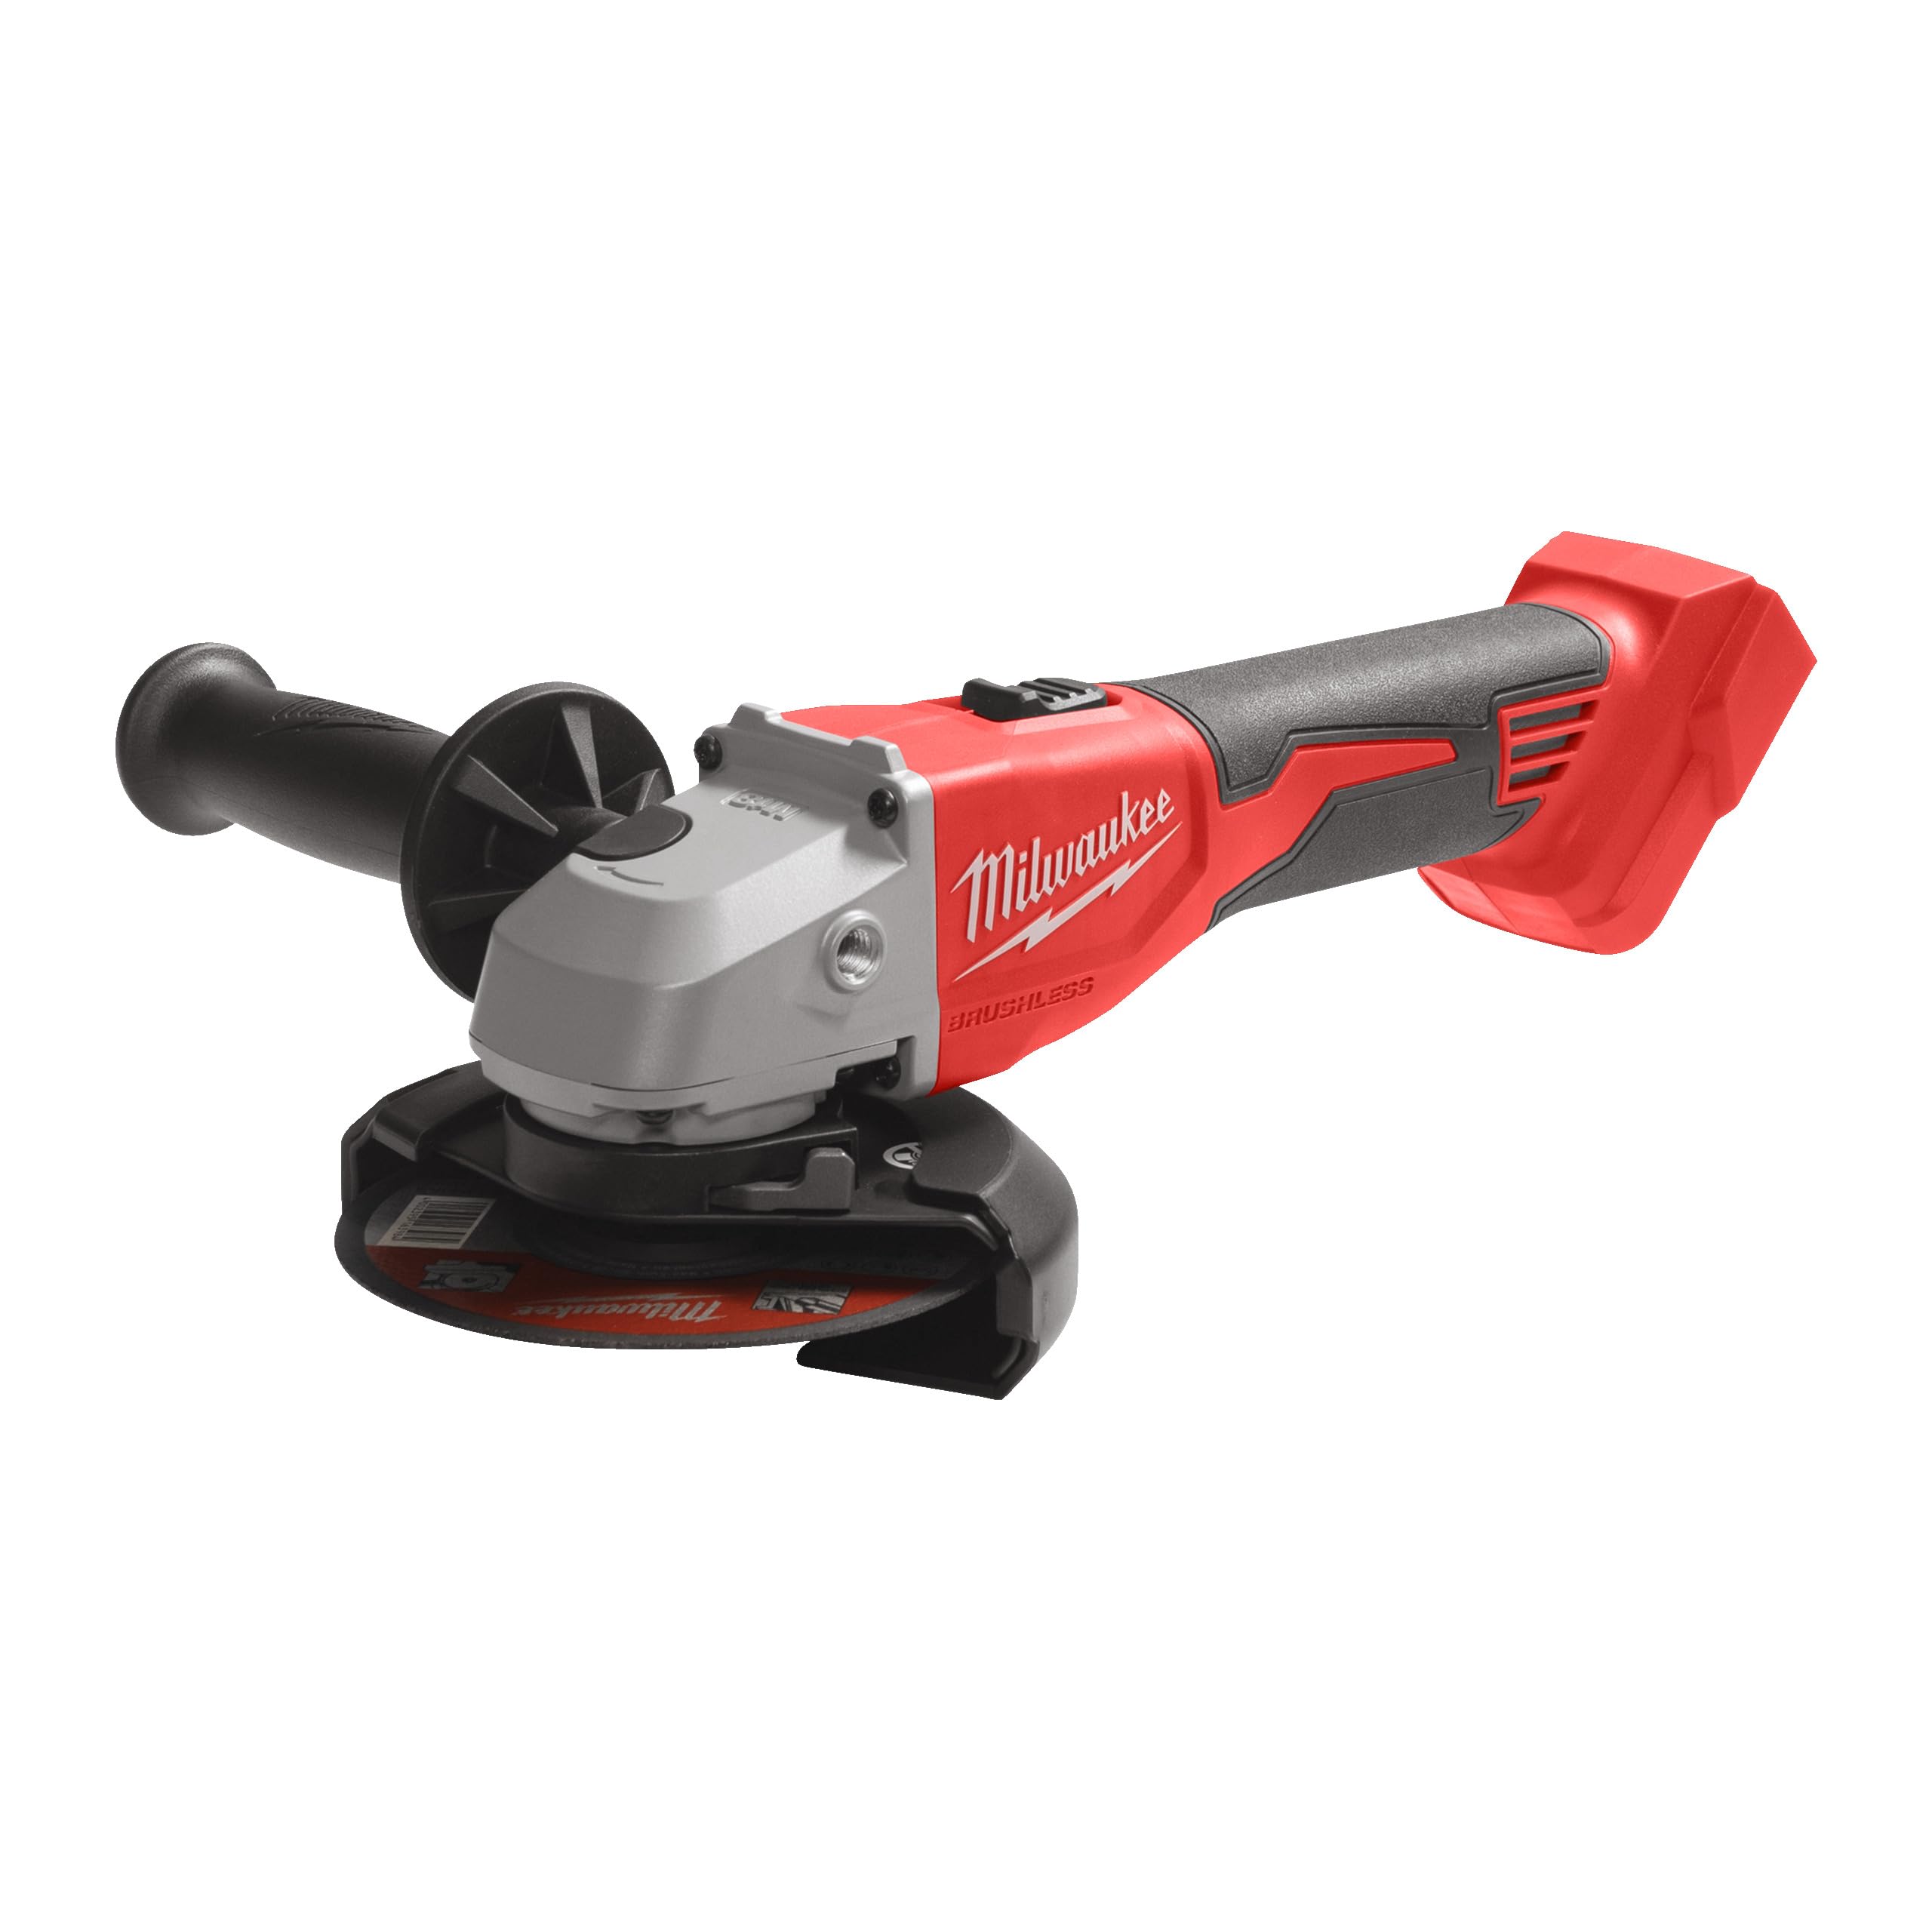
Figure 1: Milwaukee M18 BLSAG125X-0 125mm 18V Angle Grinder. This image shows the main unit of the angle grinder, typically without a battery or disc attached, highlighting its compact form factor.
2. Safety Instructions
WARNING: Read all safety warnings, instructions, illustrations, and specifications provided with this power tool. Failure to follow all instructions listed below may result in electric shock, fire, and/or serious injury.
General Power Tool Safety Warnings:
- Work Area Safety: Keep work area clean and well lit. Cluttered or dark areas invite accidents. Do not operate power tools in explosive atmospheres, such as in the presence of flammable liquids, gases, or dust.
- Electrical Safety: Power tool plugs must match the outlet. Never modify the plug in any way. Do not use any adapter plugs with earthed (grounded) power tools.
- Personal Safety: Always wear eye protection, hearing protection, and appropriate respiratory protection. Use personal protective equipment such as dust masks, non-skid safety shoes, hard hats, or hearing protection for appropriate conditions.
- Tool Use and Care: Do not force the power tool. Use the correct power tool for your application. Disconnect the battery pack from the power tool before making any adjustments, changing accessories, or storing power tools.
- Kickback Protection: This tool features kickback protection. However, always maintain a firm grip on the tool and position your body and arm to allow you to resist kickback forces.
- Guard Usage: Always use the protective guard provided with the tool. Ensure it is correctly positioned and securely fastened before operation.
3. Package Contents
Verify that all items are present upon unpacking. If any items are missing or damaged, contact your dealer immediately.
- Milwaukee M18 BLSAG125X-0 Angle Grinder (Tool Only)
- Protective Guard (125mm)
- Side Handle
- Flange Nut Wrench
- Dust Filter (removable)
- Instruction Manual
Note: Battery pack and charger are sold separately.
4. Setup
4.1. Battery Installation
- Ensure the tool is switched off.
- Align the battery pack with the battery port on the tool.
- Slide the battery pack into the tool until it clicks securely into place.
- To remove, press the release button on the battery pack and slide it out.
4.2. Attaching the Protective Guard
- Ensure the tool is switched off and the battery is removed.
- Place the protective guard over the spindle collar.
- Rotate the guard to the desired position for your application.
- Secure the guard using the quick-release clip mechanism. Ensure it is firmly locked and cannot rotate freely.
4.3. Attaching the Side Handle
- The side handle can be screwed into either the left or right side of the gear housing.
- Choose the position that provides the best control and comfort for your task.
- Tighten the handle securely by hand.
4.4. Installing/Changing Grinding/Cutting Discs (FIXTEC System)
- Ensure the tool is switched off and the battery is removed.
- Press and hold the spindle lock button.
- Unscrew the flange nut. For tools with the FIXTEC system, this can often be done without a wrench by hand.
- Place the grinding or cutting disc onto the spindle, ensuring it is centered.
- Screw the flange nut back on and tighten it firmly. For FIXTEC, ensure it is hand-tight.
- Release the spindle lock button.
Always use discs rated for the maximum RPM of the grinder (11,000 RPM).
5. Operating Instructions
5.1. Switching On/Off
- To switch on, slide the switch forward and press down.
- To switch off, release the switch. The tool also features a lock-off function to prevent accidental starting.
5.2. Grinding and Cutting Techniques
- Always hold the tool firmly with both hands.
- Allow the disc to reach full speed before contacting the workpiece.
- Apply moderate pressure. Excessive pressure will reduce efficiency and shorten disc life.
- For cutting, use a cutting disc and make straight, controlled cuts. Avoid twisting or bending the disc.
- For grinding, use a grinding disc and maintain a slight angle (15-30 degrees) to the workpiece.
- Be aware of the direction of sparks and debris, and ensure they are directed away from yourself and others.
5.3. Kickback Protection
The tool is equipped with kickback protection to reduce the risk of injury. In the event of a sudden bind or stall, the tool will automatically shut off. If this occurs, release the switch, remove the tool from the workpiece, and then restart. Investigate the cause of the bind before resuming work.
6. Maintenance
6.1. Cleaning
- Always remove the battery pack before cleaning.
- Keep the ventilation openings of the machine clean to prevent overheating.
- Regularly clean the tool housing with a soft, damp cloth. Do not use solvents or abrasive cleaners.
6.2. Removable Dust Filter
The tool features a removable dust filter to protect the motor from debris. Regularly inspect and clean this filter. To clean, remove the filter, tap out any accumulated dust, or use compressed air. Reinstall securely.
6.3. Storage
Store the tool in a dry, secure place out of reach of children. Remove the battery pack before storing for extended periods.
7. Troubleshooting
| Problem | Possible Cause | Solution |
|---|---|---|
| Tool does not start. | Battery not inserted correctly or discharged. Lock-off function engaged. | Ensure battery is fully charged and correctly inserted. Disengage lock-off switch. |
| Tool stops during operation (as mentioned in a review). | Overload protection activated. Kickback protection activated. | Reduce pressure on the tool. Check for disc binding. Release switch, remove from workpiece, and restart. |
| Reduced performance. | Worn or incorrect disc. Dirty dust filter. Low battery charge. | Replace disc. Clean dust filter. Recharge battery. |
| Excessive vibration. | Damaged or improperly mounted disc. Loose flange nut. | Inspect disc for damage and replace if necessary. Ensure disc is correctly mounted and flange nut is tightened. |
8. Specifications
| Brand | Milwaukee |
| Model Number | 4933492643 (M18 BLSAG125X-0) |
| Disc Diameter | 125 mm |
| Voltage | 18 Volts |
| Max. Rotation Speed | 11000 rpm |
| Power (comparable) | 800 Watts |
| Power Source | Battery Powered |
| Style | Angled |
| International Article Code (EAN) | 04058546413934 |
| Country of Origin | Germany |
9. Warranty and Support
For detailed warranty information, service, or technical support, please refer to the official Milwaukee website or contact your authorized Milwaukee dealer. Keep your purchase receipt as proof of purchase for warranty claims.