
1. Introduction
This manual provides detailed instructions for the installation, operation, and maintenance of your Toiumops Headlight Washer Nozzle for the Mazda 3 Axela. Please read this manual thoroughly before installation and use to ensure proper function and longevity of the product. This specific product is designed for the Right side of the vehicle.
2. Product Overview
The Toiumops Headlight Washer Nozzle is a replacement component designed to restore the functionality of your vehicle's headlight cleaning system. It utilizes a high-pressure water column to effectively remove dirt, debris, and smudges from the headlight lens, ensuring clear visibility and optimal light output. This component is crucial for maintaining driving safety, especially in adverse weather conditions.

Figure 2.1: Top-down view of the Toiumops Headlight Washer Nozzle, showing the two spray outlets and the main body with a green O-ring.

Figure 2.2: Angled view of the headlight washer nozzle, highlighting the textured grip area and the connection point.
3. Features
- Reference OE Number: BP4K-51-8G1B (for Right side). Please verify this number against your vehicle's original part before purchase.
- Premium-Quality Material: Constructed from high-quality ABS plastic and metal components, ensuring anti-corrosion properties, durability, and resistance to deformation.
- Efficient Cleaning Function: Designed to spray a high-pressure stream of washer fluid onto the headlight lens, effectively removing dirt and debris to maintain clear visibility.
- High Accuracy Sensitivity: Provides precise spray patterns for optimal cleaning performance.
- Direct Replacement: Engineered for a perfect fit as a direct replacement for the original or broken headlight washer nozzle, simplifying the installation process.
- Enhanced Driving Safety: Contributes to improved road visibility by keeping headlights clean, thereby enhancing overall driving safety.
4. Specifications
| Specification | Detail |
|---|---|
| Item Type | Headlight Washer Nozzle |
| Installation Position | Front Right |
| Function | Headlight Cleaning |
| Material | High-quality ABS and Metal |
| Reference OE Number (Right) | BP4K-51-8G1B |
| Manufacturer | Toiumops |
| ASIN | B0CHHKYMHK |
5. Installation
This headlight washer nozzle is designed for direct replacement. While no complex tools are required, basic automotive repair knowledge is recommended. If you are unsure about any step, it is advisable to seek professional assistance.
Installation Steps:
- Preparation: Ensure the vehicle is turned off and the engine is cool. Access the area around the headlight where the washer nozzle is located. This may require removing part of the bumper or fender liner, depending on your vehicle model.
- Disconnect Old Nozzle: Carefully disconnect the fluid hose from the existing headlight washer nozzle. Be prepared for a small amount of fluid to leak.
- Remove Old Nozzle: Unclip or unscrew the old nozzle from its mounting position. Note its orientation for correct installation of the new part.
- Install New Nozzle: Position the new Toiumops Headlight Washer Nozzle (BP4K-51-8G1B for the Right side) into the mounting slot. Ensure it clicks securely into place.
- Connect Fluid Hose: Reconnect the fluid hose to the new nozzle, ensuring a tight and secure connection to prevent leaks.
- Test Functionality: After installation, refill the washer fluid reservoir if necessary. Turn on the vehicle and activate the headlight washer function to check for proper spray pattern and absence of leaks.
- Reassemble: Reinstall any removed bumper or fender liner components.
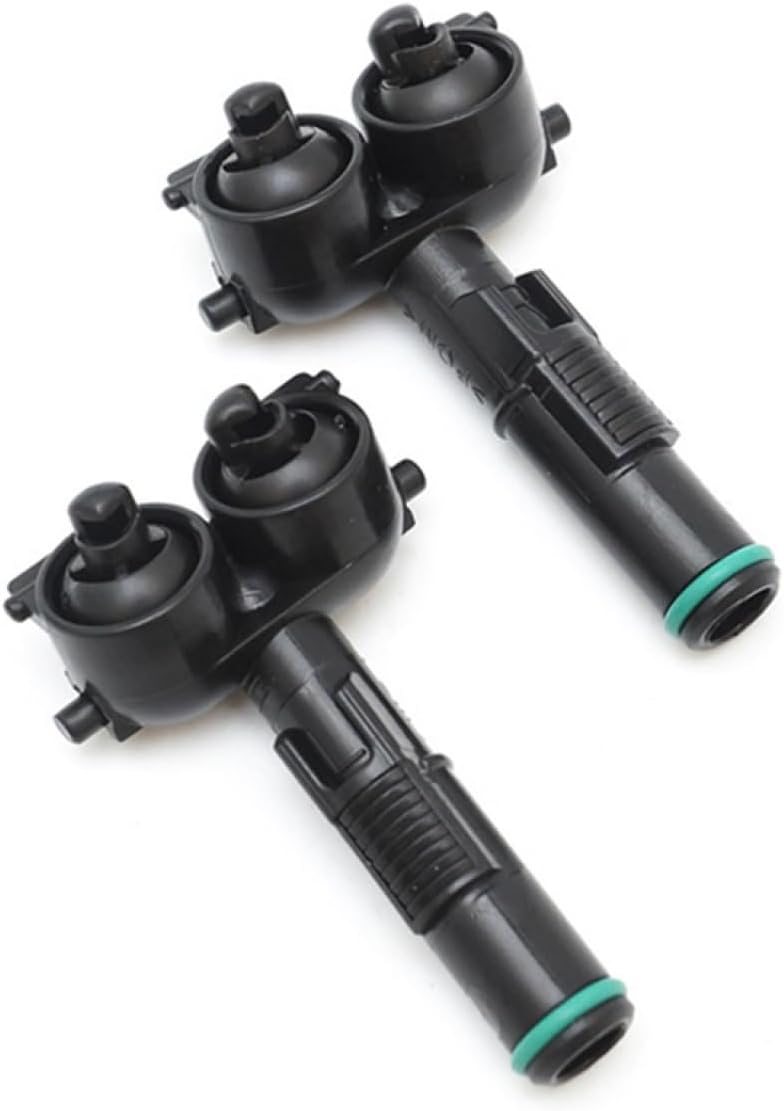
Figure 5.1: Two headlight washer nozzles, illustrating the slight difference between left and right variants. Ensure the correct part (Right side, BP4K-51-8G1B) is used for installation.
6. Operation
The headlight washer nozzle operates as part of your vehicle's integrated headlight cleaning system. When activated (typically by a specific control on your vehicle's dashboard or steering column, often linked to the windshield washer system), the nozzle will extend and spray washer fluid onto the headlight lens. This action is designed to clear the headlight surface of accumulated dirt and debris, ensuring optimal light output and visibility.
Refer to your vehicle's owner's manual for specific instructions on how to activate the headlight washer system.
7. Maintenance
Regular maintenance helps ensure the longevity and effective operation of your headlight washer nozzle.
- Fluid Level: Regularly check and maintain the appropriate level of headlight washer fluid in your vehicle's reservoir. Using a high-quality, non-freezing washer fluid is recommended, especially in colder climates.
- Nozzle Cleaning: Periodically inspect the nozzle outlets for any blockages caused by dirt, wax, or dried fluid. Gently clear any obstructions using a fine needle or compressed air if necessary. Avoid using sharp or abrasive objects that could damage the nozzle.
- System Check: Test the headlight washer system periodically to ensure it is functioning correctly and that the spray pattern is even and effective.
- Winter Care: In freezing conditions, ensure the washer fluid contains antifreeze properties to prevent the nozzle and lines from freezing and potentially bursting.
8. Troubleshooting
If you encounter issues with your headlight washer nozzle, consider the following troubleshooting steps:
- No Spray or Weak Spray:
- Cause: Low or empty washer fluid reservoir.
- Solution: Check fluid level and refill if necessary.
- Cause: Clogged nozzle outlets.
- Solution: Carefully clean the nozzle outlets as described in the Maintenance section.
- Cause: Frozen fluid in lines or nozzle (in cold weather).
- Solution: Move the vehicle to a warmer environment to thaw, or use a washer fluid with antifreeze properties.
- Cause: Faulty washer pump or electrical issue (less common for a new nozzle).
- Solution: If the above steps do not resolve the issue, consult a qualified mechanic to diagnose the washer pump or electrical system.
- Leaking Fluid:
- Cause: Loose or improperly connected fluid hose.
- Solution: Ensure the fluid hose is securely attached to the nozzle.
- Cause: Damaged O-ring or seal.
- Solution: Inspect the O-ring on the nozzle for damage. If damaged, replacement may be necessary.
9. Warranty and Support
The manufacturer stands behind the quality of this product. If you have any questions, concerns, or encounter any issues with your Toiumops Headlight Washer Nozzle that are not resolved by the troubleshooting steps in this manual, please do not hesitate to contact the seller or manufacturer directly. Provide your purchase details and a clear description of the issue to facilitate prompt assistance.
Your satisfaction is important, and the manufacturer is committed to providing a pleasant shopping experience and resolving any product-related concerns.