Introduction
Thank you for choosing the Generic Solar Street Light, Model GY-TYD. This outdoor solar-powered lamp is designed to provide efficient and reliable illumination for your front door, garden, patio, or other outdoor areas. Featuring 72 COB LEDs, a sensitive PIR motion sensor, and three distinct lighting modes, it offers versatile security and convenience. This manual provides detailed instructions for installation, operation, and maintenance to ensure optimal performance and longevity of your solar light.
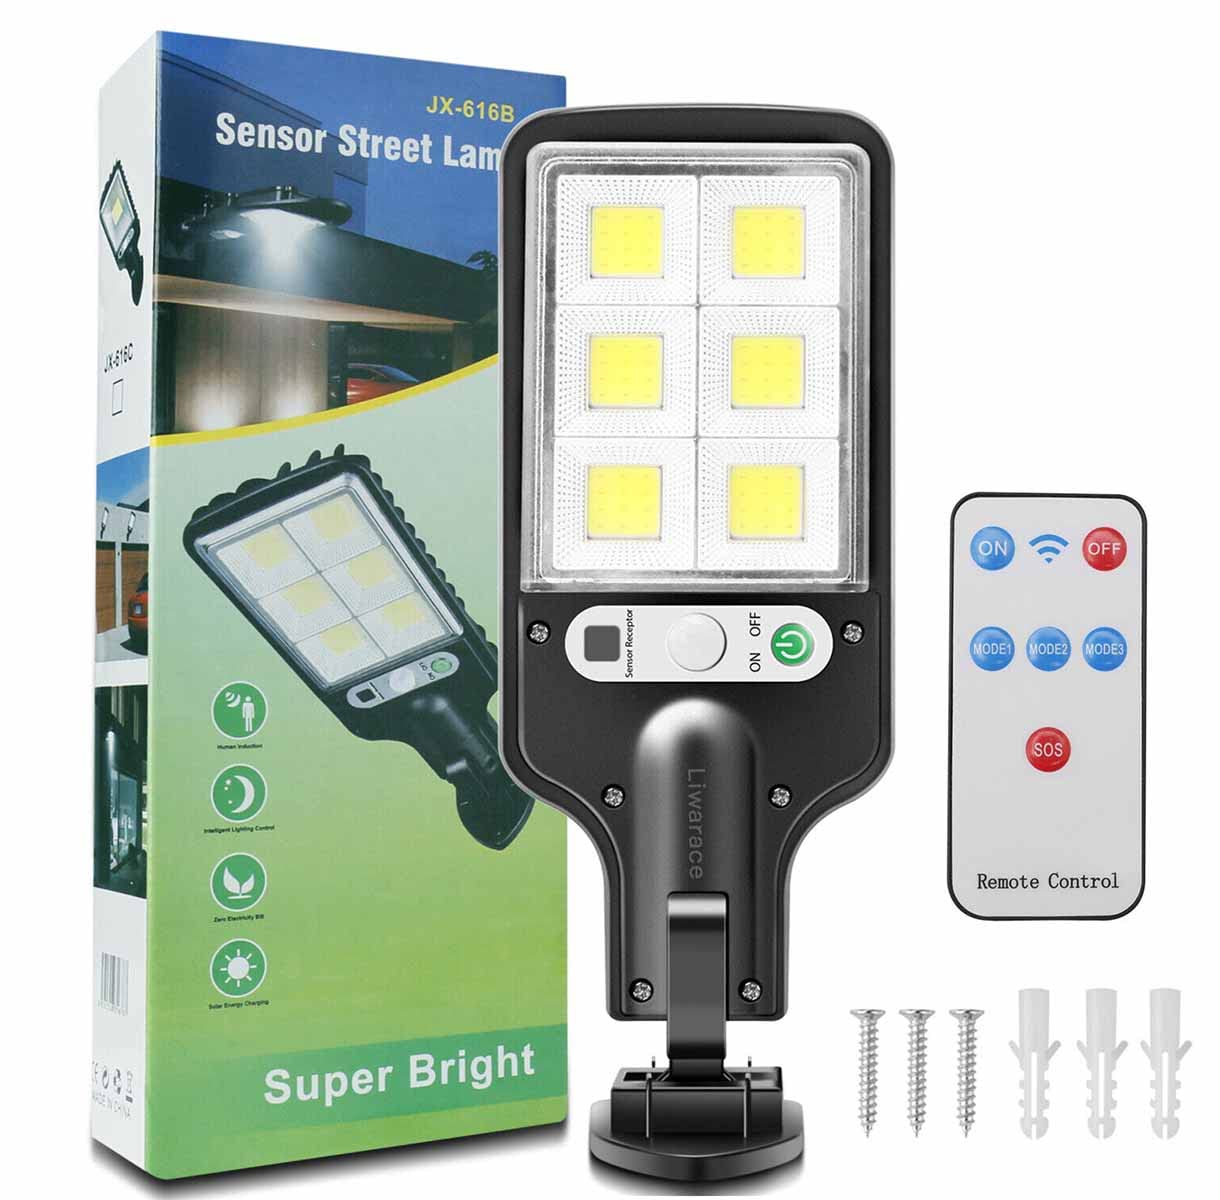
Image: Overview of the Generic Solar Street Light GY-TYD, showcasing its design and solar panel.
Package Contents
Please check the package for the following items:
- 1x Solar Street LED Light Lamp
- 1x Remote Control
- 3x Nails (for installation)
Specifications
| Model Number | GY-TYD |
| Solar Panel | Polycrystalline Silicon |
| Battery | 5.5V 1200mAh Lithium Battery |
| LED Quantity | 72 COB LEDs |
| Brightness | 300 Lumens |
| Voltage | 5.5V |
| Waterproof Rating | IP65 |
| Motion Sensor Angle | 120° |
| Motion Sensor Distance | 9.8ft - 16.4ft (3m - 5m) |
| Material | Acrylonitrile Butadiene Styrene, Metal |
| Product Dimensions | 8.9"L x 3.3"W x 1"H |
| Charging Time | 6-8 hours in direct sunlight |
| Working Time | 8-10 hours (after full charge) |

Image: Detailed view of the high-brightness COB LED light source, highlighting its design for efficient light emission.
Setup & Installation
For optimal performance, install the solar light in a location that receives direct sunlight for 6-8 hours daily. Avoid areas under eaves, trees, or other obstructions that may block sunlight.
- Choose a Location: Select a wall or pole where the solar panel can receive maximum direct sunlight throughout the day.
- Mark Drill Points: Hold the light in the desired position and mark the drilling points for the mounting screws.
- Drill Holes: Use an appropriate drill bit to create holes at the marked points. Insert the provided plastic anchors (if applicable) into the holes.
- Mount the Light: Align the light with the drilled holes and secure it using the provided nails/screws. Ensure it is firmly attached. The light fixture can be rotated up to 60 degrees for optimal positioning.
- Initial Charge: Allow the solar light to charge for at least 6-8 hours in direct sunlight before its first use.

Image: Illustration of the solar light's components, including the PIR motion inductor and ON/OFF switch, along with the rotating mounting bracket and included nails for installation.
Operating Instructions
The solar light features a built-in light sensor and motion sensor, operating automatically from dusk till dawn. It also includes a remote control for mode selection.
Charging
The solar panel absorbs sunlight during the day to charge the internal lithium battery. Ensure the solar panel is clean and unobstructed for efficient charging. A full charge typically takes 6-8 hours of direct sunlight and provides 8-10 hours of illumination.

Image: Visual representation of the solar light's operation, showing daytime charging (6-8 hours) and nighttime illumination (over 6 hours) with motion detection.
Lighting Modes
The light offers three distinct operating modes, selectable via the remote control:
-
Mode 1: Motion Sensor Full Brightness (Off after 20s)
The light remains off in darkness. When motion is detected, it illuminates at full brightness. After approximately 20 seconds of no further motion, the light turns off completely.
-
Mode 2: Motion Sensor Full Brightness (Dim after 20s)
The light remains dim in darkness. When motion is detected, it illuminates at full brightness. After approximately 20 seconds of no further motion, the light returns to dim brightness.
-
Mode 3: Always On Dim Brightness
The light automatically turns on at a constant dim brightness in darkness and stays on until dawn or battery depletion. This mode does not react to motion.

Image: Visual explanation of the three operational modes: Mode 1 (motion-activated full brightness then off), Mode 2 (motion-activated full brightness then dim), and Mode 3 (constant dim light).
Remote Control Functions
Use the provided infrared remote control to select the desired lighting mode and power the unit on/off.
- ON: Powers on the light.
- OFF: Powers off the light.
- MODE 1: Activates Motion Sensor Full Brightness (Off after 20s).
- MODE 2: Activates Motion Sensor Full Brightness (Dim after 20s).
- MODE 3: Activates Always On Dim Brightness.
- SOS: (If applicable) Activates a flashing emergency signal.

Image: The intelligent infrared remote control, showing buttons for ON, OFF, MODE 1, MODE 2, MODE 3, and SOS, allowing adjustment of light modes.
Maintenance
- Clean Solar Panel: Regularly wipe the solar panel with a soft, damp cloth to remove dust, dirt, or debris. A clean panel ensures maximum sunlight absorption and charging efficiency.
- Clear Obstructions: Ensure no new obstructions (e.g., growing branches, new structures) block sunlight from reaching the solar panel.
- Battery Care: The integrated lithium battery is designed for long life. Avoid prolonged storage in a completely discharged state. If storing for an extended period, fully charge the light before storage and recharge every few months.
- Inspect for Damage: Periodically check the light fixture and wiring for any signs of damage. If damage is found, discontinue use and contact support.
Troubleshooting
| Problem | Possible Cause | Solution |
|---|---|---|
| Light does not turn on at night. |
|
|
| Light stays on during the day. |
|
|
| Motion sensor is not working. |
|
|
| Light duration is shorter than expected. |
|
|
Warranty & Support
Specific warranty information for this product is not provided in the available data. For any questions, technical assistance, or warranty claims, please contact your retailer or the manufacturer, EZTRONICS CORP, directly. Please have your model number (GY-TYD) and purchase details ready when contacting support.
Manufacturer: EZTRONICS CORP
Application Scenes
The Generic Solar Street Light is suitable for various outdoor applications, providing reliable illumination and security.
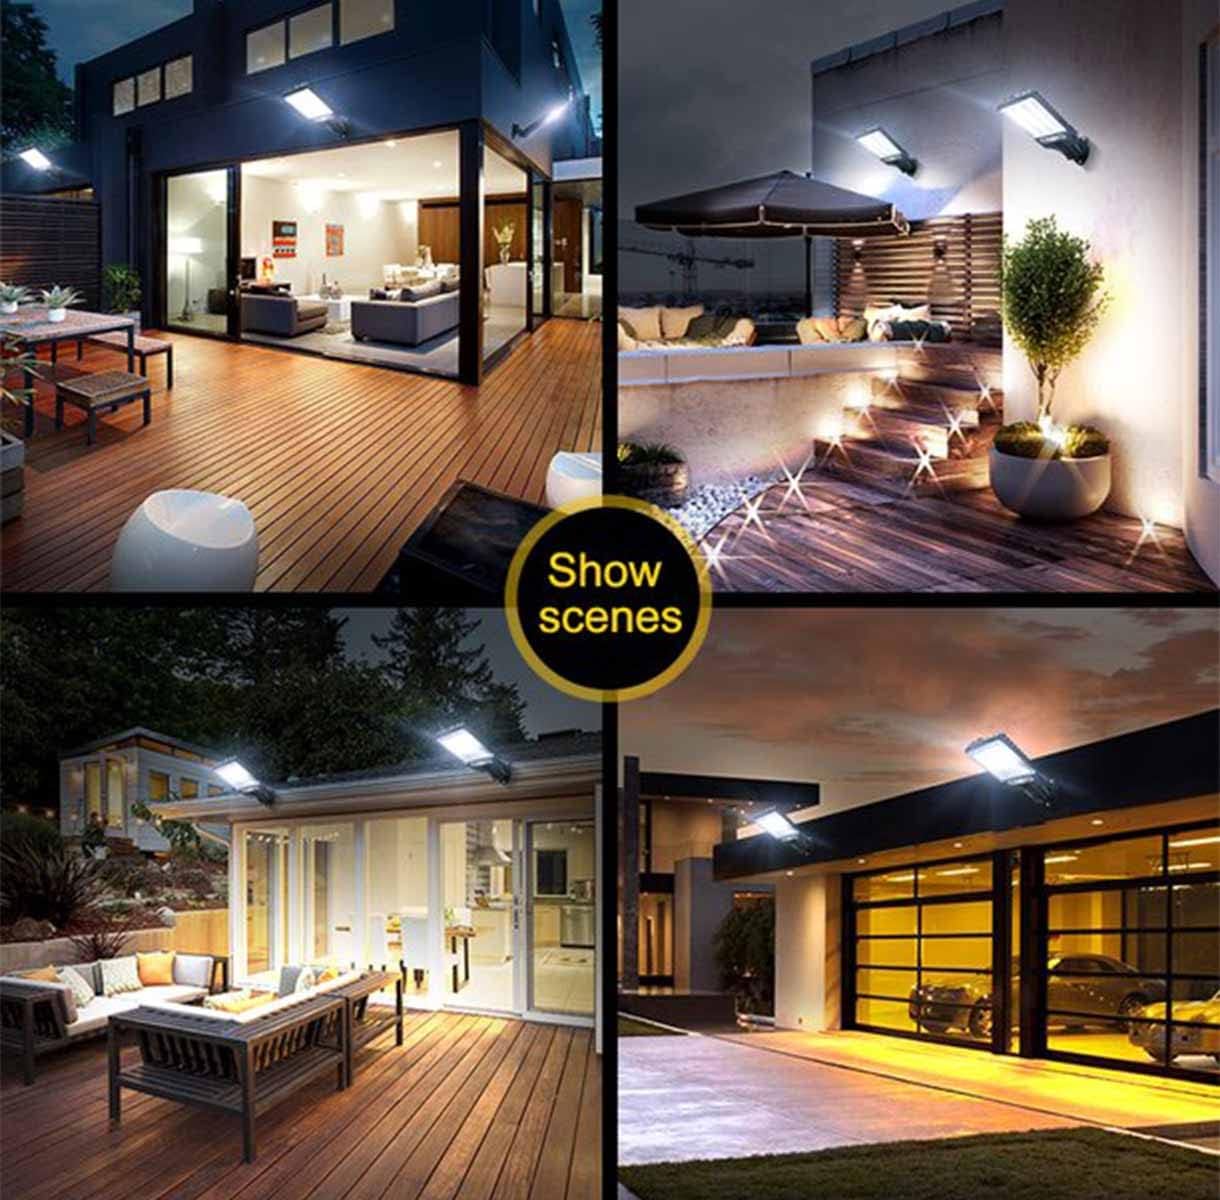
Image: Examples of the solar street light installed in different outdoor environments, including patios, courtyards, and driveways, demonstrating its versatility.