GasDoc GS2001
GasDoc GS2001 RV Propane Gas Detector Instruction Manual
Model: GS2001 | Brand: GasDoc
Introduction
The GasDoc GS2001 RV Propane Gas Detector is designed to provide continuous monitoring for combustible gas leaks in recreational vehicles (RVs) and motorhomes. This device offers both audible and visual alarms to alert users to potential hazards from propane or natural gas, ensuring enhanced safety. It is engineered to meet UL1484 testing standards for reliable performance.
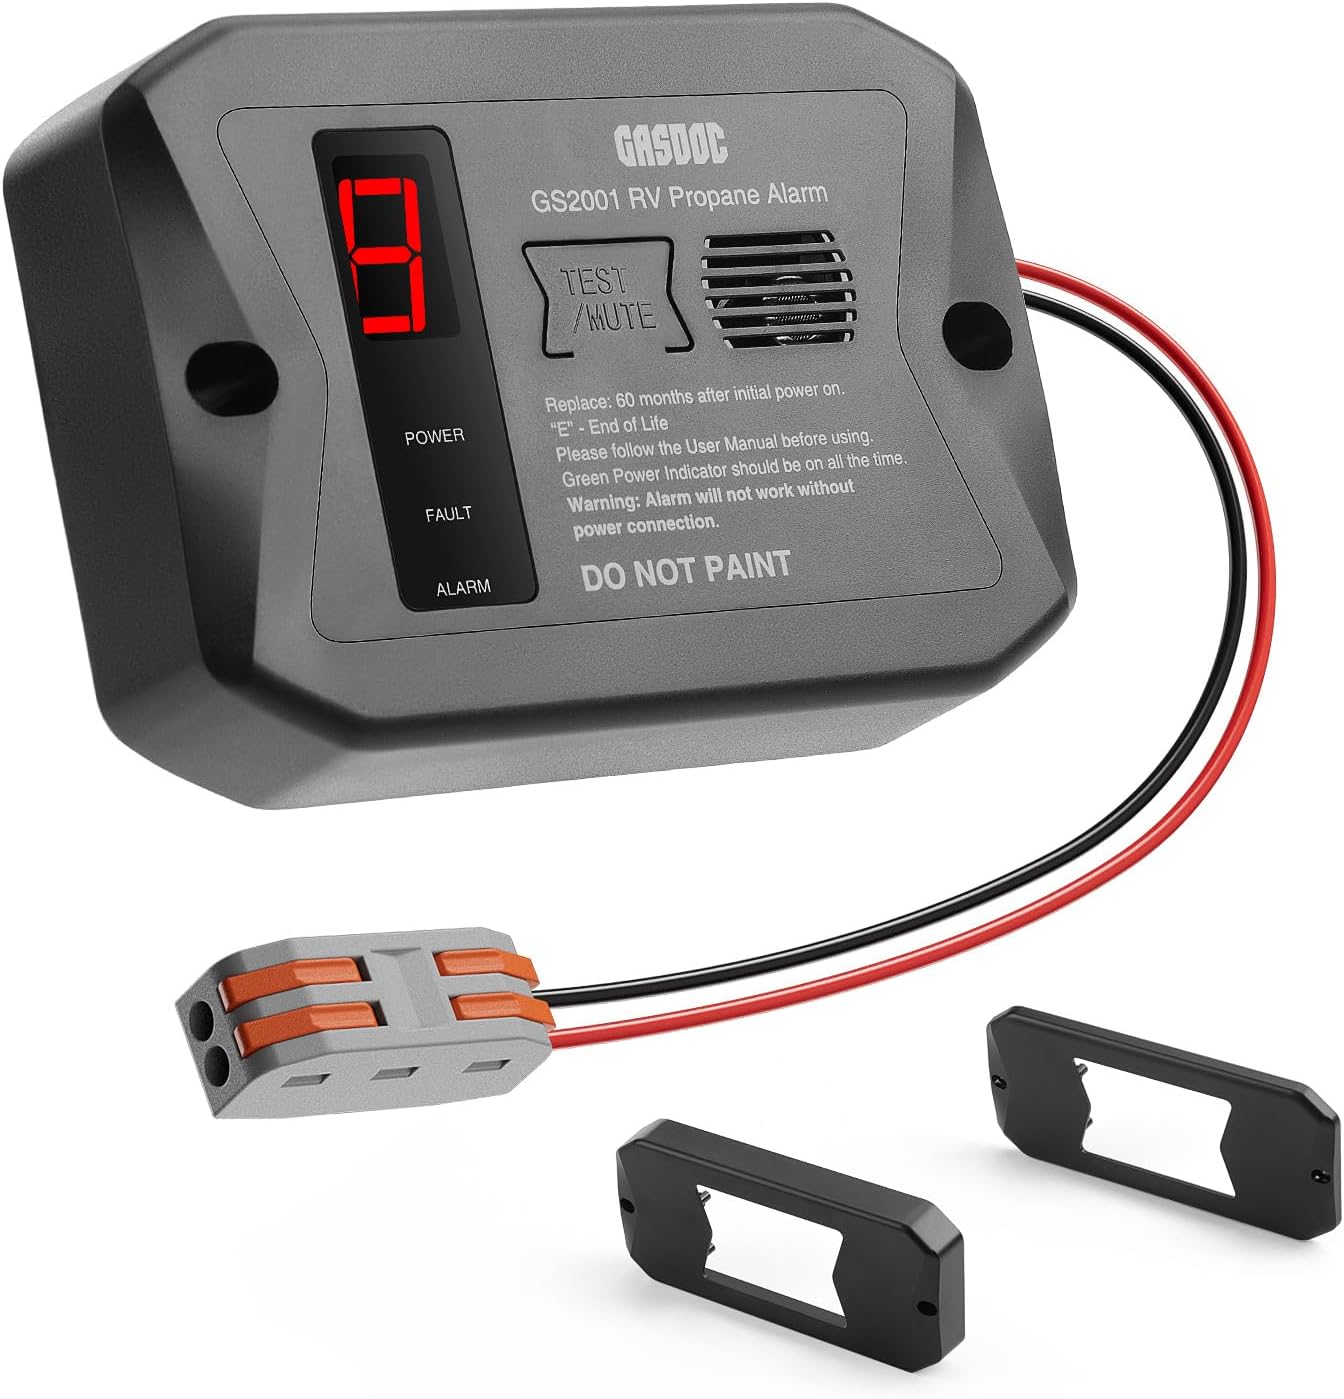
Figure 1: GasDoc GS2001 RV Propane Gas Detector with included accessories.
Safety Information
- This detector is designed for use with DC 12V power sources commonly found in RVs and motorhomes. Ensure proper voltage connection.
- The device requires a 3-minute calibration period upon initial power-up. During this time, the detector is not fully active.
- Do not paint the detector. Painting may interfere with sensor operation.
- Propane gas is heavier than air and tends to settle at lower levels. Natural gas (methane) is lighter than air and tends to rise. Install the detector according to the type of gas being monitored for optimal detection.
- In case of an alarm, immediately evacuate the area, shut off the gas source, open windows and doors for ventilation, and contact emergency services or a qualified professional.
- The detector has an approximate lifespan of 60 months (5 years) from initial power-on. An "E" code on the display indicates the end of its operational life, requiring replacement.
Features
- 7x24h Protection: Satisfies UL1484 testing standards for efficient, sensitive, and long-lasting combustible gas leak monitoring.
- DC 12V Corded Power: Connects to a 12V DC power source for stable, continuous protection without battery concerns.
- Audible & Visual Alarm: Swiftly responds to potential propane or natural gas leaks, triggering an 85-decibel alarm and illuminating a red warning light.
- Three Mounting Brackets: Includes Long Surface, Long Flush, and Short Surface mounts for flexible installation options.
- Easy Power Connection: Features a lever-nut connector for simplified wiring.

Figure 2: The GasDoc GS2001 provides 24-hour durable protection in an RV environment.
Package Contents
- 1x GasDoc GS2001 RV Propane Gas Detector (Core Alarm)
- 3x Mounting Brackets (Long Surface, Long Flush, Short Surface)
- 1x Lever-nut Connector
- 2x Screws
- 1x User Manual
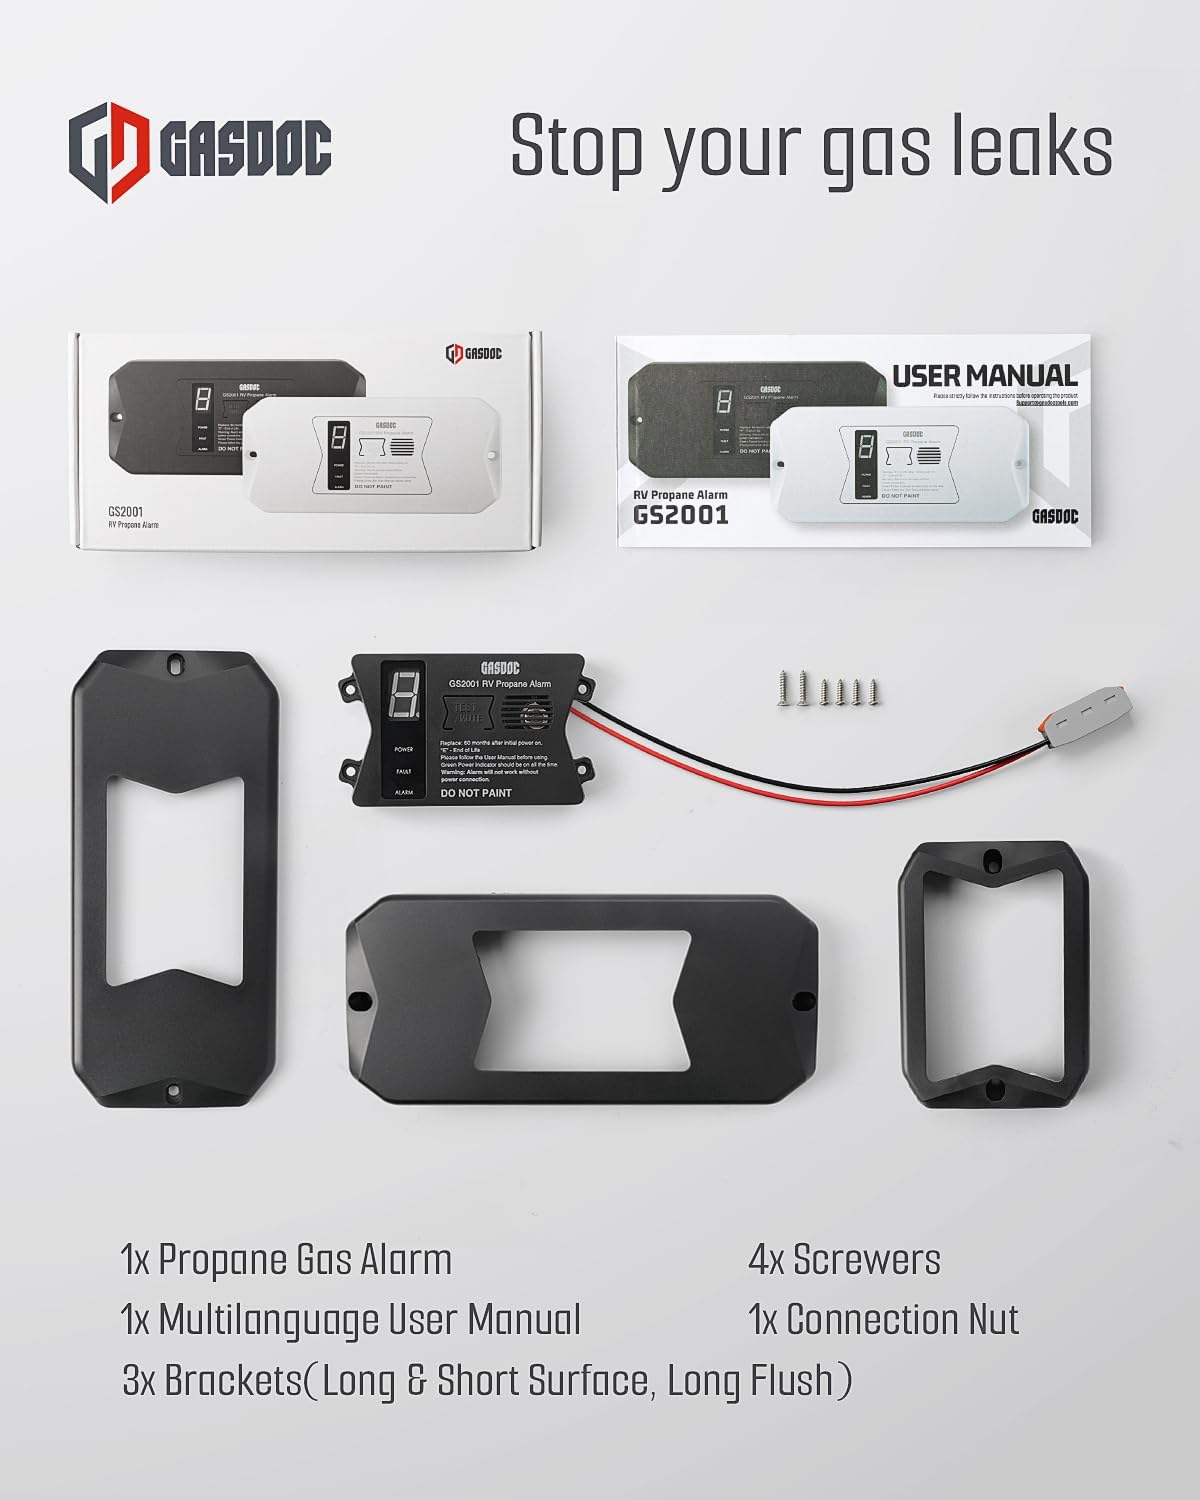
Figure 3: All components included in the GasDoc GS2001 package.
Installation
1. Choosing an Installation Location
The optimal location for your gas detector depends on the type of gas you are monitoring:
- For Propane (LP Gas): Propane is heavier than air and will sink to the lowest points. Install the detector in a low area, typically 4-12 inches (10-30 cm) from the floor.
- For Natural Gas (Methane): Natural gas is lighter than air and will rise. Install the detector in a high area, typically 4-12 inches (10-30 cm) from the ceiling.
Avoid installing the detector near windows, doors, or ventilation openings where air currents might prevent gas from reaching the sensor. Also, avoid areas with high humidity, dust, or direct heat sources.

Figure 4: The GasDoc GS2001 is suitable for both RVs and home kitchens, with placement depending on gas type.
2. Mounting the Detector
The GS2001 comes with three types of brackets to suit various installation needs:
- Short Surface Mount: For discreet installation in tight corners.
- Long Flush Mount: For a minimized presence, often recessed.
- Long Surface Mount: For versatile placement on any flat surface.
Select the appropriate bracket and use the provided screws to securely mount it to the chosen location. Once the bracket is installed, the detector unit can be easily attached.

Figure 5: Illustration of the three different mounting brackets and their dimensions.

Figure 6: The detector unit with various mounting brackets.
3. Wiring the Detector (DC 12V)
The GS2001 operates on a DC 12V power source. Follow these steps for wiring:
- Ensure the power source is OFF before beginning installation.
- Strip approximately 0.5 inches (1.27 cm) of insulation from the ends of the power wires.
- Use the provided lever-nut connector to connect the detector's red wire to the positive (+) terminal of your 12V DC power supply and the detector's black wire to the negative (-) terminal.
- Ensure all connections are secure.

Figure 7: Step-by-step guide for connecting the power wires using the lever-nut connector.

Figure 8: The detector's wiring connected to a power source.
Installation Video
Video 1: A user demonstrates the wiring and testing of the GasDoc RV Propane Gas Detector.
Operation
1. Initial Power-Up and Calibration
After connecting the power, turn on the 12V DC supply. The detector will begin a 3-minute warm-up and calibration process. During this time, the display will show a countdown or flashing lights. The green power indicator light should remain on once calibration is complete, and the display will show "0" for normal operation.

Figure 9: The detector features both visual (LED display) and audible (85dB) alarms.
2. Understanding LED Indicators and Alarm Sounds
| LED Display | Buzzer Alarm Sound | LED Lights | Notes |
|---|---|---|---|
| 0 | None | Green: on | Normal operation, no gas detected. |
| 5, 6, 7, 8, 9 (%LEL) | "Di" frequency: 2 times/s | Green: on, Red: flash | May encounter gas leak. Refer to "What to do in case of Alarm". |
| A | "Di" frequency: 5 time /s | Green: on, Red: flash | Abbreviation of "Alarm". Refer to "What to do in case of Alarm". |
| E | None | Green: on, Yellow: flash | Abbreviation of "End of Life". Need to replace with a new one after 5 years. |
3. Testing the Device
To ensure the detector is functioning correctly, periodic testing is recommended. The test button on the device will activate the alarm sound and lights to confirm operational status. For a functional gas test, you can carefully expose the sensor to a small amount of gas (e.g., from an unlit lighter for 6-8 seconds) to trigger the alarm. Ensure proper ventilation after testing with gas.
Note: Do not apply gas to test during the warm-up process as the gas will not be detected.
Video 2: A user demonstrates the self-test and alarm functions of a similar natural gas detector, including proper placement for different gas types.
Maintenance
- Periodic Testing: It is recommended to test the detector at least once every 3-4 months to ensure proper functionality.
- Cleaning: Gently wipe the exterior of the detector with a soft, damp cloth. Do not use harsh chemicals or abrasive cleaners. Ensure the sensor vents are clear of dust and debris.
- Lifespan: The GasDoc GS2001 has an operational lifespan of approximately 5 years (60 months) from its initial power-on. When the device reaches its end-of-life, an "E" will be displayed, and the yellow LED will flash. Replace the unit promptly.
Troubleshooting
1. What to do in case of an alarm warning?
- Immediately evacuate the potential leaking area.
- Shut off the main gas source if safe to do so.
- Open windows and doors to enhance room ventilation.
- Get to the outside (without propane) and call emergency services or qualified professionals for assistance.

Figure 10: Important actions to take during a gas alarm.
2. "E" Display / Yellow Flashing LED
This indicates the detector has reached its end of operational life. The sensor's accuracy may degrade over time. Replace the unit with a new GasDoc GS2001 detector immediately.
3. No Power Indicator
Check the 12V DC power connection. Ensure wires are securely connected to the correct terminals (red to positive, black to negative) and that the power source is active.
Specifications
| Brand | GasDoc |
| Model Number | R501 (GS2001) |
| Power Source | DC 12V (Corded Electric) |
| Alarm | 85dB Audible Alarm & Visual Alarm |
| Product Dimensions | 7.09"D x 1.69"W x 3.31"H |
| Item Weight | 140.3 Grams (4.9 ounces) |
| Operating Humidity | 15% to 93% (Avoid condensation) |
| Upper Temperature Rating | 131 Degrees Fahrenheit |
| Sensor Type | Electrochemical |
| Material | ABS |
| Certifications | UL1484 Testing Standard Compliant |

Figure 11: The GasDoc GS2001 is certified to UL1484 standards.
Warranty and Support
For warranty information or technical support, please refer to the contact details provided in the original product packaging or visit the official GasDoc website. Keep your purchase receipt for warranty claims.