1. Introduction
This manual provides essential information for the proper setup, operation, and maintenance of your UISCOM U310 88-Key Weighted Digital Piano. Please read this manual thoroughly before using the instrument to ensure safe and optimal performance. Retain this manual for future reference.
2. Safety Instructions
- Power Supply: Use only the specified power adapter. Ensure the voltage matches the requirements of your region.
- Moisture: Do not expose the instrument to rain, moisture, or excessive humidity. Avoid placing liquids on or near the piano.
- Heat Sources: Keep the instrument away from direct sunlight, radiators, heat registers, stoves, or other heat-producing appliances.
- Ventilation: Do not block any ventilation openings. Ensure adequate airflow around the instrument.
- Cleaning: Clean only with a dry cloth. Do not use liquid cleaners or aerosols.
- Servicing: Do not attempt to service this product yourself. Refer all servicing to qualified service personnel.
- Placement: Place the piano on a stable, level surface to prevent tipping.
3. Package Contents
Verify that all items listed below are included in your package:
- UISCOM U310 Digital Piano Unit
- Portable Stand (Legs)
- Triple Pedal Unit
- Power Adapter
- Music Rest
- Instruction Manual (this document)
4. Assembly Instructions
Follow these steps to assemble your digital piano. It is recommended to have two people for assembly to prevent damage.
- Carefully unpack all components from the box.
- Attach the four stand legs to the underside of the piano unit using the provided screws. Ensure they are securely fastened.
- Place the assembled piano on a stable, level surface.
- Connect the triple pedal unit cable to the designated "3 PEDAL" port on the rear of the piano.
- Insert the music rest into the slot on top of the piano unit.
- Connect the power adapter to the "DC POWER" port on the rear of the piano, then plug it into a wall outlet.

Figure 4.1: The UISCOM U310 Digital Piano fully assembled with its stand and triple pedal unit. This image illustrates the complete setup after successful assembly.

Figure 4.2: The UISCOM U310 Digital Piano integrated into a home environment, showcasing its minimalist design and full setup with an optional bench.
5. Controls and Functions
The control panel provides access to various functions and settings of your digital piano.

Figure 5.1: Close-up view of the control panel, LED screen, and integrated stereo speakers. The panel includes buttons for various functions like Metronome, Record, Tones, Rhythms, and Volume control.
5.1. LED Screen
The LED screen displays current settings such as selected tone, rhythm, tempo, and other operational parameters.
5.2. Control Buttons
- POWER: Turns the piano on or off.
- VOLUME: Adjusts the overall output volume.
- START/STOP: Initiates or halts rhythm playback or demo songs.
- METRONOME: Activates or deactivates the metronome function.
- RECORD: Starts or stops recording your performance.
- TONE: Selects different instrument voices (e.g., Grand Piano, Electric Piano). The piano offers 128 distinct tones.
- RHYTHM: Selects from 127 built-in rhythm patterns.
- DEMO: Plays one of the 60 pre-programmed demo songs.
- EFFECT: Applies various digital effects to the sound.
- SPLIT: Divides the keyboard into two sections, allowing different tones to be played by each hand.
- DUAL TIMBRE: Layers two different tones to be played simultaneously with each key press.
- TRANS: Transposes the pitch of the keyboard.
- SELECT: Used in conjunction with other buttons to navigate and confirm selections on the LED screen.
6. Connectivity
The UISCOM U310 Digital Piano offers various connectivity options for expanded functionality.

Figure 6.1: Diagram illustrating the various input and output ports located on the rear of the piano, including MIDI, MP3, USB, Audio, Sustain, 3 Pedal, and DC Power connections.
- 1. MIDI IN: Connects to external MIDI devices to receive MIDI data.
- 2. MIDI OUT: Sends MIDI data to external MIDI devices or computers.
- 3. MP3: Input for connecting an external audio player (e.g., smartphone, MP3 player) to play along with music.
- 4. USB Transport (USB MIDI): Connects the piano to a computer for MIDI data transfer, allowing use with music software.
- 5. Audio Input: Connects external audio sources.
- 6. Audio Output: Connects to external amplifiers, mixers, or recording devices.
- 7. Sustain: Dedicated port for a single sustain pedal (if not using the triple pedal unit).
- 8. 3 Pedal: Connects the included triple pedal unit for sustain, sostenuto, and soft pedal functions.
- 9. DC Power: Connects the provided power adapter.
- Headphone Jack (2.5mm): Located on the front/side of the piano, allows for silent practice.
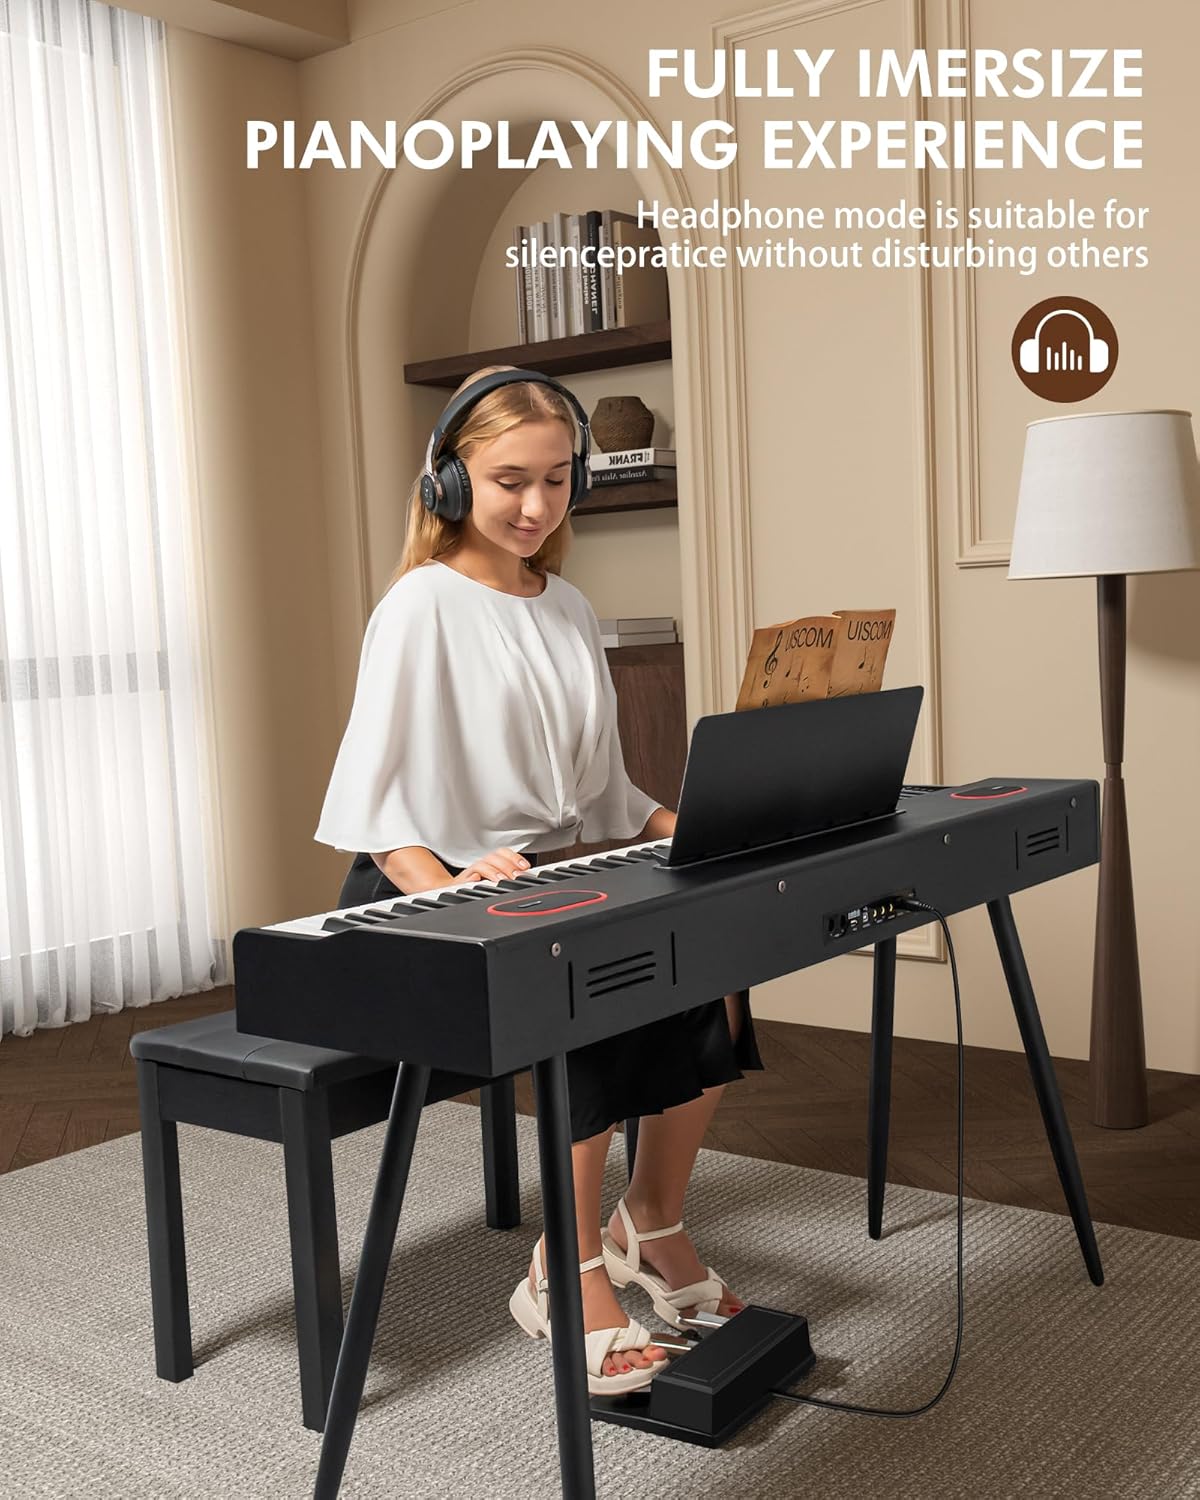
Figure 6.2: A user practicing silently with headphones connected to the digital piano, demonstrating the headphone mode feature.
7. Basic Operation
7.1. Power On/Off
Press the POWER button to turn the piano on. The LED screen will illuminate. Press the POWER button again to turn the piano off.
7.2. Volume Adjustment
Use the VOLUME knob or buttons on the control panel to adjust the overall sound level.
7.3. Selecting Tones
Press the TONE button. Use the SELECT buttons (or numerical input if available) to choose from the 128 available instrument voices. The selected tone will be displayed on the LED screen.
7.4. Playing Rhythms
Press the RHYTHM button, then use the SELECT buttons to choose a rhythm pattern. Press START/STOP to begin or end rhythm playback.
7.5. Demo Songs
Press the DEMO button to play one of the 60 built-in demo songs. Use the SELECT buttons to cycle through the songs. Press START/STOP to stop playback.

Figure 7.1: A close-up of hands playing the 88-key weighted hammer action keyboard, highlighting the authentic feel and touch sensitivity.
8. Advanced Features
8.1. Recording Your Performance
To record, press the RECORD button. Play your desired piece. Press RECORD again to stop. To play back your recording, press the REPLAY button (if available, or follow specific instructions on the control panel).
8.2. Split Mode
The SPLIT function allows you to divide the keyboard into two independent sections, each capable of playing a different tone. This is useful for duets or practicing with different sounds for each hand. Refer to the LED screen for the split point and tone selection.
8.3. Dual Timbre (Layer Mode)
Activate DUAL TIMBRE to layer two different instrument tones, playing them simultaneously with each key press. This creates a richer, more complex sound. Adjust the volume balance between the two layered tones as needed.
8.4. Touch Sensitivity
The weighted keys are designed to respond to your playing dynamics. The harder you press a key, the louder the sound. This feature can often be adjusted via the TOUCH button or menu settings to suit your playing style.
9. Maintenance and Care
- Cleaning: Wipe the piano's surface with a soft, dry, lint-free cloth. Do not use abrasive cleaners, waxes, or solvents.
- Storage: When not in use for extended periods, cover the piano to protect it from dust. Store in a cool, dry place away from extreme temperatures.
- Transportation: When moving the piano, ensure it is powered off and disconnected from all cables. Handle with care to avoid impact.
10. Troubleshooting
| Problem | Possible Cause | Solution |
|---|---|---|
| No sound |
|
|
| Keys not responding |
|
|
| Pedals not working |
|
|
| Distorted sound |
|
|
11. Specifications
| Feature | Detail |
|---|---|
| Model Number | U310 |
| Brand | UISCOM |
| Number of Keys | 88 |
| Key Type | Weighted Keys |
| Instrument Type | Digital Piano |
| Headphone Jack | 2.5mm Jack |
| Connectivity Technology | Auxiliary, MIDI, USB |
| Power Source | Corded Electric |
| Item Weight | 24 kg |
| Package Dimensions | 142.24 x 41.91 x 29.21 cm |
| Special Features | Portable, Weighted Keys, LED Screen, Triple Pedal System, MIDI Compatibility |
| Skill Level | Beginner |
| Finish Type | Lacquered |
| Style | Modern |

Figure 11.1: Dimensional overview of the UISCOM U310 Digital Piano, indicating its length, width, and height for placement and setup considerations.
12. Warranty and Support
For warranty information and technical support, please refer to the documentation provided with your purchase or contact UISCOM customer service. Keep your proof of purchase for warranty claims.