
1. Product Overview
The GESIPOR 32"x19" Wall Mount Bathroom Vanity with Sink is a modern, floating vanity designed for bathrooms, powder rooms, checkrooms, or utility rooms. It features a rectangular sink with a beveled surface for efficient drainage and an integrated countertop for small items. The unit is constructed from solid white stone resin, offering a smooth, durable, and easy-to-clean surface.
Key Features:
- Overall Dimensions: 32" Length x 18.89" Width x 5.9" Height.
- Multi-function Sink: Rectangular design with beveled surface for quick drainage and integrated countertop.
- Durable Material: Solid white stone resin construction, smooth and resistant to bleeding and stains.
- Easy Installation: Designed for self-assembly with included manual and hardware.
- Unique Cutout: Features a unique cutout design for hanging towels.

Image: GESIPOR 32"x19" Wall Mount Bathroom Vanity with Sink, showcasing its modern design and integrated features.
2. What's Included
The package contains the following components:
- Bathroom Sink (32"x19")
- Bottle Trap
- Sand Sponge
- Installation Hardware
Note: A faucet for the 1.37" faucet hole must be purchased separately.

Image: Visual representation of the package contents, including the sink, bottle trap, sand sponge, and hardware. Faucet is not included.
3. Installation Instructions
This section provides a general guide for installing your GESIPOR wall-mount bathroom vanity. For detailed visual instructions, please refer to the official installation video below. Professional installation is recommended.
3.1 Tools Required (Not Included)
- Measuring Tape
- Drill
- Hammer
- Level (recommended)
- Caulking Gun and Sealant
3.2 Step-by-Step Installation Guide
- Unpack and Inspect: Carefully remove all components from the packaging. Inspect for any damage or missing parts. Ensure you have the sink, bottle trap, sand sponge, and all necessary hardware.
- Measure and Mark: Determine the desired height for your vanity. Use a measuring tape to mark the positions for the wall-mount brackets on your bathroom wall. Ensure the marks are level and accurately spaced according to the vanity's dimensions.

Image: Measuring the vanity to determine appropriate mounting height and width on the wall.
- Drill Pilot Holes: Using a drill, create pilot holes at the marked locations. The size of the drill bit should match the wall anchors provided.

Image: Drilling pilot holes into the wall for secure mounting of the vanity brackets.
- Install Wall Anchors and Brackets: Insert the wall anchors into the pilot holes. Use a hammer to gently tap them flush with the wall surface. Secure the wall-mount brackets using the provided screws. Ensure they are firmly attached and level.
- Mount the Vanity: Carefully lift the vanity and align it with the installed wall brackets. Secure the vanity to the brackets using the appropriate hardware. Ensure the vanity is stable and level.
- Install Bottle Trap: Connect the bottle trap to the sink drain opening and the wall drain pipe. Ensure all connections are tight to prevent leaks.
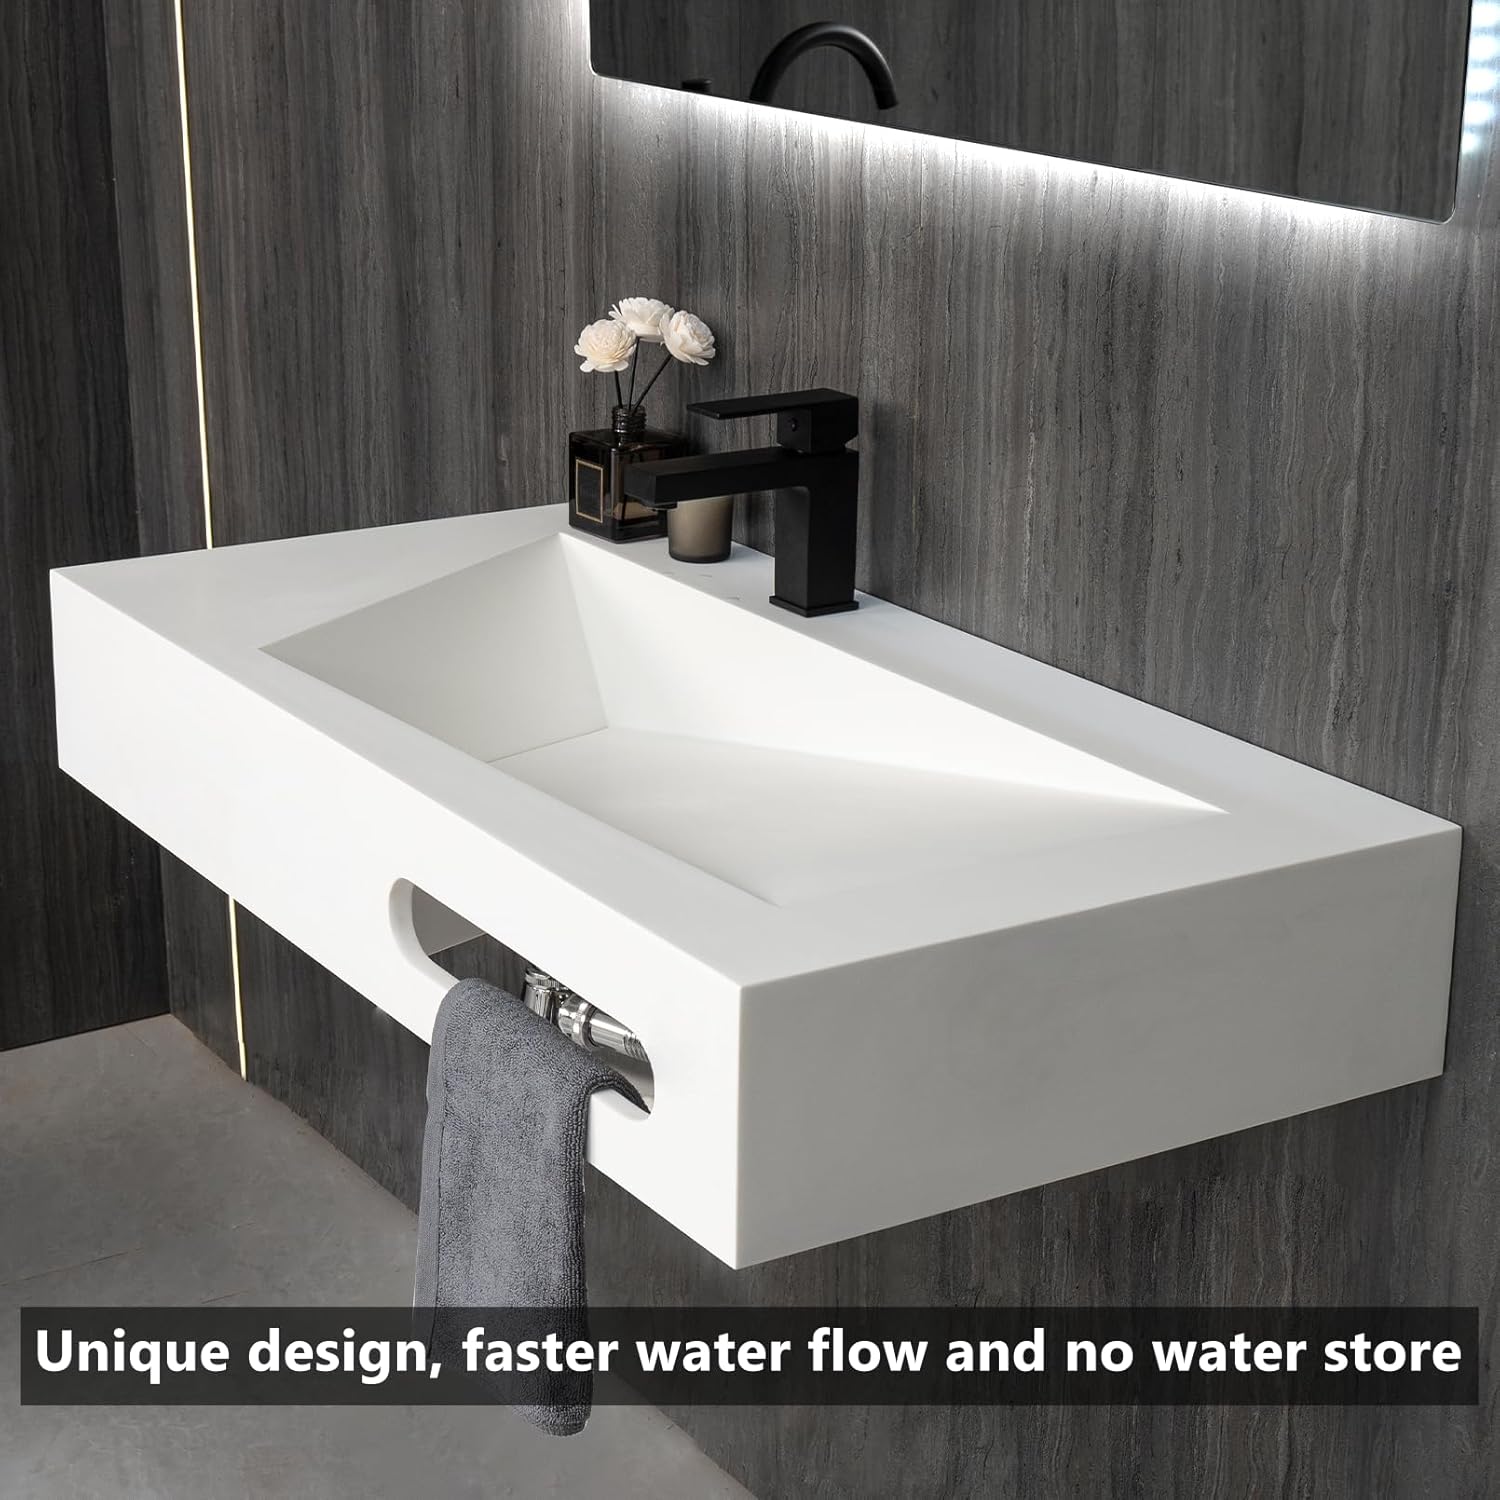
Image: Close-up of the bottle trap installation, connecting it to the sink drain.
- Apply Sealant: Apply a bead of silicone sealant around the edges where the vanity meets the wall to prevent water infiltration.
- Faucet Installation: Install your chosen faucet into the pre-drilled faucet hole (faucet sold separately). Connect the water supply lines according to the faucet manufacturer's instructions.
3.3 Official Installation Video
Video: Official installation guide for the Gesipor Bathroom Vanity, demonstrating the step-by-step process from unpacking to final setup.
4. Operating Instructions
The GESIPOR bathroom vanity sink operates like any standard bathroom sink. Ensure the faucet is properly installed and connected to the water supply. Turn the faucet handles to control water flow and temperature. The beveled sink design facilitates quick drainage.
Image: The vanity sink with water flowing from the faucet, demonstrating its functional design.
5. Maintenance and Care
To maintain the appearance and longevity of your GESIPOR bathroom vanity, follow these care instructions:
- Regular Cleaning: Wipe the surface with a dry cloth after each use to prevent water spots and soap scum buildup.
- Deep Cleaning: For more thorough cleaning, use a mild, non-abrasive cleaner and a soft cloth or sponge. Avoid harsh chemicals, abrasive pads, or scouring powders, as these can damage the resin surface.
- Stain Removal: The included sand sponge can be used for minor scuffs or stubborn stains on the resin surface. Gently rub the affected area with the damp sand sponge, then rinse and dry. Test on an inconspicuous area first.
- Avoid Extreme Heat: Do not place extremely hot items directly on the vanity surface.
- Prevent Scratches: While durable, avoid dragging sharp or heavy objects across the surface to prevent scratches.

Image: Demonstrating the ease of cleaning the vanity surface with a sponge, highlighting its smooth, non-porous finish.
6. Troubleshooting
If you encounter issues with your GESIPOR bathroom vanity, refer to the following common troubleshooting tips:
- Leaks:
- Check all plumbing connections (faucet, drain, bottle trap) for tightness.
- Ensure sealant around the drain and faucet base is intact.
- If leaks persist, consult a professional plumber.
- Slow Drainage:
- Inspect the bottle trap for any blockages.
- Clean the sink drain opening of any hair or debris.
- Surface Stains/Scratches:
- For minor stains, use the provided sand sponge with water and gentle rubbing.
- For deeper scratches, professional repair may be required.
- Vanity Not Level:
- Re-check the wall brackets and their installation. Adjust as necessary to ensure the vanity is perfectly level.
7. Specifications
| Feature | Detail |
|---|---|
| Brand | GESIPOR |
| Model | 32"x19" (B0CHDQHJVT) |
| Color | Matte White |
| Material | Resin |
| Product Dimensions (D x W x H) | 18.89" x 32" x 5.9" |
| Item Weight | 23.59 Kilograms |
| Style | Modern |
| Shape | Rectangular |
| Installation Type | Countertop, Wall-Mount |
| Drain Type | Wall Drain |
Image: Diagram illustrating the precise dimensions of the 32"x19" vanity sink.
8. Warranty and Support
For warranty information or customer support regarding your GESIPOR product, please refer to the documentation included with your purchase or contact GESIPOR customer service directly through their official website or the retailer where the product was purchased.
GESIPOR is committed to providing high-quality bathroom products and ensuring customer satisfaction. They continuously improve and innovate based on customer feedback.