1. Introduction
The Quincry Wireless LED Strobe Light is a versatile and high-brightness lighting solution designed to enhance visibility and safety. It features 7 vibrant LED colors and multiple lighting modes, making it ideal for various applications including anti-collision night signaling for cars, trucks, motorcycles, bicycles, vehicles, and drones. Its compact, USB-rechargeable design ensures convenience and portability.
This manual provides detailed instructions on how to set up, operate, and maintain your wireless LED strobe light to ensure optimal performance and longevity.

Figure 1.1: Versatile applications of the Quincry Wireless LED Strobe Light.
2. Package Contents
Please verify that all items listed below are included in your package. If any items are missing or damaged, please contact customer support.
- 1 x Wireless LED Strobe Light (M3)
- 1 x USB Charging Cable
- 1 x Wireless Remote Control
- 3 x Velcro with Adhesive Backing
- 1 x User Specification (this manual)
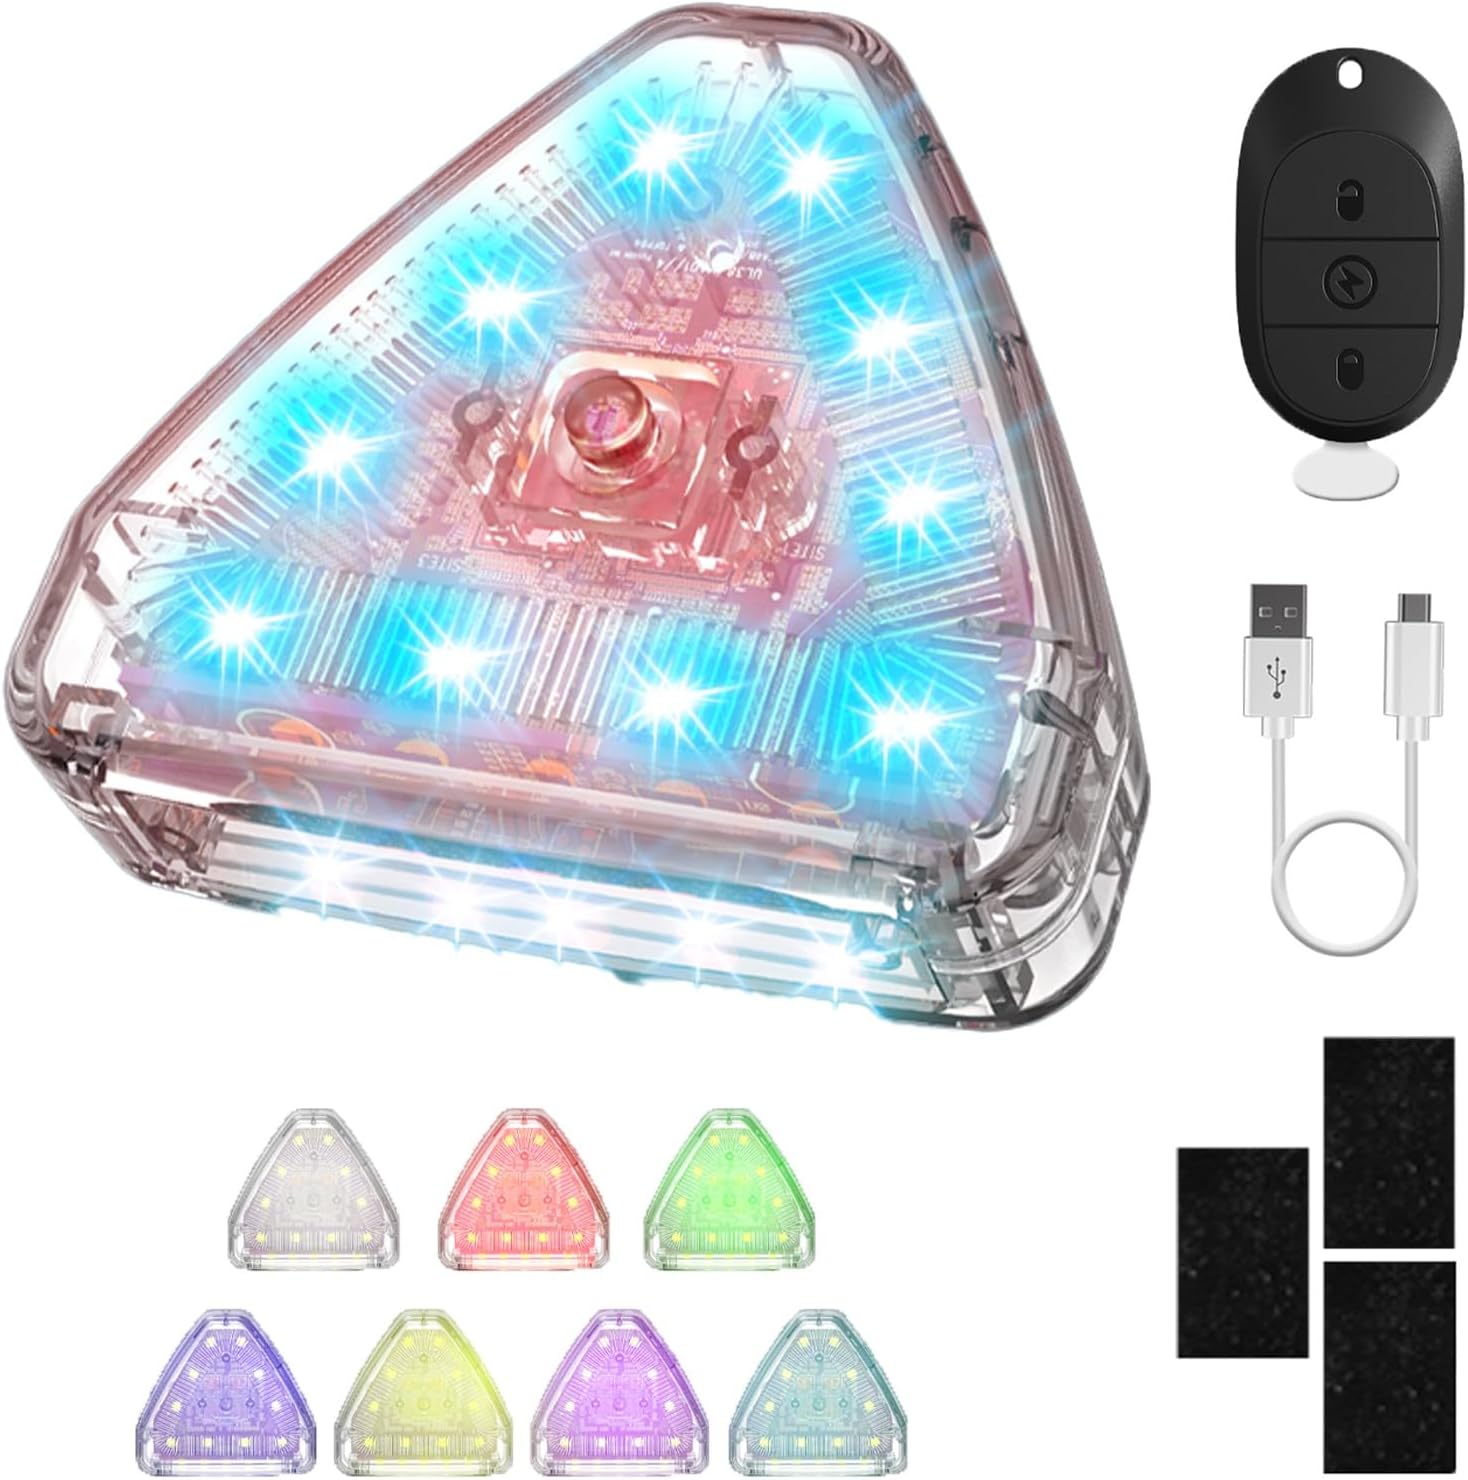
Figure 2.1: Package contents of the Quincry Wireless LED Strobe Light.
3. Setup and Installation
The Quincry Wireless LED Strobe Light offers flexible and easy installation options.
3.1 Charging the Device
Before first use, fully charge the strobe light. Connect the provided USB charging cable to the light's charging port and to a standard USB power source (e.g., computer USB port, wall adapter). The charging indicator will show the charging status. A full charge takes approximately 120 minutes.

Figure 3.1: USB charging and battery life overview.
3.2 Mounting Options
The strobe light can be installed using two primary methods:
- Velcro with Adhesive: For a secure, lossless installation, attach the provided velcro pads to a clean, flat surface on your vehicle, drone, or other desired location. Then, attach the light to the velcro.
- Magnetic Absorption: The light features a magnetic base, allowing it to be easily attached to any magnetic surface.

Figure 3.2: Installation methods: Velcro and Magnetic.
4. Operation
Your Quincry Wireless LED Strobe Light is controlled via the included 2.4G wireless remote control, offering convenience and flexibility.
4.1 Remote Control Functions
The remote control allows you to switch between various colors and lighting modes. Ensure the remote's diaphragm is removed before use.
- Function Switch Button (Top):
- Short press: Enter flash mode.
- Long press: Exit vibration mode (lights out).
- Constant Light Function Button (Middle):
- Short press: Enter normal light mode (constant illumination).
- Power Button (Bottom):
- Long press: Turn the light ON/OFF.

Figure 4.1: Remote Control Analysis.
4.2 Color and Lighting Modes
The strobe light offers 7 distinct LED colors and 30 different lighting modes, including memory function for your preferred settings. Available colors include White, Red, Green, Blue, Yellow, Purple, and Sky Blue.
Key modes include:
- Seven-color flash
- Seven-color slow flash
- SOS mode
- Four-color everbright
- Civil aviation mode
- Circulation mode
- And many more.

Figure 4.2: Seven LED Colors and Multiple Modes.
5. Maintenance
5.1 Battery Life and Charging
The strobe light is equipped with a built-in 600mAh/3.7V battery. A full charge takes approximately 120 minutes. Battery life varies depending on the mode used:
- Slow flash use: Up to 16 hours
- Flash use: Up to 10 hours
- Constant light use: Up to 2 hours
Recharge the device using the provided USB cable when the light intensity diminishes or it stops functioning.

Figure 5.1: Internal Battery Lasting Voyage.
5.2 Waterproofing
The Quincry LED Strobe Light is designed with deep waterproofing, making it suitable for use in various weather conditions, including rain. You do not need to worry about damage when riding in wet conditions.

Figure 5.2: Deep Waterproofing.
5.3 Cleaning and Storage
Clean the light with a soft, damp cloth. Do not use abrasive cleaners or solvents. Store the device in a cool, dry place when not in use for extended periods.
6. Troubleshooting
If you encounter any issues with your Quincry Wireless LED Strobe Light, please refer to the following common problems and solutions:
- Light does not turn on:
- Ensure the battery is charged. Connect to a USB power source and allow it to charge for at least 30 minutes.
- Verify the remote control's diaphragm is removed.
- Long press the power button on the remote control to turn on the light.
- Remote control not responding:
- Ensure the remote control's diaphragm is removed.
- Check if the light is within the 2.4G wireless control range.
- The remote control uses a small button cell battery. If unresponsive after checking the above, the remote's battery may need replacement (battery type not specified, typically CR2032 or similar).
- Light modes not changing:
- Ensure you are pressing the correct function switch button on the remote.
- Recharge the device, as low battery can sometimes affect functionality.
If the problem persists after attempting these solutions, please contact Quincry customer support for further assistance.
7. Specifications
| Feature | Specification |
|---|---|
| Model Number | M3 |
| Brand | Quincry |
| Light Source Type | LED |
| Number of Colors | 7 (White, Red, Green, Blue, Yellow, Purple, Sky Blue) |
| Brightness | Up to 600 lumens |
| Power Source | Battery Powered (USB Rechargeable) |
| Battery Type | Built-in 600mAh/3.7V |
| Charging Time | Approximately 120 minutes |
| Battery Life (Max) | Up to 16 hours (slow flash mode) |
| Control Method | 2.4G Wireless Remote Control |
| Material | Acrylonitrile Butadiene Styrene (ABS) |
| Dimensions (L x W x H) | 1.89" x 1.38" x 0.71" |
| Item Weight | 3.53 ounces |
| Special Features | Waterproof, Magnetic/Velcro Installation |
8. Warranty and Support
Quincry stands behind the quality of its products. For information regarding warranty coverage, returns, or technical support, please refer to the warranty card included with your purchase or visit the official Quincry website.
For direct assistance, you may contact Quincry customer service through the contact information provided on the product packaging or the brand's official online presence. Please have your model number (M3) and purchase date ready when contacting support.


