AMZCHEF HCK213-22A1
AMZCHEF RV Gas Range User Manual
Model: HCK213-22A1
1. Product Overview
The AMZCHEF RV Gas Range is a versatile and compact cooking solution, combining a three-burner gas stove with a 1.77 cubic foot oven. Designed for efficiency and space-saving, it is ideal for RVs, apartments, and mobile homes. This appliance delivers a total of 28100 BTU high heat output, ensuring efficient cooking and baking.
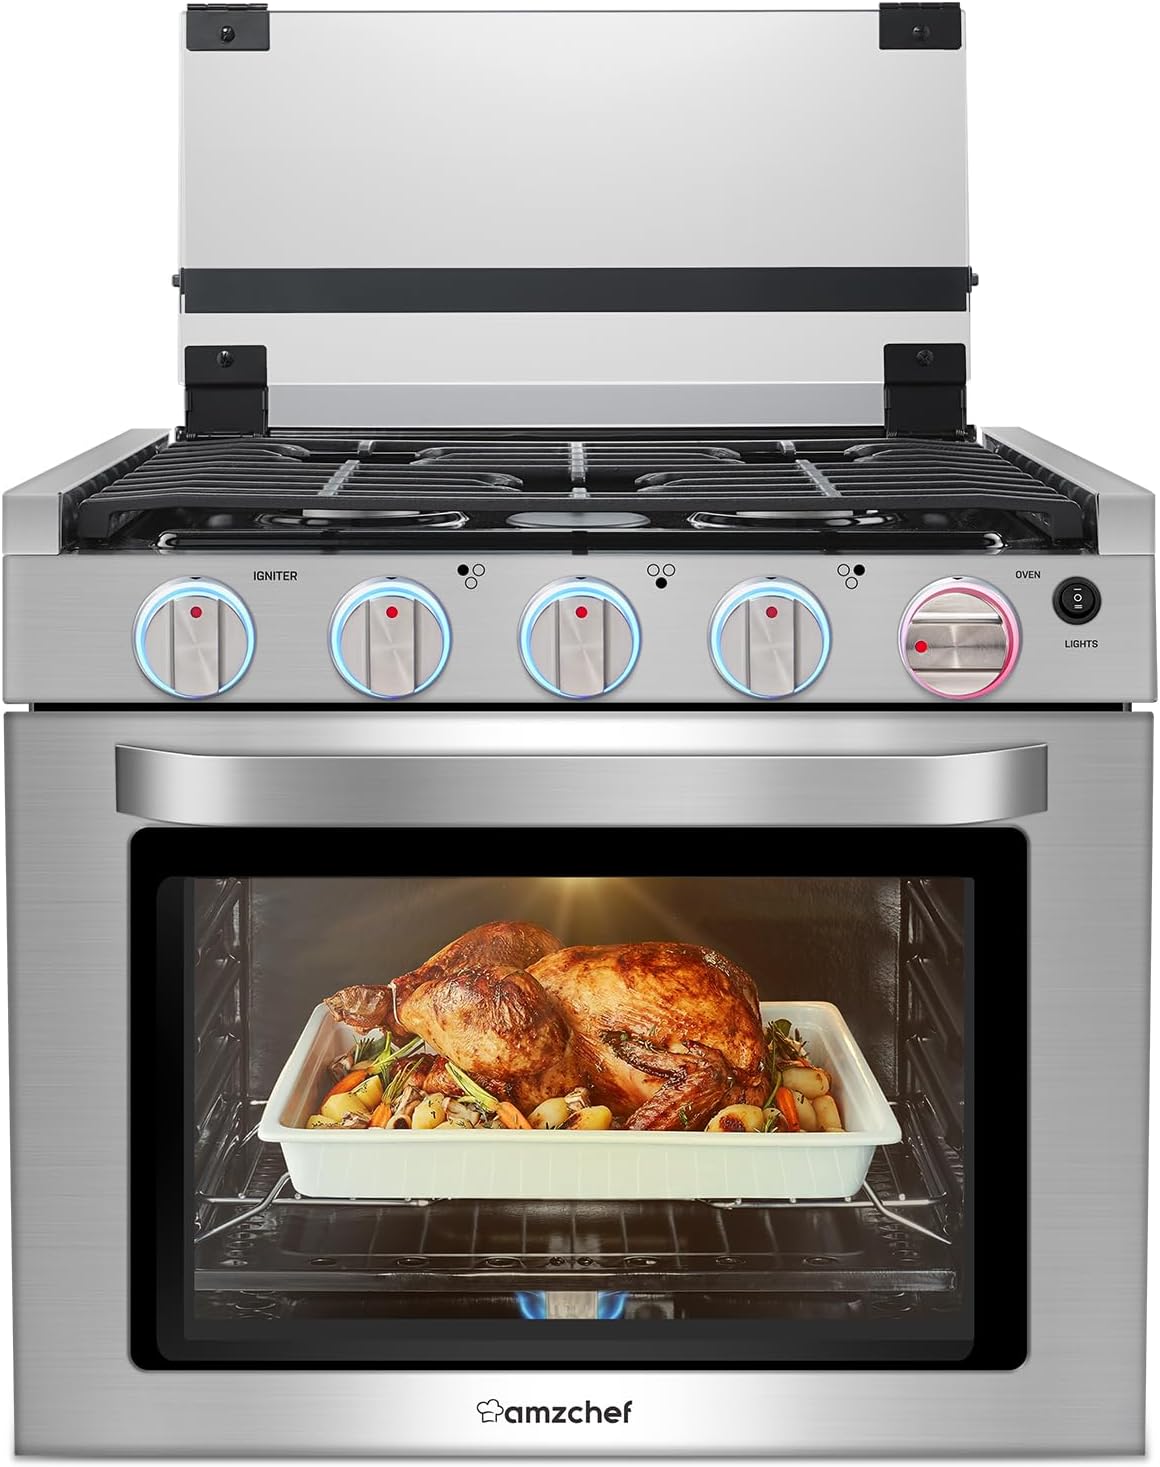
Figure 1.1: Front view of the AMZCHEF RV Gas Range, showcasing the three top burners and the oven with a roasted chicken inside.
The stove features multi-power open-flame cooking for even heat distribution, while the oven's 1.77 cu.ft capacity allows for baking various dishes simultaneously. Safety is enhanced with knob indicator lights that show red for active status and blue for standby mode.
2. Key Features
- Versatile Cooking: High-efficiency three-burner gas range stove with a built-in 1.77 cu.ft. oven, suitable for baking, searing, and simmering.
- High Heat Output: Total 28100 BTU output for powerful and efficient cooking.
- Safety Indicators: Knob indicator lights (red for active, blue for standby) reduce misuse and enhance safety.
- Compact Design: Measures 21.54" (W) x 21.30" (D) x 19.96" (H), designed to fit compact spaces like RVs.
- Easy to Clean: Enamel-coated oven cavity is corrosion-resistant, durable, and easy to wipe clean.
- Durable Construction: Features a damped dust-proof glass cover and high-temperature cast iron grates.
- Included Accessories: Comes with a baking rack, air fryer basket, and grease collection tray.

Figure 2.1: Illustration of the powerful burners, indicating individual BTU outputs for efficient cooking.

Figure 2.2: Detailed view of the oven's triple insulated glass doors, corrosion-resistant enamelled interior, and high-temperature cast iron grate.
3. Installation and Setup
Proper installation is crucial for the safe and efficient operation of your AMZCHEF RV Gas Range. It requires both a 12V power supply and a propane gas connection.
3.1 Power Supply Connection
Connect the appliance to a 12V DC power supply. Ensure correct polarity: the black wire is positive (+), and the white wire is negative (-). The maximum current draw is less than 1 amp.
3.2 Propane Supply Line Connection
Connect a propane supply line with a 3/8" Flare Female connection to the regulator on the appliance. Always check for gas leaks after connection using a soapy water solution.

Figure 3.1: Rear view of the range indicating the connection points for the 12V power supply and the propane gas line.
3.3 Dimensions and Built-in Size
Refer to the following dimensions for proper installation and fit within your kitchen space:

Figure 3.2: Detailed product and built-in dimensions for accurate installation planning.
| Measurement | Width | Depth | Height |
|---|---|---|---|
| Product Size | 21.54 in | 21.30 in (Handle included) | 19.96 in |
| Built-in Size | 20.24 in | 17.72 in | 20.00 in |
4. Operating Instructions
4.1 Using the Burners
- Ensure the gas supply is open.
- Push in the desired burner knob and turn it counter-clockwise to the 'Ignite' position.
- Hold the knob in for a few seconds while the igniter sparks. The knob indicator light will turn red when the burner is active.
- Once lit, adjust the flame size by turning the knob between the 'High' and 'Low' settings.
- To turn off, turn the knob clockwise to the 'Off' position. The indicator light will return to blue.
4.2 Using the Oven
- Open the oven door and ensure the oven rack is in the desired position.
- Push in the oven knob and turn it to the desired temperature setting.
- Hold the knob in for approximately 30-45 seconds to allow the pilot light to ignite and the thermocouple to heat up. You may need to hold the igniter button simultaneously if available.
- Once the oven is lit, the knob indicator light will turn red. Release the knob.
- Allow the oven to preheat to the set temperature. The oven light can be turned on to monitor cooking progress.
- To turn off, turn the oven knob to the 'Off' position.

Figure 4.1: Recommended temperature ranges for common dishes when using the oven.
5. Maintenance and Cleaning
Regular cleaning and maintenance will ensure the longevity and optimal performance of your gas range.
5.1 Oven Cavity Cleaning
The oven's enamel-coated cavity is designed for easy cleaning. Allow the oven to cool completely before cleaning. Use a damp cloth with mild detergent to wipe down the interior. Avoid abrasive cleaners or scouring pads that could damage the enamel.

Figure 5.1: The smooth, anti-cracking, and anti-rust enamelled interior is designed for easy cleaning.
5.2 Glass Cover and Burner Grates
The damped dust-proof glass cover helps prevent dust and debris. Clean with a soft cloth and glass cleaner. The high-temperature cast iron grates can be removed for cleaning. Wash with warm soapy water and dry thoroughly before replacing.
5.3 Included Accessories
The package includes a grill rack, an air fryer basket, and an oil drip pan. Clean these accessories after each use with warm soapy water. The oil drip pan is specifically for collecting oil drips and crumbs.

Figure 5.2: The complimentary items included with your AMZCHEF RV Gas Range.
6. Troubleshooting
If you encounter issues with your AMZCHEF RV Gas Range, refer to the common problems and solutions below. For persistent issues, contact customer support.
| Problem | Possible Cause | Solution |
|---|---|---|
| Burner or Oven not igniting | No gas supply; Air in gas line; Igniter not sparking; Knob not held long enough. | Check gas tank and supply valve. Bleed air from line by attempting ignition multiple times. Ensure igniter is clean. Hold knob firmly for 15-30 seconds after turning to ignite. |
| Uneven oven heating | Oven not preheated sufficiently; RV not level; Overcrowding. | Allow full preheat time. Ensure RV is level. Avoid placing too many items in the oven at once. Consider using a pizza stone for better heat distribution. |
| Knob indicator lights not working | 12V power supply issue; Loose wiring. | Check 12V power connection and polarity. Inspect wiring for any loose connections. |
| Gas odor | Gas leak. | Immediately turn off gas supply. Ventilate the area. Do not operate any electrical switches. Check all gas connections for leaks using soapy water. If odor persists, evacuate and contact a qualified technician. |
7. Specifications
| Feature | Detail |
|---|---|
| Brand Name | AMZCHEF |
| Model Number | HCK213-22A1 |
| Item Weight | 55.8 pounds |
| Product Dimensions (W x D x H) | 21.54 x 21.30 x 19.96 inches (with handle) |
| Built-in Oven Size (W x D x H) | 20.24 x 17.72 x 20.00 inches |
| Oven Capacity | 1.77 Cubic Feet |
| Installation Type | Built-In |
| Burner Type | 3 Gas Stove + 1 Oven |
| Heating Elements | 3 (Burners) |
| Control Console | Knob |
| Voltage | 12V |
| Fuel Type | Gas (Propane) |
| Material Type | Cast Iron, Stainless Steel |
| Finish Type | Glossy |
| First Available Date | July 18, 2024 |
8. Warranty and Support
8.1 Warranty Information
The AMZCHEF gas stove with oven comes with a 12-month warranty from the date of purchase. This warranty covers manufacturing defects and ensures the product's quality and performance under normal use.
8.2 Customer Support
For any inquiries, technical support, or warranty claims, please contact AMZCHEF customer service. Our team is dedicated to providing assistance and ensuring a positive customer experience. Please refer to your purchase documentation or the AMZCHEF official website for specific contact details.
Ask a question about this manual
Ask about setup, troubleshooting, compatibility, parts, safety, or missing instructions. Manuals+ will review the question and use this page’s manual context to help answer it.