Introduction
Thank you for purchasing the Rockville RCM01 Studio Condenser Microphone Bundle. This manual provides detailed instructions for setting up, operating, and maintaining your microphone and accessories. Please read this guide thoroughly to ensure proper use and optimal performance.
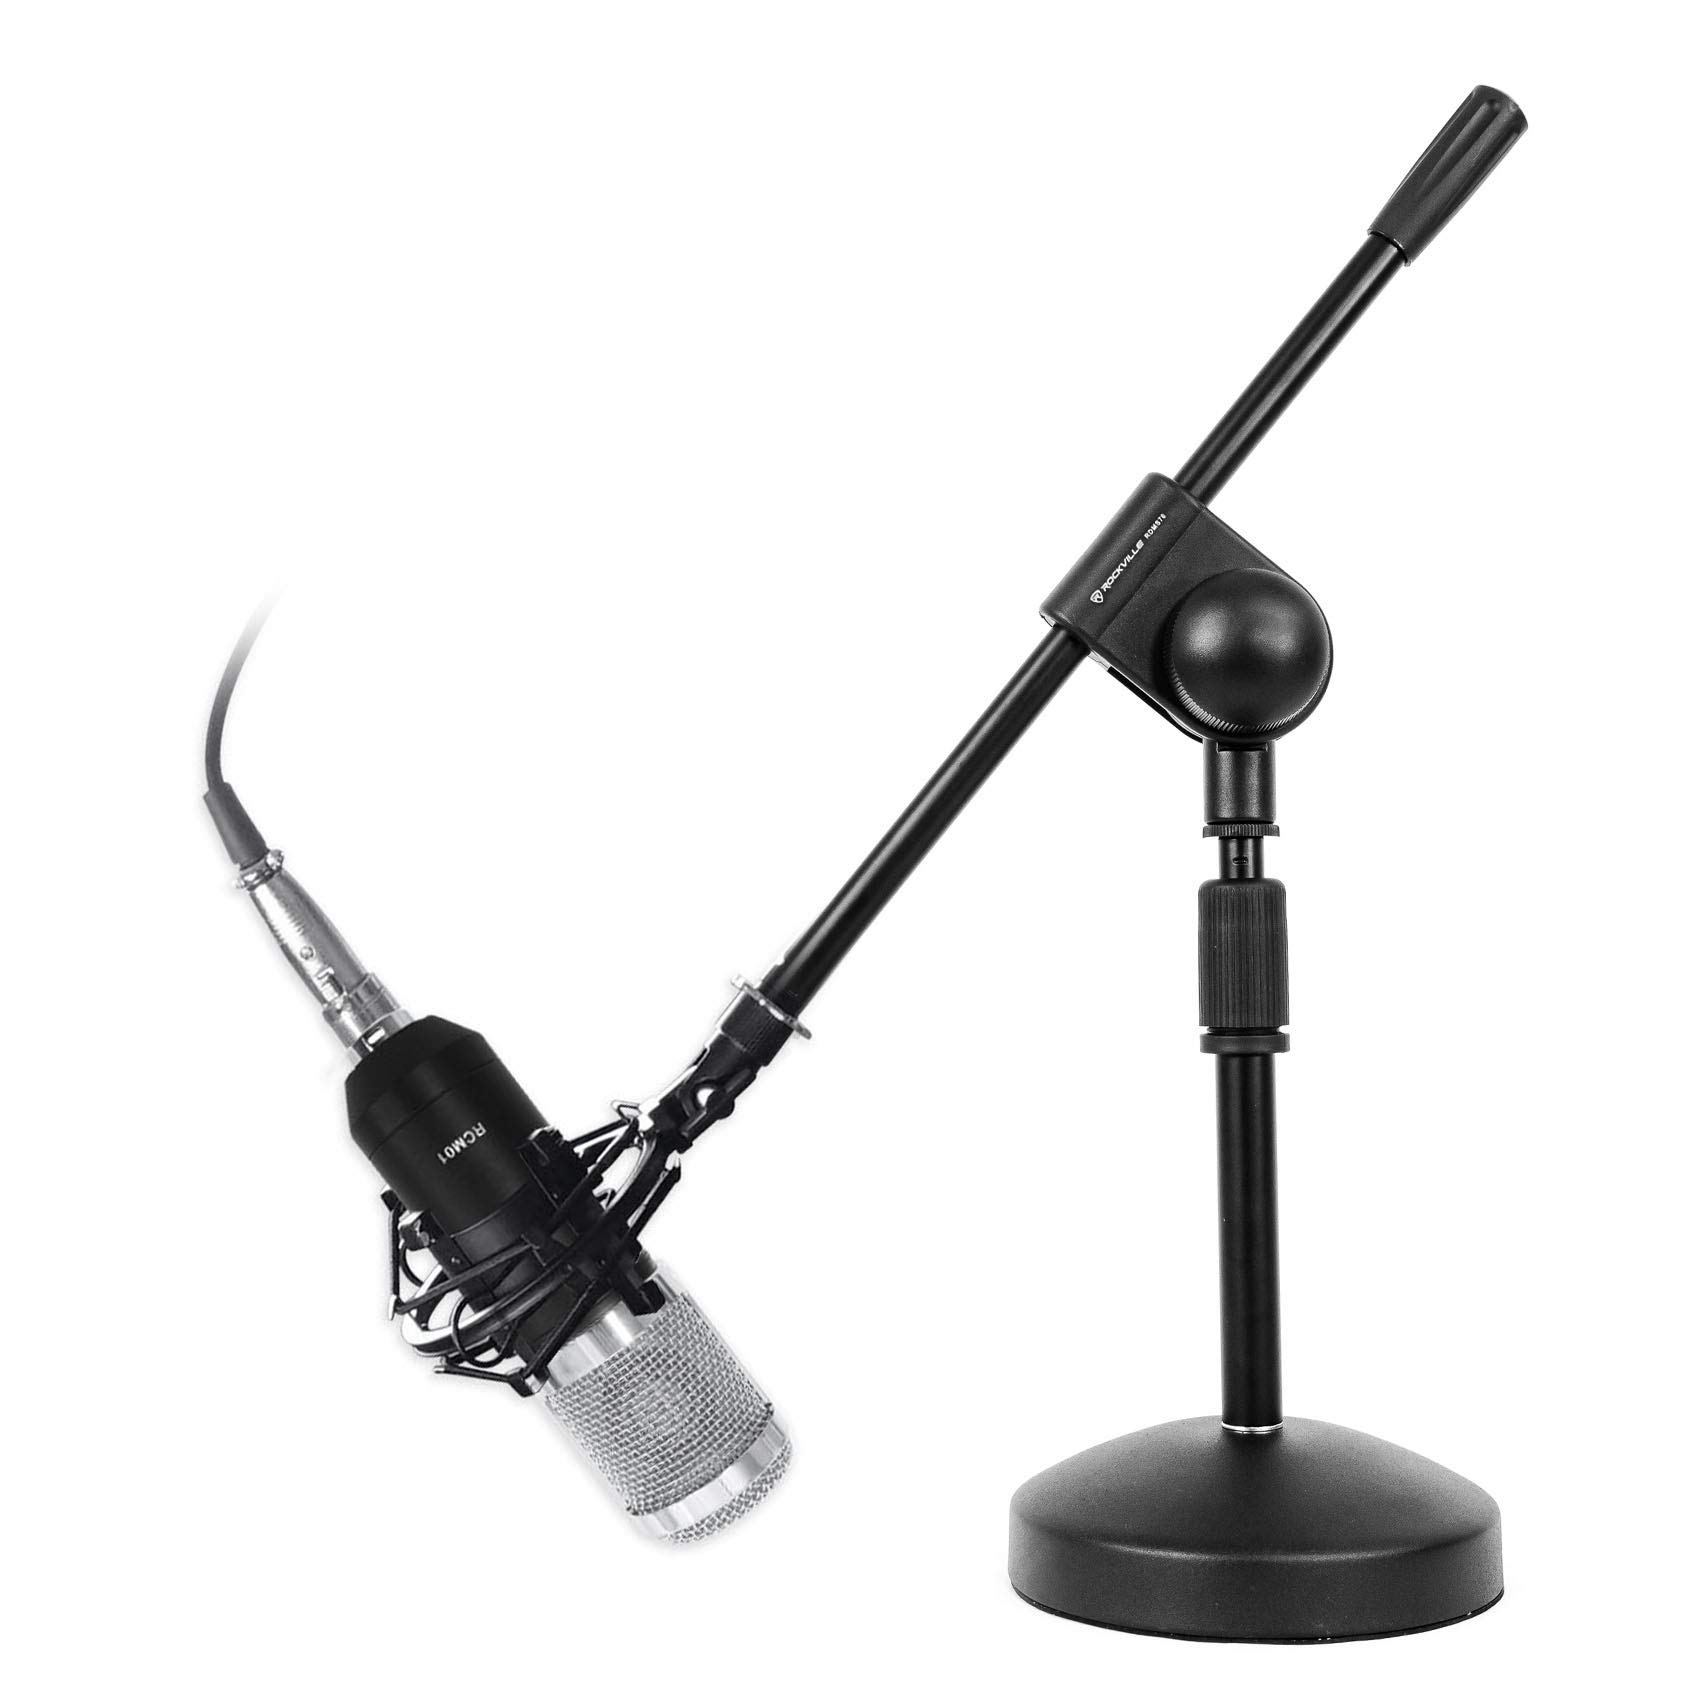
Image: The Rockville RCM01 Studio Condenser Microphone Bundle, showing the microphone, shock mount, cables, and foam wind cap.
Package Contents
- (1) Rockville RCM01 Pro Studio Recording Condenser Microphone
- (1) Metal Shock Mount
- (1) Rockville RDMS70 Desktop Mic Stand with Boom Arm and Steel Round Base
- (1) 10 ft XLR-to-XLR Cable (for 48V phantom power)
- (1) 10 ft 3.5 mm-to-XLR Cable
- (1) Foam Wind Cap
- Warranty Card
Product Features
- Studio Vocal Quality: 25 mm condenser capsule captures natural detail from 30Hz-20kHz with wide dynamic range and low ≤18 dBA self-noise. Cardioid pattern focuses on voice and reduces room noise. High sensitivity (-27 dB +/-2 dB) for clarity at normal speaking levels.
- Durable Construction: Full metal high-quality construction with a zinc alloy body and steel head.
- Versatile Connectivity: Connects to mixers, interfaces, or PCs with included XLR-to-XLR (48V phantom) and 3.5 mm-to-XLR cables.
- Stable Desktop Stand: RDMS70 desktop mic stand features a heavy weighted steel round base with a rubber pad. Adjustable height from 10.63 inches to 15.75 inches with a 13.8 inch boom arm.
- Noise Reduction: Metal shock mount and foam wind cap reduce handling noise and plosives.
- Power Requirements: Electret capsule operates on 3V (1.5-10V range, ≤500 A), while the full mic assembly is designed for 48V phantom-powered use.
Setup
1. Microphone and Shock Mount Assembly
Attach the RCM01 microphone to the included metal shock mount. The shock mount helps isolate the microphone from vibrations and handling noise.

Image: The Rockville RCM01 microphone securely mounted in its shock mount, attached to a desktop stand.
2. Attaching to Desktop Mic Stand (RDMS70)
The RDMS70 desktop mic stand provides a stable base for your microphone. Screw the shock mount onto the threaded top of the mic stand. Adjust the height and boom arm to your desired position.

Image: The Rockville RDMS70 Desktop Mic Stand with its boom arm extended.
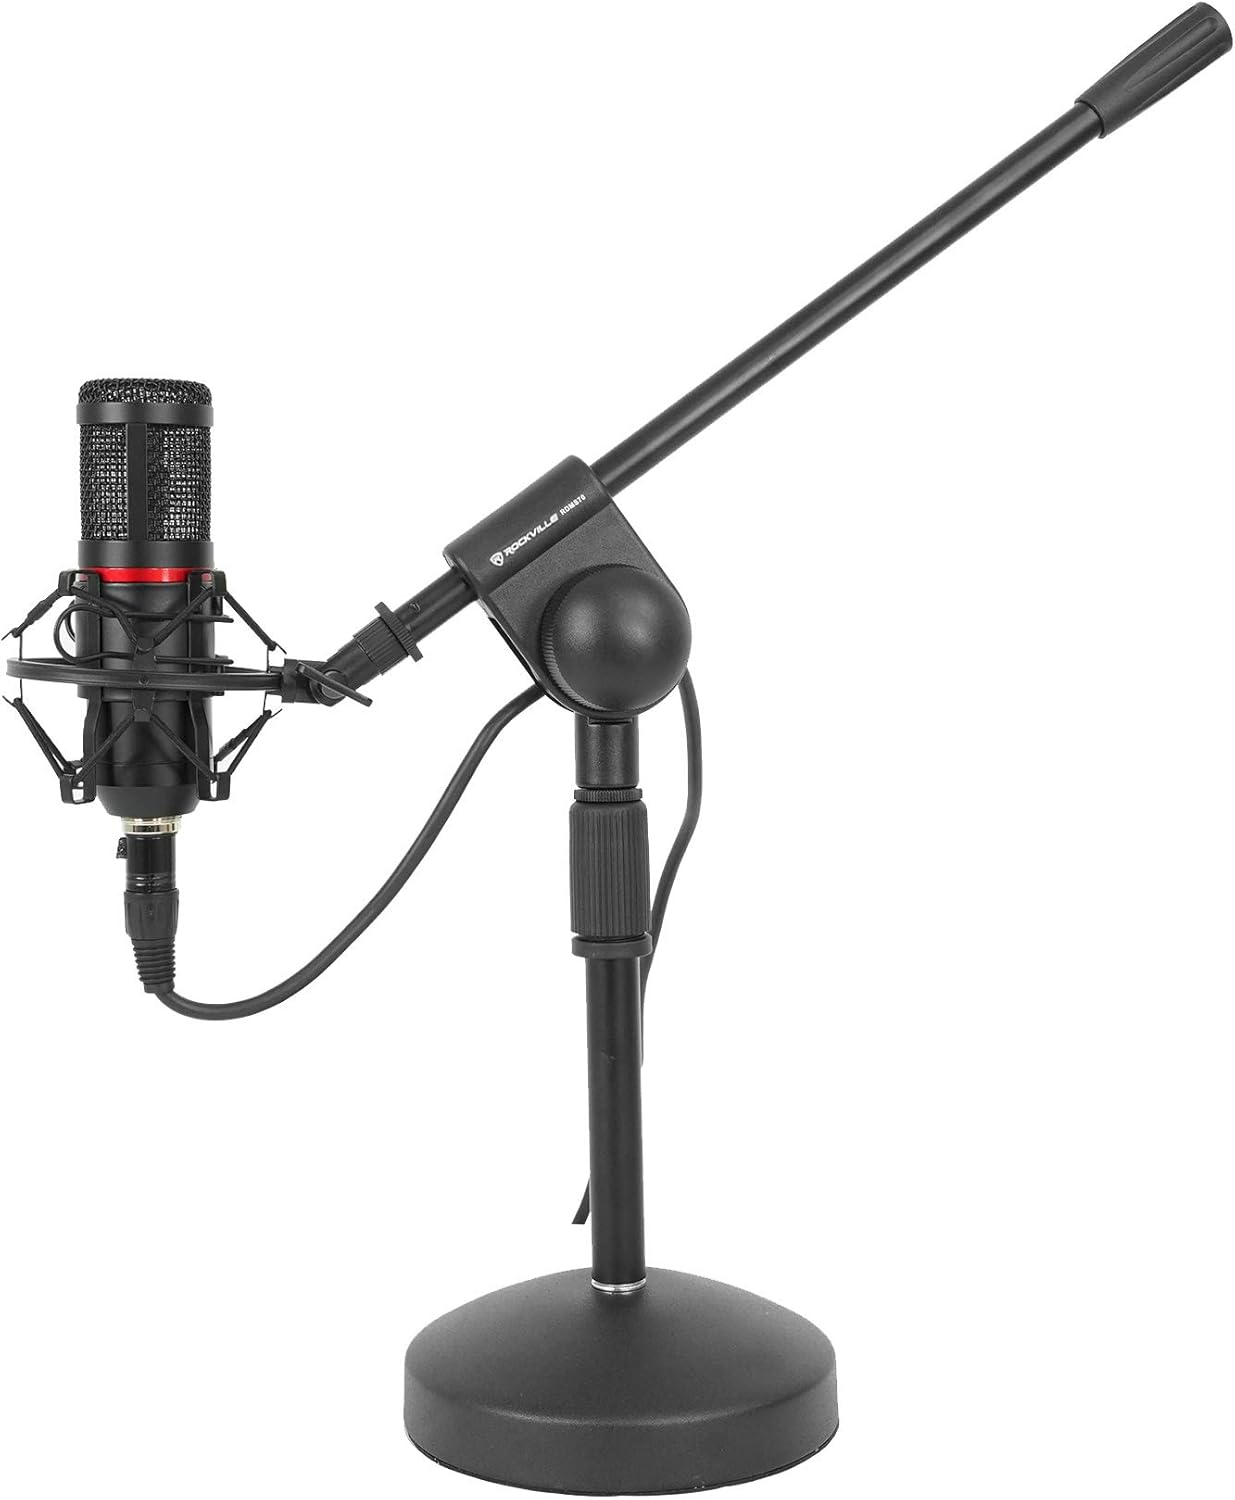
Image: The Rockville RCM01 microphone mounted on the RDMS70 Desktop Mic Stand, ready for use.
3. Connecting to an Audio Interface or Mixer (XLR)
For professional recording, connect the RCM01 to an audio interface or mixer using the included 10 ft XLR-to-XLR cable. Ensure your interface or mixer provides 48V phantom power, as condenser microphones require this to operate.
Video: "How To Set Up Your RCM01" - This video demonstrates connecting the RCM01 microphone to an audio interface and setting up software for recording.
4. Connecting to a PC/Laptop (3.5mm)
If connecting directly to a computer without an audio interface, use the included 10 ft 3.5 mm-to-XLR cable. Note that direct connection to a computer's 3.5mm input may not provide phantom power, which is essential for the RCM01's full functionality. An external phantom power supply (like the Rockville PSP5) or an audio interface is recommended for optimal performance.
5. Using the Foam Wind Cap
Place the foam wind cap over the microphone's grille to reduce plosive sounds (like 'p' and 'b' sounds) and minimize unwanted wind noise during recording.
6. Setting up with an Iso Box (Optional)
For enhanced sound isolation and to further reduce room noise, the RCM01 can be used with an Iso Box. The shock mount can be attached inside the Iso Box, and cables routed through designated openings.
Video: "How To Set Up Your RCM01 With An ISOBOX" - This video demonstrates the process of setting up the RCM01 microphone inside an Iso Box for improved acoustic isolation.

Image: The Rockville RCM01 microphone positioned within an Iso Box, connected to an audio interface and laptop, illustrating a typical recording setup.
Operating Instructions
1. Phantom Power Activation
The RCM01 is a condenser microphone and requires 48V phantom power to operate. This is typically supplied by your audio interface, mixer, or a dedicated phantom power supply. Ensure phantom power is activated on your device before use.
2. Gain Staging
Adjust the gain (input level) on your audio interface or mixer. Monitor the input levels in your recording software (DAW) to prevent clipping or distortion. Aim for levels that are strong but do not peak into the red zone.
3. Microphone Placement
Experiment with microphone placement to achieve the desired sound. For vocals, a distance of 6-12 inches from the mouth is a good starting point. The cardioid pickup pattern means the microphone is most sensitive to sound coming from the front, so ensure it's facing the sound source.
Maintenance
- Keep the microphone clean by wiping it with a soft, dry cloth.
- Avoid exposing the microphone to extreme temperatures, humidity, or direct sunlight.
- Store the microphone in a protective case when not in use to prevent dust and damage.
- Handle the microphone and its accessories with care to avoid physical damage.
Troubleshooting
| Problem | Solution |
|---|---|
| No sound from microphone |
|
| Distorted or clipped audio |
|
| Excessive background noise |
|
Specifications
| Feature | Detail |
|---|---|
| Microphone Form Factor | Microphone Only |
| Power Source | Corded Electric (requires 48V Phantom Power) |
| Material | Zinc Alloy Body, Steel Head (Microphone); Steel (Stand Base) |
| Signal-to-Noise Ratio | 24 dB |
| Frequency Response | 30 Hz - 20 KHz |
| Item Weight | 8.1 pounds (Bundle) |
| Polar Pattern | Unidirectional (Cardioid) |
| Connectivity Technology | XLR |
| Connector Type | XLR |
| Adjustable Stand Height | 10.63 inches to 15.75 inches |
| Stand Boom Arm Length | 13.8 inches |
Warranty and Support
This product comes with a warranty card included in the package. For any questions, comments, or concerns regarding your Rockville RCM01 Studio Condenser Microphone Bundle, please contact our customer support team.
Customer Support:
- Phone: 1-646-758-0144
- Email: sales@rockvilleaudio.com
- Hours: Open 24/7