Introduction
This user manual provides comprehensive instructions for the safe and efficient operation, maintenance, and troubleshooting of your CASO VRH 790 advanced Pro Vacuum Sealer. Please read this manual thoroughly before first use and keep it for future reference. This appliance is designed for vacuum sealing various food items, including liquids, to extend their freshness and preserve their aroma.
Safety Instructions
Always observe the following basic safety precautions when using electrical appliances:
- Read all instructions carefully before operating the appliance.
- Do not immerse the appliance, cord, or plug in water or other liquids.
- Keep the appliance out of reach of children.
- Do not operate the appliance with a damaged cord or plug, or after the appliance malfunctions or has been damaged in any manner.
- Use only accessories recommended by the manufacturer.
- Unplug from outlet when not in use and before cleaning.
- Avoid contact with moving parts.
- Do not use outdoors.
- The sealing bar becomes hot during operation. Avoid direct contact.
- Ensure the appliance is placed on a stable, flat, heat-resistant surface.
Product Overview
Familiarize yourself with the components of your CASO VRH 790 advanced Pro Vacuum Sealer.

Figure 1: Top view of the CASO VRH 790 advanced Pro Vacuum Sealer, showcasing its sleek design and control panel.
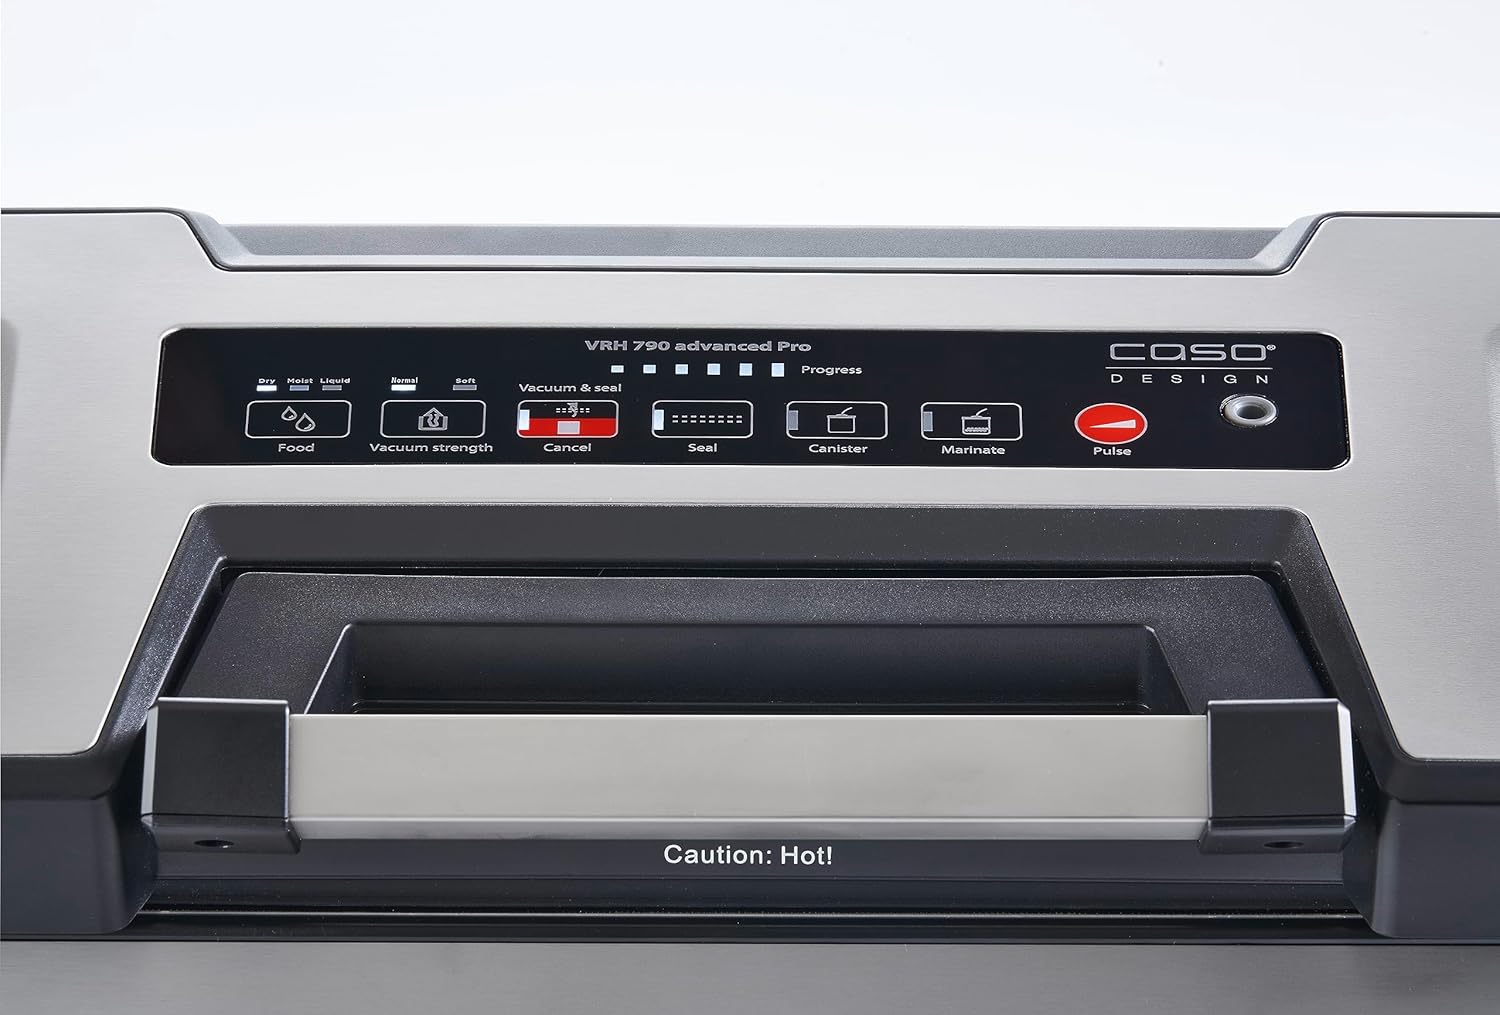
Figure 2: Detailed view of the touch control panel with LED display, showing various function buttons like Food, Vacuum Strength, Cancel, Seal, Canister, Marinate, and Pulse.
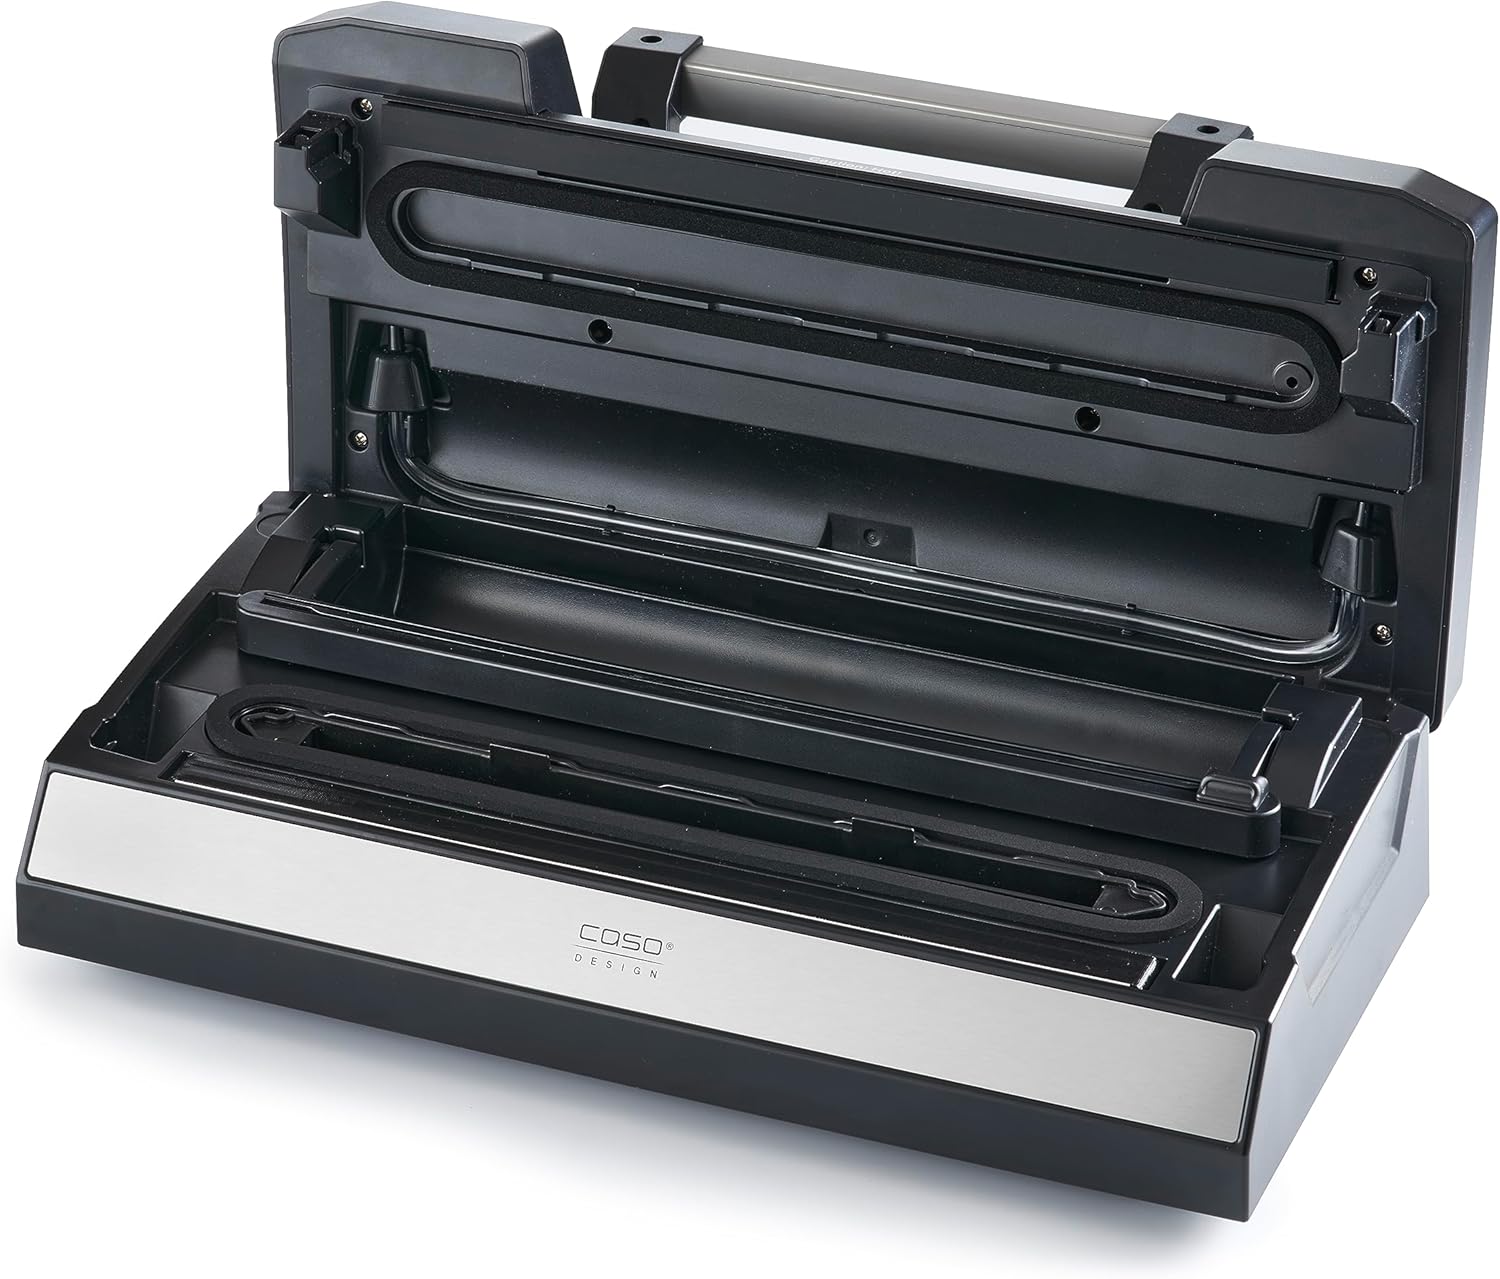
Figure 3: The vacuum sealer with its lid open, revealing the vacuum chamber, sealing bar, and liquid drip tray, ready for bag placement.
Key Components:
- Control Panel: Touch-sensitive buttons with LED indicators for various functions.
- Vacuum Chamber: Area where air is removed from the bag.
- Sealing Bar: Heats up to create a secure double seal on the bag.
- Integrated Roll Box & Cutter: Conveniently stores vacuum film rolls and allows for custom bag sizing.
- Removable Drip Tray: Collects excess liquids, especially useful with the Casotek Liquid function.
- Vacuum Hose Port: For connecting the vacuum hose to external containers.
- Handle: For easy opening and closing of the lid.
Setup
- Unpacking: Carefully remove the vacuum sealer and all accessories from the packaging. Retain packaging for storage or future transport.
- Initial Cleaning: Wipe down the exterior of the appliance with a damp cloth. Clean the removable drip tray and vacuum chamber with warm, soapy water, then rinse and dry thoroughly.
- Placement: Place the appliance on a clean, dry, flat, and stable surface, ensuring adequate ventilation around it.
- Power Connection: Plug the power cord into a grounded electrical outlet. The appliance is now in standby mode.
- Install Film Roll (Optional): If using a film roll, open the integrated roll box, insert the roll, and pull out the desired length of film. Use the integrated cutter to create a bag. Seal one end of the bag using the "Seal" function before filling.
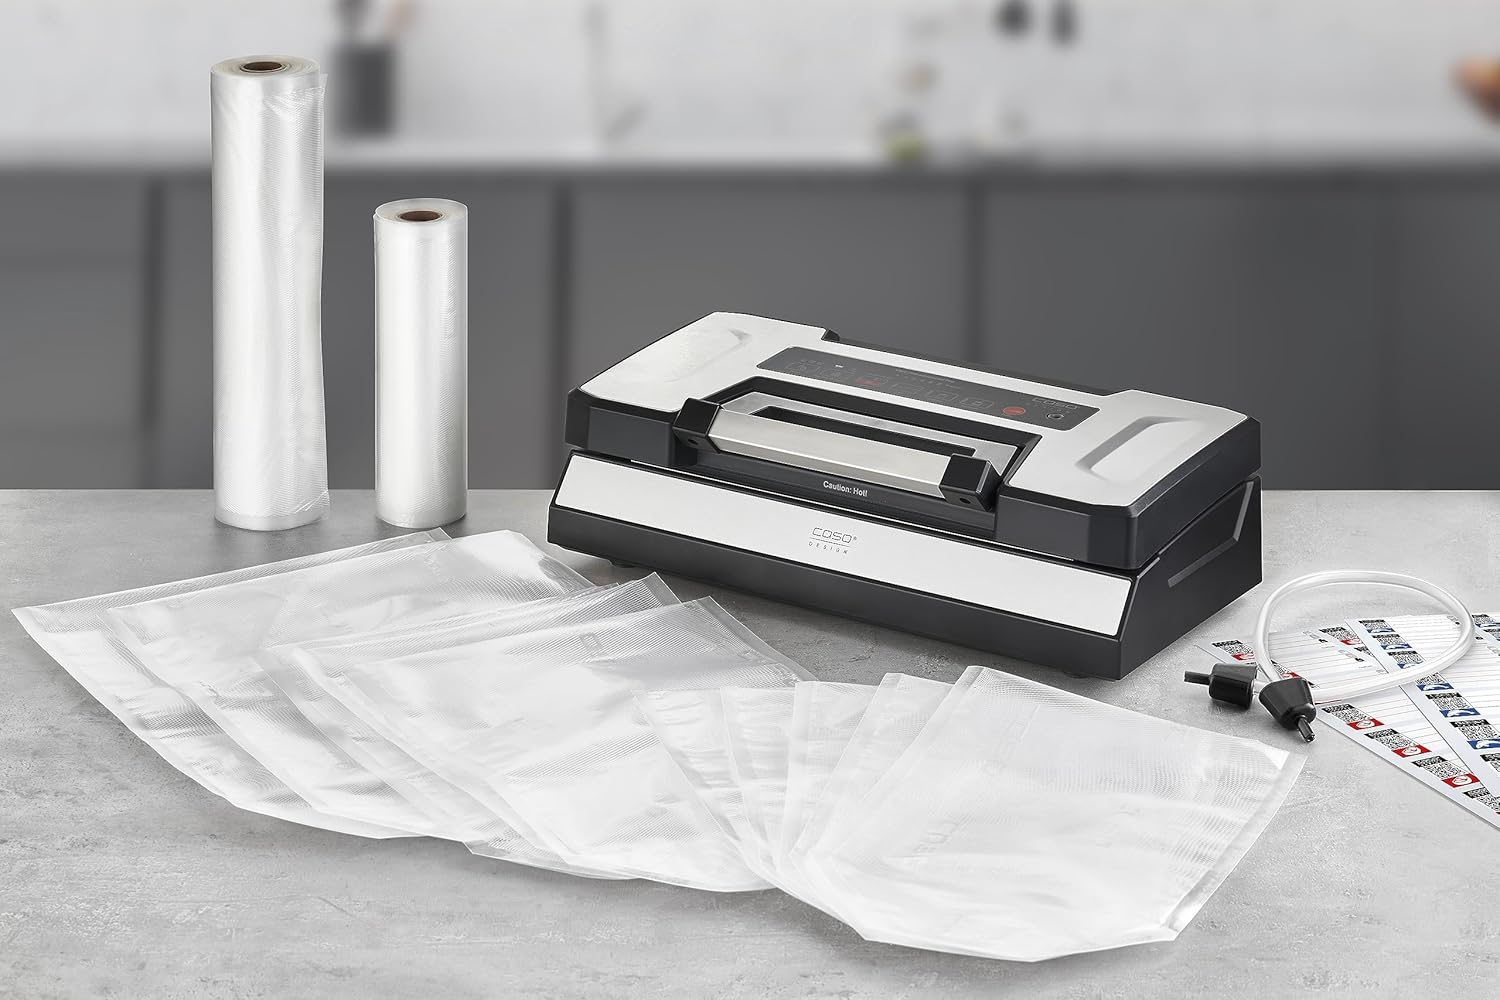
Figure 4: The vacuum sealer displayed with its comprehensive set of accessories, including two vacuum film rolls, various sizes of vacuum bags, and a vacuum hose for containers.
Operating Instructions
1. Basic Vacuum Sealing (Dry Foods)
- Place the food item into a suitable vacuum bag, leaving at least 6-8 cm of space from the top edge.
- Open the lid of the vacuum sealer.
- Place the open end of the bag into the vacuum chamber, ensuring it lies flat and smooth over the sealing bar. Make sure no food particles are on the sealing area.
- Close the lid firmly until it clicks into place. The handle should be in the locked position.
- Press the "Vac & Seal" button. The appliance will automatically remove air from the bag and then seal it.
- Once the process is complete, the LED indicator will turn off. Open the lid and remove the sealed bag.
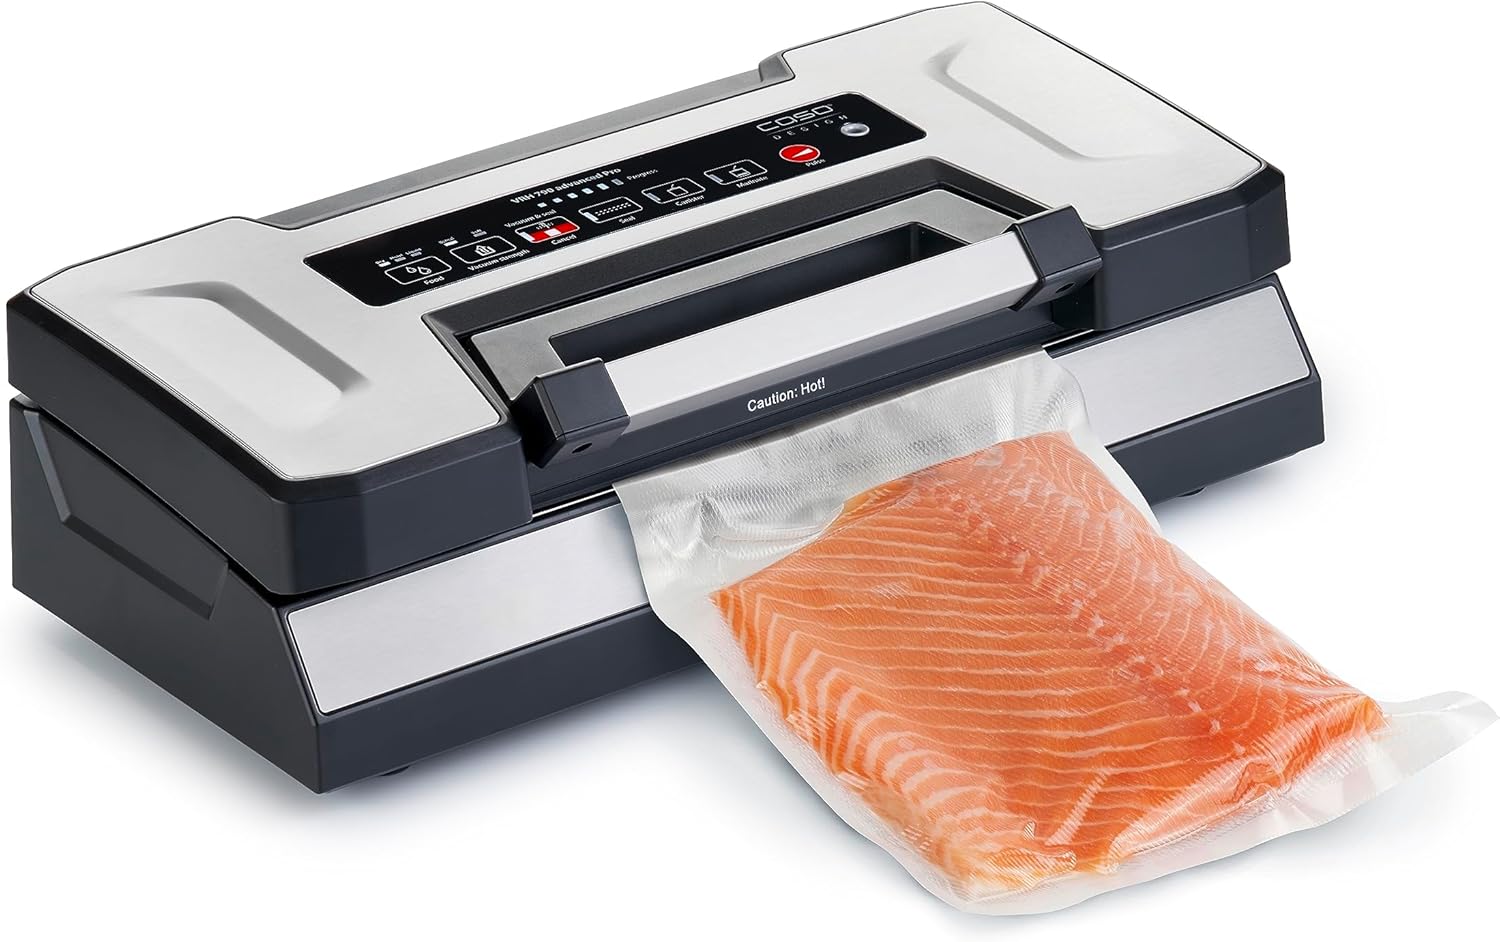
Figure 5: The vacuum sealer actively sealing a bag containing a piece of salmon, demonstrating the vacuuming process.
2. Using the Casotek Liquid Function (Wet Foods)
The patented Casotek Liquid function is designed for vacuum sealing liquids like soups or sauces without drawing them into the machine.
- Place the liquid food into a suitable vacuum bag. Ensure the liquid level is well below the sealing area.
- Place the open end of the bag into the vacuum chamber.
- Close the lid firmly.
- Select the "Liquid" food setting (if available on the control panel, otherwise ensure the drip tray is correctly installed). The appliance will automatically detect liquid or you can manually select the appropriate setting for wet foods.
- Press the "Vac & Seal" button. The "Liquid Stop" feature will automatically stop the vacuum process before liquid is drawn into the sealing area, then proceed with sealing.
- Open the lid and remove the sealed bag.
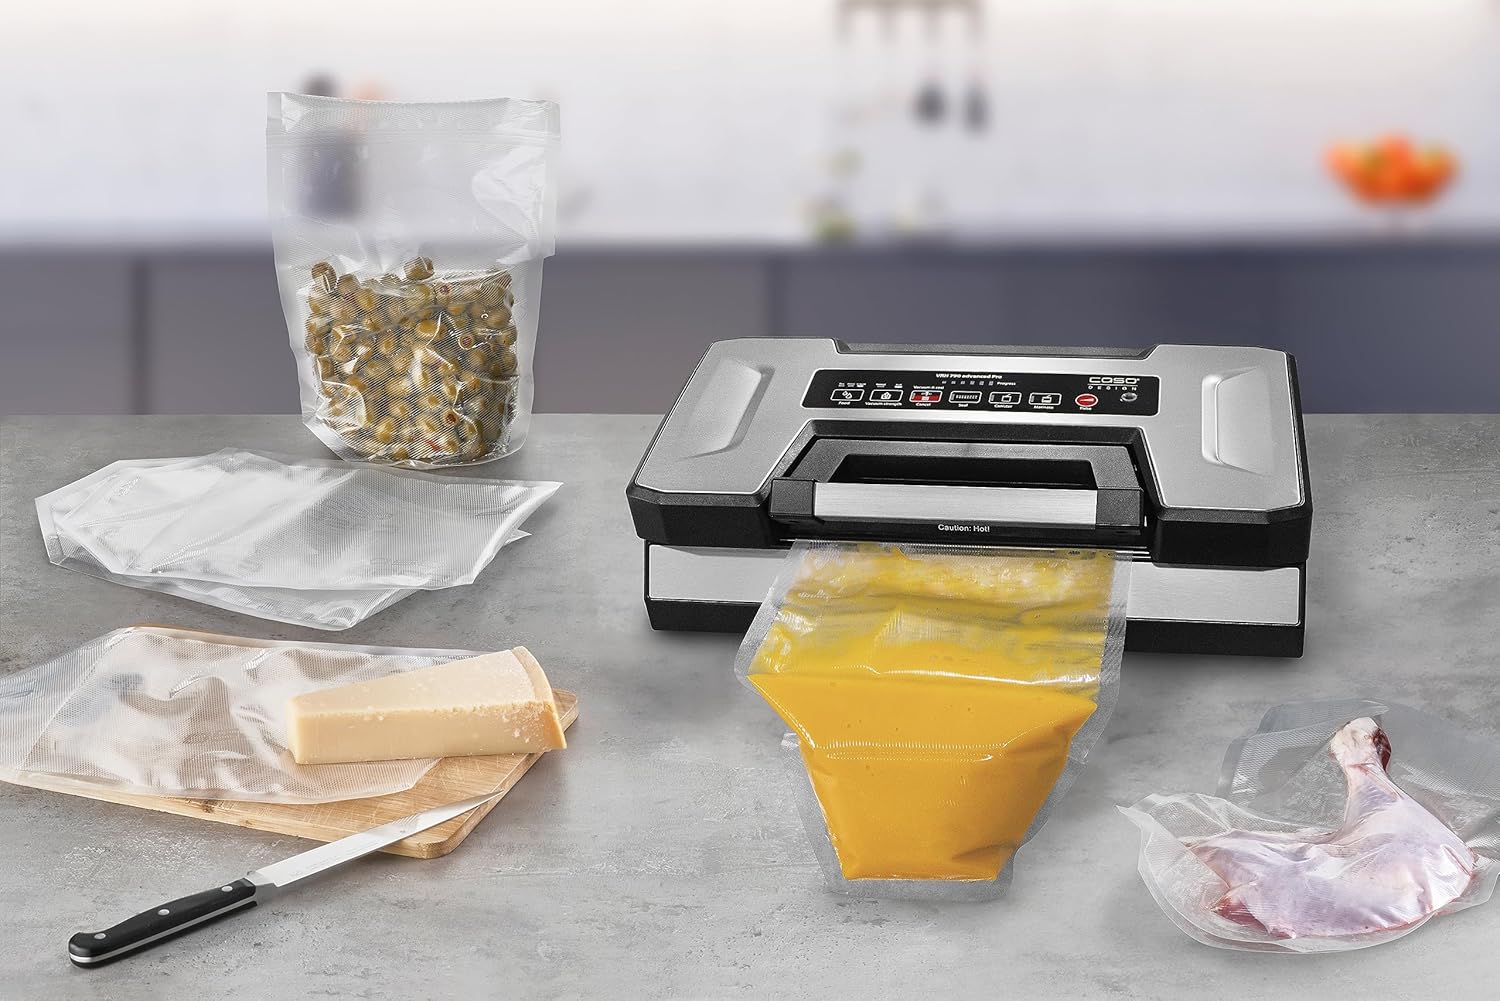
Figure 6: An assortment of food items, including a bag of liquid soup, cheese, and poultry, demonstrating the versatility of the vacuum sealer for different food types, including those requiring the liquid function.
3. Vacuuming Containers
Your vacuum sealer can also be used to vacuum seal compatible external containers.
- Place food into a CASO-compatible vacuum container and secure its lid.
- Connect one end of the vacuum hose (included accessory) to the vacuum hose port on the appliance.
- Connect the other end of the hose to the port on the vacuum container.
- Press the "Canister" button on the control panel. The appliance will begin to remove air from the container.
- Once the vacuum process is complete, the appliance will stop automatically. Disconnect the hose from both the appliance and the container.
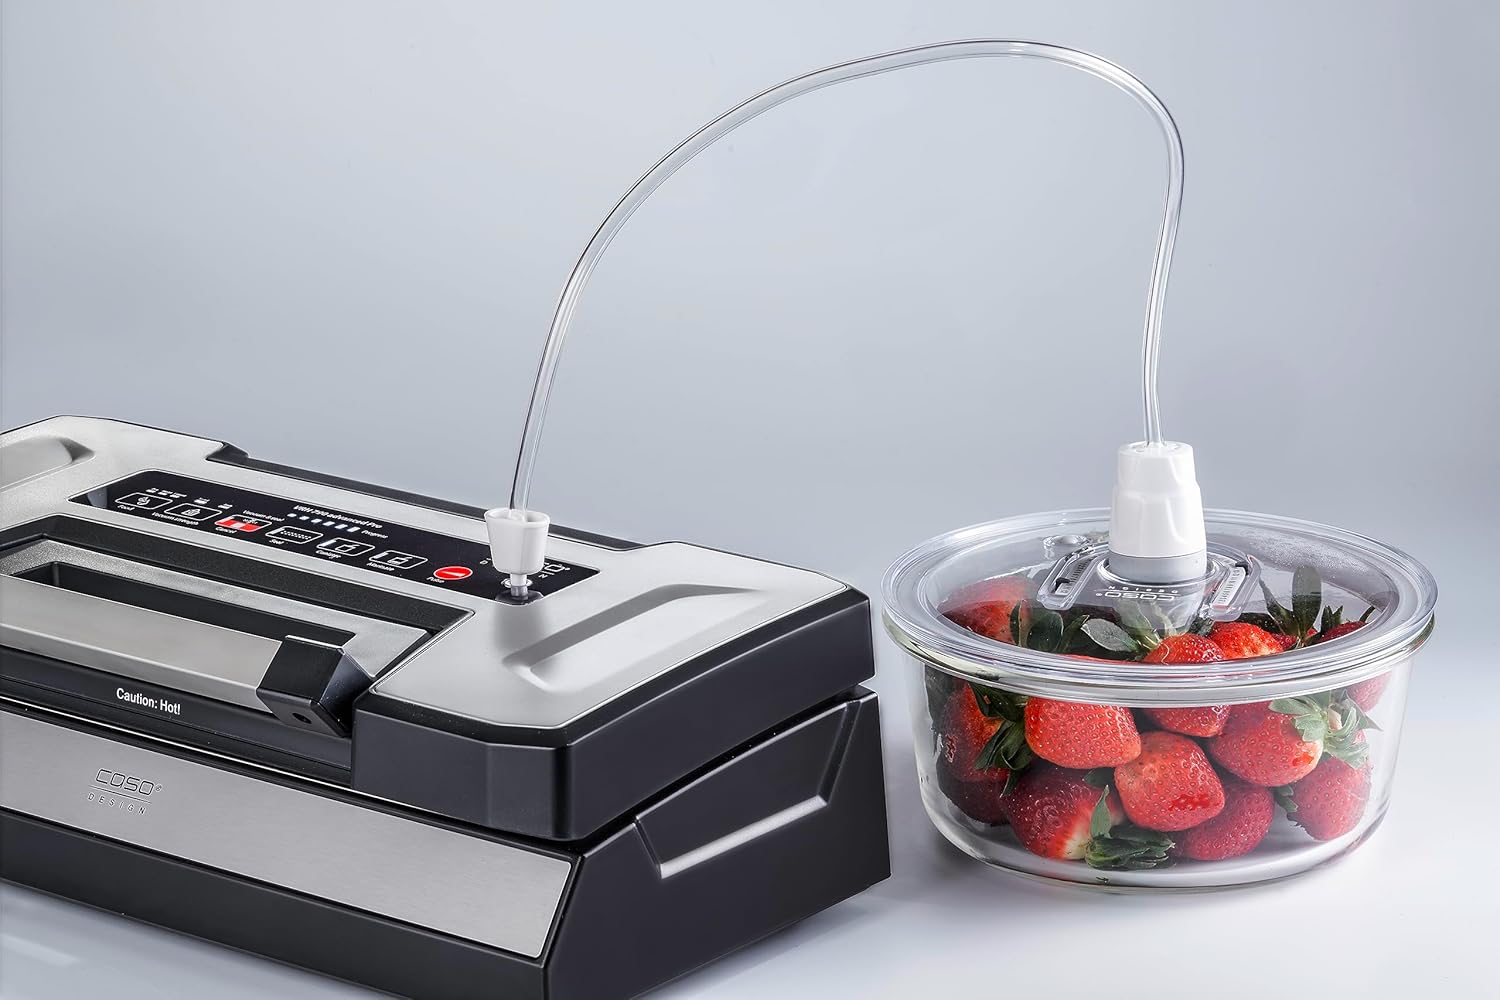
Figure 7: The vacuum sealer connected to an external vacuum container filled with strawberries via its vacuum hose, illustrating the container vacuuming function.
4. Marinating Function
The marinating function uses pulsed vacuum to quickly infuse marinades into food by alternately opening and closing meat pores.
- Place food and marinade into a vacuum bag or compatible container.
- Close the lid of the appliance (for bags) or connect the hose (for containers).
- Press the "Marinate" button. The appliance will cycle through vacuum and release phases to accelerate marinating.
- The process will complete automatically after a set time.
5. Pulse Function
The pulse function allows for manual control over the vacuum strength, ideal for delicate or soft foods.
- Place the food item into a vacuum bag and position it in the vacuum chamber.
- Close the lid firmly.
- Press and hold the "Pulse" button. The appliance will begin to vacuum.
- Release the "Pulse" button when the desired vacuum level is reached.
- Immediately press the "Seal" button to seal the bag.
6. Adjusting Sealing Time and Vacuum Strength
The appliance offers adjustable settings for optimal results with different food types.
- Food Setting: Use the "Food" button to toggle between settings for dry or moist foods. This adjusts the sealing time.
- Vacuum Strength: Use the "Vacuum Strength" button to select between normal or gentle vacuum levels, suitable for hard or soft foods respectively.
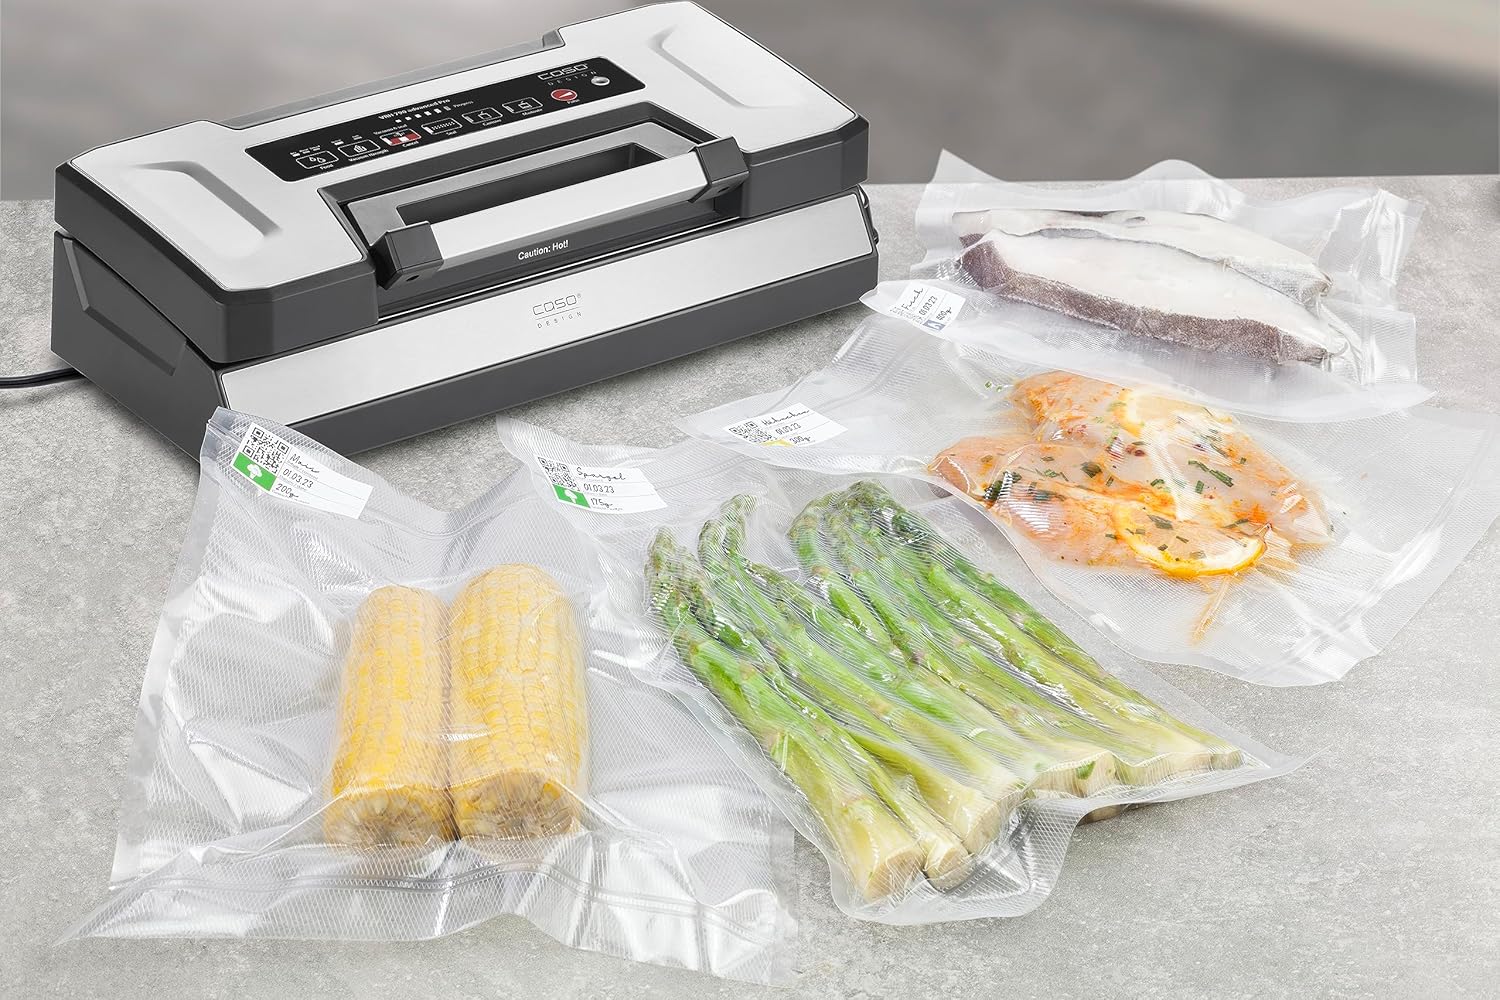
Figure 8: A display of various food items, such as corn on the cob, asparagus, and fish fillets, successfully vacuum-sealed, highlighting the appliance's effectiveness in food preservation.
Maintenance and Cleaning
Regular cleaning ensures optimal performance and extends the lifespan of your vacuum sealer.
1. Cleaning the Removable Drip Tray
- Always unplug the appliance before cleaning.
- Carefully remove the drip tray from the vacuum chamber.
- Wash the drip tray with warm, soapy water. Rinse thoroughly and dry completely before reinserting.
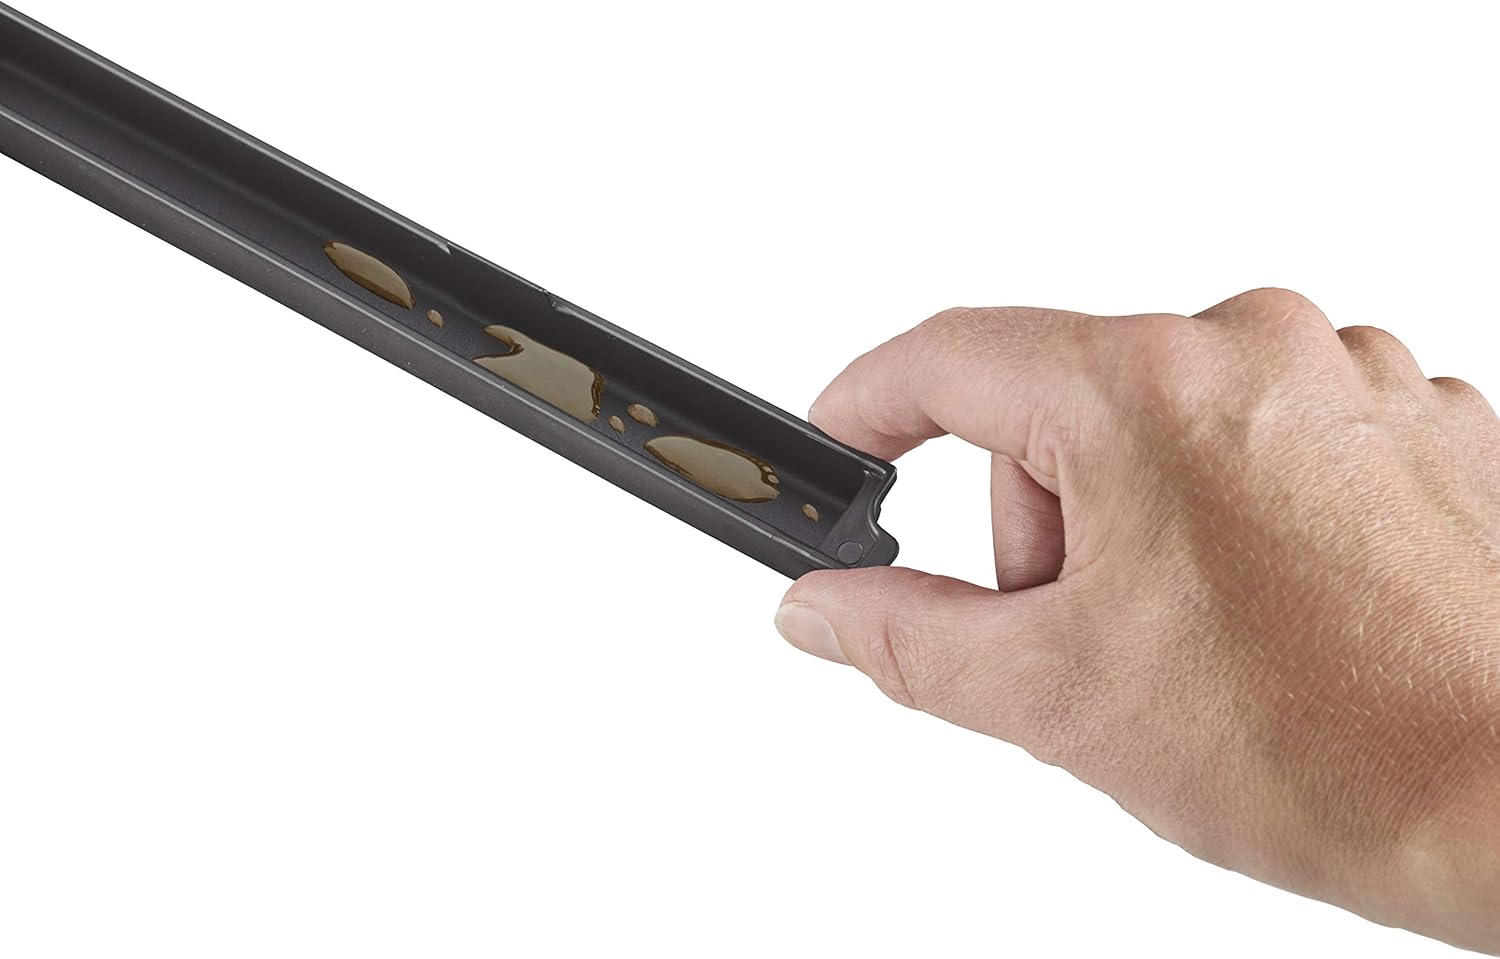
Figure 9: A hand holding the removable drip tray, which has collected some liquid, emphasizing the ease of cleaning this component.
2. General Cleaning
- Wipe the exterior of the appliance with a damp cloth. Do not use abrasive cleaners or solvents.
- Clean the vacuum chamber and sealing bar area with a soft, damp cloth. Ensure no food particles or moisture remain.
- Ensure all parts are completely dry before storing or next use.
Troubleshooting
If you encounter issues with your vacuum sealer, refer to the following common problems and solutions:
| Problem | Possible Cause | Solution |
|---|---|---|
| Appliance does not turn on. | Not plugged in; power outlet issue. | Ensure the power cord is securely plugged into a working outlet. |
| Bag does not vacuum properly. | Bag not positioned correctly; sealing bar dirty; bag is damaged. | Ensure the open end of the bag is flat and fully inside the vacuum chamber. Clean the sealing bar. Use a new, undamaged bag. |
| Bag does not seal. | Sealing bar not hot enough; bag not positioned correctly; moisture on sealing area. | Allow the appliance to cool down between cycles if used continuously. Reposition the bag. Ensure the sealing area is dry and clean. |
| Liquid is drawn into the vacuum chamber. | Bag overfilled; liquid setting not used. | Do not overfill bags with liquid. Ensure the Casotek Liquid function is active or manually stop vacuuming before liquid reaches the sealing area. Clean the drip tray immediately. |
| Appliance overheats. | Excessive continuous use. | The appliance is designed for up to 200 non-stop operations. If it feels excessively hot, allow it to cool down for 20-30 minutes before resuming use. |
Specifications
- Model: VRH 790 advanced Pro (Model 1528)
- Brand: Caso
- Color: Silver/Black
- Dimensions (L x W x H): 19.5 x 40 x 12 cm (7.68 x 15.75 x 4.72 inches)
- Weight: 2.68 Kilograms (5.91 lbs)
- Power: 130 Watts
- Voltage: 230V
- Material: Stainless Steel
- Vacuum Pump: Powerful double-piston pump
- Vacuum Pressure: Up to -0.90 bar
- Pump Capacity: 20 liters/minute
- Sealing: Double seal (2.5 mm thick), up to 30 cm width
- Continuous Operation: Up to 200 non-stop sealing operations
Warranty and Support
For warranty information and customer support, please refer to the warranty card included with your purchase or visit the official Caso website. Keep your proof of purchase for any warranty claims.
Online Resources: For additional tips, recipes, and FAQs, visit the Caso official website or download the Caso Food Manager app.