Introduction
Welcome to the Easy@Home Portable Wireless Bottle Warmer. This device is designed to simplify the process of preparing milk or water for your baby, ensuring it's always at the perfect temperature, whether you are at home or on the go. Its compact design and efficient heating capabilities make it an essential tool for parents.
Safety Information
- Read all instructions before use.
- Keep out of reach of children.
- Do not immerse the main unit in water or other liquids.
- Use only the provided USB cable for charging.
- Ensure the bottle is securely attached before heating to prevent leaks.
- Always check the milk temperature before feeding your baby.
- Do not use abrasive cleaners or scourers on the device.
- Disconnect from power when not in use or before cleaning.
- Do not attempt to disassemble or repair the device yourself. Contact customer support for assistance.
Package Contents
Please check the box for the following items:
- 1 x Easy@Home Portable Wireless Bottle Warmer
- 1 x USB Charging Cable
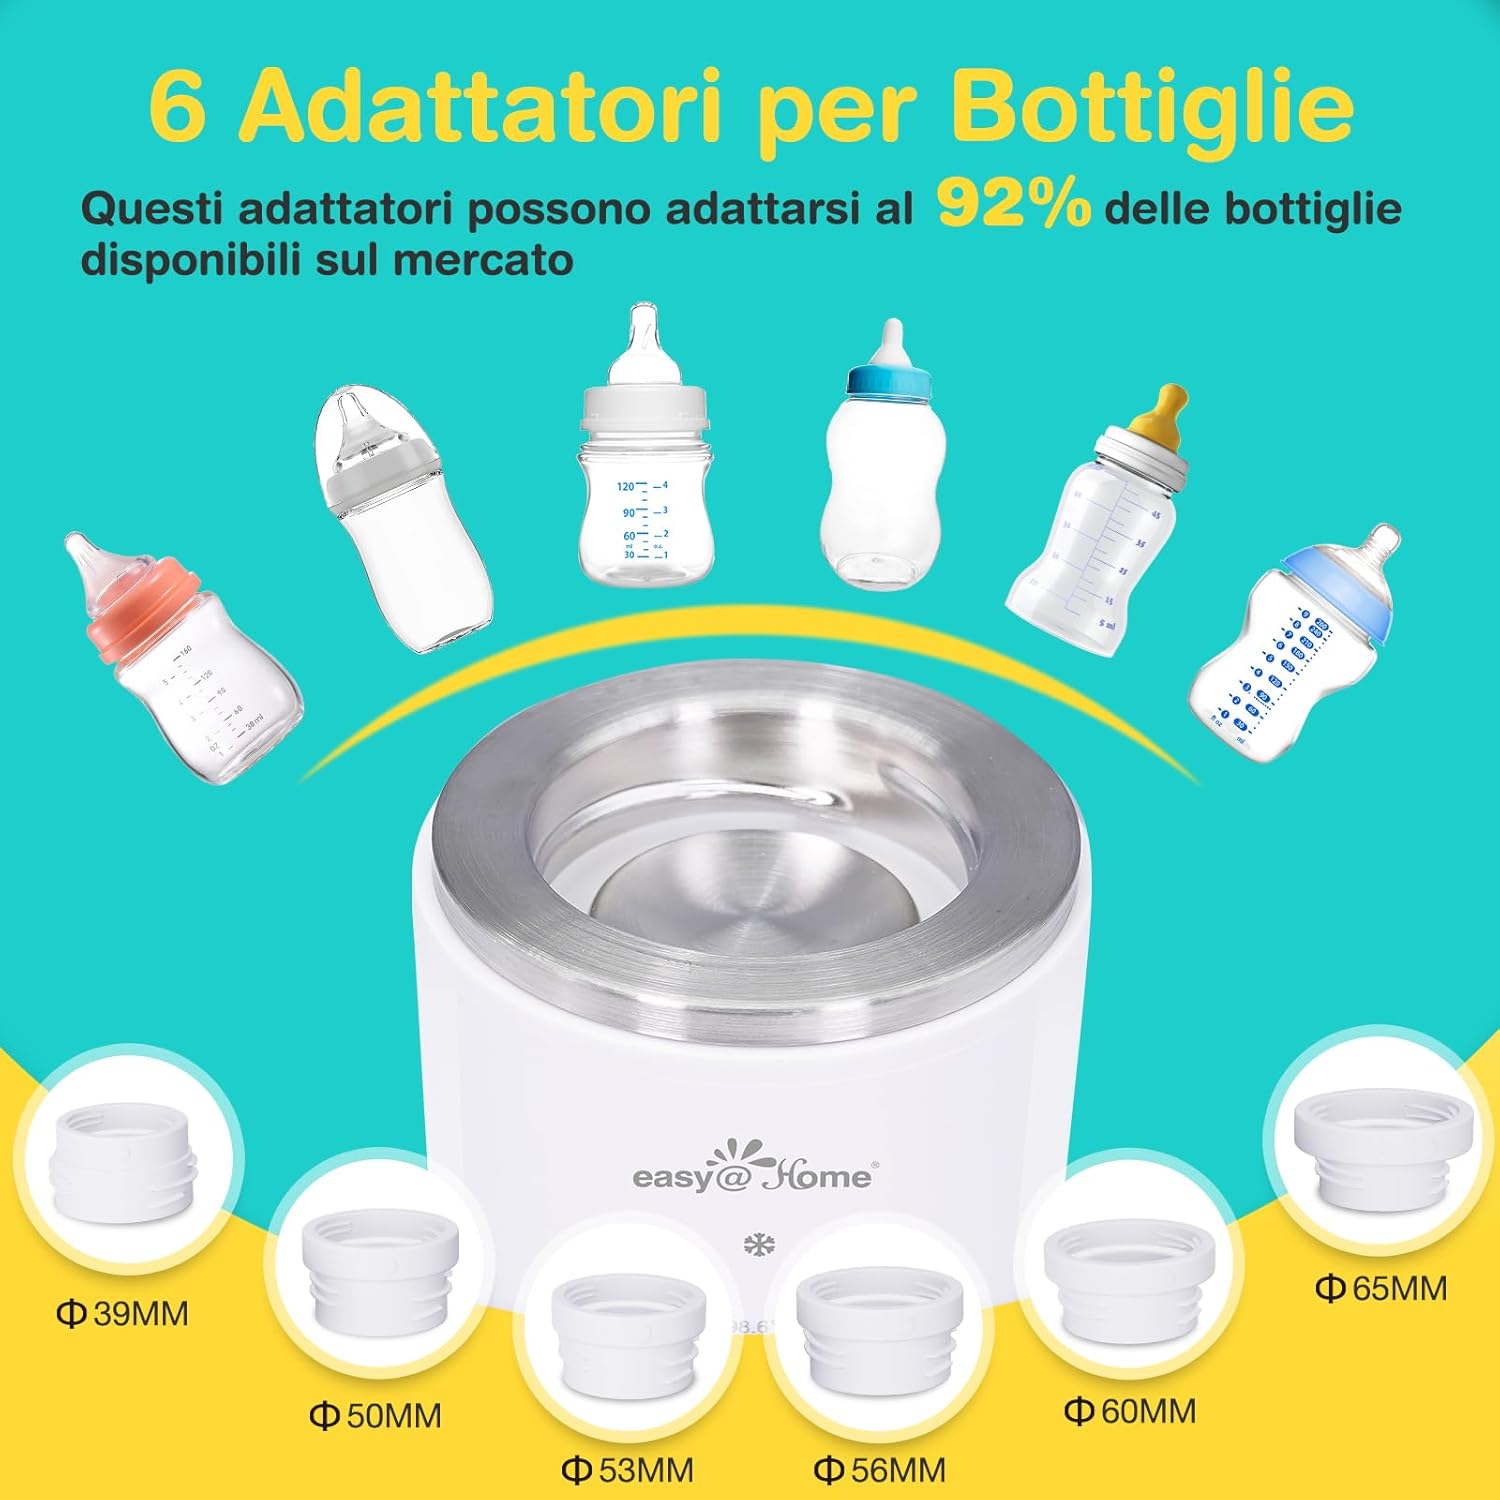
- 6 x Bottle Adapters (39mm, 50mm, 53mm, 56mm, 60mm, 65mm)
- 1 x User Manual (this document)
Product Features
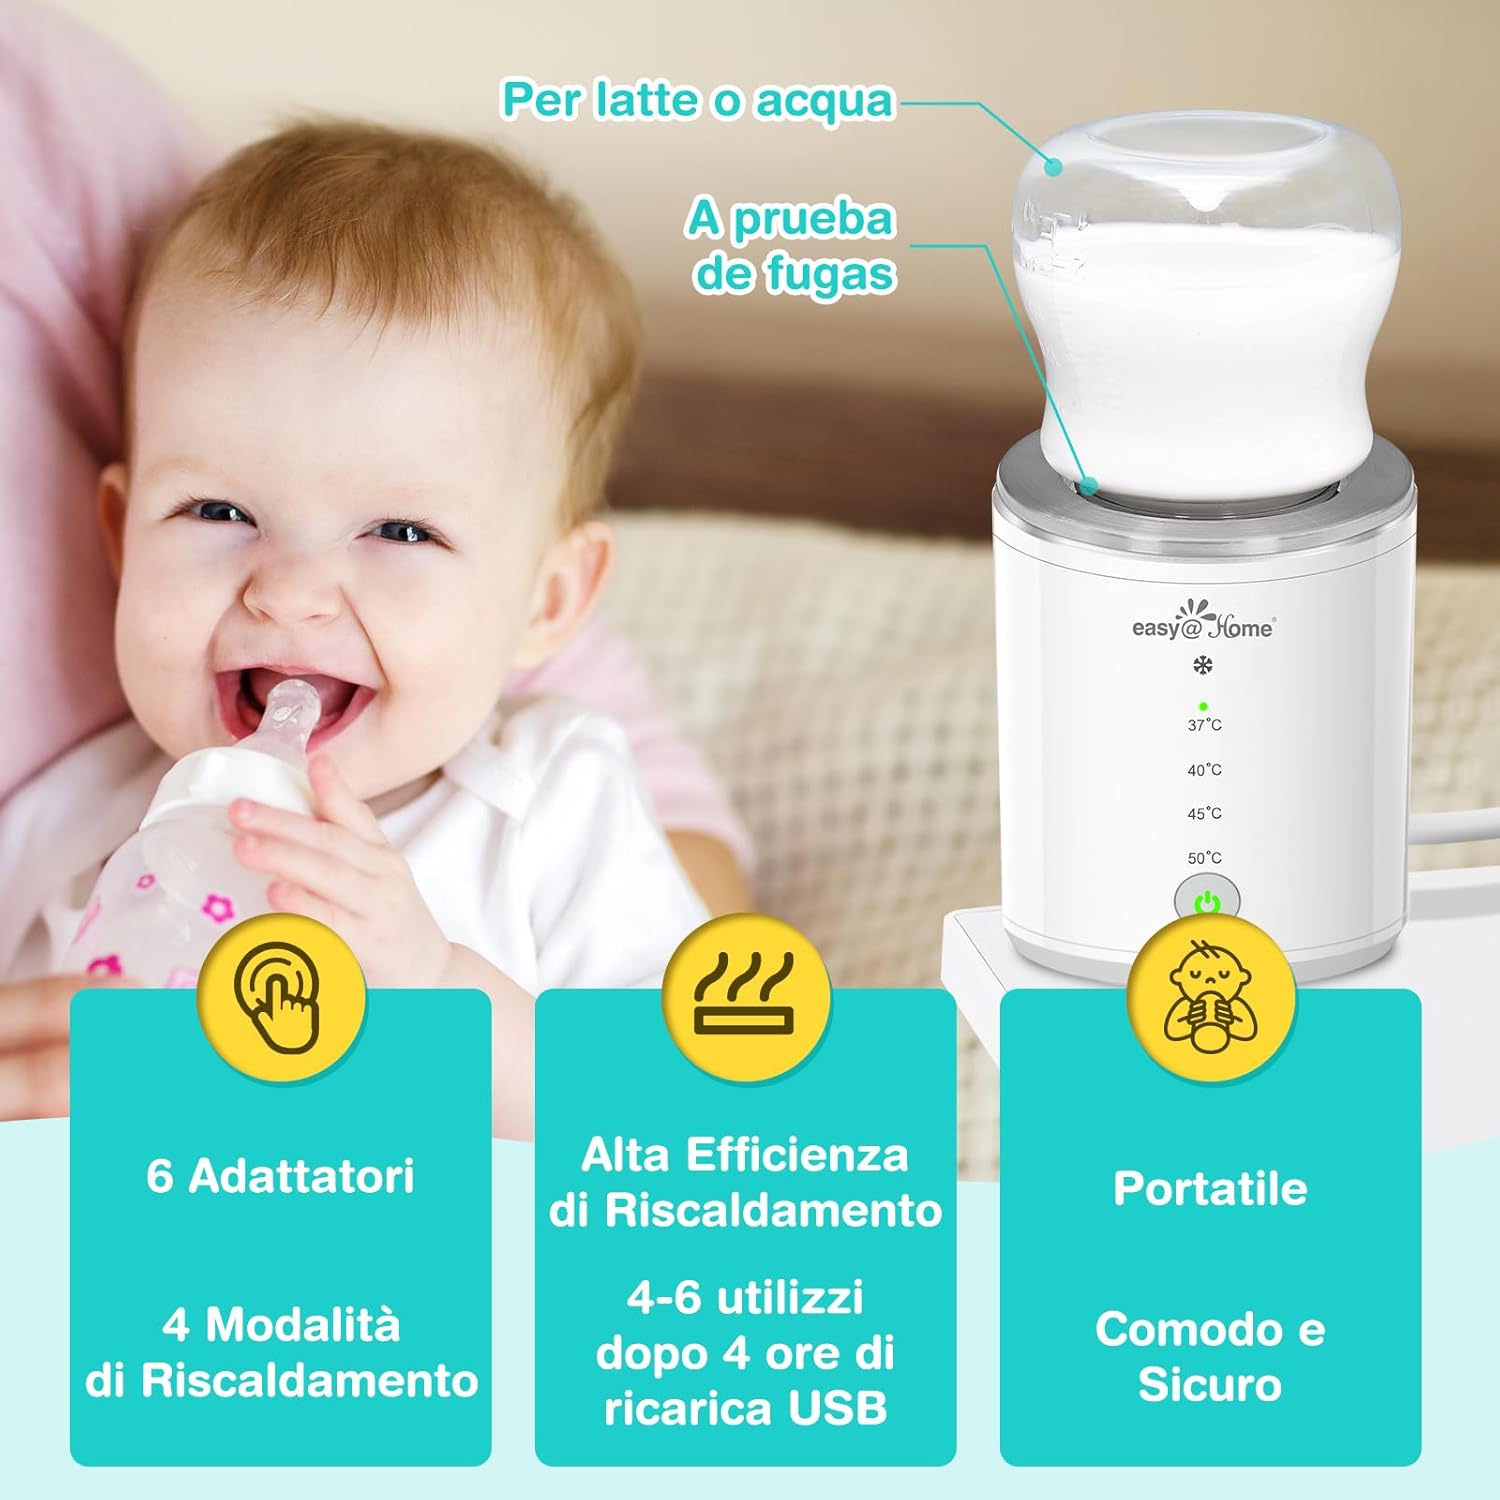
- Wireless and Portable: Compact design (8.1*8.1*10.9 cm, 395g) for easy carrying and use anywhere.
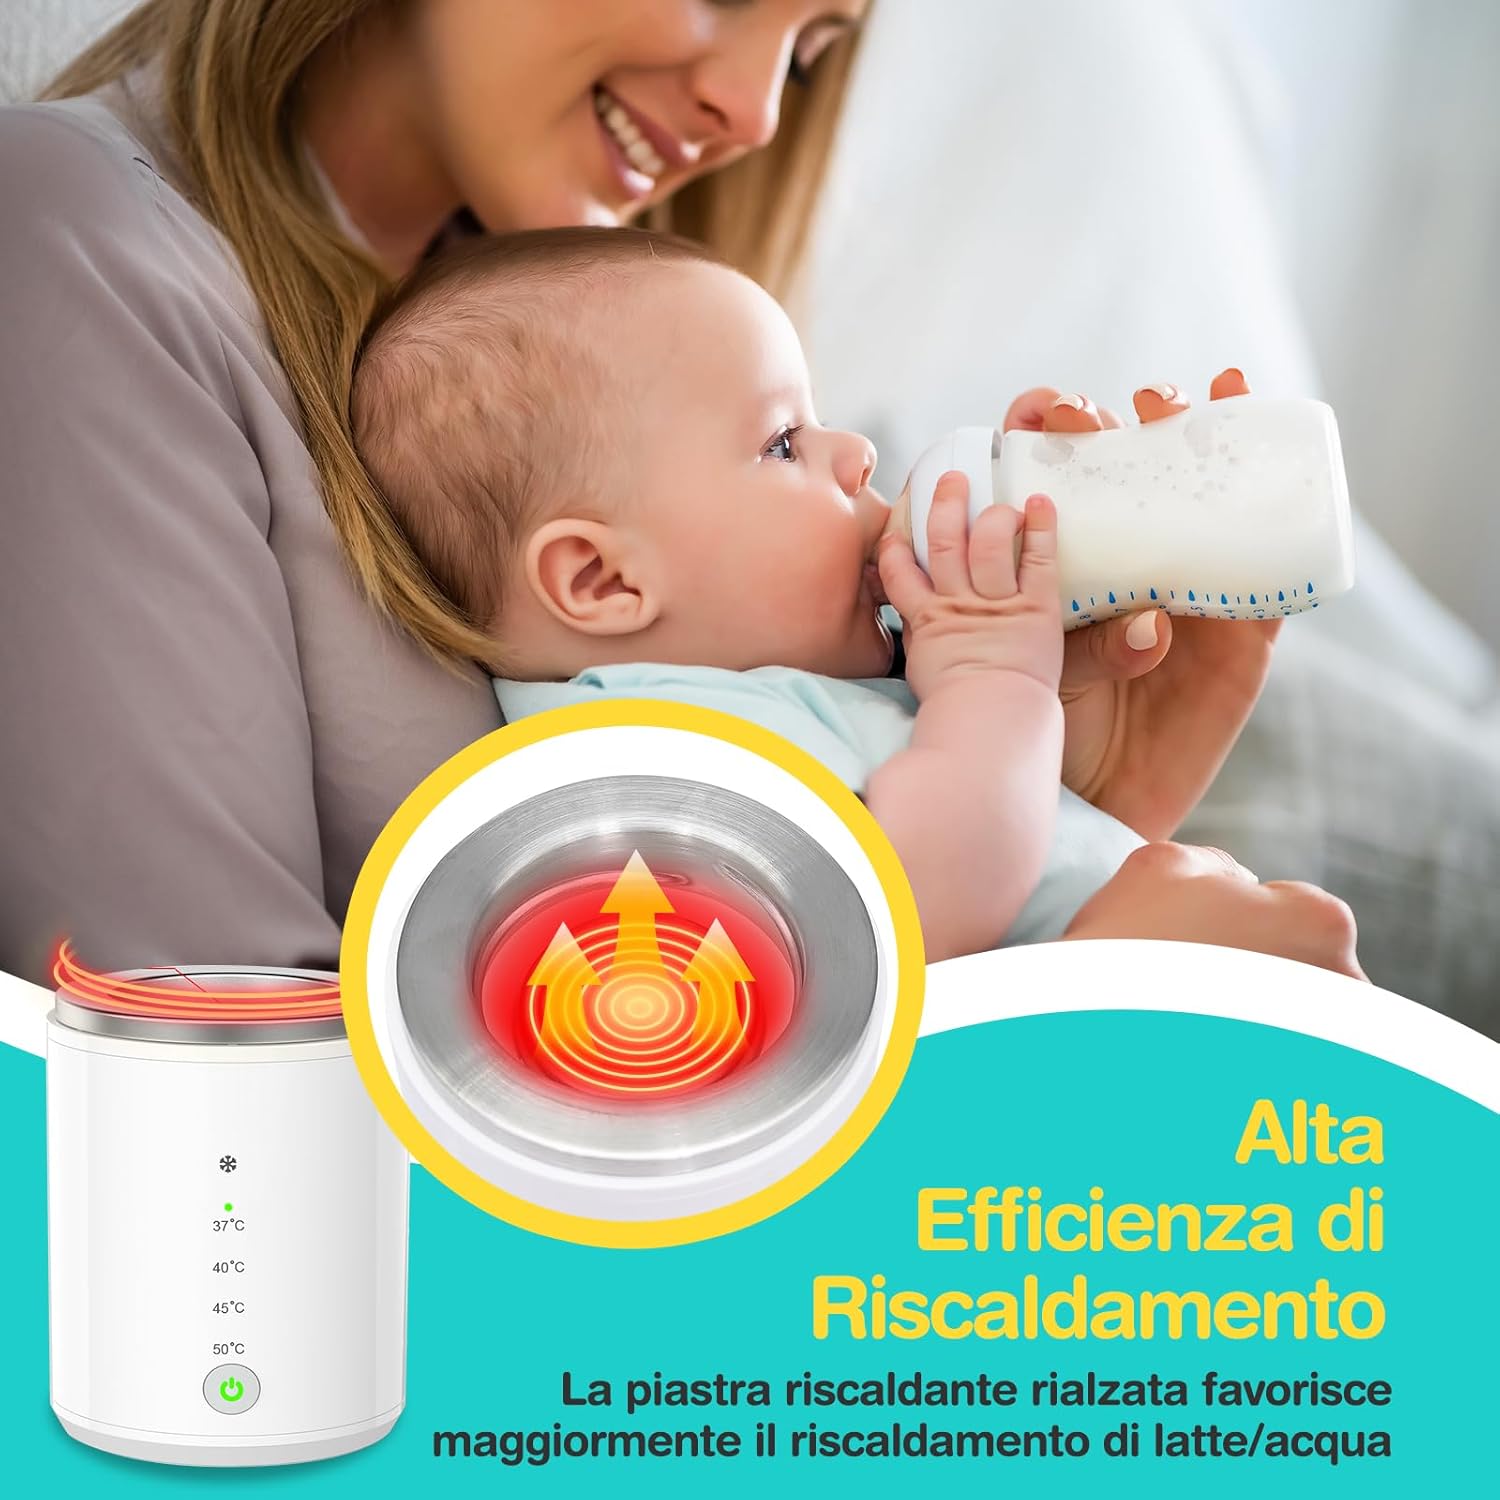
- Fast and Efficient Heating: Heats 4 oz/120 ml of milk to 40°C (104°F) in approximately 3 minutes.
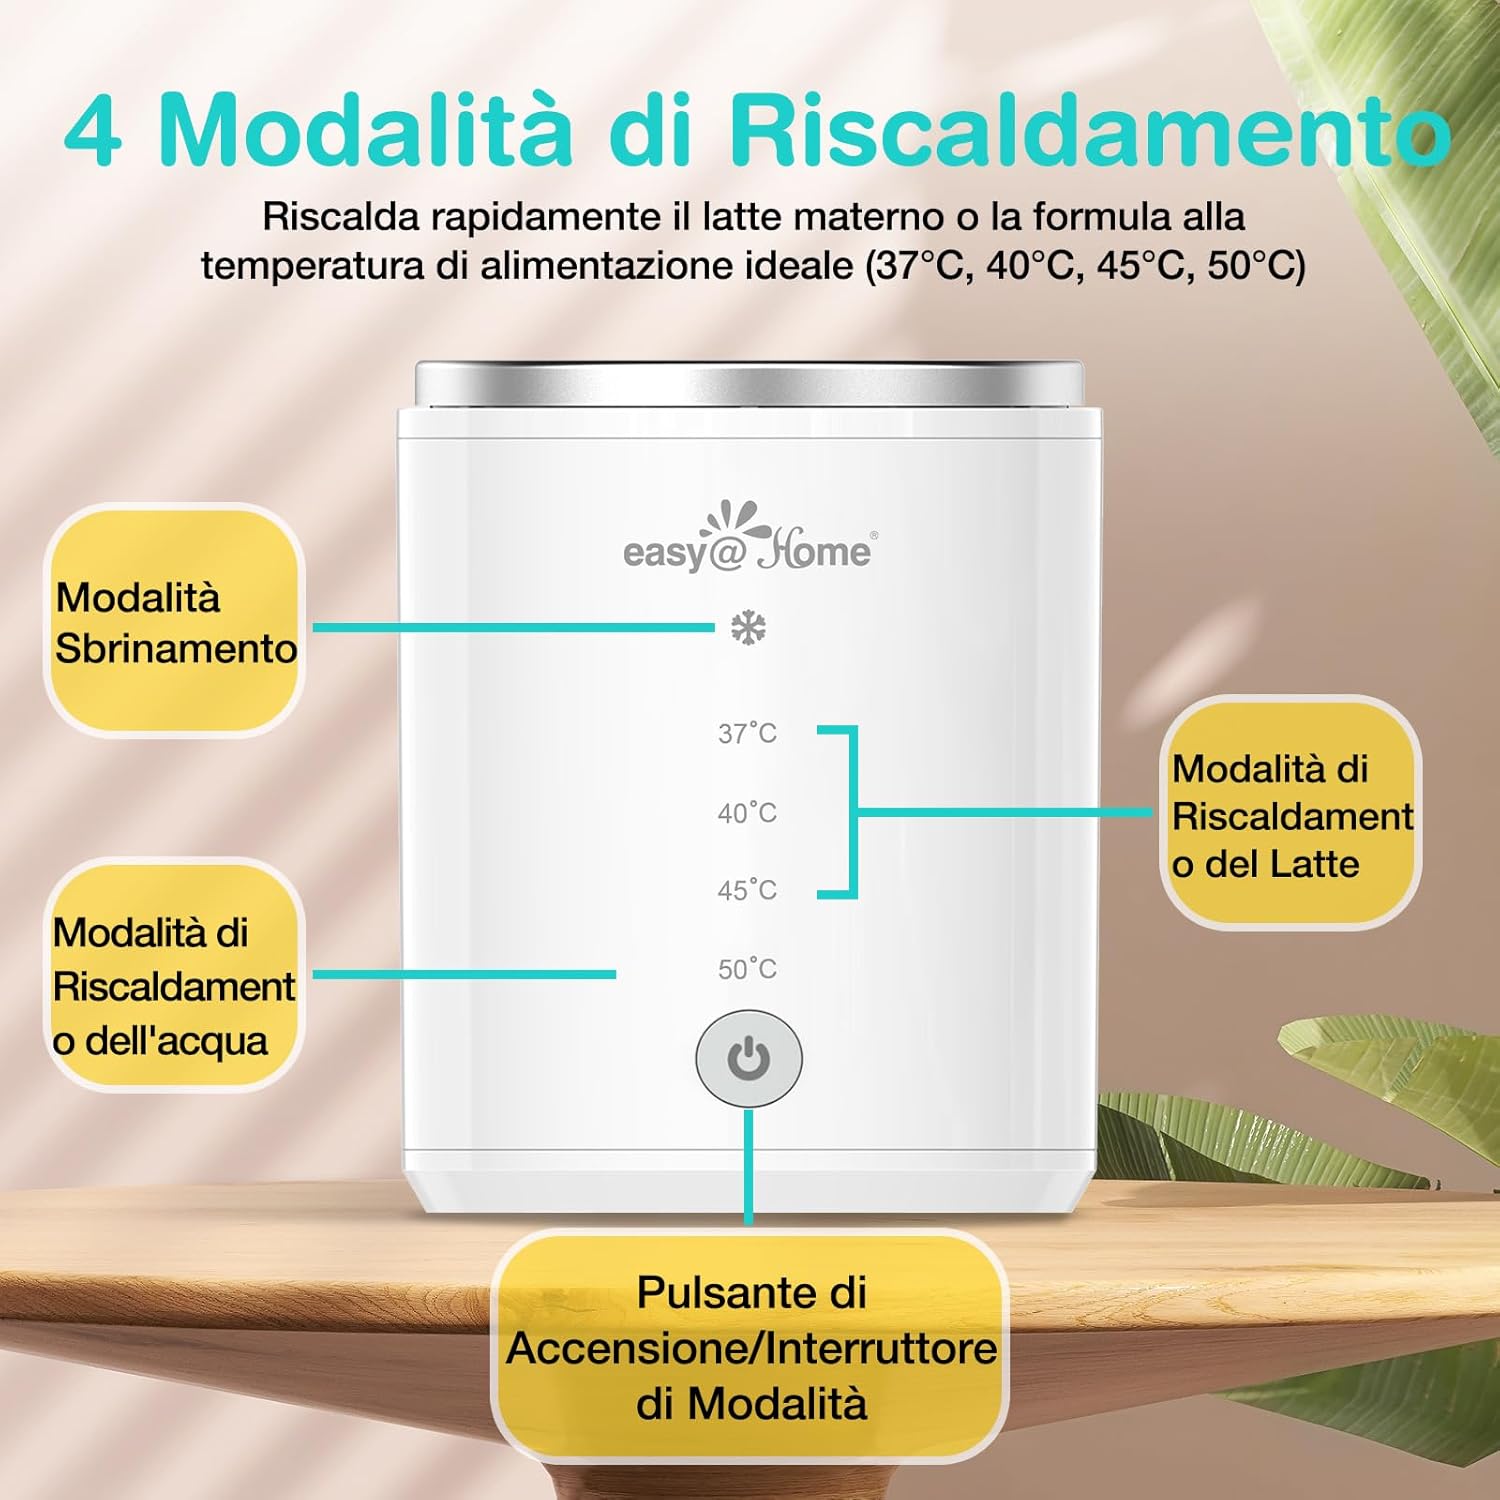
- 4 Temperature Modes: Select from 37°C, 40°C, 45°C, or 50°C for optimal feeding temperature.
- Automatic Keep Warm Function: Maintains the set temperature once reached.
- Unique Defrosting Mode: Automatically thaws milk below 15°C to 30°C before heating.
- Wide Compatibility: Includes 6 adapters to fit up to 92% of baby bottles on the market.
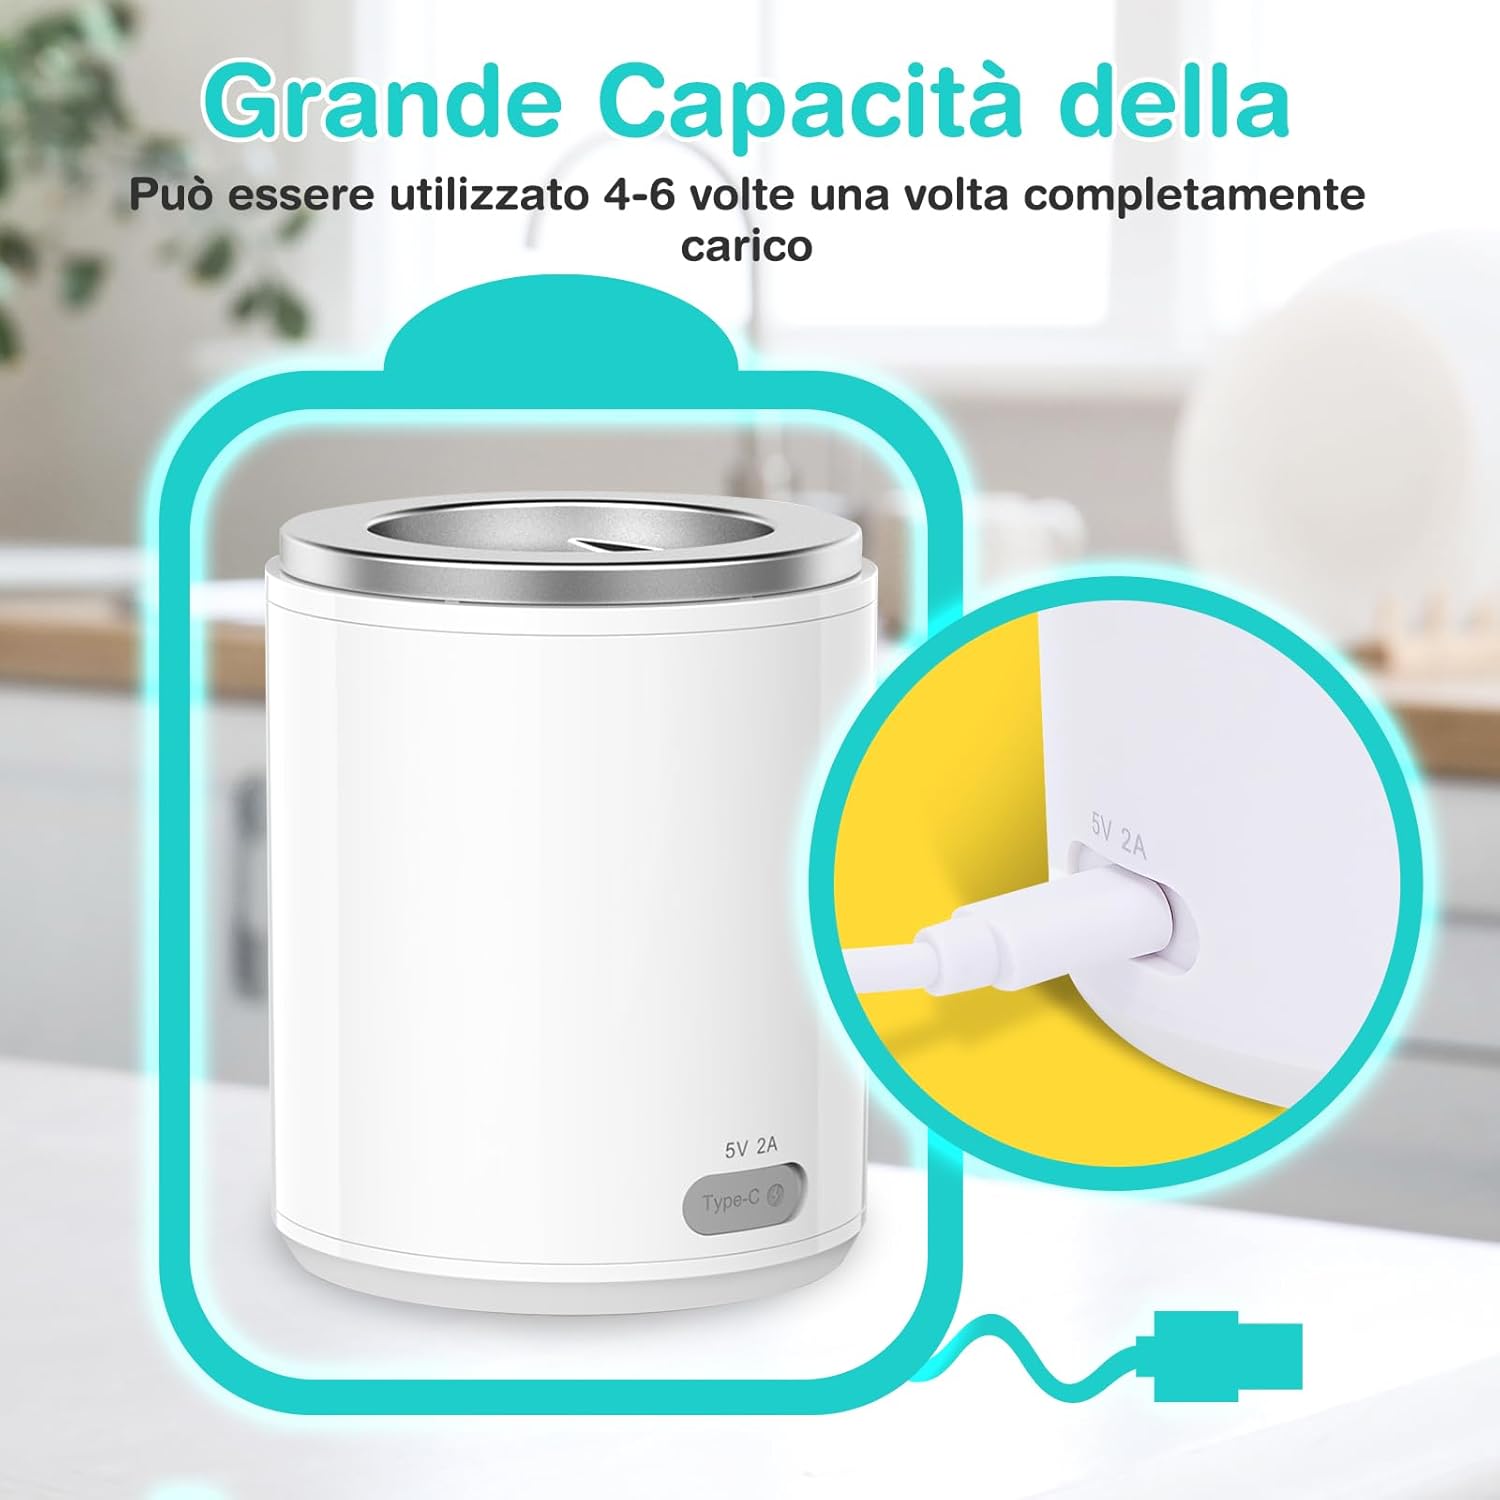
- Long Battery Life: Supports 4-6 uses on a single 4-hour USB charge.
- Leak-Proof Design: Features two integrated sealing rings to prevent milk leakage.
Setup
- Charge the Device: Before first use, fully charge the bottle warmer using the provided USB cable. The indicator lights will show charging progress. A full charge takes approximately 4 hours.
- Select the Correct Adapter: Identify the appropriate adapter from the six included sizes that best fits your baby bottle.
- Attach Adapter to Warmer: Screw the selected adapter onto the top of the bottle warmer unit. Ensure it is securely fastened.
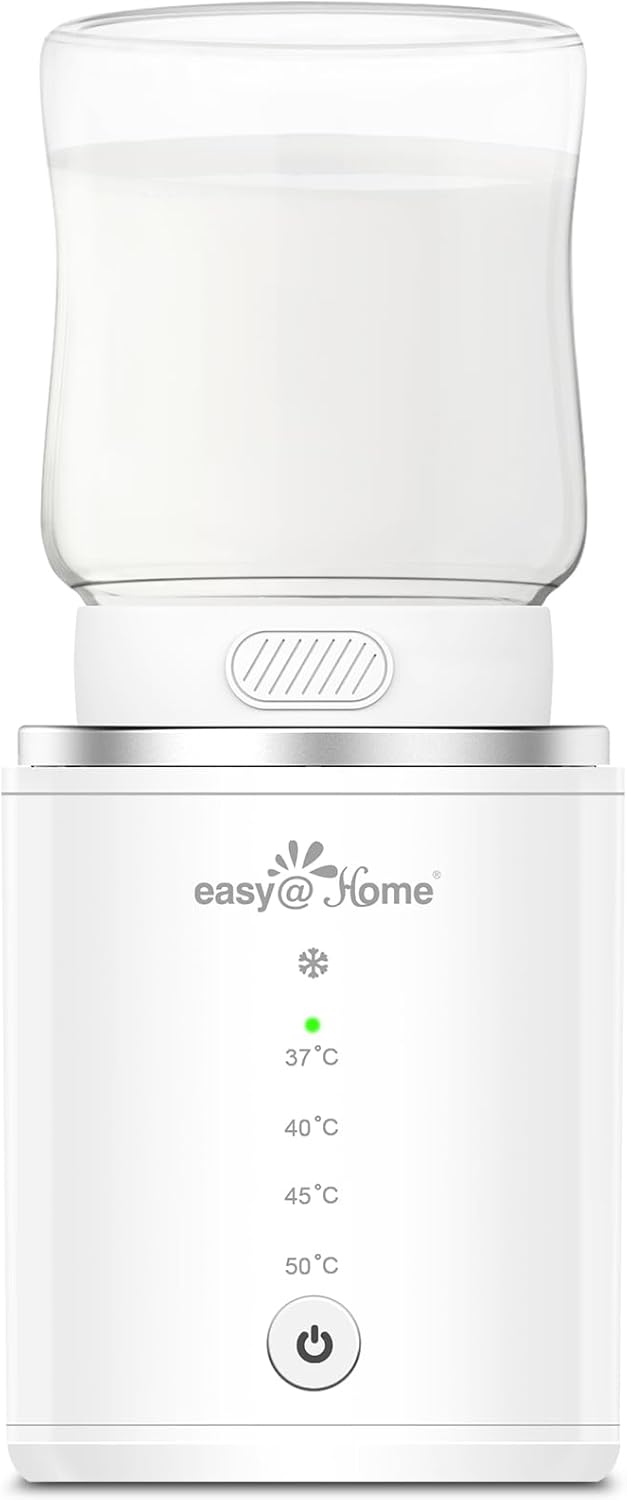
- Attach Bottle: Screw your baby bottle onto the adapter. Make sure the connection is tight to prevent any leakage.
Operating Instructions
- Power On: Press and hold the power button (bottom button) for a few seconds to turn on the device.
- Select Temperature Mode: Briefly press the power button repeatedly to cycle through the available temperature settings: 37°C, 40°C, 45°C, and 50°C. The corresponding indicator light will illuminate.
- Defrosting Mode: If the liquid temperature is below 15°C, the device will automatically enter defrosting mode, indicated by the snowflake icon. It will heat the liquid to 30°C before switching to the selected heating mode.
- Heating Process: The device will begin heating the milk or water to the selected temperature. The indicator light for the chosen temperature will blink during heating and become solid once the temperature is reached.
- Keep Warm: Once the target temperature is achieved, the device will automatically enter keep-warm mode, maintaining the temperature for an extended period.
- Power Off: To turn off the device, press and hold the power button until the lights turn off.

Watch the official product video for a visual guide:
Maintenance
Cleaning
To clean the Easy@Home Portable Wireless Bottle Warmer:
- Ensure the device is turned off and disconnected from any power source.
- Dampen a soft cloth with water and gently wipe the heating plate and the interior of the warmer to remove any milk residue.
- Wipe the exterior with a soft, dry cloth.
- Do not immerse the main unit in water or rinse it under running water.
- The bottle adapters can be washed with warm soapy water and rinsed thoroughly.
Storage
Store the device in a cool, dry place away from direct sunlight when not in use.
Troubleshooting
| Problem | Possible Cause | Solution |
|---|---|---|
| Device not turning on. | Low battery or not charged. | Charge the device fully using the USB cable. |
| Milk not heating or heating slowly. | Incorrect temperature setting; insufficient battery; too much liquid; very cold initial temperature. | Ensure correct temperature is selected. Fully charge the device. Reduce liquid volume if exceeding capacity. Allow defrosting mode to complete if liquid is very cold. |
| Leaking from the bottle connection. | Bottle not securely attached; incorrect adapter used; sealing ring not properly placed. | Ensure the bottle and adapter are tightly screwed on. Verify the correct adapter for your bottle type. Check that the sealing rings are correctly seated. |
| Indicator lights not working. | Device malfunction. | Contact customer support. |
Specifications
- Model: N1
- Dimensions: 8.1 x 8.1 x 10.9 cm (3.19 x 3.19 x 4.29 inches)
- Weight: 395 grams (0.87 lbs)
- Battery: Lithium-ion (included)
- Charging Port: USB Type-C (5V 2A)
- Temperature Settings: 37°C, 40°C, 45°C, 50°C
- Heating Time: Approx. 3 minutes for 120ml to 40°C (from room temperature)
- Battery Life: 4-6 uses per full charge
- Compatibility: Fits 92% of baby bottles with included adapters (39mm, 50mm, 53mm, 56mm, 60mm, 65mm)
Warranty and Support
Easy@Home products come with a standard manufacturer's warranty. For detailed warranty information, product support, or troubleshooting assistance, please visit the official Easy@Home website or contact their customer service.
Brand Store: Easy@Home Amazon Store
Please retain your proof of purchase for warranty claims.