NDNCZDHC F150
Wireless WiFi Industrial Endoscope Camera User Manual
Model: F150 | Brand: NDNCZDHC
1. Introduction
Thank you for choosing the NDNCZDHC Wireless WiFi Industrial Endoscope Camera. This portable HD endoscope camera is designed for detailed inspection in hard-to-reach areas, featuring IP68 waterproofing, an 8mm lens diameter, and built-in battery for convenience. It connects wirelessly to your smartphone or computer, providing clear visuals for various industrial and household applications.
2. Safety Information
- Do not attempt to disassemble or modify the device. This may void the warranty and cause damage.
- Keep the device away from extreme temperatures, direct sunlight, and corrosive liquids.
- Ensure the waterproof ring is properly seated before immersing the lens in water.
- Use only the provided charging cable to charge the device.
- This device is intended for inspection purposes only and should not be used for medical or personal examination.
- The focal length is approximately 3-10cm. It is designed for close-range observation and not suitable for distant landscapes or portraits.
3. Package Contents
Please check the package to ensure all items are present:
- 1 x Endoscope
- 1 x WiFi Box
- 1 x USB Charging Cable
- 1 x Hook
- 1 x Magnet
- 1 x Reflector
- 1 x Waterproof Ring
- 1 x Storage Tube
- 1 x User Manual
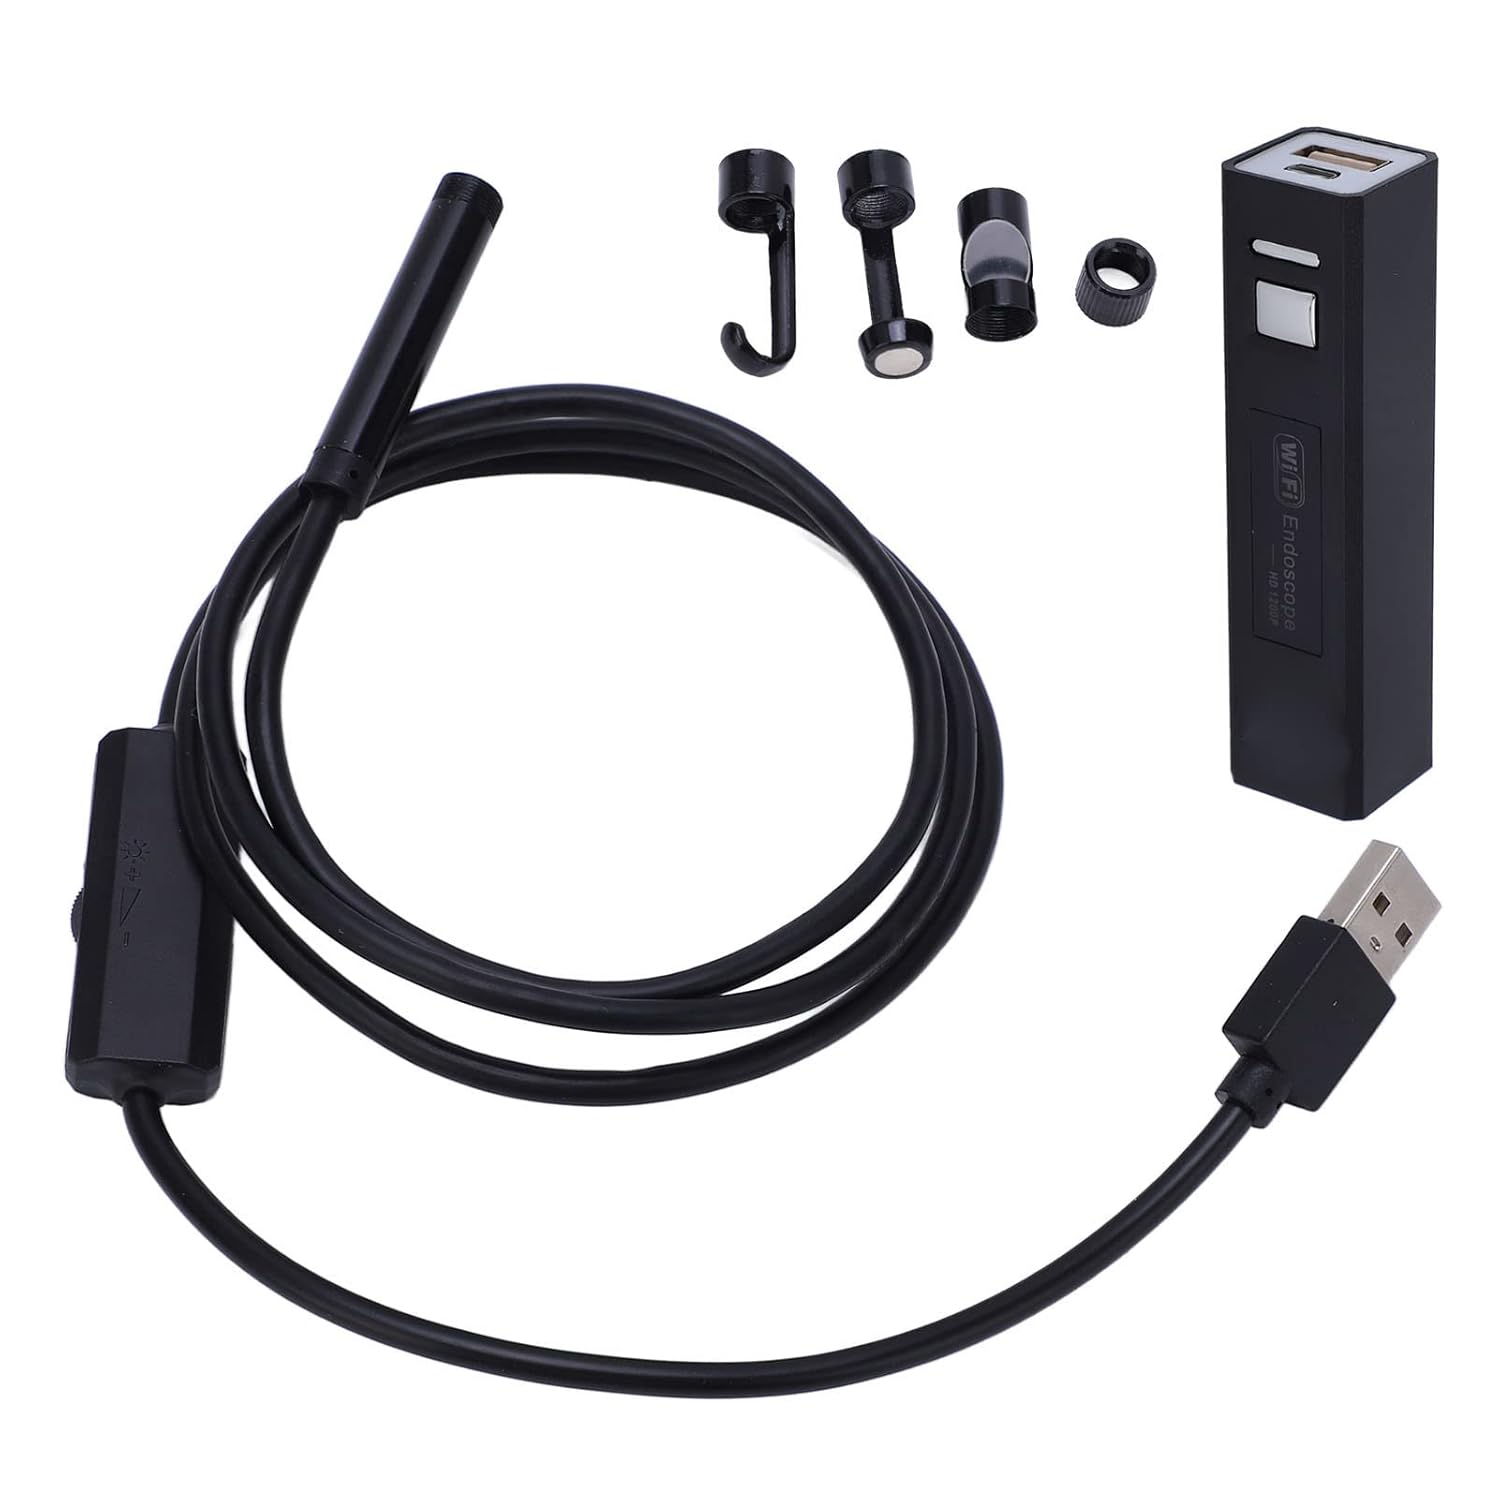
Figure 3.1: Contents of the package including the endoscope, WiFi box, charging cable, and various attachments.
4. Product Overview
Familiarize yourself with the main components of your endoscope camera system.

Figure 4.1: Diagram showing the WiFi box with battery indicator, charging indicator, WiFi indicator, switch, charge port, and camera socket. Also shown is the endoscope cable with 8mm camera, formable hard wire, and dimmer switch.

Figure 4.2: Close-up view of the included accessories: delivery hook, magnet, reflector, and waterproof ring, stored in a clear tube.
5. Setup Guide
5.1 Charging the Device
Before first use, fully charge the WiFi box. Connect the provided USB charging cable to the 'Charge' port on the WiFi box and a standard USB power adapter (not included).
- The charging indicator light will illuminate during charging.
- A full charge typically takes a few hours.
5.2 Connecting the Endoscope Camera
Insert the USB connector of the endoscope camera cable into the 'Camera socket' on the WiFi box.
5.3 Connecting to Your Device (Smartphone/PC)
The endoscope camera connects wirelessly via its own WiFi signal. No internet connection is required for this process.
- Power On: Press the 'Switch machine' button on the WiFi box to turn it on. The WiFi indicator will light up.
- WiFi Connection: On your smartphone or computer, go to your WiFi settings. Locate and connect to the WiFi network named "WiFi Check_..." (the exact name may vary slightly). This network does not provide internet access; it is solely for connecting to the endoscope. No password is required.
- App/Software: For optimal functionality, download and install the recommended "WiFi Check" application (or similar compatible app) from your device's app store. Alternatively, for PC connection, specific software may be required (refer to the product packaging or manufacturer's website for details).
- Launch App: Open the installed application. The live video feed from the endoscope camera should now be displayed.

Figure 5.1: Illustration of the endoscope camera connected wirelessly to a smartphone, displaying the live feed.
5.4 Attaching Accessories
The hook, magnet, and reflector can be attached to the end of the camera lens for specific inspection needs. Simply slide them onto the lens tip.
- Hook: Useful for retrieving small objects from tight spaces.
- Magnet: Ideal for picking up metallic items.
- Reflector (Side Mirror): Provides a side view, useful for inspecting walls of pipes or cavities.
- Waterproof Ring: Ensure this is securely in place around the lens for IP68 waterproofing when operating in wet environments.
6. Operating Instructions
6.1 Adjusting LED Lights
The endoscope camera features 8 adjustable LED lights around the lens to illuminate dark inspection areas. Use the 'Dimmer switch' located on the cable to adjust the brightness. Rotate the wheel to increase or decrease the light intensity.

Figure 6.1: Illustration showing the endoscope lens with its 8 LED lights and the dimmer switch on the cable for brightness control.
6.2 Performing Inspections
- Carefully insert the endoscope camera into the area you wish to inspect. The semi-rigid cable can be bent and held in shape to navigate tight spaces.
- Adjust the LED brightness for optimal visibility.
- Observe the live feed on your connected device. The optimal focal length for clear images is approximately 3-10cm from the object.
- Use the features within your chosen application to capture still images or record videos as needed.
7. Maintenance
- Cleaning: After use, especially in dirty or wet environments, gently wipe the camera lens and cable with a soft, damp cloth. Do not use harsh chemicals or abrasive materials.
- Storage: Store the endoscope and its accessories in the provided storage tube or a clean, dry place away from direct sunlight and extreme temperatures.
- Battery Care: To prolong battery life, avoid fully discharging the battery frequently. If storing for extended periods, charge the battery to about 50% every few months.
8. Troubleshooting
| Problem | Possible Cause | Solution |
|---|---|---|
| No image on screen / App not connecting. |
|
|
| Image is blurry or unclear. |
|
|
| WiFi signal drops frequently. |
|
|
9. Specifications
| Feature | Specification |
|---|---|
| Item Model Number | F150 |
| Imaging Sensor | CMOS |
| Resolution | 1600x1200 |
| Horizontal Viewing Angle | 70° |
| Battery | 1 x Lithium battery 3.7V 500mah |
| Unobstructed Effective Distance | Approx. 5 ~ 10 meter / 16.4 ~ 32.8ft |
| Lens Waterproof Rating | IP68 |
| Lens Diameter | Approx. 8mm / 0.31in |
| Focal Length | Approx. 3 ~ 10cm / 1.2 ~ 3.9in |
| Color | Black |
10. Warranty and Support
This product is subject to a standard return policy of 30 days from the date of purchase. For any technical assistance, troubleshooting beyond this manual, or inquiries regarding your product, please contact the manufacturer or seller through the platform where you purchased the item.
Manufacturer: NDNCZDHC
Related Documents - F150
 |
User Manual for F150 HD WiFi Inspection Camera Comprehensive user manual for the F150 HD WiFi Inspection Camera, detailing setup, operation on mobile and PC, and technical specifications. Includes instructions for connecting via WiFi, using the 'WIFI LOOK' app, and troubleshooting. |
 |
Fabtech 2-Inch Lift Kit Installation Instructions for Ford F150 (2004-2014) Comprehensive installation guide and warranty details for Fabtech's 2-inch lift kits (FTL5204) for 2004-2014 Ford F150 2WD and 4WD vehicles. Covers parts, hardware, step-by-step assembly, safety warnings, and product warranty. |
 |
DECKED DF6 Installation Instructions for Ford F150 (2004-2014) 8' Bed Comprehensive installation guide for the DECKED DF6 drawer system, designed for Ford F150 trucks with an 8' bed (2004-2014 models). Includes tools required, parts list, step-by-step assembly, and warranty information. |
 |
Rough Country Manual Bed Step Installation Guide for Ford 2015-2020 F-150 Detailed installation instructions for the Rough Country Manual Bed Step (Part #PW044434) for Ford 2015-2020 F-150 trucks. Includes parts list, tools required, and step-by-step assembly. |
 |
QA1 2015-2026 Ford F150 Traction Bar Kit Installation Guide | Part 52098 Comprehensive installation guide for the QA1 2015-2026 Ford F150 Traction Bar Kit (Part #52098). This manual provides essential safety information, required tools, a detailed parts list, and step-by-step instructions for enhancing your F150's rear suspension and traction. Designed for compatibility with the QA1 Rear Drop Kit. |
 |
2015-2019 Ford F150 Sail Panel Tweeter Installation Instructions Detailed installation guide for 2015-2019 Ford F150 sail panel tweeters, covering wiring polarity (Green +, White -) and mounting procedures into OE locations. |