1. Introduction
This manual provides detailed instructions for the safe installation, operation, and maintenance of your E ENERGETIC LIGHTING 6 Inch LED Disk Light. Please read this manual thoroughly before installation and retain it for future reference. This LED disk light is designed for flush mounting, offers 5%-100% smooth dimming, and provides 5000K Daylight illumination with a high CRI of 90+.

Figure 1.1: E ENERGETIC LIGHTING 6 Inch LED Disk Lights (4-pack).
2. Safety Information
- WARNING: Risk of electric shock. Disconnect power at the fuse or circuit breaker before installation or servicing.
- This product must be installed in accordance with the applicable installation code by a person familiar with the construction and operation of the product and the hazards involved.
- Ensure all electrical connections are made correctly and securely.
- Do not modify the fixture. Any modifications may void the warranty and create safety hazards.
- Suitable for wet locations, such as bathrooms and soffits.
- Operating temperature range: -20°C to 40°C (-4°F to 104°F).
3. Package Contents
Verify that all components are present before beginning installation:
- LED Disk Light Fixture (Quantity: 4 per pack)
- Wire Nuts (3 pieces)
- Long Screws (2 pieces)
- Short Screws (2 pieces)
- Self-Tapping Screws (2 pieces)
- Instruction Manual

Figure 3.1: Illustration of the installation accessories included with the LED disk light.
4. Specifications
| Feature | Specification |
|---|---|
| Brand | E ENERGETIC LIGHTING |
| Model | 6 Inch LED Disk Light |
| Color Temperature | 5000K Daylight |
| Wattage | 15 Watts |
| Brightness | 1100 Lumens |
| CRI (Color Rendering Index) | 90+ |
| Voltage | 120 Volts |
| Dimmability | 5%-100% Smooth Dimmable |
| Installation Type | Flush Mount (Junction Box) |
| Product Dimensions | 7.2"L x 7.2"W x 0.9"H |
| Certifications | ETL, FCC |
| Material | Metal |
| Wet Rated | Yes |

Figure 4.1: Product dimensions and key specifications.
5. Installation Instructions (Setup)
This LED disk light is designed for easy installation into standard 2.75, 3.5, or 4-inch junction boxes. No additional housing is required.
- Step 1: Disconnect Power. Before starting, ensure the power supply to the junction box is turned off at the circuit breaker to prevent electrical shock.
- Step 2: Remove Lens. Gently twist the light fixture's lens counter-clockwise to remove it. This will expose the internal wiring and mounting holes.
- Step 3: Connect Wires. Connect the wires from the LED disk light to the corresponding wires in the junction box using the provided wire nuts.
- Black wire (Line) to the household live wire.
- White wire (Neutral) to the household neutral wire.
- Green/Yellow wire (Ground) to the household ground wire.
- Step 4: Mount Fixture. Align the mounting holes on the LED disk light with the screw holes on the junction box. Secure the fixture to the junction box using the appropriate screws (long screws for deeper boxes, short screws for shallower ones, or self-tapping screws if needed).
- Step 5: Tighten Lens. Once the fixture is securely mounted, reattach the lens by twisting it clockwise until it is firmly in place.
- Step 6: Restore Power. Turn the power back on at the circuit breaker.

Figure 5.1: Visual guide for the installation process.
6. Operating Instructions
6.1 Dimmable Functionality
This LED disk light features smooth dimming capabilities from 5% to 100%. It is compatible with most standard LED dimmers on the market. For optimal performance, ensure your dimmer switch is compatible with LED lighting.

Figure 6.1: Dimmable range and examples of compatible dimmer switches.
6.2 Light Quality (CRI 90+)
The fixture provides a high Color Rendering Index (CRI) of 90+, ensuring that colors appear true and vibrant under its illumination, similar to natural sunlight.

Figure 6.2: Visual comparison of color rendering index.
6.3 Application Areas
This low-profile surface mount ceiling light is suitable for various indoor and wet locations, including living rooms, kitchens, bedrooms, bathrooms, soffits, and workplaces.

Figure 6.3: Versatile application of the LED disk light in various rooms.
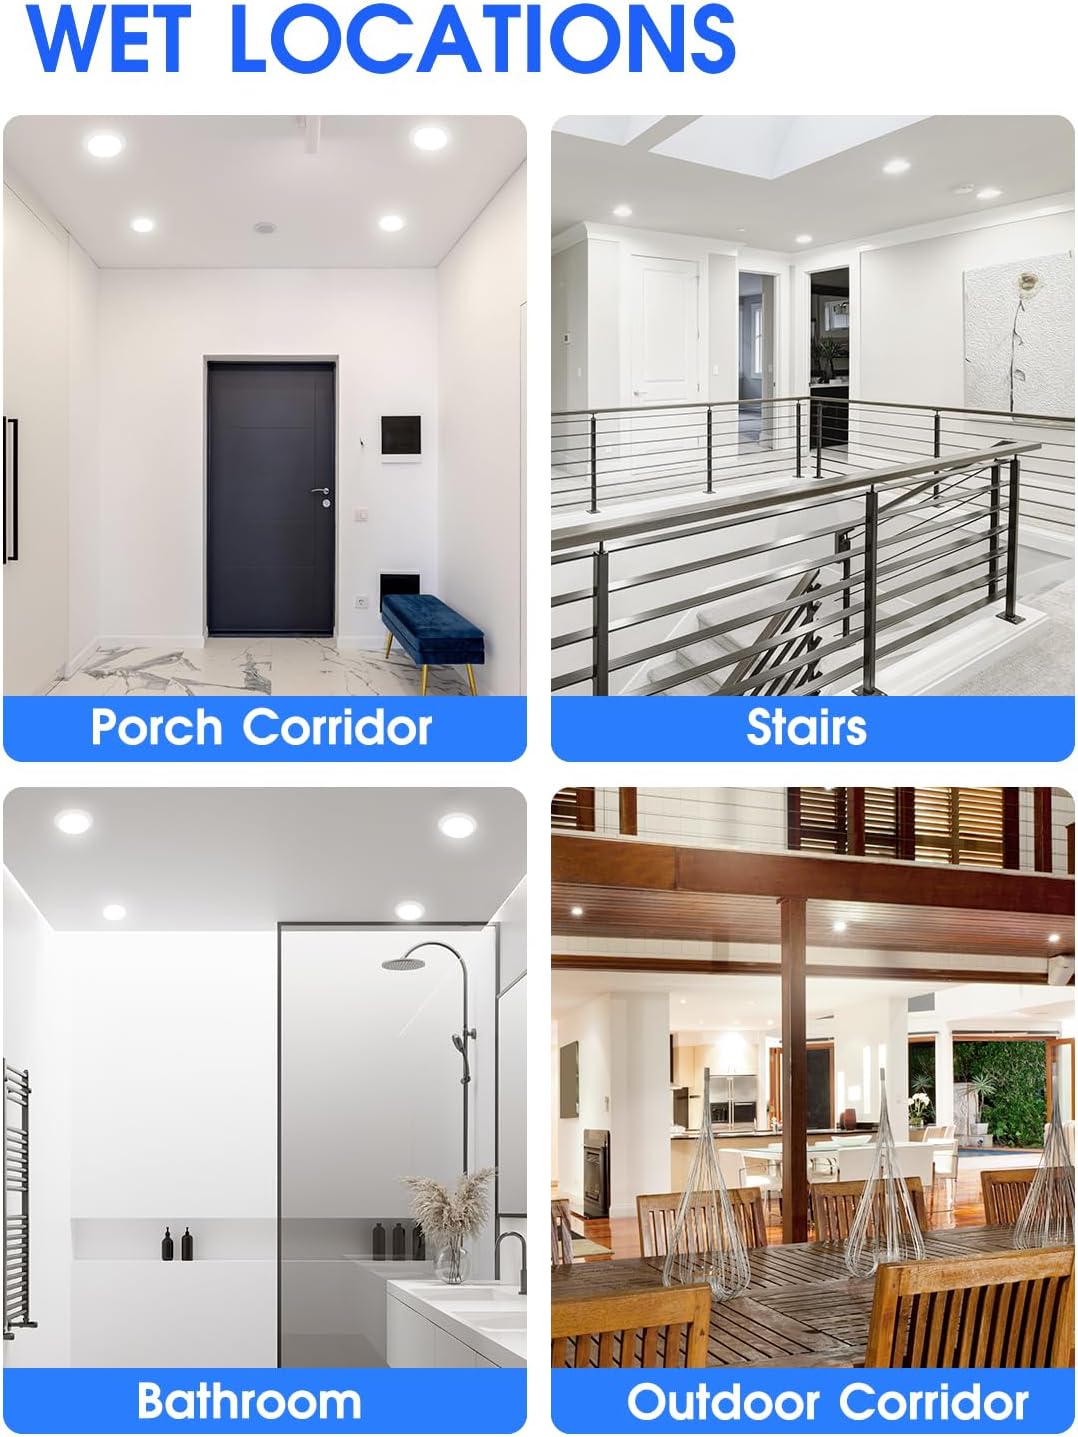
Figure 6.4: Examples of wet location installations, including porch corridors, stairs, bathrooms, and outdoor corridors.
7. Maintenance
- Cleaning: Ensure the power is off before cleaning. Use a soft, dry, or slightly damp cloth to wipe the surface of the fixture. Do not use harsh chemicals or abrasive cleaners, as they may damage the finish or electrical components.
- Bulb Replacement: This LED fixture uses integrated LED chips and does not require bulb replacement. The LEDs are designed for a long operational life.
- Inspection: Periodically inspect the fixture for any signs of damage or loose connections. If any issues are found, disconnect power and consult a qualified electrician.
8. Troubleshooting
| Problem | Possible Cause | Solution |
|---|---|---|
| Light does not turn on. |
|
|
| Light flickers or dims improperly. |
|
|
| Light is not as bright as expected. |
|
|
9. Warranty and Support
E ENERGETIC LIGHTING provides a 5-year warranty for this LED disk light, ensuring reliability and peace of mind. This warranty covers defects in materials and workmanship under normal use.
For technical support, warranty claims, or any questions regarding your product, please contact E ENERGETIC LIGHTING customer service. Refer to the product packaging or the brand's official website for contact information.
Certifications: This product is ETL-certified and FCC compliant, indicating it meets recognized safety and performance standards.