1. Product Overview
This instruction manual provides essential information for the assembly, use, and maintenance of your vidaXL Raised Garden Bed. Designed for outdoor use, this planter is ideal for cultivating a variety of plants, vegetables, herbs, and flowers in your garden, on your balcony, or patio.

Image 1.1: The vidaXL Raised Garden Bed in an outdoor setting, showcasing its capacity for various plants.
Key Features:
- Spacious Design: The planter offers ample depth and width to accommodate a significant amount of soil, providing sufficient space for plant growth.
- Enhanced Stability: Internal supports are integrated into the raised bed's structure to ensure robustness and stability.
- Safe Edges: The top edge of the garden bed features a folded design, eliminating sharp, exposed edges for safer handling.
- Durable Material: Constructed from Corten steel, known for its weather-resistant properties and unique aesthetic development over time.
2. Safety Information
Please read and understand all safety instructions before assembly and use. Failure to follow these instructions may result in injury or damage to the product.
- Always wear appropriate personal protective equipment, such as gloves, during assembly to prevent cuts or pinches.
- Ensure all components are securely fastened before filling the planter with soil.
- Do not climb on or stand in the raised garden bed.
- Be aware that Corten steel will develop a rust-like patina over time. During the initial weathering process, some rust runoff may occur, which can stain surrounding surfaces. It is recommended to place the planter on a surface that can tolerate staining or to use a protective barrier.
- Keep children and pets away from the assembly area.
3. Components and Assembly
Before beginning assembly, verify that all parts are present and undamaged. Refer to the included parts list in your packaging for specific component identification.
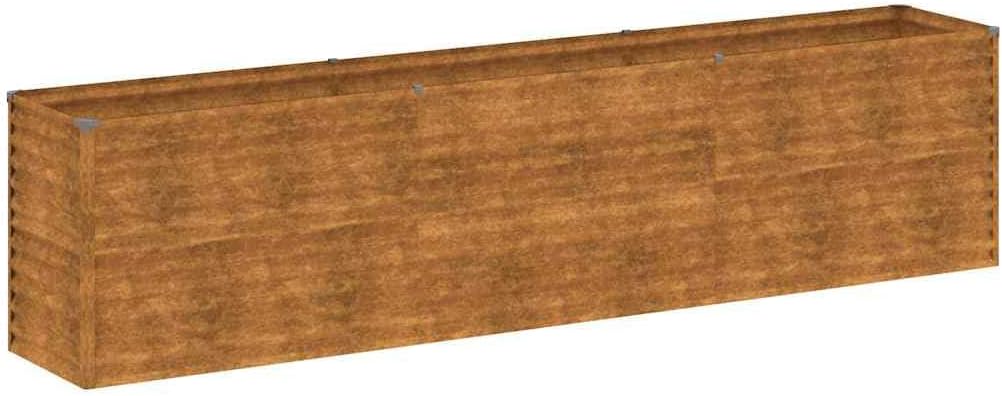
Image 3.1: Top-down view of the unassembled or empty raised garden bed, showing its rectangular shape.
Assembly Steps:
- Unpack Components: Carefully remove all parts from the packaging. Lay them out on a clean, flat surface.
- Identify Panels: Identify the side panels and end panels. Note the pre-drilled holes for fasteners.
- Connect Panels: Begin by connecting the side panels to the end panels using the provided fasteners (screws, nuts, bolts). Ensure the folded edges are oriented correctly at the top.
- Install Internal Supports: Attach the internal support beams or cross-braces as indicated in your specific assembly diagram. These supports are crucial for maintaining the structural integrity of the planter once filled with soil.
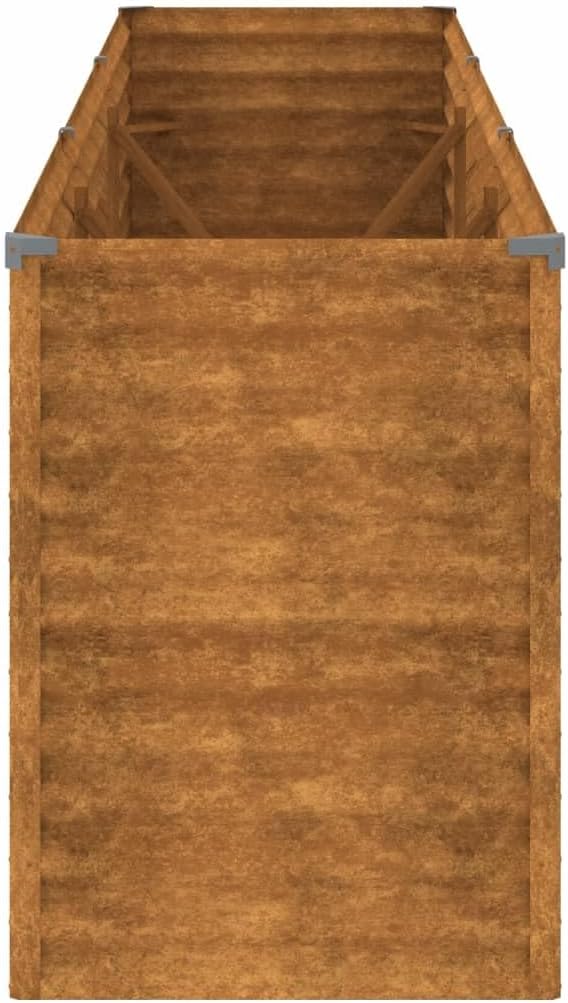
Image 3.2: Internal view of the raised garden bed, highlighting the support beams that provide structural reinforcement.
- Tighten Fasteners: Once all panels and supports are in place, securely tighten all fasteners. Do not overtighten.
- Final Placement: Carefully move the assembled raised garden bed to its desired permanent location before filling.
4. Usage and Placement
Proper placement and filling are essential for the health of your plants and the longevity of the garden bed.
Placement:
- Choose a level surface to ensure stability and proper drainage.
- Consider sunlight requirements for the plants you intend to grow.
- Ensure adequate drainage. The open bottom design allows for direct contact with the ground, promoting natural drainage. If placed on a hard surface, consider adding a layer of gravel or drainage material at the bottom.
Filling the Planter:
- Layer the bottom with coarse material like gravel or broken pottery for improved drainage, if desired.
- Fill the raised bed with a high-quality potting mix or garden soil suitable for your chosen plants.
- Leave a few inches of space from the top edge to prevent soil overflow when watering.
5. Maintenance and Care
The vidaXL Raised Garden Bed is made from Corten steel, a material designed to develop a protective rust-like appearance over time. This patina not only gives it a unique aesthetic but also acts as a protective layer against further corrosion.
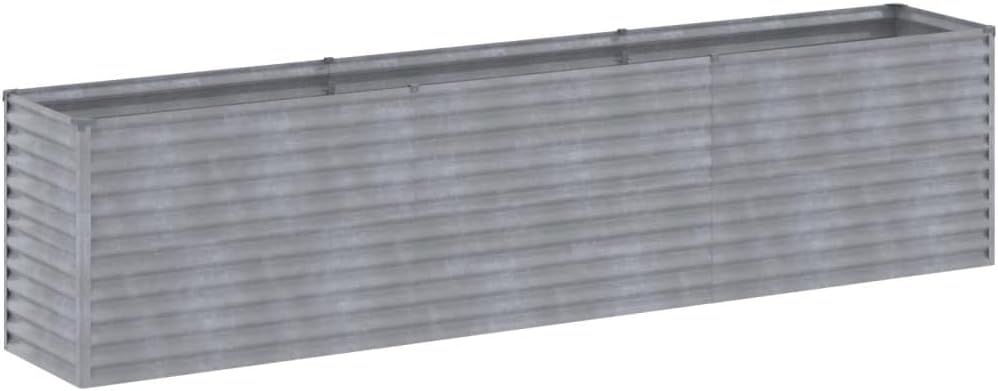
Image 5.1: The initial appearance of the Corten steel, which is a grey metallic finish.

Image 5.2: The natural weathering process of Corten steel, showing its transformation from grey to a rich orange-brown patina over time.
Corten Steel Weathering Process:
- Upon arrival, your garden bed will have a grey metallic finish.
- Exposure to weather elements (rain, humidity, sun) will initiate the rusting process. This typically takes several weeks to months, depending on environmental conditions.
- The rust layer will deepen in color, eventually settling into a stable, dark orange-brown patina. This layer protects the underlying steel from further corrosion.

Image 5.3: Visual comparison illustrating the change in appearance of Corten steel from its initial state to its weathered, rusted state.
Accelerating the Rust Process (Optional):
If you wish to speed up the weathering process, you can apply a saltwater solution:
- Mix water with a small amount of salt (e.g., 1 tablespoon per liter).
- Spray or wipe the solution onto the surface of the steel.
- Repeat this process daily for several days.
- The rust will begin to form more rapidly.

Image 5.4: A visual guide demonstrating methods to accelerate the natural rusting process of Corten steel.
General Care:
- Cleaning: Periodically wipe down the exterior with a damp cloth to remove dirt or debris. Avoid harsh chemicals or abrasive cleaners.
- Drainage: Ensure drainage holes (if any) remain clear to prevent waterlogging.
- Minimal Maintenance: Once the protective patina has formed, the Corten steel requires very little maintenance.
6. Troubleshooting
This section addresses common issues you might encounter with your raised garden bed.
| Problem | Possible Cause | Solution |
|---|---|---|
| Uneven rust development | Inconsistent exposure to moisture/drying cycles; initial surface variations. | This is normal. The patina will eventually even out. You can accelerate the process in less affected areas using the saltwater method (Section 5). |
| Rust stains on surrounding surfaces | Runoff during the initial weathering period. | This is expected. Place the planter on a surface that can be stained or use a protective barrier underneath during the first few months. Once the patina stabilizes, runoff will significantly decrease. |
| Waterlogging in the planter | Poor drainage; compacted soil. | Ensure the base of the planter is on permeable ground. If on a hard surface, add a layer of gravel or drainage material before adding soil. Loosen compacted soil. |
7. Specifications
Detailed specifications for the vidaXL Raised Garden Bed (Model: 151986).

Image 7.1: Dimensional drawing of the raised garden bed, indicating its length, width, and height.
| Attribute | Value |
|---|---|
| Product Dimensions (L x W x H) | 291 x 50 x 69 cm (114.6 x 19.7 x 27.2 inches) |
| Model Number | 151986 |
| Weight | 15.24 kg (33.6 lbs) |
| Material Type | Alloy Steel (Corten Steel) |
| Color | Brown (weathered appearance) |
| Special Feature | Weather Resistant |
| Planter Shape | Raised Bed (Rectangular) |
| Indoor/Outdoor Use | Outdoor |
| Mounting Type | Floor Mount |
| Number of Pieces | 1 |
8. Warranty and Support
vidaXL products are manufactured to high-quality standards. For information regarding warranty coverage, returns, or technical support, please refer to the warranty details provided with your purchase or visit the official vidaXL website.
You can also visit the vidaXL store on Amazon for more products and support: