1. Introduction
The Orbit B-hyve Gen 2 Smart Hose Watering Timer with Wi-Fi Hub (Model 21206) provides an automated and intelligent solution for managing your outdoor watering needs. This system allows you to control your watering schedule from anywhere using your mobile device, ensuring optimal hydration for your lawn and plants while conserving water.
This manual provides detailed instructions for setting up, operating, and maintaining your B-hyve Gen 2 Smart Hose Watering Timer system.
2. What's Included
Your Orbit B-hyve Gen 2 Smart Hose Watering Timer package includes the following components:
- B-hyve Gen 2 Smart Hose Watering Timers (2 units)
- Wi-Fi Hub
- Hose Y Splitter
- Instruction Manual
3. Setup Guide
3.1. Install Batteries in the Smart Hose Timer
The B-hyve Smart Hose Timer requires batteries for operation. Locate the battery compartment, typically on the back or side of the timer, and insert the required batteries (usually AA or AAA, refer to the timer itself for exact type). Ensure correct polarity.

Image: Orbit B-hyve Gen 2 Smart Hose Watering Timer, showing the battery compartment.
3.2. Connect the Smart Hose Timer to your Faucet
Attach the B-hyve Smart Hose Timer directly to your outdoor hose faucet. Hand-tighten the connection to prevent leaks. If using the included Hose Y Splitter, attach the splitter to the faucet first, then attach the timers to the splitter outlets.
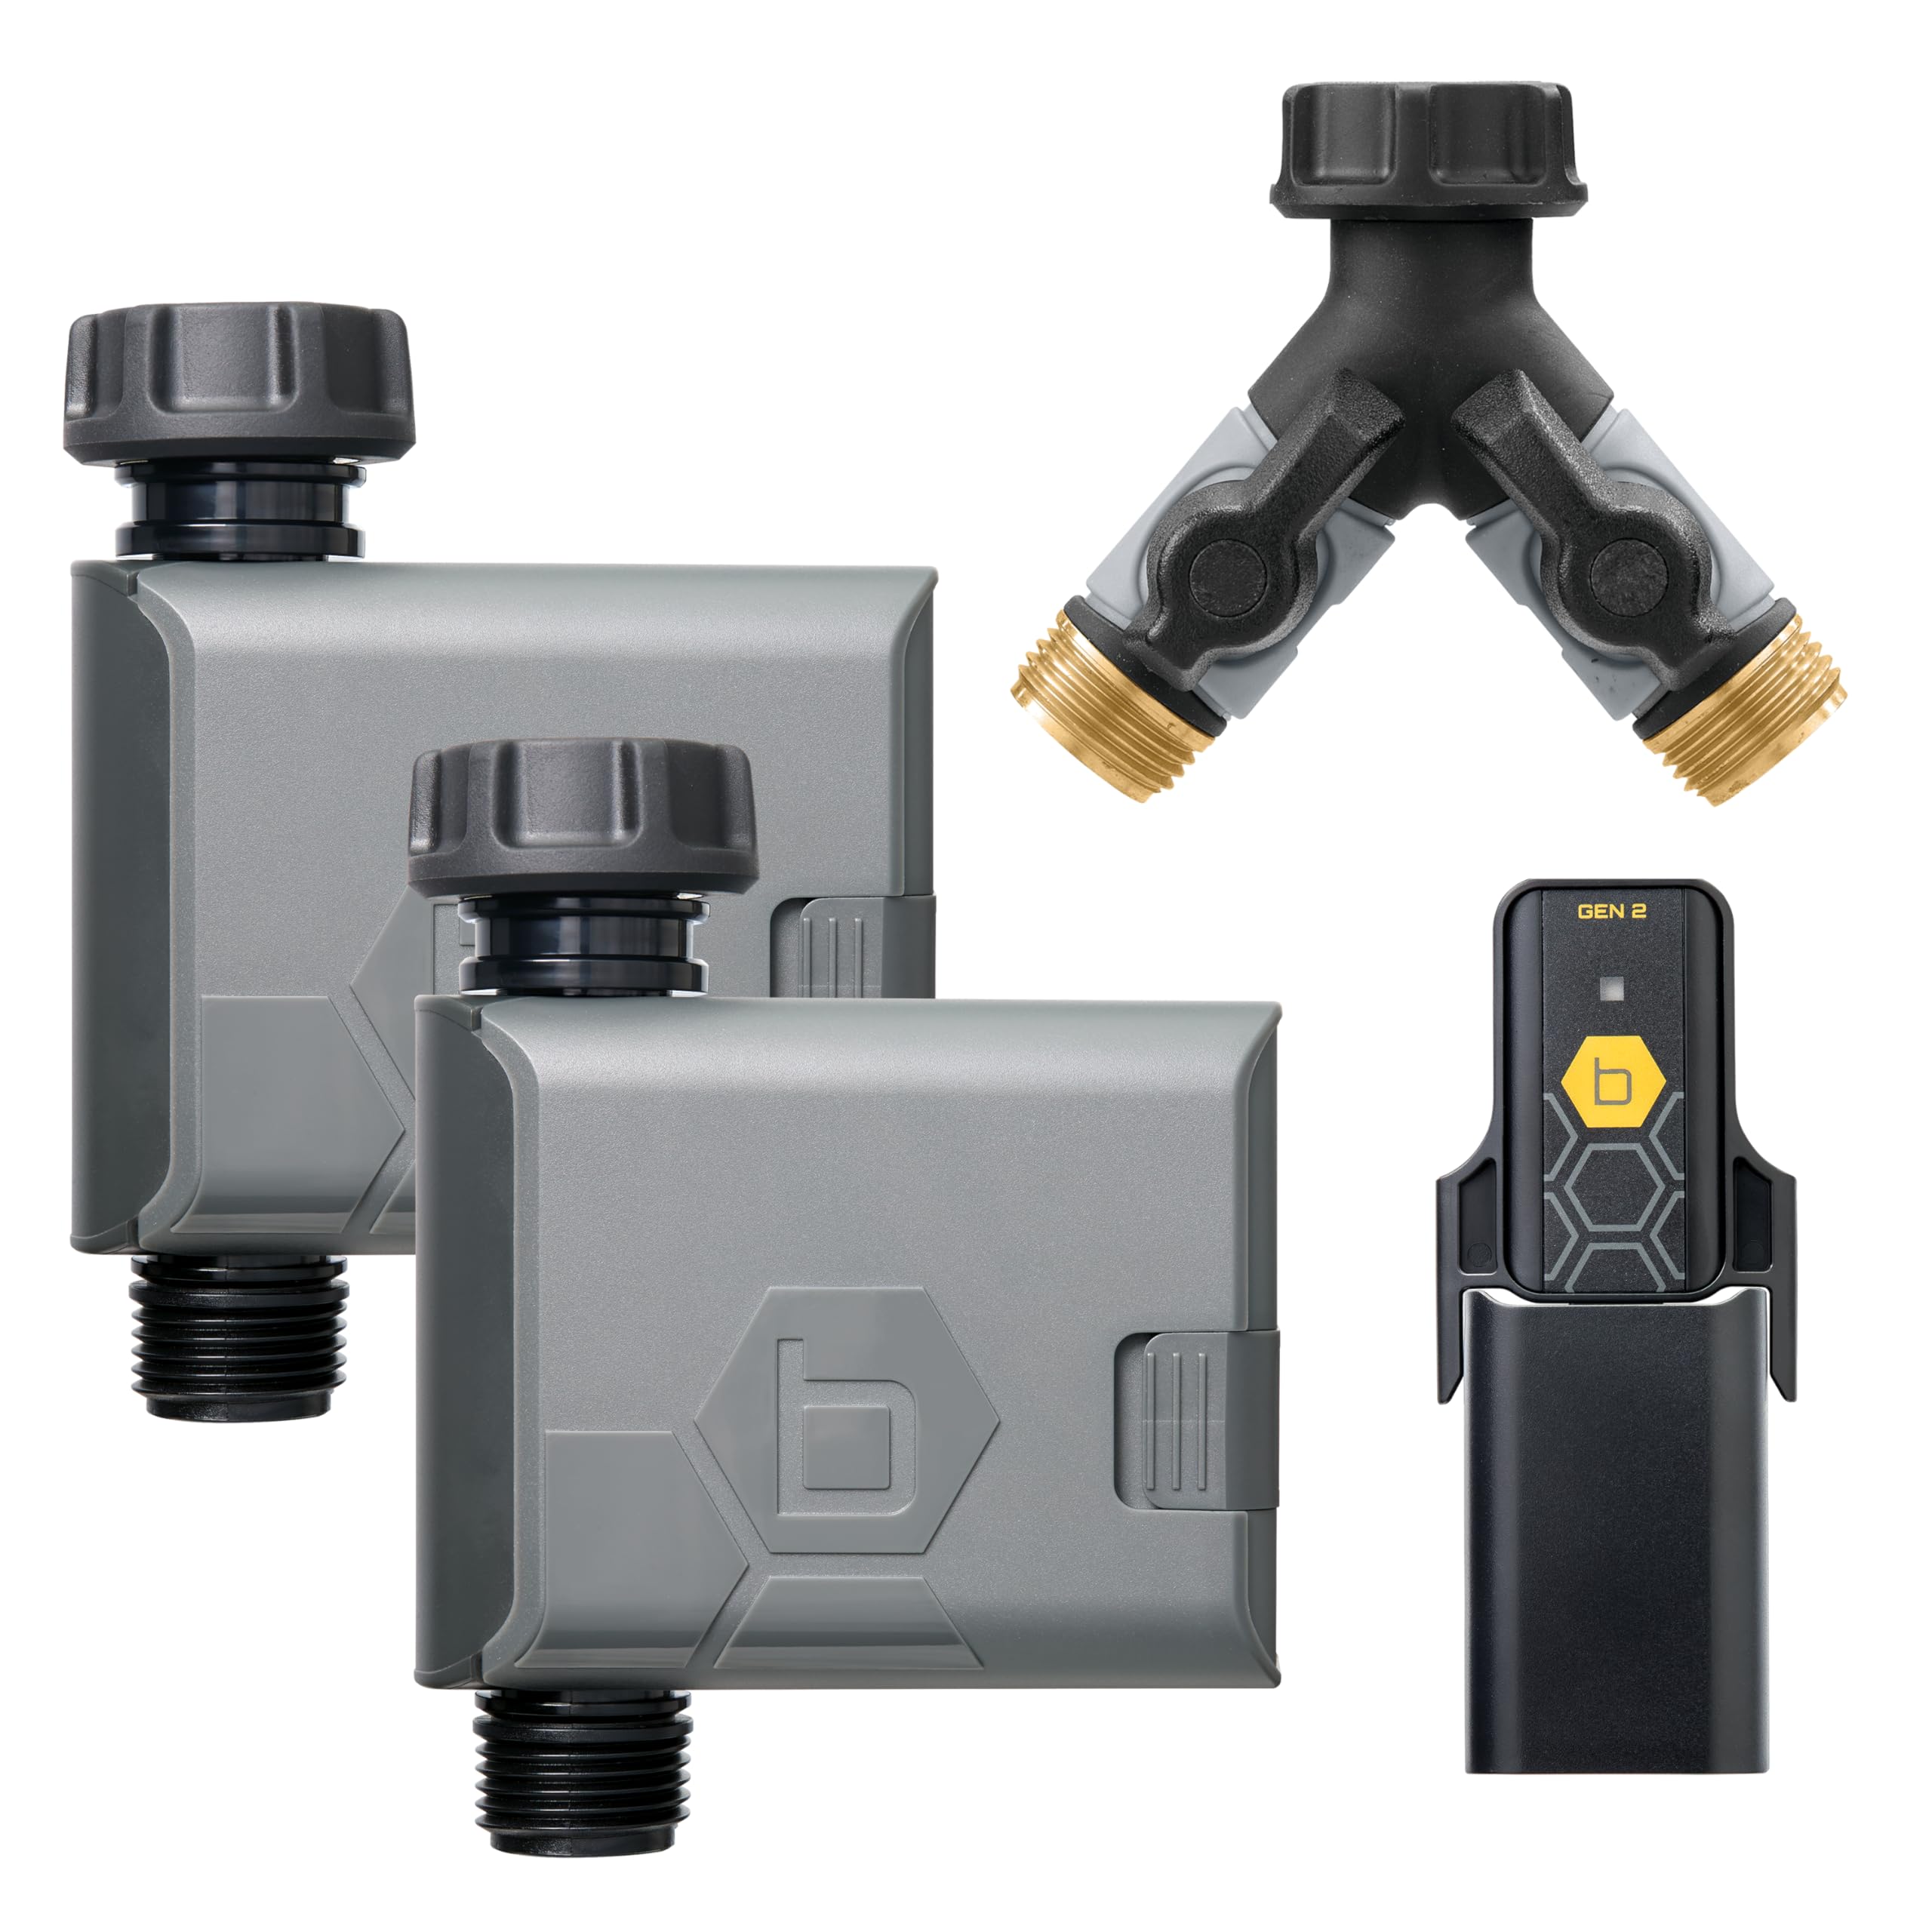
Image: Orbit B-hyve Gen 2 Smart Hose Watering Timer connected to a standard outdoor hose faucet.
3.3. Connect the Wi-Fi Hub
Plug the Wi-Fi Hub into an indoor power outlet. For optimal performance, place the hub in a central location within range of your Wi-Fi router and the B-hyve Smart Hose Timers. The hub connects the timers to your home Wi-Fi network, enabling remote control.
Important Note on Hub Compatibility: The B-hyve Gen 2 Smart Hose Watering Timer requires a Gen 2 Wi-Fi Hub. Gen 1 hubs are not compatible with Gen 2 timers. You can identify a Gen 2 hub by the "Gen 2" label and black graphic on its sticker, while Gen 1 hubs have a gray sticker.

Image: Visual guide for B-hyve Wi-Fi Hub compatibility, distinguishing between Gen 1 and Gen 2 hubs.
3.4. Download the B-hyve App and Pair Devices
Download the B-hyve app from your smartphone's app store. Follow the in-app instructions to create an account and pair your Wi-Fi Hub and Smart Hose Timers. This process typically involves pressing a button on the devices and confirming connection within the app.
Video: An official Orbit video introducing the B-hyve Gen 2 Smart Hose Timer, detailing its features and setup process.
4. Operating Instructions
4.1. Using the B-hyve App
The B-hyve app is your primary interface for controlling the Smart Hose Timers. From the app, you can:
- Create Watering Schedules: Set specific start times, durations, and days for watering.
- Manual Watering: Initiate watering instantly for a set duration.
- WeatherSense Technology: Enable smart watering based on local weather conditions, preventing overwatering during rain or adjusting for heat.
- View Watering History: Monitor past watering events and water usage.

Image: A smartphone displaying the B-hyve app, illustrating remote control capabilities for watering.
4.2. Manual Control on the Timer
Each B-hyve Smart Hose Timer also features a manual ON/OFF button. Pressing this button will typically initiate a default manual watering cycle or stop an active one. Refer to the app for configuring manual watering defaults.

Image: Close-up view of the B-hyve Gen 2 Smart Hose Watering Timer, highlighting the manual ON/OFF button.
5. Maintenance
5.1. Battery Replacement
When the battery indicator in the B-hyve app shows low power, replace the batteries in your Smart Hose Timer. Use fresh alkaline batteries of the specified type (e.g., AA or AAA). Ensure the battery compartment is sealed properly after replacement to maintain water resistance.
5.2. Cleaning
Periodically inspect the timer and hose connections for debris or mineral buildup. Clean with a soft brush and water. Do not use harsh chemicals or abrasive cleaners.
5.3. Winterization
Before the first frost, disconnect the Smart Hose Timer from the faucet and store it indoors in a dry, protected area. Remove batteries to prevent corrosion. Failure to properly winterize may result in damage to the unit due to freezing water.
6. Troubleshooting
6.1. Connectivity Issues
- Timer not connecting to Hub: Ensure the Wi-Fi Hub is plugged in and within range of the timer. Check that the hub is a Gen 2 model for compatibility with your Gen 2 timer.
- Hub not connecting to Wi-Fi: Verify your home Wi-Fi network is active and the hub is within range of your router. Try restarting the hub and your router.
- App not responding: Close and reopen the B-hyve app. Ensure your smartphone has a stable internet connection.
6.2. Watering Problems
- No water flow: Check that the faucet is fully open. Ensure the timer is securely attached and there are no kinks in the hose. Verify batteries are charged.
- Timer not following schedule: Confirm the schedule is correctly set in the B-hyve app. Check for any active rain delays or manual overrides.
- Leaks at connections: Ensure all connections are hand-tightened. Check for worn-out washers and replace if necessary.
7. Specifications
| Feature | Detail |
|---|---|
| Brand | Orbit |
| Model Number | 21206 |
| Color | Gray |
| Material | Plastic |
| Item Weight | 8 ounces (0.5 Pounds) |
| Number of Settings | 3 |
| UPC | 046878212060 |
| Package Dimensions | 12.68 x 9.45 x 2.17 inches |
| Batteries Required | Yes |
| Included Components | Wi-Fi hub, Hose Y, Instruction manual |
8. Warranty Information
The Orbit B-hyve Gen 2 Smart Hose Watering Timer (Model 21206) is covered by a 2-year manufacturer's warranty. This warranty covers defects in materials and workmanship under normal use. Please retain your proof of purchase for warranty claims.
9. Customer Support
For technical assistance, troubleshooting, or warranty inquiries, please visit the official Orbit website or contact their customer support team. Refer to the product packaging or Orbit's website for the most current contact information.
Online Resources: Visit the Orbit Store on Amazon