1. Introduction
This manual provides comprehensive instructions for the installation, configuration, and maintenance of your TP-Link Omada SG3428XPP-M2 switch. This L2+ managed switch is designed for high-performance networking environments, offering 24x 2.5 Gigabit Ethernet ports with extensive Power over Ethernet capabilities and 4x 10 Gigabit SFP+ uplink ports. It is an integral component of the Omada Software Defined Networking (SDN) solution, enabling centralized cloud management.
2. Package Contents
Before proceeding with installation, please verify that all items are present in your package:
- SG3428XPP-M2 Switch Unit
- Power Cord
- Quick Installation Guide
- Rackmount Kit
- Rubber Feet
3. Physical Overview
Familiarize yourself with the physical components and indicators of the switch.
3.1 Front Panel

Figure 3.1: Front view of the Omada SG3428XPP-M2 switch, showing 24 2.5GbE ports (16 PoE+, 8 PoE++) and 4 10Gb SFP+ ports, along with LED indicators for power, system, speed, and PoE status.

Figure 3.2: Angled front-left view of the switch, highlighting the port layout and ventilation on the side.
3.2 Rear Panel

Figure 3.3: Rear view of the switch, showing the power input, grounding screw, and Kensington lock slot.
3.3 Port Capabilities
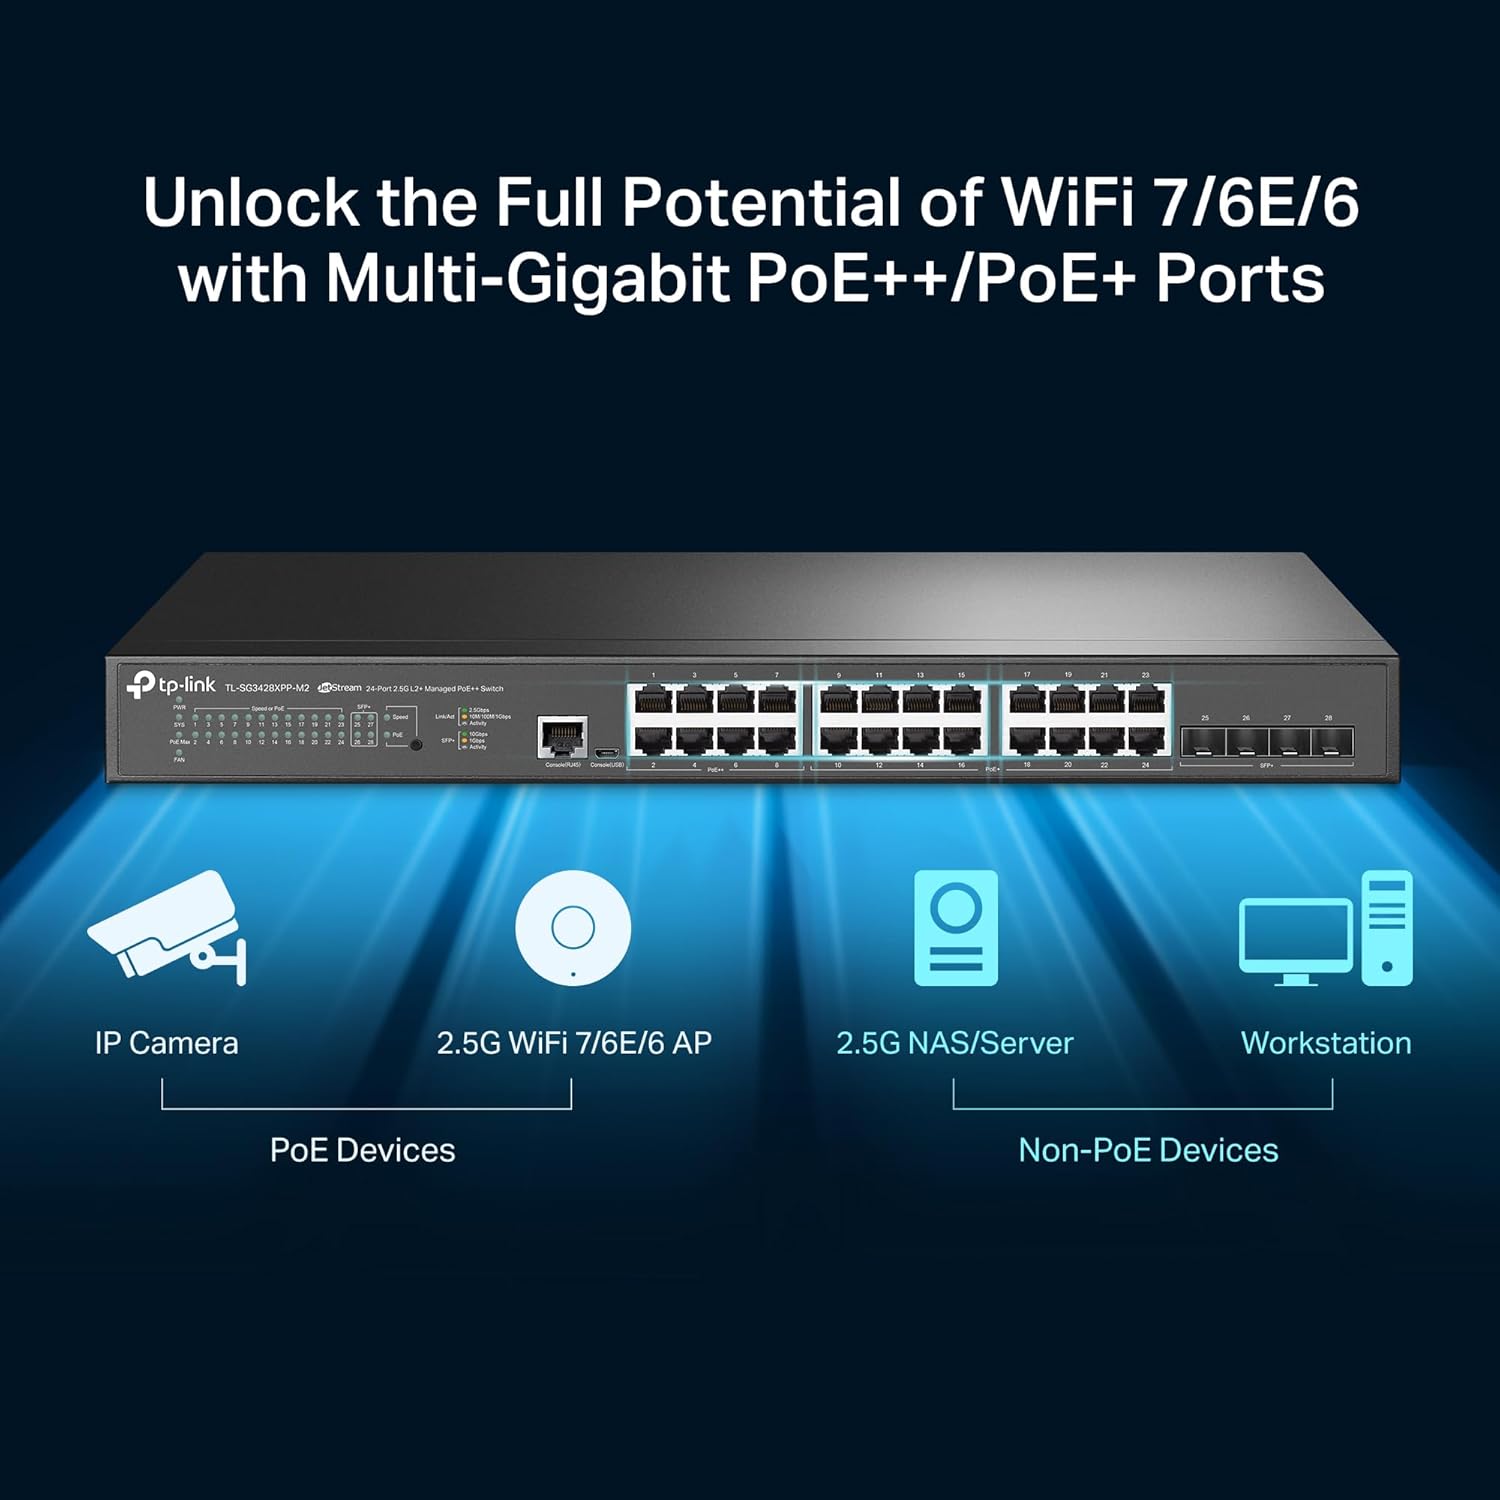
Figure 3.4: Illustration of the switch's versatility, connecting IP cameras (PoE devices) and 2.5G WiFi 7/6E/6 APs to PoE++ / PoE+ ports, alongside 2.5G NAS/Servers and Workstations to non-PoE 2.5GbE ports.

Figure 3.5: Close-up view of the four 10 Gigabit SFP+ uplink slots, emphasizing their high-speed capability for network backbone connections.
4. Setup
Follow these steps for initial setup of your switch:
- Mounting: Use the included rackmount kit to install the switch in a standard 19-inch rack, or attach the rubber feet for desktop placement. Ensure adequate ventilation around the unit.
- Power Connection: Connect the provided power cord to the switch's power inlet and then to a suitable power outlet.
- Network Connections: Connect your network devices (e.g., computers, servers, access points, IP cameras) to the 2.5 Gigabit Ethernet ports using standard Ethernet cables. For high-bandwidth uplinks, connect SFP+ transceivers to the 10 Gigabit SFP+ slots and link to your core network infrastructure.
- Initial Configuration: The switch can be managed via its web-based GUI or through the Omada SDN Controller. Refer to the Quick Installation Guide for default IP address and login credentials to access the web GUI for standalone management, or follow the Omada SDN documentation for centralized control.
5. Operating the Switch
The SG3428XPP-M2 offers advanced features for robust network operation.
5.1 Power over Ethernet (PoE) Capabilities
The switch features 16 PoE+ (802.3at/af) ports, each providing up to 30W, and 8 PoE++ (802.3bt/at/af) ports, each providing up to 60W. The total PoE power budget is 500W, allowing for flexible deployment of PoE-powered devices such as IP cameras, VoIP phones, and Wi-Fi access points.
5.2 Omada SDN Integration
As part of the Omada SDN platform, this switch can be seamlessly integrated with Omada Access Points and Gateways for centralized management. This allows for remote cloud access and control of your entire network from a single interface, enhancing operational efficiency and simplifying network administration.
5.3 Network Security and Management
The switch supports a comprehensive suite of L2+ features to enhance network security and resource management, including:
- 802.1Q VLAN: For network segmentation and traffic isolation.
- IP-MAC-Port Binding: To prevent unauthorized access.
- Access Control Lists (ACL): For granular traffic filtering.
- Port Security: To limit the number of MAC addresses on a port.
- DoS Defend: Protection against Denial of Service attacks.
- Storm Control: To prevent broadcast, multicast, and unknown unicast storms.
- DHCP Snooping: To prevent rogue DHCP servers.
- 802.1X Radius Authentication: For secure network access control.
- Static Routing: To route internal traffic more efficiently.
6. Maintenance
Proper maintenance ensures the longevity and optimal performance of your switch.
- Firmware Updates: Regularly check the TP-Link official website for the latest firmware versions. Updating firmware can provide new features, performance improvements, and security patches.
- Cleaning: Keep the switch clean and free from dust. Use a soft, dry cloth for external cleaning. Ensure ventilation openings are not obstructed.
- Environmental Conditions: Operate the switch within the specified temperature and humidity ranges. Ensure adequate airflow around the device to prevent overheating.
7. Troubleshooting
If you encounter issues with your switch, consider the following common troubleshooting steps:
- No Power: Verify that the power cord is securely connected to both the switch and the power outlet. Check the power source.
- No Network Connectivity: Ensure Ethernet cables are properly connected to both the switch and the end devices. Check the link/activity LEDs on the switch ports. Verify IP configurations on connected devices.
- PoE Device Not Powering On: Confirm the connected device is PoE-compatible. Check the PoE status LED for the specific port. Ensure the total PoE budget of 500W is not exceeded.
- Accessing Web Management Interface: Ensure your computer's IP address is in the same subnet as the switch's default IP. Clear your browser's cache or try a different browser.
- Performance Issues: Check for network loops, excessive broadcast traffic, or high CPU utilization on the switch. Consider optimizing QoS settings if applicable.
For more detailed troubleshooting or complex issues, refer to the comprehensive user guide available on the TP-Link support website or contact technical support.
8. Specifications
| Model | TL-SG3428XPP-M2 |
| Switch Type | Layer 2+ Managed |
| Ports | 24x 2.5GbE RJ45 Ports (16 PoE+, 8 PoE++), 4x 10GE SFP+ Slots |
| PoE Standard | 802.3at/af (PoE+), 802.3bt/at/af (PoE++) |
| Total PoE Budget | 500W |
| Data Transfer Rate | 2.5 Gbps per RJ45 port, 10 Gbps per SFP+ slot |
| Dimensions (W x D x H) | 17.32 x 12.99 x 1.73 inches (440 x 330 x 44 mm) |
| Item Weight | 11.15 pounds (5.07 kg) |
| Case Material | Metal |
| Voltage | 100-240V AC, 50/60Hz |
9. Warranty and Support
The TP-Link Omada SG3428XPP-M2 switch comes with an industry-leading 5-year warranty. For technical support, warranty claims, and additional resources, please visit the official TP-Link support website. You can find FAQs, updated drivers, and contact information for customer service.