1. Introduction
This manual provides essential information for the proper setup, operation, and maintenance of your FanyiTek 24-inch 1920x360 IPS Stretched Bar LCD Monitor. Please read this manual thoroughly before using the product to ensure optimal performance and safety.
2. Safety Information
- Ensure the monitor is placed on a stable, flat surface to prevent accidental falls.
- Do not expose the monitor to water, moisture, or extreme temperatures.
- Use only the provided power adapter. Using an incorrect adapter may damage the device and void the warranty.
- Avoid blocking ventilation openings to prevent overheating.
- Do not attempt to disassemble or repair the monitor yourself. Contact qualified service personnel for assistance.
3. Package Contents
Verify that all items are present in the package:
- 1 × FanyiTek 24-inch 1920x360 VS240ZJ-V823 LCD Monitor
- 1 × Bracket
- 1 × 12V 2A Power Adapter
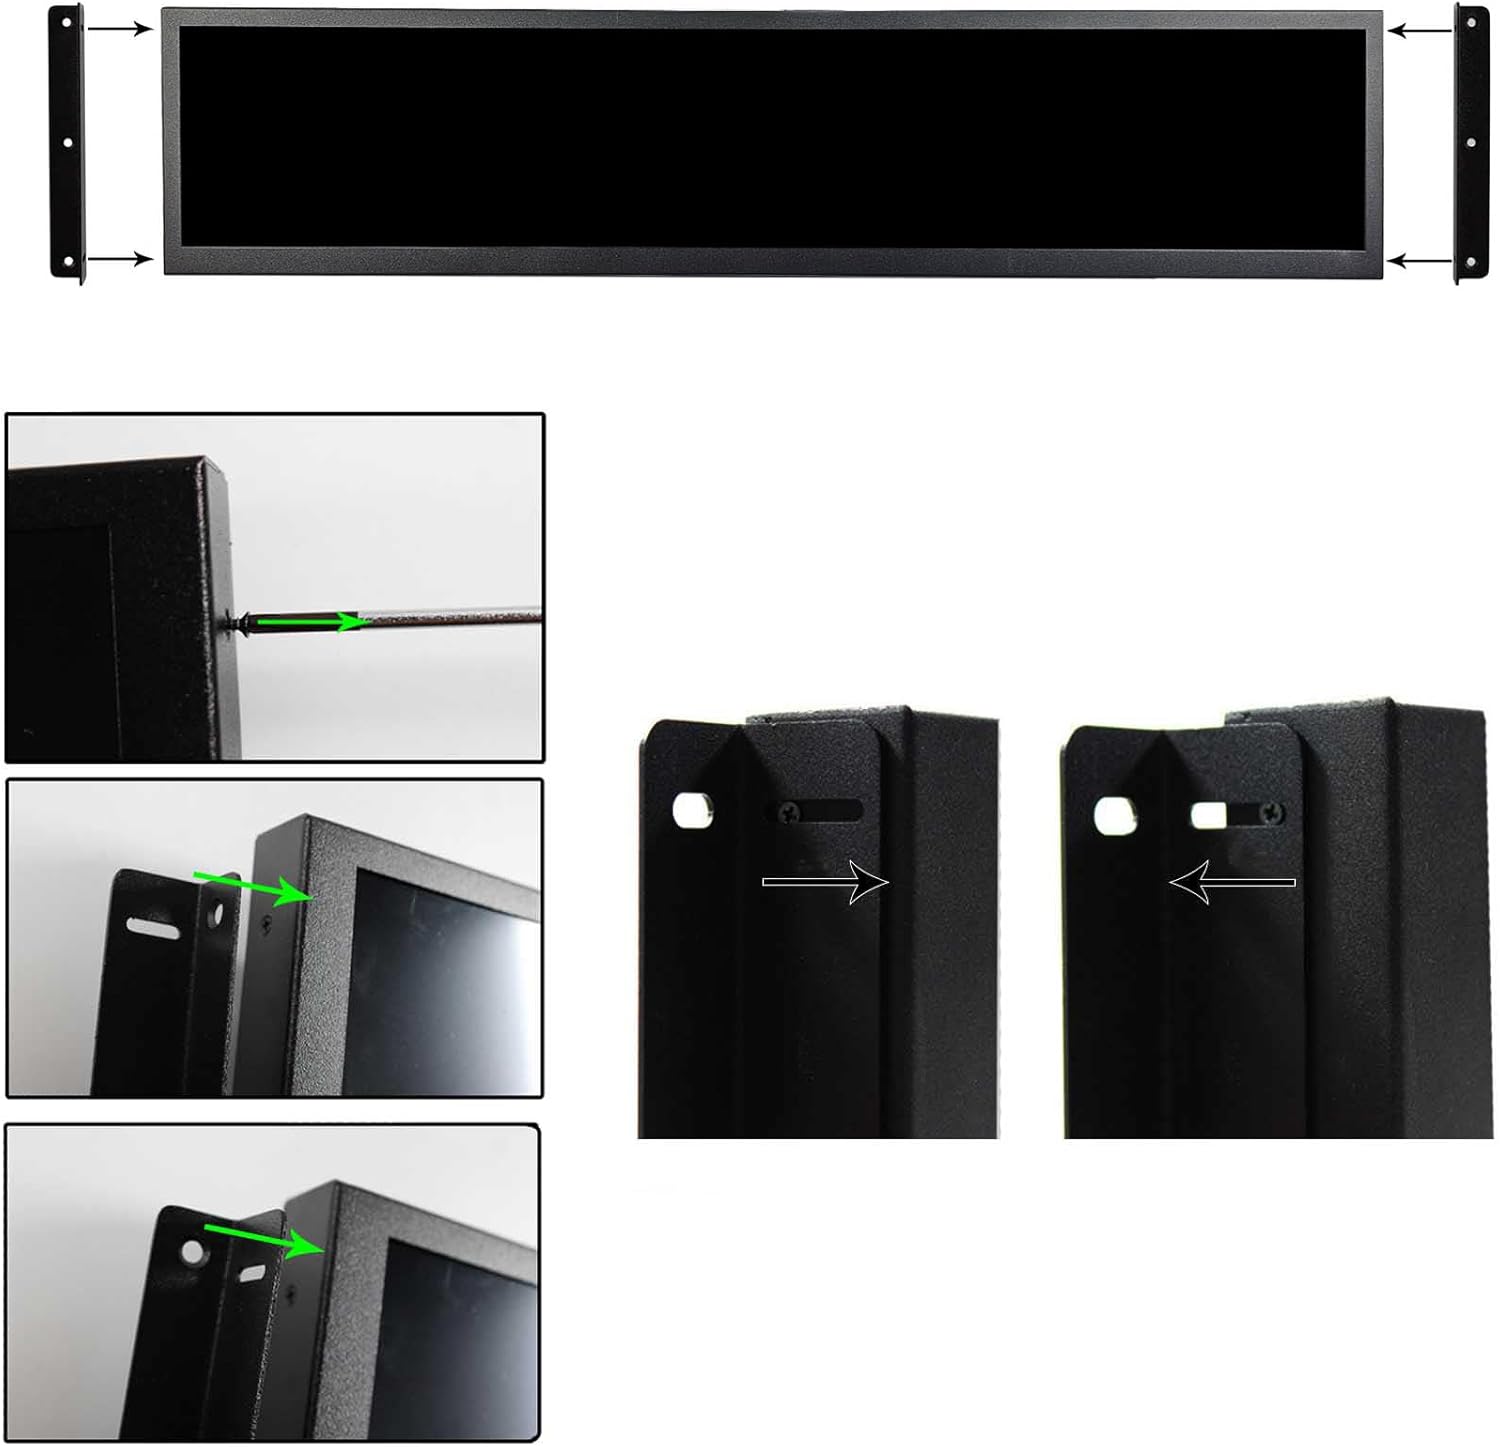
Image: The included 12V 2A power adapter and two mounting brackets.
4. Product Overview
The FanyiTek 24-inch Stretched Bar LCD Monitor features a unique 1920x360 IPS display, ideal for specialized applications such as DIY marquee displays or advertising screens. It supports USB video input and 180-degree image rotation.

Image: Front view of the FanyiTek 24-inch Stretched Bar LCD Monitor.
Dimensions
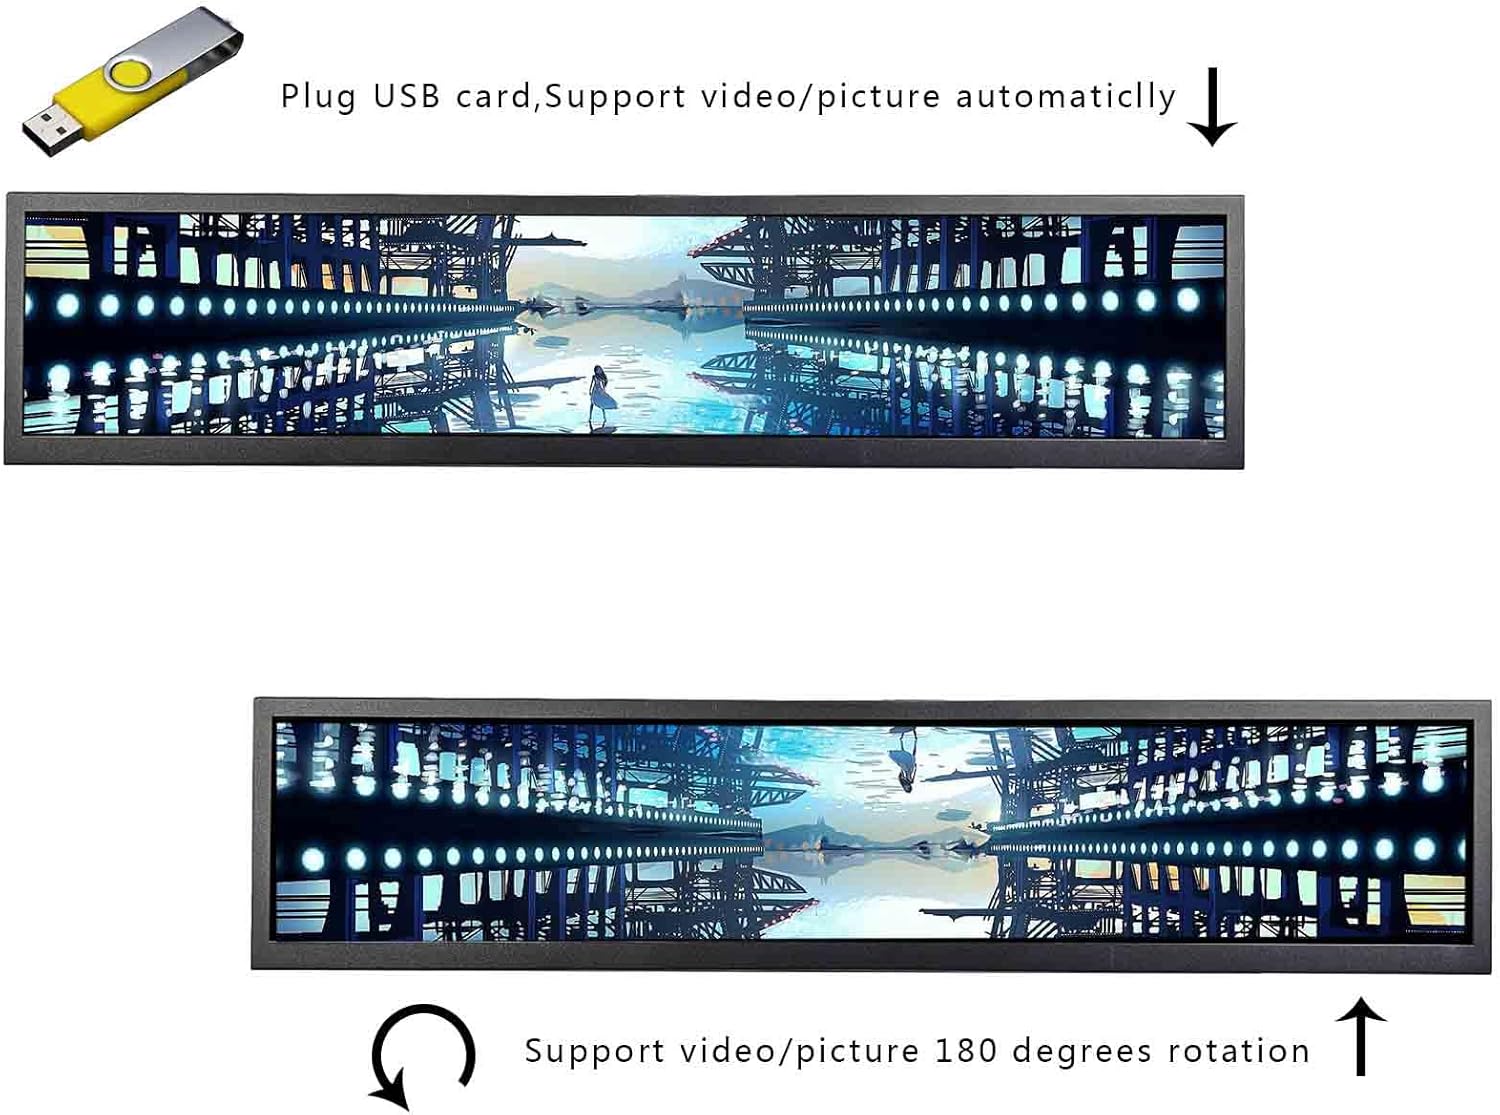
Image: Detailed diagram illustrating the physical dimensions of the monitor, including overall size and display area measurements.
- Dimension Size: 619 x 137 x 30 mm (H x V x D)
- Display Area: 598 x 112 mm (H x V)
5. Setup
5.1 Attaching the Bracket
To install the monitor using the included bracket:
- Align the bracket with the mounting holes on the side of the monitor.
- Secure the bracket using appropriate screws (not included, typically M3 or M4 screws depending on the monitor's mounting points).
- Ensure the bracket is firmly attached before mounting the monitor to a surface.

Image: Visual instructions demonstrating how to attach the mounting brackets to the monitor using screws.
5.2 Connecting Power and Video
- Connect the 12V 2A power adapter to the monitor's power input port.
- Plug the power adapter into a suitable electrical outlet.
- Connect your video source (e.g., computer, media player) to the monitor using a USB cable. The monitor supports USB video input.
6. Operation
6.1 Power On/Off
Once connected to power, the monitor will automatically power on. To power off, disconnect the power adapter.
6.2 USB Video Input and Autoplay
The monitor supports video input via USB. When a USB drive containing video or picture files is inserted, the monitor can be configured to autoplay content upon power-on. Note that videos with Dolby sound effects are not supported.
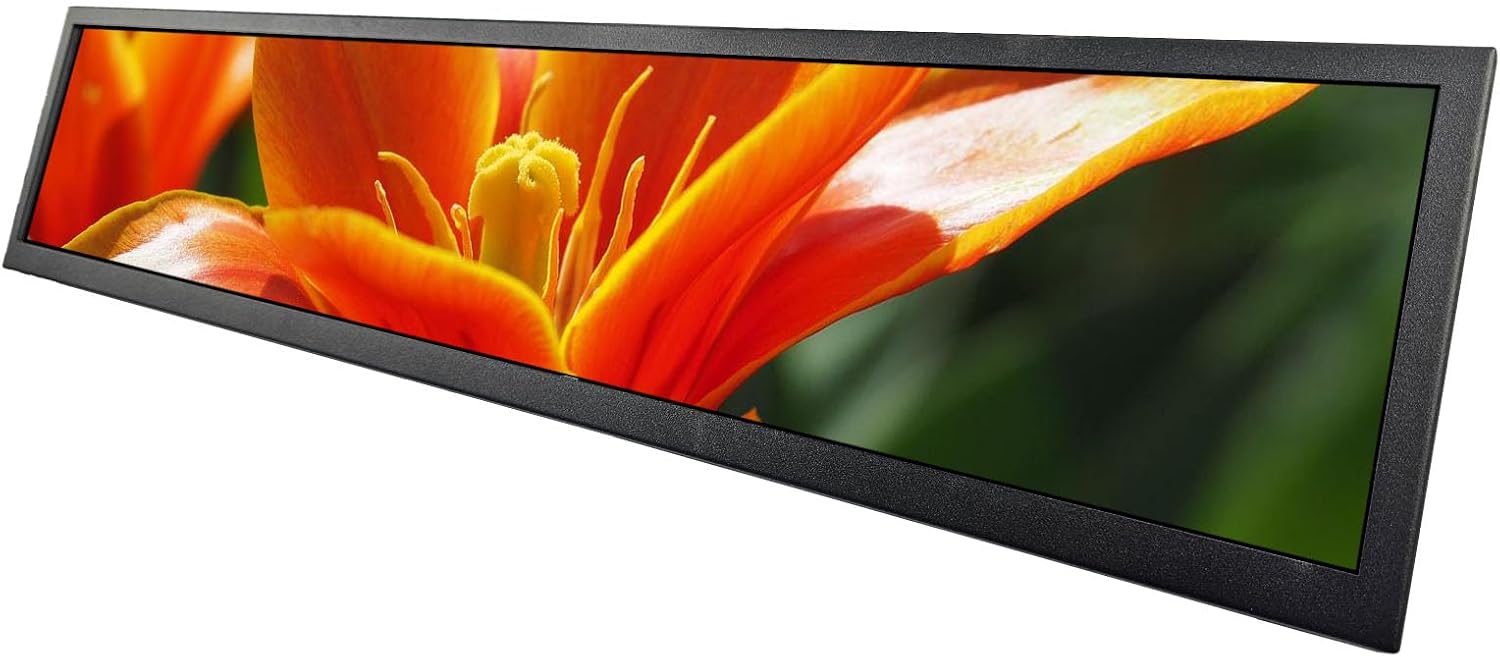
Image: A USB drive connected to the monitor, demonstrating its ability to play videos and pictures automatically, and illustrating the 180-degree image rotation feature.
6.3 180-Degree Image Rotation
The monitor supports 180-degree image rotation, which can be useful for various display orientations. This setting is typically accessible through the On-Screen Display (OSD) menu.
6.4 OSD Menu Navigation
The monitor features an On-Screen Display (OSD) menu for adjusting various settings, including image rotation, brightness, contrast, and other display parameters. Navigate the menu using the physical buttons located on the monitor's side or back.
Video: Demonstration of the FanyiTek 24-inch stretched bar monitor, showcasing its display capabilities, color tests, and navigation through the On-Screen Display (OSD) menu to adjust settings like 180-degree rotation.
7. Maintenance
- Cleaning the Screen: Gently wipe the screen with a soft, lint-free cloth. For stubborn marks, dampen the cloth slightly with water or a screen-cleaning solution. Avoid harsh chemicals.
- Cleaning the Casing: Use a soft, dry cloth to clean the monitor's casing.
- Storage: If storing the monitor for an extended period, disconnect it from power and store it in a cool, dry place, away from direct sunlight.
8. Troubleshooting
No Image on Screen
- Ensure the power adapter is securely connected to both the monitor and the power outlet.
- Verify that the USB video input cable is properly connected to both the monitor and the video source.
- Check if the video source is powered on and outputting a signal.
Image is Distorted or Incorrectly Oriented
- Access the OSD menu to adjust display settings, including the 180-degree image rotation option.
- Ensure the resolution and refresh rate settings on your video source are compatible with the monitor.
No Sound
- The monitor does not support video output or audio output directly. Ensure your video source is configured to output audio to an external speaker system if needed.
- Videos with Dolby sound effects are not supported for autoplay via USB.
9. Specifications
| Feature | Specification |
|---|---|
| Case | Metal Case Black |
| Screen Size | 24 inch |
| Dimension Size (H x V x D) | 619 x 137 x 30 mm |
| Display Area (H x V) | 598 x 112 mm |
| Screen Resolution | 1920 x 360 Pixels |
| Screen Brightness | 300 cd/m2 |
| Screen Contrast | 1200:1 |
| View Angle | 89/89/89/89 (Typ.) (CR≥10) [Left / Right / Up / Down] |
| Response Time | <8ms |
| Video Input | USB |
| Image Rotation Support | 180 degree |
| Autoplay Video Support | Yes (Videos with Dolby sound effects are not supported) |
| Video Output | Not Supported |
| Standby Model | <0.4W |
| Operating Temperature | 0°C to 45°C |
| Storage Temperature | -20°C to 60°C |
10. Warranty and Support
For warranty information and technical support, please refer to the documentation provided with your purchase or contact FanyiTek customer service. Keep your proof of purchase for any warranty claims.