1. Introduction
This manual provides comprehensive instructions for the setup, operation, and maintenance of your Keychron V1 75% Layout Custom QMK/VIA Wired Mechanical Keyboard. Please read this manual thoroughly before using the keyboard to ensure optimal performance and longevity.
2. Product Overview
The Keychron V1 is an 81-key, 75% layout mechanical keyboard designed for a premium typing experience. It features hot-swappable switches, south-facing RGB backlighting, and support for QMK/VIA customization. The keyboard is compatible with both macOS and Windows operating systems.

Figure 2.1: Top-down view of the Keychron V1 mechanical keyboard, showcasing its 75% layout with 81 keys, including function row, navigation cluster, and arrow keys. The keycaps are a mix of dark grey and blue-grey with red accent keys for Esc and Enter.

Figure 2.2: Angled view of the Keychron V1 keyboard, highlighting its compact design and the color scheme of the PBT keycaps. The keyboard rests on a white surface, emphasizing its form factor.
2.1 Package Contents
Ensure all items are present in the package:
- Keychron V1 Mechanical Keyboard
- USB-C to USB-C Cable
- USB-A to USB-C Adapter
- Keycap Puller
- Switch Puller
- Extra Keycaps for Windows/macOS
- Screwdriver

Figure 2.3: Included accessories: a keycap puller, switch puller, and additional keycaps for Windows and macOS layouts, demonstrating the keyboard's adaptability.
3. Setup
3.1 Connecting the Keyboard
The Keychron V1 is a wired keyboard and connects via a USB-C cable.
- Locate the USB-C port on the back of the keyboard.
- Connect one end of the provided USB-C cable to the keyboard.
- Connect the other end of the USB-C cable to an available USB-C port on your computer. If your computer only has USB-A ports, use the included USB-A to USB-C adapter.
- The keyboard will be automatically recognized by your operating system.

Figure 3.1: Close-up of the USB-C port on the Keychron V1 keyboard, indicating the connection point for the provided cable.
3.2 Switching Operating System Layout
The Keychron V1 features a physical toggle switch to change between macOS and Windows layouts.
- Locate the toggle switch on the side of the keyboard, near the USB-C port.
- Slide the switch to the 'Mac' position for macOS or 'Win' position for Windows.
- For optimal experience, replace the default keycaps with the included macOS or Windows specific keycaps as needed (e.g., Command/Option for Mac, Alt/Windows for Win).

Figure 3.2: Side view of the Keychron V1 keyboard showing the physical toggle switch for selecting between Windows and macOS operating system layouts, located next to the USB-C port.
4. Operating Instructions
4.1 Basic Typing
The Keychron V1 functions as a standard 75% layout keyboard. All alphanumeric keys, modifiers, and function keys operate as expected for their respective operating systems.
4.2 Function Keys (F1-F12)
The top row of keys serves as function keys (F1-F12). By default, these keys may have multimedia or system control functions. To access the standard F1-F12 functions, press the Fn key simultaneously with the desired function key.
4.3 RGB Backlighting
The Keychron V1 features south-facing RGB LED lights with multiple lighting effects. You can cycle through different lighting modes and adjust brightness directly on the keyboard.
- Change Lighting Mode: Use the dedicated lighting effect key (often located near the navigation cluster or accessible via Fn combinations).
- Adjust Brightness: Use Fn + Light Brightness Up/Down keys (refer to keyboard layout for specific key assignments).

Figure 4.1: Close-up view of the Keychron V1's south-facing RGB backlighting, showing various colors illuminating the mechanical switches beneath the keycaps.
5. Customization (QMK/VIA)
The Keychron V1 supports QMK firmware and VIA software, allowing for extensive customization of key assignments, macros, and lighting effects.
5.1 Using VIA Software
VIA is a powerful graphical user interface (GUI) that enables real-time key remapping and macro programming without needing to flash new firmware. To use VIA:
- Download the VIA software from the official Keychron website or the VIA GitHub repository.
- Connect your Keychron V1 keyboard to your computer.
- Launch the VIA application. The software should automatically detect your keyboard.
- Use the intuitive interface to remap keys, create macros, and customize RGB lighting. Changes are applied instantly.

Figure 5.1: Screenshot of the VIA software interface, demonstrating its capabilities for remapping keys and programming macros on the Keychron V1 keyboard. The interface shows different layers and key assignments.
5.2 Hot-Swappable Switches
The Keychron V1 features hot-swappable sockets, allowing you to change mechanical switches without soldering. This supports both 3-pin and 5-pin MX style mechanical switches.
- Removing a Switch: Use the included switch puller. Gently grip the switch from the top and bottom clips and pull straight up.
- Installing a Switch: Align the pins of the new switch with the holes on the PCB. Ensure the pins are straight. Press the switch firmly until it clicks into place. Do not force the switch if it doesn't go in easily, as bent pins can damage the socket.

Figure 5.2: Close-up view demonstrating the hot-swappable nature of the Keychron V1 keyboard, showing different colored switches inserted and one empty socket, indicating easy switch replacement.
5.3 Keycap Replacement
The Keychron V1 comes with double-shot PBT keycaps. You can replace them with other compatible keycaps using the included keycap puller.
- Removing a Keycap: Use the keycap puller to gently grip the keycap from two opposite sides and pull straight up.
- Installing a Keycap: Align the keycap stem with the switch stem and press down firmly until it is seated.
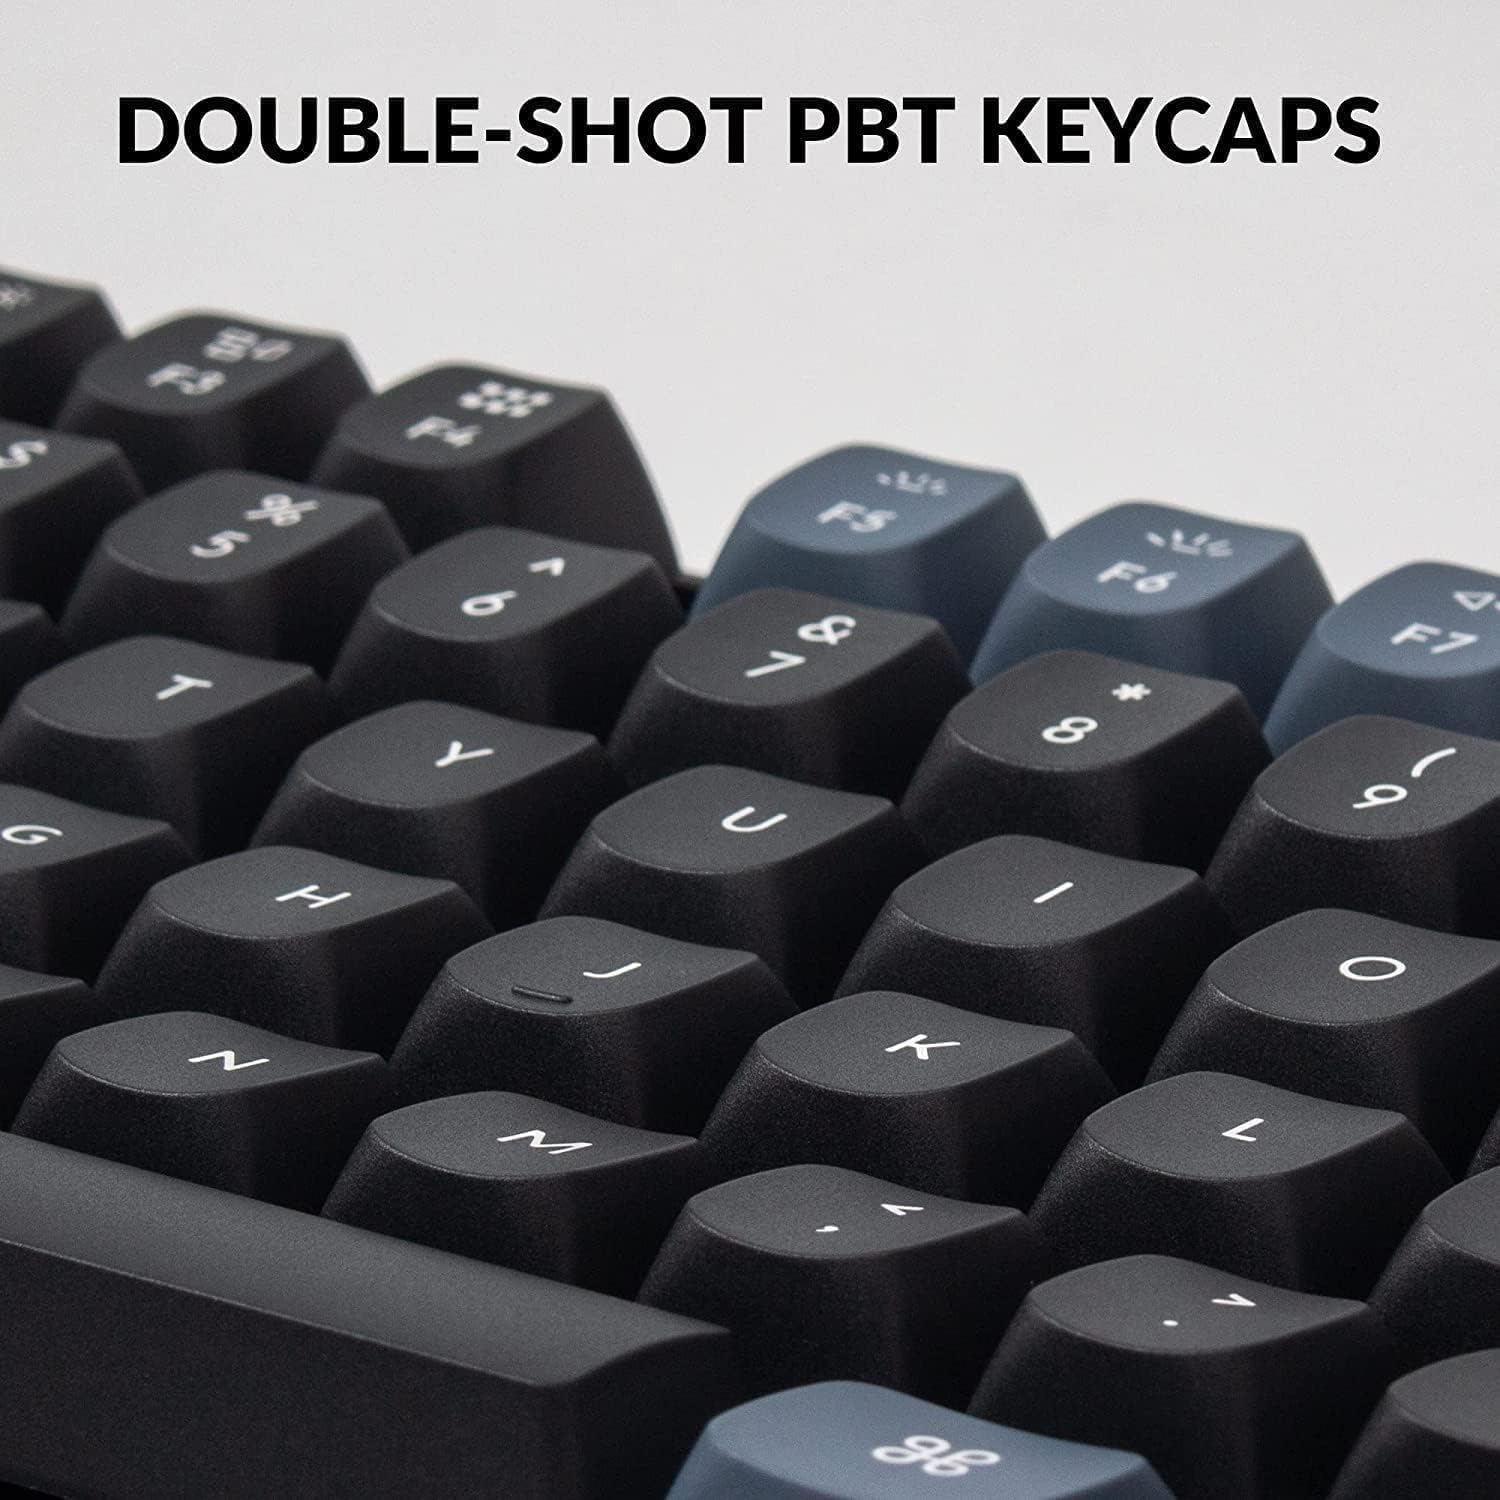
Figure 5.3: Close-up of the double-shot PBT keycaps on the Keychron V1 keyboard, highlighting their texture and legends, which are durable and resistant to shine.
6. Maintenance
6.1 Cleaning the Keyboard
- Disconnect the keyboard from your computer before cleaning.
- Use a can of compressed air to remove dust and debris from between the keycaps.
- For stubborn dirt, remove the keycaps using the keycap puller and clean the plate and switches with a soft brush or microfiber cloth.
- Wipe the keycaps and keyboard case with a slightly damp, lint-free cloth. Avoid using harsh chemicals or abrasive materials.
6.2 Switch Lubrication
The Keychron V1 comes with factory pre-lubricated Keychron K Pro switches for a smoother typing experience. If you replace switches or wish to re-lubricate them, use a specialized switch lubricant and follow proper lubrication techniques to avoid damaging the switches.
7. Troubleshooting
| Problem | Possible Cause | Solution |
|---|---|---|
| Keyboard not responding | Loose cable connection, incorrect USB port, driver issue. | Ensure USB-C cable is securely connected to both keyboard and computer. Try a different USB port. Restart your computer. |
| Keys not registering or double-typing | Faulty switch, debris under keycap/switch. | Remove keycap and switch, clean the area with compressed air. Reinstall switch or replace with a new one if faulty. |
| RGB backlight not working or incorrect | Lighting mode setting, software conflict. | Cycle through lighting modes using keyboard shortcuts. Check VIA software settings for lighting customization. |
| Incorrect key output (Mac/Windows) | Operating system toggle switch is in the wrong position. | Ensure the Mac/Win toggle switch on the side of the keyboard is set to your current operating system. |
8. Specifications
| Feature | Detail |
|---|---|
| Model | HS-V1-B2 |
| Layout | 75% (81 Keys) |
| Connectivity | Wired USB-C |
| Switches | Keychron K Pro Blue Switch (Hot-swappable, 3-pin & 5-pin compatible) |
| Keycaps | Double-shot PBT |
| Backlight | South-facing RGB LED |
| Compatibility | macOS, Windows, Linux |
| Customization | QMK/VIA Support |
| Material | Polybutylene Terephthalate (Keycaps) |
| Item Weight | 2.1 pounds |
| Package Dimensions | 15.7 x 5.9 x 2 inches |

Figure 8.1: Table detailing Keychron K Pro Switch features, including behavior (Linear, Clicky, Tactile), pre-lubrication status, sound level, and suitable applications (Office/gaming, Typist).

Figure 8.2: Exploded diagram illustrating the internal components of the Keychron V1 keyboard, including keycaps, switches, top case, sound absorbing foam, plate, PCB, silicone pad, and bottom case.
9. Warranty and Support
Keychron products typically come with a limited warranty. For detailed warranty information, technical support, and frequently asked questions, please visit the official Keychron website or contact their customer service.
Official Keychron Website: www.keychron.com
For further assistance, refer to the product page on Amazon: Keychron V1 on Amazon