1. Introduction
Thank you for choosing XmnSoly Solar Wall Lights. These outdoor lights are designed to provide efficient and warm illumination for various outdoor areas such as house numbers, fences, mailboxes, and patios. Featuring lens-focused LEDs and a high-capacity battery, they offer reliable dusk-to-dawn lighting. This manual provides essential information for the proper installation, operation, and maintenance of your solar wall lights.

Figure 1.1: XmnSoly Solar Wall Lights in typical outdoor applications.
2. Safety Information
- Always handle the product with care.
- Do not attempt to disassemble or modify the solar light. This may void the warranty and pose a safety risk.
- Keep the solar panel clean to ensure optimal charging performance.
- Ensure the installation surface is stable and can support the weight of the light.
- Avoid installing the light in areas prone to excessive heat or direct exposure to fire.
3. What's in the Box
Upon opening the package, please verify that all components are present and undamaged:
- Solar Wall Light (x2)
- Screw (x6)
- Punched Card (x1)
- Instructions (x1)
4. Specifications
| Feature | Detail |
|---|---|
| Brand | XmnSoly |
| Model Number | YH0615 |
| Dimensions | 4.4"L x 2"W x 2.3"H |
| Material | Acrylic, Acrylonitrile Butadiene Styrene (ABS) |
| Light Color | Warm White (3000K) |
| Brightness | 60 Lumens per light (total 1200 lumen stated for product, likely refers to total output of multiple lights or a different metric) |
| Power Source | Solar Powered |
| Battery | 1800mAh Lithium Ion (included) |
| Working Hours | 6-10 hours (after full charge) |
| Charging Time | 4-6 hours (direct sunlight) |
| Water Resistance | IP65 Waterproof |
| Light Source Type | LED (Lens-Focused) |
| Control Method | Automatic Dusk to Dawn, Push Button On/Off |

Figure 4.1: Side and detailed view of the solar wall light components.

Figure 4.2: Illustration of Lens-Focused LEDs for enhanced light output.
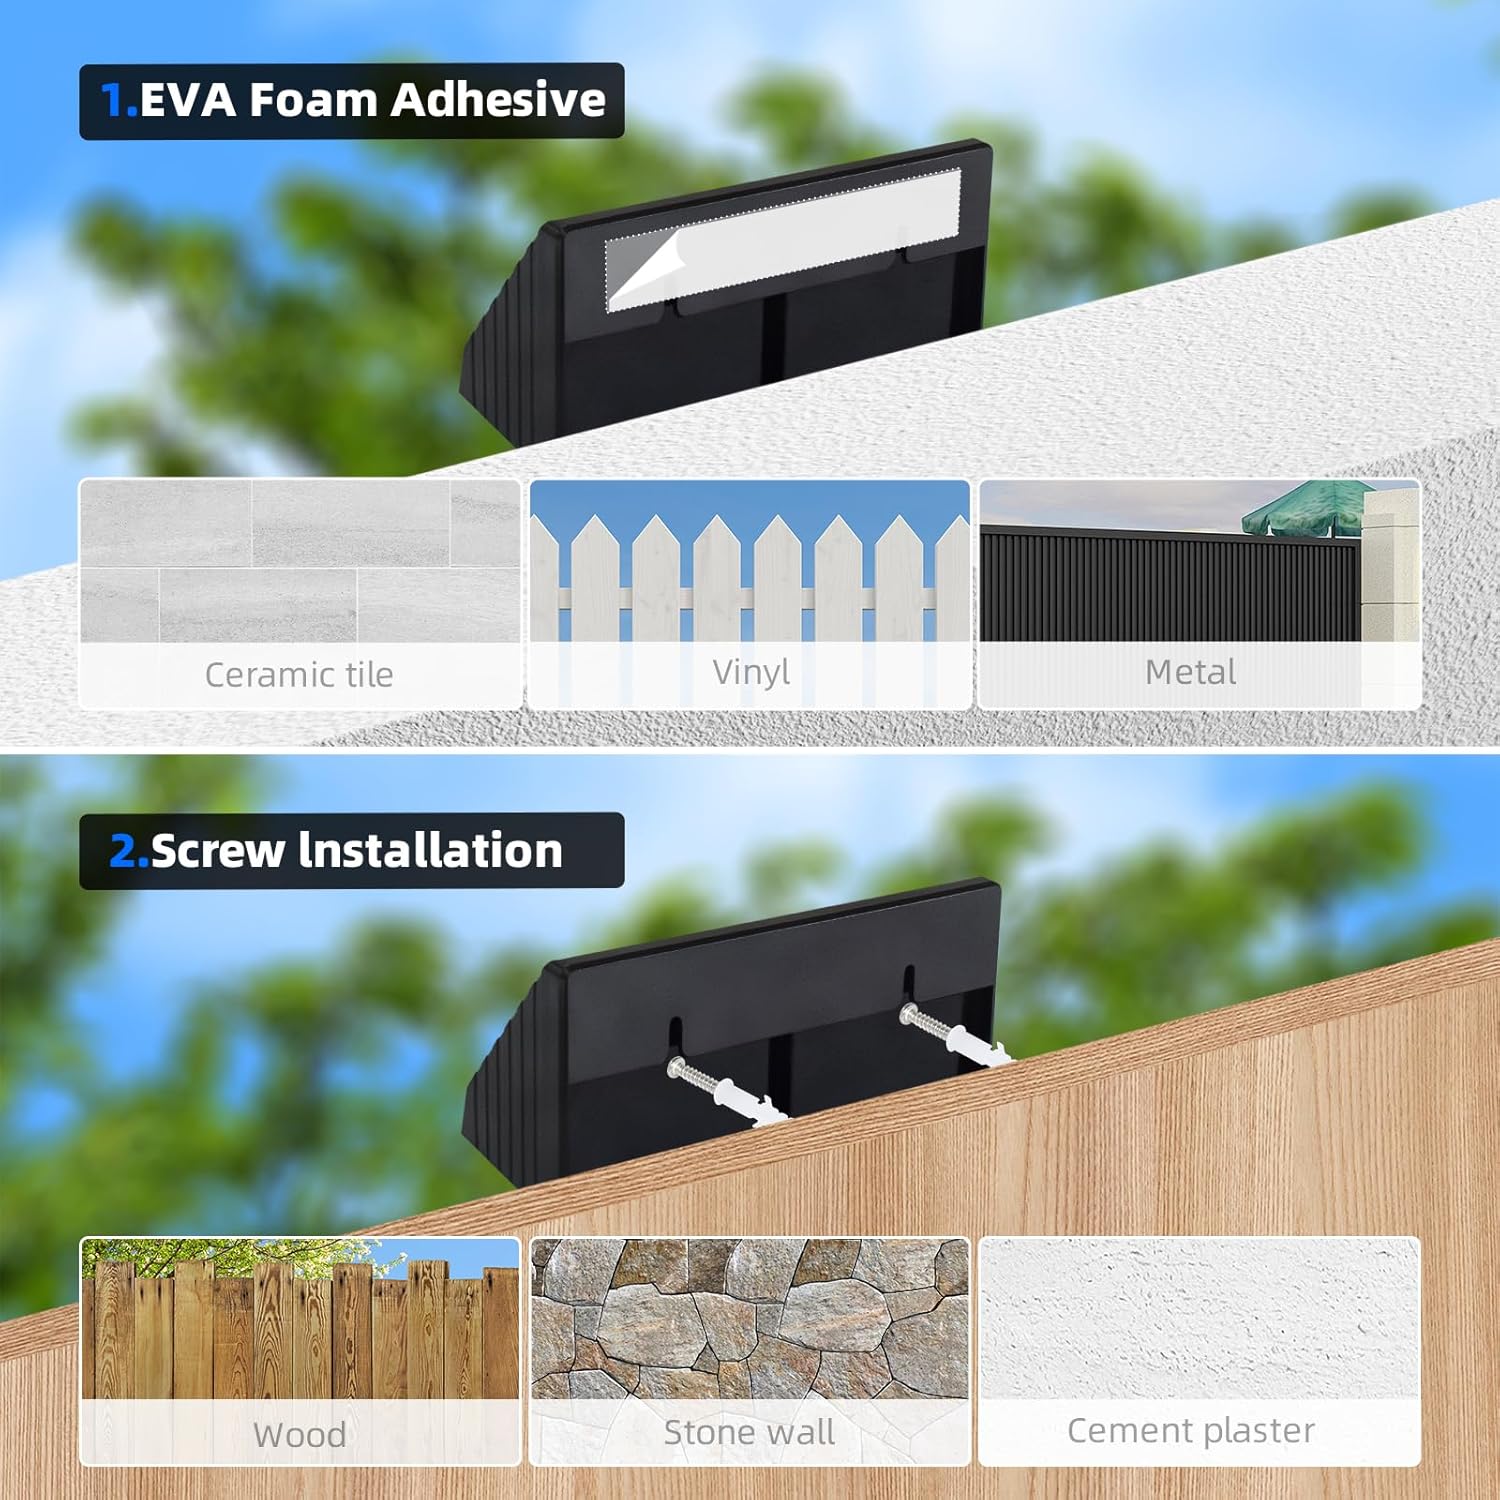
Figure 4.3: IP65 Waterproof design ensures functionality in all weather.
5. Setup and Installation
The XmnSoly Solar Wall Lights are designed for easy installation. For optimal performance, ensure the lights are installed outdoors in direct sunlight.
5.1 Choosing the Correct Installation Position
Select a location that receives ample direct sunlight throughout the day to allow the solar panel to charge effectively. Avoid areas under eaves, trees, or streetlights that might obstruct sunlight or trigger the light sensor prematurely.

Figure 5.1: Guide to selecting the optimal installation position for maximum solar charging.
5.2 Installation Methods
Two primary installation methods are available:
- Adhesive Installation (for smooth surfaces):
Clean the desired surface thoroughly. Apply double-sided adhesive (not included) to the back of the solar light. Press firmly onto the surface for secure attachment. This method is suitable for ceramic tile, vinyl, or metal surfaces. - Screw Installation (for rougher surfaces):
Use the provided punched card as a template to mark the drilling points on the wall. Drill holes at the marked positions. Insert the plastic anchors (if necessary for your wall type). Align the light with the drilled holes and secure it using the provided screws. This method is suitable for wood, stone walls, or cement plaster.

Figure 5.2: Visual guide for adhesive and screw installation methods.
5.3 Initial Activation
Before first use, locate the ON/OFF button (typically a small push button) between the two LED bulbs on the underside of the light. Press this button to activate the light. The light will then automatically charge during the day and illuminate at night.
6. Operating Instructions
Your XmnSoly Solar Wall Lights are designed for automatic operation once activated.
6.1 Automatic Dusk to Dawn Functionality
The integrated light sensor detects ambient light levels. During the day, the solar panel converts sunlight into electricity, charging the internal battery. As dusk falls, the light will automatically turn on. At dawn, it will turn off and resume charging.

Figure 6.1: Automatic Dusk to Dawn operation.
6.2 Light Beam Height and Coverage
The lens-focused LEDs project a concentrated beam. The height and spread of the light beam can vary based on the installation height. For example, at 6.5 feet, the light effectively illuminates a larger ground area, while at 3.3 feet, it provides a more concentrated spot.
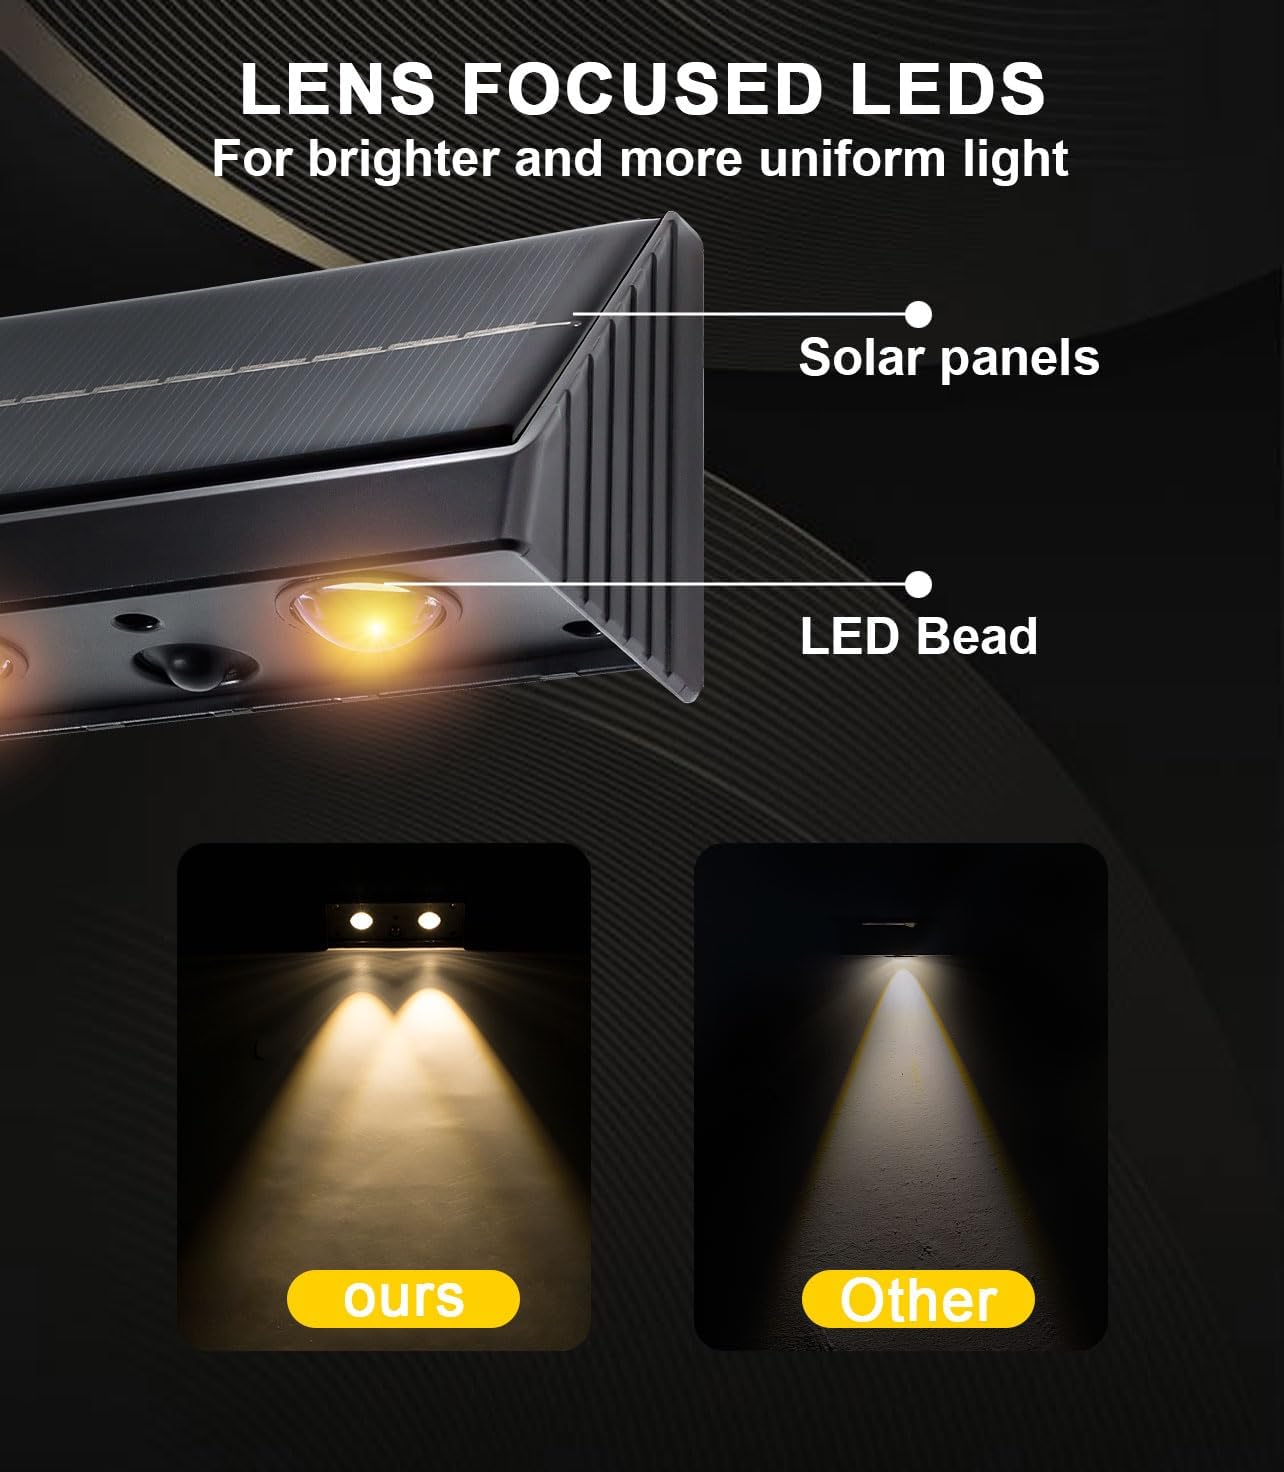
Figure 6.2: Different light effects at varying installation heights.
7. Maintenance
Regular maintenance ensures the longevity and optimal performance of your solar wall lights.
- Cleaning: Periodically wipe the solar panel with a soft, damp cloth to remove dust, dirt, or debris. A clean solar panel ensures efficient charging.
- Inspection: Regularly check the light for any physical damage or loose mounting.
- Battery: The integrated lithium-ion battery is designed for long-term use. No user-serviceable parts are inside.
8. Troubleshooting
If you encounter issues with your solar wall lights, refer to the following common problems and solutions:
| Problem | Possible Cause | Solution |
|---|---|---|
| Light does not turn on at night. | 1. ON/OFF button not pressed. 2. Insufficient sunlight for charging. 3. Light sensor detecting ambient light. | 1. Ensure the ON/OFF button is pressed to activate the light. 2. Relocate the light to an area with direct sunlight for 4-6 hours daily. 3. Ensure the light is not installed near other light sources (e.g., streetlights, porch lights) that might prevent it from activating. |
| Light stays on for a short duration. | 1. Insufficient battery charge. 2. Solar panel is dirty. | 1. Ensure the light receives full direct sunlight for charging. Consider a different location. 2. Clean the solar panel regularly to maximize charging efficiency. |
| Light flickers or is dim. | 1. Low battery charge. 2. Internal component issue. | 1. Allow the light to charge fully in direct sunlight. 2. If the problem persists after full charge, contact customer support. |
9. Warranty and Support
XmnSoly stands behind the quality of its products. For specific warranty details, please refer to the product packaging or contact your retailer. If you require technical assistance or have questions not covered in this manual, please contact XmnSoly customer support through the retailer's platform or the official brand website.
No official product videos from the seller are available for embedding at this time.