1. Introduction
This manual provides detailed instructions for the setup, operation, and maintenance of your XTUGA CT80 Audio Mixer. Please read this manual thoroughly before using the device to ensure proper functionality and safety. The XTUGA CT80 is an 8-channel audio mixer designed for various applications including recording, live streaming, and studio use, offering precise audio control and versatile connectivity.
2. Safety Information
- Ensure the power supply matches the device's requirements.
- Do not expose the mixer to water or excessive moisture.
- Avoid placing the mixer near heat sources or in direct sunlight.
- Do not attempt to open or repair the device yourself. Refer to qualified service personnel.
- Disconnect power before cleaning or when not in use for extended periods.
3. Package Contents
Upon opening the package, verify that all items are present and in good condition:
- XTUGA CT80 Audio Mixer
- AC Power Adapter
- Instruction Manual (this document)

Image: XTUGA CT80 Audio Mixer and included accessories.
4. Product Overview
The XTUGA CT80 features an intuitive layout with various inputs, controls, and outputs for comprehensive audio management.

Image: Detailed labeled diagram of the XTUGA CT80 Audio Mixer's front panel.
- 1-8. Mic/Line Inputs: XLR (Canon) and 1/4-inch Line inputs for microphones and instruments.
- Gain Control: Adjusts input sensitivity for each channel.
- 3-Band EQ: High, Mid, and Low frequency adjustments for tone shaping.
- AUX/FX Controls: Sends for auxiliary effects and monitoring.
- Pan Control: Adjusts stereo positioning (left/right).
- Channel Volume Faders: Individual volume control for each input channel.
- Digital MP3 Player: USB port and controls for MP3/WAV/WMA playback and recording.
- Bluetooth Connectivity: For wireless audio streaming.
- +48V Phantom Power: Button to enable phantom power for condenser microphones.
- Main Output: XLR and 1/4-inch outputs for connecting to speakers or amplifiers.
- Headphone Output: 1/4-inch jack for monitoring.
- LED Level Meters: Visual indication of audio levels.
5. Setup
5.1 Power Connection
Connect the provided AC power adapter to the mixer's power input on the rear panel, then plug it into a suitable power outlet. Ensure the power switch is in the OFF position before connecting.
5.2 Connecting Audio Devices
The CT80 offers various input options:
- Microphones: Connect XLR microphones to the MIC inputs (1-8). Activate +48V Phantom Power for condenser mics.
- Instruments/Line Devices: Connect instruments or line-level devices (keyboards, guitars with preamps) to the 1/4-inch LINE inputs.
- External Playback Devices (RCA): Use the RCA TAPE IN inputs for devices like CD players or older audio equipment.

Image: Connecting a microphone and enabling 48V Phantom Power.
5.3 Connecting to a Computer (USB)
The mixer can be connected to a PC or Mac via USB for recording and sound editing. Use a USB Type-A to USB Type-A cable (not included) to connect the mixer's USB port to your computer.
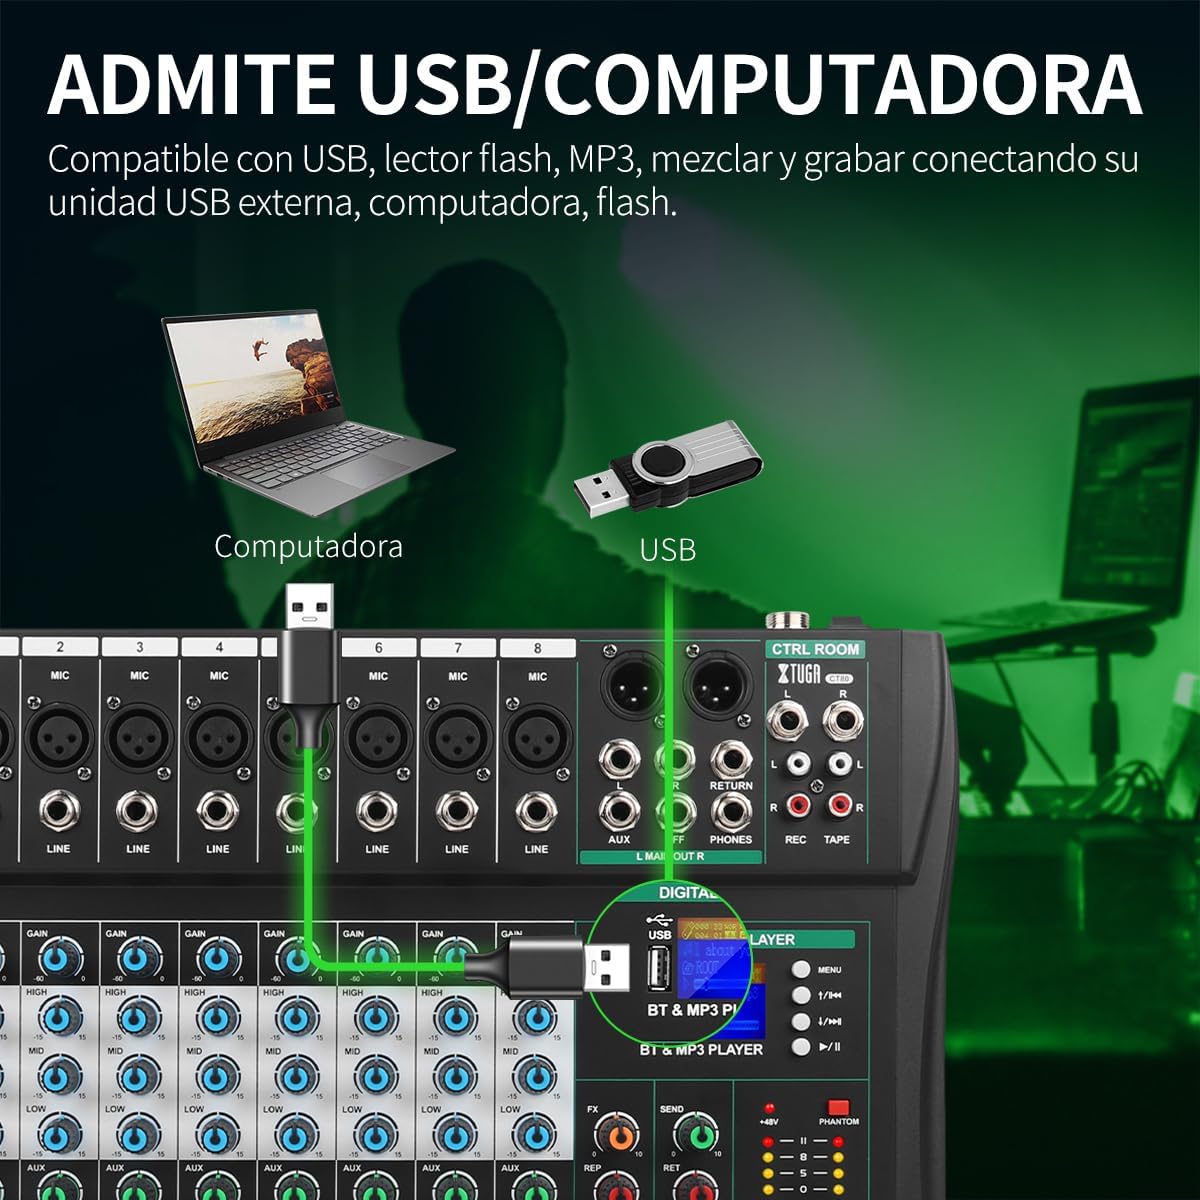
Image: USB connection setup for recording and playback with a computer.
5.4 Connecting to Speakers/Headphones
- Main Speakers: Connect your main speakers or amplifier to the L MAIN OUT R (XLR or 1/4-inch) outputs.
- Headphones: Plug your headphones into the PHONES 1/4-inch jack for monitoring.
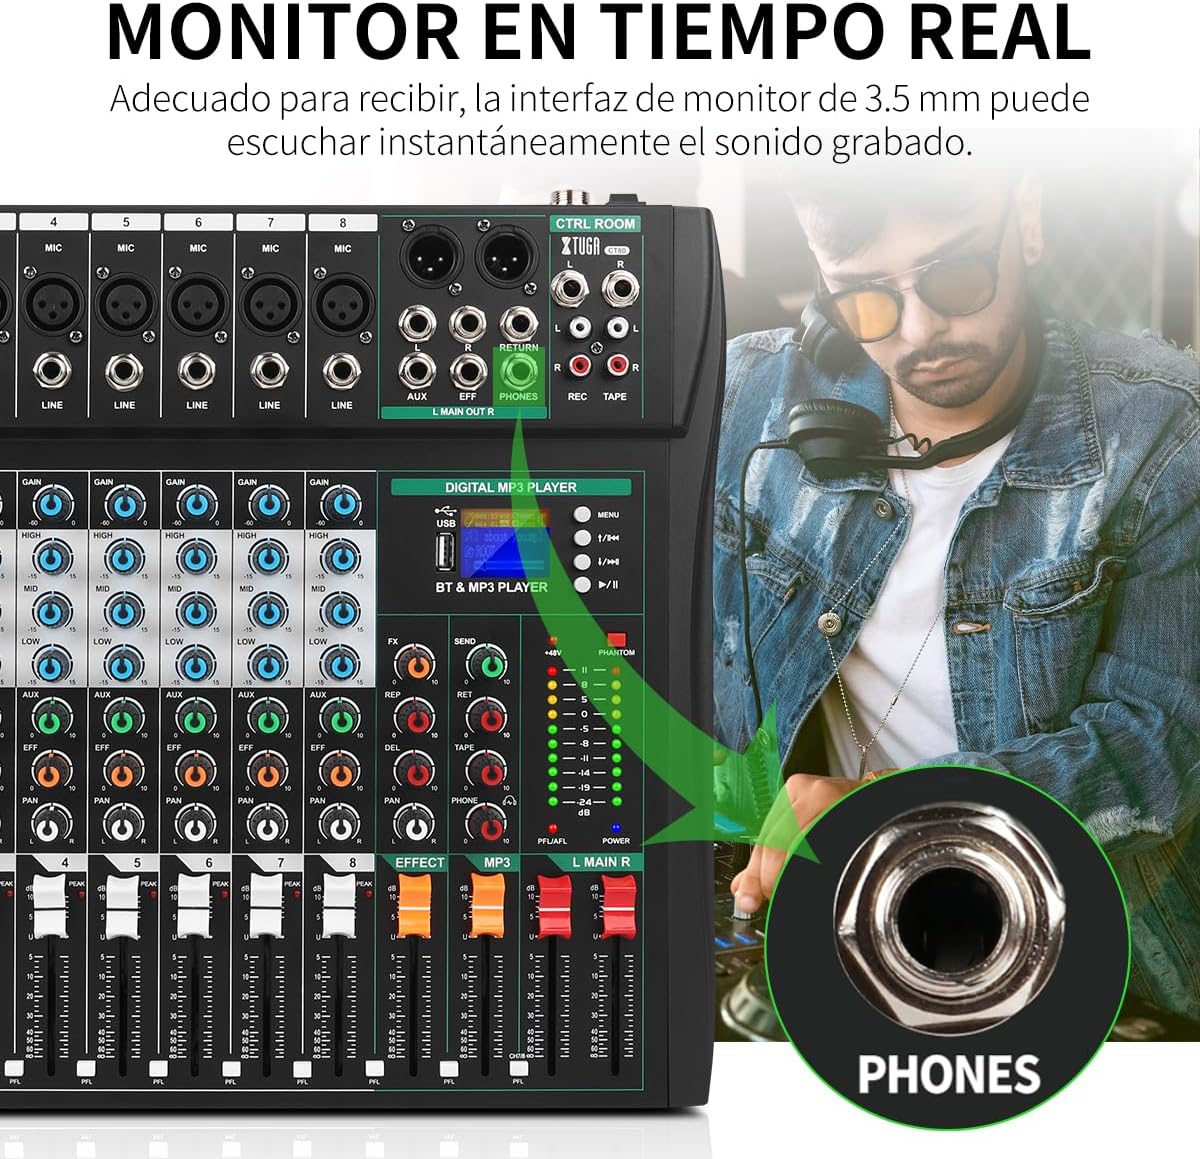
Image: Headphone connection for real-time audio monitoring.
6. Operating Instructions
6.1 Basic Operation
- Power on the mixer using the rear panel switch.
- Adjust the GAIN knob for each input channel to achieve an optimal signal level without clipping (indicated by the PK! LED).
- Use the channel volume faders to set the individual volume for each input.
- Adjust the MAIN R/L faders for the overall output volume.
6.2 Equalization (EQ)
Each channel features a 3-band EQ (HIGH, MID, LOW) to shape the tone of your audio. Rotate the knobs to boost or cut frequencies.

Image: Adjusting the 3-band equalizer for precise sound control.
6.3 Digital MP3 Player & Bluetooth
The built-in digital MP3 player supports USB drive playback and Bluetooth streaming.
- USB Playback: Insert a USB flash drive with MP3/WAV/WMA files into the USB port. Use the player controls (MENU, Play/Pause, Skip) to navigate.
- Bluetooth: Press the BT button on the MP3 player section. On your device (phone, tablet), search for "BT-Speaker" and pair. You can then stream audio wirelessly.

Image: Bluetooth connectivity for wireless audio streaming.
Video: Official XTUGA CT80 audio mixer features demonstration, including USB and Bluetooth connectivity.
7. Maintenance
- Clean the mixer's surface with a soft, dry cloth.
- Avoid using abrasive cleaners or solvents.
- Keep the mixer free from dust and debris.
- Store in a cool, dry place when not in use.
8. Troubleshooting
| Problem | Possible Cause | Solution |
|---|---|---|
| No power | Power cable not connected; Power switch off; Faulty power adapter | Check power connections; Turn power switch ON; Replace power adapter if faulty. |
| No sound output | Volume faders too low; Incorrect input/output connections; Mute engaged | Increase volume faders; Verify all cables are correctly connected; Check if any channels or main output are muted. |
| Distorted audio | Input gain too high; Faulty cables/microphones | Reduce GAIN knob; Test with different cables/microphones. |
| Bluetooth not connecting | Mixer not in pairing mode; Device too far; Interference | Ensure mixer's BT mode is active; Move device closer; Reduce interference sources. |
Video: A user demonstrating a power issue with the XTUGA mixer, showing the power adapter and the mixer's controls.
9. Specifications
| Feature | Detail |
|---|---|
| Brand | XTUGA |
| Model Number | CT80 |
| Number of Channels | 8 |
| Connectivity Technology | Bluetooth, USB |
| Phantom Power | +48V |
| Item Weight | 9.68 pounds |
| Package Dimensions | 17.99 x 17.56 x 4.84 inches |
| Country of Origin | China |
10. Warranty & Support
For warranty information or technical support, please refer to the official XTUGA website or contact their customer service directly. The product may be covered by a manufacturer's warranty. Please retain your proof of purchase for any warranty claims.
You can visit the XTUGA Store on Amazon for more information and product offerings.