Marcree d20
Marcree 0.6 Cub Small Safe Box User Manual
Model: d20
Introduction
This manual provides essential information for the safe and effective use of your Marcree 0.6 Cub Small Safe Box. Please read it thoroughly before installation and operation to ensure proper functionality and security.
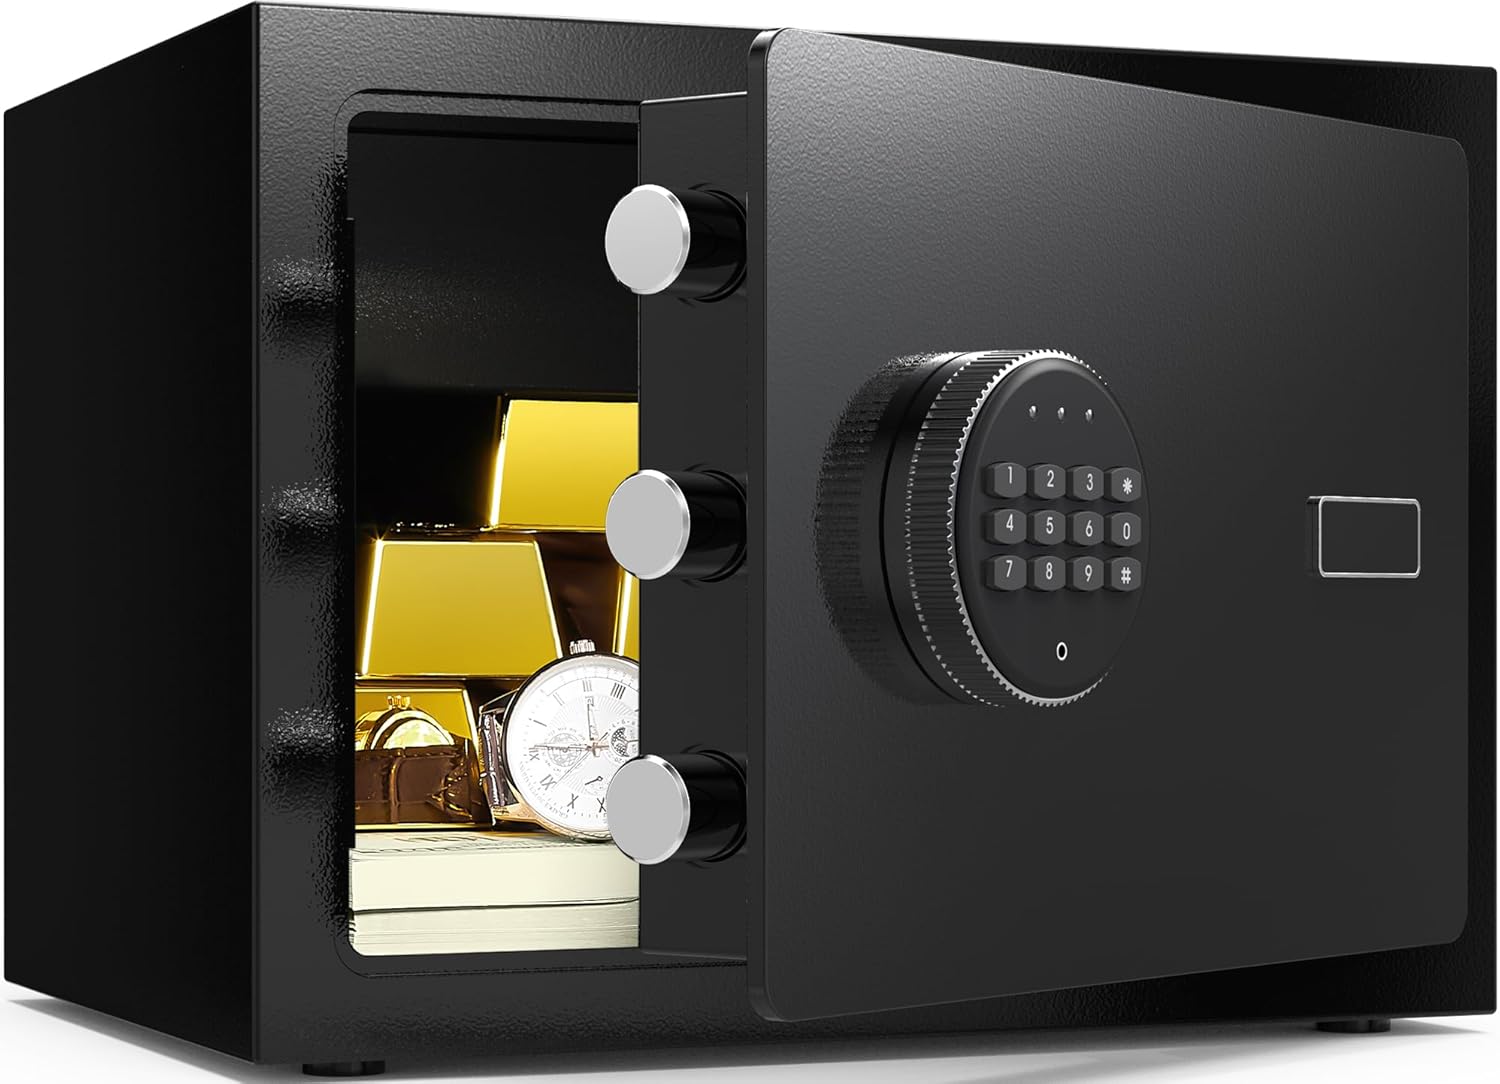
Image: The Marcree 0.6 Cub Small Safe Box, shown with its door open, displaying various valuables such as gold bars, a wristwatch, and stacks of cash, highlighting its storage capacity.
Key Features
- Solid Alloy Steel Construction: Built from high-quality cold carbon steel for enhanced durability and resistance to tampering.
- Three 20mm Locking Bolts: Features three robust 20mm diameter locking bolts for maximum security against prying attempts.
- Electronic Digital Keypad: Provides quick and secure access with a programmable 3-8 digit code.
- Multiple Unlocking Methods: Offers flexibility with digital code, emergency key, and emergency battery box options.
- Dual Alarm System: Activates an alarm after three incorrect code entries or upon detecting violent impact.
- Internal LED Light: Illuminates the interior for better visibility of contents.
- Protective Interior Lining: The bottom is lined with egg nubs to prevent scratches and damage to stored items.
- Mounting Capability: Equipped with pre-drilled holes and expansion screws for secure wall or floor mounting.

Image: A short animated GIF showing the three solid locking bolts of the safe engaging and disengaging, illustrating the robust security mechanism.
Safety Information
- Always keep the emergency keys in a secure location away from the safe. Do not store them inside the safe.
- Ensure the safe is securely mounted to a wall or floor to prevent unauthorized removal.
- Do not expose the safe to extreme temperatures or humidity.
- Replace batteries promptly when the low battery indicator appears to avoid being locked out.
- Keep the keypad clean and dry. Avoid using abrasive cleaners.
Package Contents
Verify that all items are present in the package:
- Marcree 0.6 Cub Small Safe Box
- Emergency Keys (2)
- Emergency Battery Box
- Mounting Bolts (2 expansion screws)
- User Manual (this document)
Specifications

Image: A visual representation of the safe's dimensions, indicating a height of 7.87 inches, a width of 12.20 inches, and a depth of 7.87 inches. Accompanying icons suggest suitable items for storage, including jewelry, pistols, cash, watches, and medicine.
| Feature | Detail |
|---|---|
| Brand | Marcree |
| Model Number | d20 |
| Product Dimensions | 7.87"D x 12.2"W x 7.87"H |
| Internal Volume | 0.5 cubic feet (approx. 0.6 Cub) |
| Lock Type | Electronic Digital Keypad |
| Material | Alloy Steel |
| Special Features | Alarm System, Anti-Theft, Combination Lock, Portable, Sensor Light |
| Mounting Type | Floor Mount, Wall Mount |
| Item Weight | 8.3 Pounds |
| Alarm | Yes (Dual Alarm System) |
| Water Resistance Level | Not Water Resistant |
| Batteries Required | Yes (not included) |
Setup
1. Installing Batteries
The safe requires 4 AA batteries (not included). The battery compartment is located on the inside of the safe door.
- Open the safe using the emergency key (refer to "Initial Opening" below).
- Locate the battery compartment cover on the inside of the door.
- Remove the cover and insert 4 AA batteries, ensuring correct polarity (+/-).
- Replace the battery compartment cover.
2. Initial Opening (Using Emergency Key)
Upon first use or if the digital code is forgotten, the safe can be opened with the emergency key.
- Locate the emergency keyhole, usually concealed behind a small cover on the keypad panel.
- Insert one of the emergency keys into the keyhole.
- Turn the key clockwise while simultaneously turning the knob clockwise to open the safe door.
- Keep emergency keys in a safe place outside the safe.
3. Setting the Digital Code
You can program a personal digital code (3-8 digits) for convenient access.
- With the safe door open, press the red reset button located on the inside of the door, near the hinge. A beep will sound, and the yellow indicator light on the keypad will illuminate.
- Within 5 seconds, enter your desired 3-8 digit code on the keypad.
- Press the "#" button to confirm. A beep will sound, and the yellow light will turn off, indicating the code is set.
- Test the new code with the door open before closing it.
4. Mounting the Safe
The safe can be securely mounted to a wall or floor using the pre-drilled holes and included expansion screws.

Image: A step-by-step diagram illustrating the process of mounting the safe to a wall or floor. Step 1 shows drilling pilot holes, Step 2 shows inserting expansion screws, and Step 3 shows securing the safe.
- Choose a suitable location on a solid wall or floor.
- Mark the positions for the two pre-drilled holes on the back or bottom of the safe onto the mounting surface.
- Drill pilot holes using an appropriate drill bit for your wall/floor material.
- Align the safe with the drilled holes and insert the expansion screws through the safe's holes into the wall/floor.
- Tighten the screws firmly to secure the safe.
Operating the Safe
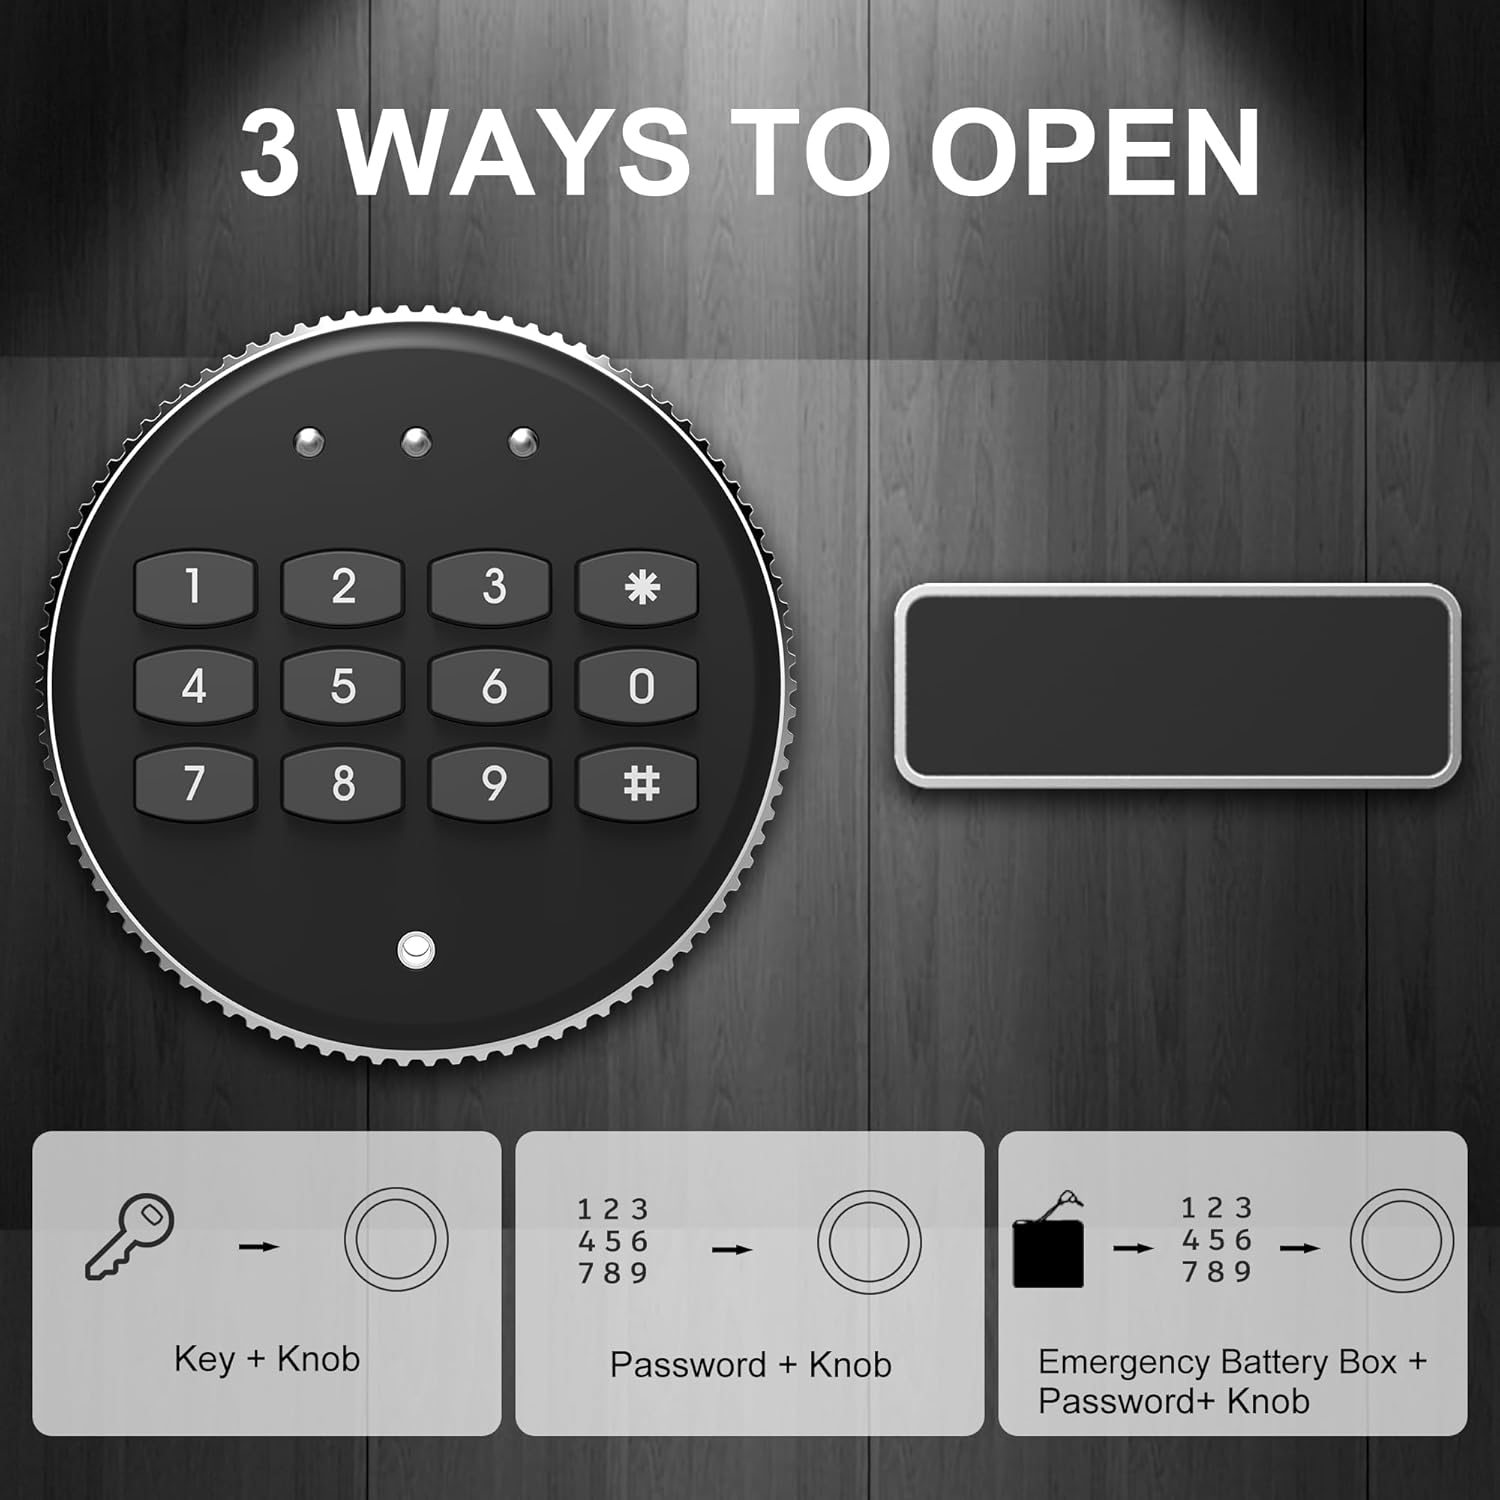
Image: A visual guide detailing the three distinct methods for opening the safe: using the emergency key in conjunction with the knob, entering the digital password followed by turning the knob, and utilizing the emergency battery box with the password and knob.
1. Opening with Digital Code

Image: A short animated GIF demonstrating the safe door opening and closing smoothly after a correct digital code has been entered.
- Enter your 3-8 digit personal code.
- Press the "#" button. The green indicator light will illuminate.
- Within 5 seconds, turn the knob clockwise to open the door.
2. Opening with Emergency Key
This method is used if you forget your code or if the batteries are dead.
- Remove the emergency keyhole cover.
- Insert the emergency key and turn it clockwise.
- Simultaneously turn the knob clockwise to open the door.
3. Opening with Emergency Battery Box + Password
If the internal batteries are depleted and you do not have the emergency key readily available, you can use the external emergency battery box.

Image: A short animated GIF demonstrating the insertion of the emergency battery box into the external power port of the safe, providing temporary power for operation.
- Insert 4 AA batteries (not included) into the emergency battery box.
- Plug the emergency battery box into the external power port on the keypad panel.
- Enter your digital code and press "#". The green indicator light will illuminate.
- Within 5 seconds, turn the knob clockwise to open the door.
4. Alarm System
The safe is equipped with a dual alarm system for enhanced security.

Image: A graphic illustrating the safe's smart alarm system. It highlights that after three consecutive incorrect password entries, the safe will activate a continuous buzzer for 5 minutes without interruption.
- Incorrect Password Alarm: If three consecutive incorrect passwords are entered, the safe's buzzer will sound continuously for 5 minutes.
- Tamper Alarm: The safe will also trigger an alarm if subjected to violent blows or shaking.
To silence the alarm, enter the correct digital code or use the emergency key.
Maintenance
- Battery Replacement: Replace batteries annually or when the low battery indicator light appears.
- Cleaning: Wipe the exterior with a soft, damp cloth. Avoid harsh chemicals or abrasive materials.
- Interior Protection: The safe's interior is lined with egg nubs to protect stored items from scuffing. Ensure this lining remains intact.

Image: A short animated GIF showcasing the protective egg-crate foam lining inside the safe, designed to cushion and prevent damage to stored items.
Troubleshooting
| Problem | Possible Cause | Solution |
|---|---|---|
| Safe does not open with digital code. | Incorrect code entered; batteries are low or dead. | Re-enter the correct code. Replace batteries or use the emergency battery box. Use emergency key. |
| Keypad is unresponsive. | Dead batteries; loose battery connection. | Replace batteries, ensuring correct polarity. Check battery connections. Use emergency battery box. |
| Alarm sounds unexpectedly. | Three incorrect code entries; physical impact/shaking. | Enter the correct code or use the emergency key to silence. Avoid tampering with the safe. |
| Cannot set new code. | Reset button not pressed correctly; code not confirmed within 5 seconds. | Ensure the red reset button is pressed firmly and the yellow light illuminates. Enter code and press '#' within 5 seconds. |
Support
If you encounter any problems during use or have questions about the product, please contact Marcree customer service. We are committed to providing satisfactory assistance.
For further assistance, please refer to the official Marcree store on Amazon: Marcree Store