1. Introduction
This manual provides essential information for the installation, operation, and maintenance of the GETPARTS 98-0600022-01LF replacement thermal printhead. This printhead is designed for use with TSC MH340, MH341, and MU341 thermal barcode printers, offering a 300dpi resolution for high-quality printing.
Please read this manual thoroughly before attempting any installation or operation to ensure proper function and longevity of the printhead.
2. Safety Information
- Power Disconnection: Always disconnect the printer from its power source before installing, removing, or performing any maintenance on the printhead.
- Static Electricity: Printheads are sensitive to static electricity. Handle the printhead by its edges and avoid touching the print elements or electrical connectors. Use anti-static precautions if available.
- Hot Surface: The printhead can become very hot during operation. Allow it to cool down completely before handling.
- Fragile Component: The printhead is a delicate component. Avoid dropping it or subjecting it to impact.
- Professional Installation Recommended: Printhead replacement can be complex. If you are unsure, seek assistance from a qualified technician.
3. Package Contents
Verify that all items are present in the package:
- 1x GETPARTS 98-0600022-01LF Thermal Printhead (300dpi)
- (Note: While "Toner Cartridges" are listed in product specifications, this printhead package typically includes only the printhead itself.)

Figure 3.1: The GETPARTS 98-0600022-01LF printhead shown in its protective packaging.
4. Specifications
| Feature | Description |
|---|---|
| Part Number | 98-0600022-01LF |
| Resolution | 300 dpi x 300 dpi |
| Printing Technology | Thermal |
| Compatibility | TSC MH340, MH341, MU341 Thermal Barcode Printers |
| Item Weight | 3.52 ounces |
| Package Dimensions | 7.5 x 4 x 2.4 inches |
| Manufacturer | GETPARTS |
5. Setup and Installation
This section outlines the general procedure for replacing a thermal printhead. Specific steps may vary slightly depending on your printer model. Always refer to your printer's official service manual for detailed instructions.
- Prepare the Printer:
- Turn off the printer and disconnect it from the power outlet.
- Open the printer's top cover and any necessary access panels to expose the printhead assembly.
- Remove any media (labels, ribbon) from the printer path.
- Remove the Old Printhead:
- Carefully locate the screws or clips securing the old printhead.
- Disconnect any ribbon cables or connectors attached to the printhead. Note their orientation.
- Remove the old printhead, handling it carefully.
- Install the New Printhead:
- Unpack the new GETPARTS printhead. Handle it by its metal frame, avoiding contact with the print elements.
- Align the new printhead with the mounting points in the printer.
- Secure the printhead with the screws or clips removed earlier. Do not overtighten.
- Reconnect all ribbon cables and connectors, ensuring they are seated correctly and in the proper orientation.
- Close and Test:
- Close all printer covers and access panels.
- Reconnect the printer to the power outlet and turn it on.
- Load appropriate media and perform a test print to verify proper installation and print quality.
- If print quality is poor, perform printhead calibration and cleaning as per your printer's manual.


Figure 5.1: Various views of the GETPARTS printhead, showing its components and connectors for installation reference.
6. Operating Guidelines
Once installed, the printhead operates as part of your thermal barcode printer. Adhere to the following guidelines for optimal performance:
- Use Quality Media: Always use high-quality thermal labels and ribbons (if applicable) recommended for your printer model. Poor quality media can cause premature printhead wear and reduced print quality.
- Proper Settings: Ensure your printer's darkness and speed settings are appropriate for the media being used. Excessive heat or speed can shorten printhead life.
- Avoid Obstructions: Ensure the print path is clear of any debris or foreign objects that could scratch or damage the printhead.
7. Maintenance
Regular maintenance helps extend the life of your printhead and ensures consistent print quality.
- Cleaning Frequency: Clean the printhead regularly, typically after every few rolls of labels or ribbon, or whenever print quality degrades.
- Cleaning Procedure:
- Turn off and unplug the printer. Allow the printhead to cool.
- Gently wipe the print elements with a lint-free cloth or cotton swab lightly moistened with isopropyl alcohol (99% pure).
- Allow the printhead to dry completely before closing the printer and resuming operation.
- Avoid Abrasives: Never use abrasive materials or harsh chemicals to clean the printhead.
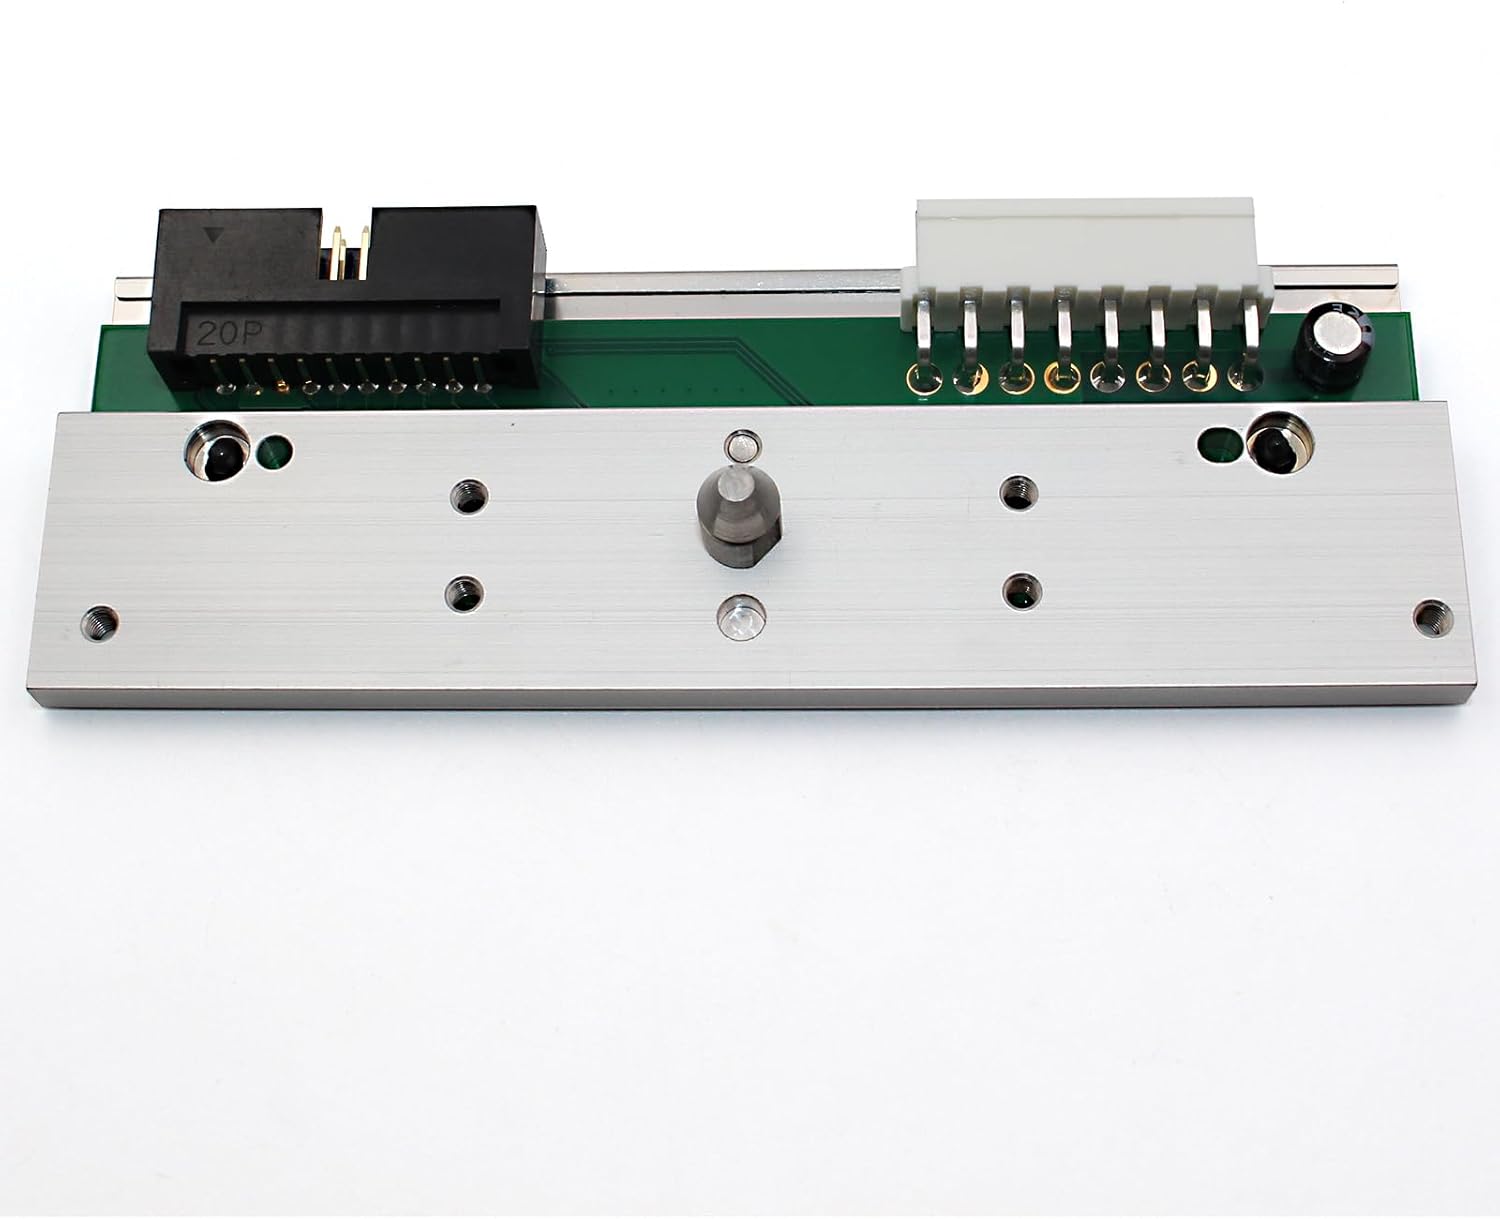

Figure 7.1: Views of the printhead's underside and side, useful for understanding its structure during cleaning and maintenance.
8. Troubleshooting
If you encounter issues with print quality after installing the new printhead, consider the following common troubleshooting steps:
- Poor Print Quality (Faint, Streaky, Missing Lines):
- Clean the Printhead: Follow the cleaning procedure in Section 7.
- Adjust Darkness/Heat Settings: Increase the print darkness setting in your printer's driver or control panel.
- Check Media: Ensure you are using the correct type and quality of labels/ribbon.
- Verify Installation: Recheck that the printhead is securely seated and all cables are properly connected.
- Printer Not Recognizing Printhead:
- Reseat Connectors: Turn off the printer, disconnect power, and reseat all printhead cables.
- Firmware Update: Ensure your printer's firmware is up to date. Consult your printer's manufacturer website.
If problems persist, contact GETPARTS customer support or a qualified printer technician.
9. Warranty and Support
The GETPARTS 98-0600022-01LF Thermal Printhead comes with a 3-month warranty from the date of purchase.
After-Sales Service: GETPARTS offers thoughtful after-sales service. If you are not satisfied with your purchase for any reason, you may return it for a refund. For any product problems or inquiries, please contact GETPARTS customer support directly. They are committed to resolving issues promptly.
For support, please refer to the contact information provided with your purchase or visit the GETPARTS store on Amazon: GETPARTS Store