OUTIGO 1
OUTIGO Cordless Electric Pruning Shears Instruction Manual
Brand: OUTIGO | Model: 1
1. Introduction
Thank you for choosing the OUTIGO Cordless Electric Pruning Shears. This powerful and efficient tool is designed to make pruning tasks easier and more effective in various environments, including gardens, orchards, and vineyards. Featuring sharp SK7 carbon steel blades and a robust brushless motor, it offers precise cuts up to 40mm in diameter. Please read this manual carefully before operation to ensure safe and optimal performance of your new pruning shears.
2. Safety Instructions
Always prioritize safety when operating power tools. Failure to follow these instructions may result in serious injury.
- Read the Manual: Familiarize yourself with all operating procedures and safety warnings before use.
- Personal Protective Equipment (PPE): Always wear appropriate safety glasses, gloves, and sturdy footwear.
- Keep Hands Clear: Never place hands or fingers near the blades when the tool is powered on or connected to a battery.
- Secure Grip: Maintain a firm grip on the tool during operation.
- Work Area: Ensure your work area is clear of obstructions and bystanders.
- Battery Safety: Use only the original charger and batteries. Do not expose batteries to extreme temperatures or moisture. Disconnect the battery when not in use, during cleaning, or before performing any maintenance.
- Accidental Start-up Prevention: The shears require a double-press of the trigger to start, preventing accidental activation.
- Children and Unauthorized Users: Keep the tool out of reach of children and ensure only trained individuals operate it.
3. Package Contents
Your OUTIGO Electric Pruning Shears package includes the following items:
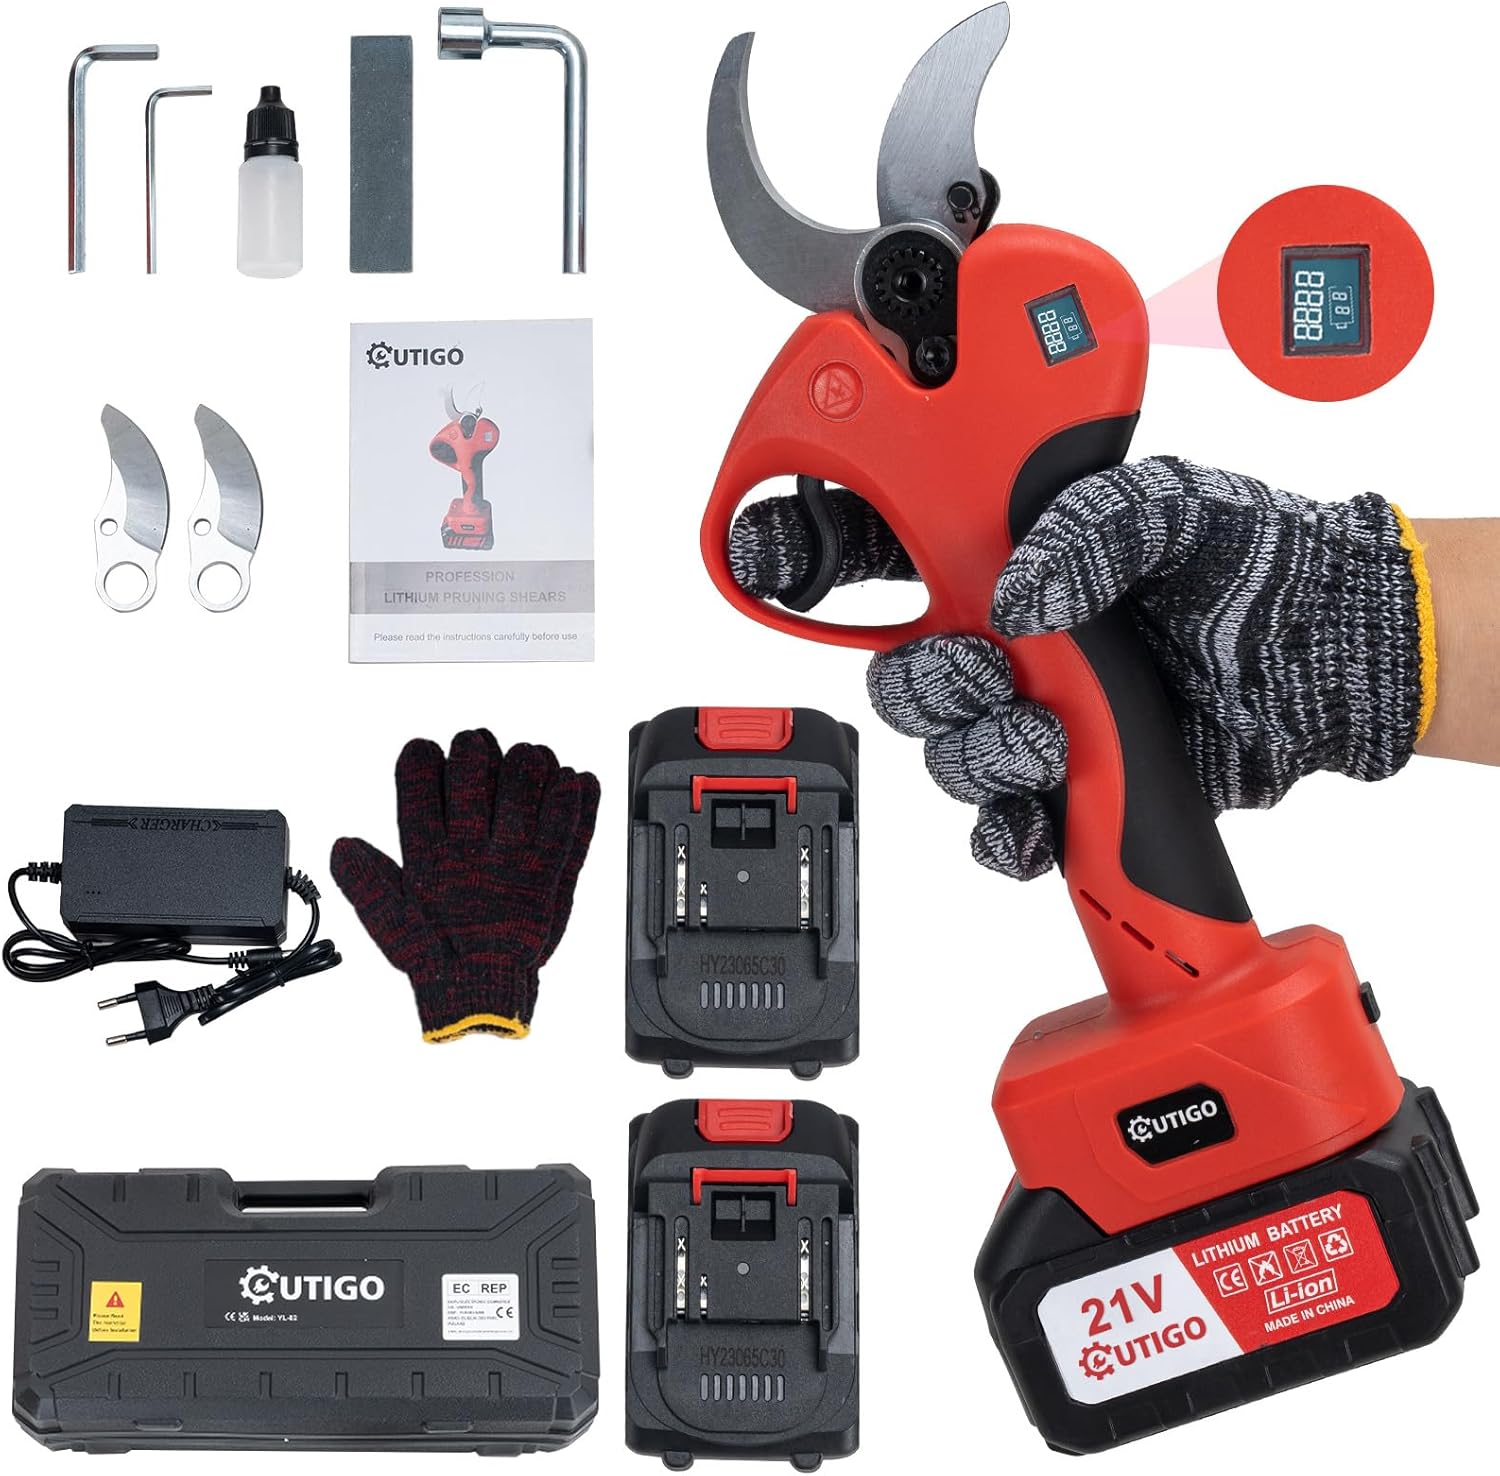
Image: Complete package contents including the pruning shears, batteries, charger, and tools.
- 1 x OUTIGO Cordless Electric Pruning Shears
- 2 x 3.0 Ah Rechargeable Lithium-ion Batteries
- 2 x Spare Blades
- 1 x Pair of Gloves
- 3 x Wrenches (for maintenance)
- 1 x Battery Charger
- 1 x Instruction Manual (this document)
- 1 x Empty Oil Bottle (for lubricant)
- 1 x File (for sharpening)
- 1 x Storage Box
4. Setup
4.1 Charging the Batteries
- Connect the charger to a standard power outlet.
- Insert a 3.0 Ah Lithium-ion battery into the charger.
- Allow 2 to 4 hours for a full charge. The charger indicator will show charging status.
- Always ensure batteries are fully charged before extensive use for optimal performance and battery longevity.
4.2 Installing the Battery
- Ensure the pruning shears are turned off.
- Align the charged battery with the battery slot at the base of the shears.
- Slide the battery firmly into place until it clicks, indicating it is securely locked.
- To remove the battery, press the power removal button (located at the base of the handle) and slide the battery out.

Image: Diagram showing the power removal button and other components.
5. Operating Instructions
5.1 Powering On/Off
- With the battery installed, press the trigger twice in quick succession to power on the shears. The blades will open.
- The integrated LED display will show the remaining battery power and the number of cuts made.
- To power off, press and hold the trigger for 3-4 seconds until the blades close and the unit powers down.

Image: Close-up of the LCD display showing battery level and cut count.

Image: Illustration of the double-press startup method.
5.2 Adjusting Cutting Diameter
- The shears have a maximum cutting diameter of 40mm.
- To switch to a smaller cutting diameter (e.g., 20mm), press and hold the trigger for 2 seconds until you hear a beep. The blades will adjust to the smaller opening.
- Repeat the process to switch back to the larger cutting diameter.

Image: Visual guide on how to adjust the cutting diameter.
5.3 General Usage Tips
- Position the branch deep into the blades for a clean cut.
- Avoid cutting metal or excessively hard materials.
- The brushless motor provides efficient and powerful cutting with reduced friction.
- The shears are suitable for various applications including pruning vines, potted plants, fruit trees, and general garden maintenance.

Image: Illustration highlighting the powerful brushless motor.

Image: Examples of various applications for the pruning shears.

Image: Comparison illustrating the benefits of electric pruning shears over manual ones.
6. Maintenance
Regular maintenance ensures the longevity and optimal performance of your pruning shears.
- Blade Cleaning: After each use, disconnect the battery and clean the blades with a damp cloth to remove sap and debris.
- Lubrication: Apply a few drops of lubricating oil (using the provided empty bottle) to the blades and pivot points regularly to ensure smooth operation and prevent rust.
- Blade Sharpening: Use the provided file to sharpen the blades as needed. Ensure the battery is disconnected before sharpening.
- Blade Replacement: If blades become dull or damaged beyond sharpening, replace them with the provided spare blades. Refer to the diagram for blade components.
- Battery Care: Store batteries in a cool, dry place. Avoid fully discharging batteries before recharging to prolong their lifespan.
7. Troubleshooting
If you encounter issues with your pruning shears, refer to the following common troubleshooting steps:

Image: Troubleshooting guide from the manufacturer's A+ content.
| Problem | Possible Cause | Solution |
|---|---|---|
| Insufficient Power | Worn or broken blade; Loose or blocked transmission components. | Check if the blade is worn or broken. If worn, sharpen it with an appropriate sharpening tool or replace it if too damaged. Also, check if the transmission components are loose or blocked, and apply lubricating oil for smooth operation. |
| Reduced Battery Life | Incorrect charger/voltage; Worn battery; Deep discharge. | Use the original charger and ensure you are using the correct charging voltage. If the battery does not charge correctly, it may be worn and should be replaced. Avoid completely discharging the battery and recharge it regularly. |
| Abnormal Noise During Operation | Loose blade; Debris blocking components; Worn gears; Loose motor screw. | Immediately stop use. Check if the blade is correctly fixed. Clean any debris blocking the transmission components and check for gear wear. Also, tighten the motor fixing screw to prevent vibrations. |
| Defective Switch | Dust/debris in switch; Damaged contacts. | Clean the switch slots to remove dust and debris. If the switch still does not work, wipe the contacts with alcohol or replace it. Remember to disconnect the battery before performing any repairs. |
| Blade Blocked | Debris trapped between blades; Blade deformation. | Turn off the pruner and clear any debris trapped between the blades. Apply lubricating grease to the movable parts. If the blade is deformed, contact a professional. |
8. Specifications
| Brand | OUTIGO |
| Model Number | 1 |
| Cutting Diameter | Up to 40 mm |
| Battery Voltage | 21V |
| Battery Capacity | 2 x 3.0 Ah Lithium-ion |
| Charging Time | 2-4 hours |
| Weight (with battery) | Approx. 3.2 kg |
| Product Dimensions | 33 x 27 x 11 cm |
| Blade Material | SK7 Carbon Steel |
| Motor Type | Brushless Motor |
| Power | 800 Watts |
9. Warranty and Support
Information regarding product warranty and customer support was not available in the provided product data. Please refer to the product packaging or the retailer's website for specific warranty terms and contact information for support.