Emerson EVP-2500
Emerson EVP-2500 Home Theater LCD Projector User Manual
Model: EVP-2500 | Brand: Emerson
1. Introduction
Thank you for purchasing the Emerson EVP-2500 Home Theater LCD Projector. This manual provides essential information for setting up, operating, and maintaining your projector to ensure optimal performance and longevity. The EVP-2500 is designed to deliver a cinematic viewing experience with its built-in DVD player, versatile connectivity options, and integrated audio.
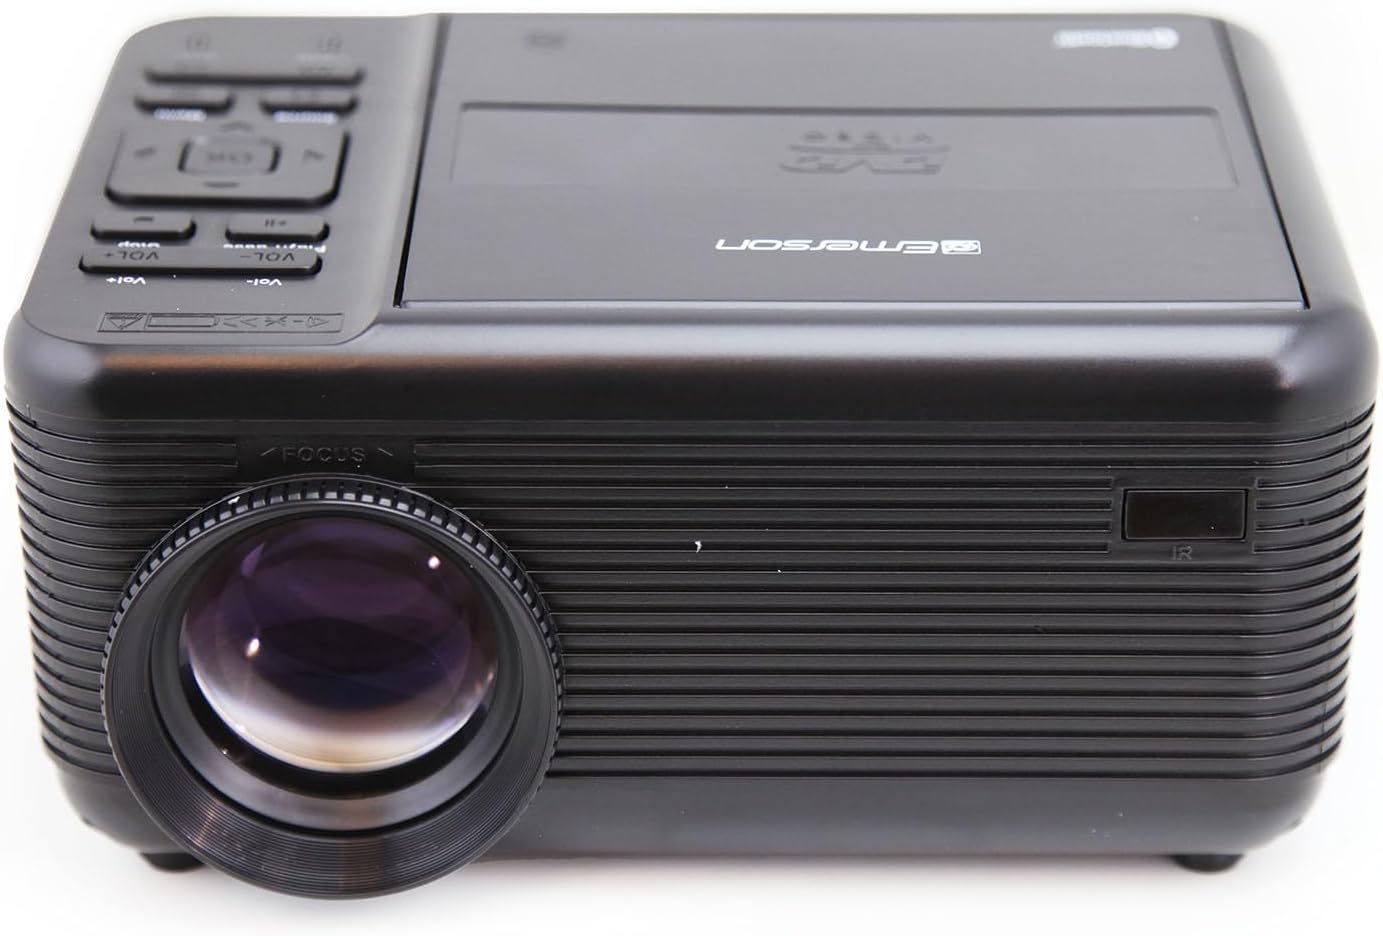
Figure 1.1: Front view of the Emerson EVP-2500 Home Theater LCD Projector.
2. What's in the Box
Please check the contents of your package to ensure all items are present:
- Emerson EVP-2500 LCD Projector
- Remote Control
- Power Adapter
- Warranty Card
- User Manual (this document)
- 150-inch Projector Screen (as specified in product features)
- 2 x AAA Batteries (for remote control)

Figure 2.1: The Emerson EVP-2500 Projector shown with its included remote control.
3. Setup Guide
3.1 Placement
Place the projector on a stable, flat surface. Ensure there is adequate ventilation around the unit. For optimal viewing, position the projector directly in front of your screen or a flat, light-colored wall.

Figure 3.1: The projector can display a viewable screen size from 31.9 inches up to 150 inches, depending on placement and conditions.
3.2 Power Connection
- Connect the power adapter to the DC IN port on the projector.
- Plug the power adapter into a standard electrical outlet.
- Press the Power button on the projector or remote control to turn on the unit.
3.3 Focus and Keystone Adjustment
Adjust the focus ring located around the projector lens until the image appears clear and sharp. If the image is trapezoidal, use the keystone correction dial (usually on the rear or top of the projector) to square the image.

Figure 3.2: The front of the projector, highlighting the focus ring around the lens.
4. Operating Instructions
4.1 Input Source Selection
The EVP-2500 supports multiple input sources. Use the "Source" button on the remote control or the projector's control panel to cycle through available inputs:
- DVD: For the built-in DVD player.
- HDMI 1 / HDMI 2: For connecting devices via HDMI (e.g., laptops, gaming consoles, streaming sticks).
- USB: For playing media from a USB flash drive.
- AV: For connecting devices via composite video (RCA cables).
- VGA: For connecting computers via VGA cable.
- TF Card: For playing media from a TF (MicroSD) card.

Figure 4.1: Connect your HDMI cable from a DVD player, PC, streaming stick, or other content source to the HDMI input.

Figure 4.2: Connect a device via USB or play a digital file stored from a USB flash drive using the USB inputs.

Figure 4.3: Play your stored digital media content from a TF (MicroSD) memory card.
4.2 Using the Built-in DVD Player
- Select "DVD" as the input source.
- Gently open the DVD tray cover on top of the projector.
- Insert a DVD disc with the label side facing up.
- Close the DVD tray cover. The projector will automatically begin playing the DVD.
- Use the remote control for playback functions (Play, Pause, Stop, Skip, Menu, etc.).

Figure 4.4: The built-in DVD player allows for seamless playback of your favorite movies and shows.
4.3 Bluetooth Audio Streaming
The EVP-2500 features Bluetooth connectivity for wireless audio output to external speakers or headphones.
- Ensure your Bluetooth audio device (speaker, headphones) is in pairing mode.
- On the projector, navigate to the Bluetooth settings menu.
- Select "Pair New Device" or similar option.
- Choose your Bluetooth audio device from the list of available devices to connect.
- Once connected, audio from the projector will be routed to your external Bluetooth device.

Figure 4.5: Play audio wirelessly through an external speaker for an enhanced audio experience using Bluetooth Out.
4.4 Built-in Speakers
The projector includes dual stereo speakers for integrated audio. If no external audio device is connected via Bluetooth or the 3.5mm audio jack, sound will play through the built-in speakers. Adjust volume using the remote control or the projector's control panel.

Figure 4.6: With a built-in speaker, setup is quick and effortless—just plug in and start enjoying!
5. Maintenance
5.1 Cleaning the Lens
Use a soft, lint-free cloth specifically designed for optical lenses to gently wipe the projector lens. Do not use abrasive cleaners or excessive force, as this can scratch the lens.
5.2 Cleaning the Projector Body
Wipe the exterior of the projector with a soft, dry cloth. For stubborn marks, a slightly damp cloth can be used, followed by a dry cloth. Avoid using harsh chemicals or solvents.
5.3 Ventilation
Ensure the ventilation vents on the projector are not blocked. Proper airflow is crucial for preventing overheating and extending the lifespan of the LED light source, which is designed to last up to 30,000 hours.
6. Troubleshooting
| Problem | Possible Cause | Solution |
|---|---|---|
| No image on screen |
|
|
| Image is blurry |
|
|
| No sound |
|
|
| Remote control not working |
|
|
7. Specifications
| Feature | Detail |
|---|---|
| Model Number | EVP-2500 |
| Display Technology | LCD |
| Native Resolution | 1280 x 720 pixels |
| Max. Supported Resolution | 1920 x 1080 pixels (via HDMI) |
| Light Source | LED |
| LED Lifespan | Up to 30,000 hours |
| Projection Size | 31.9" - 150" (diagonal) |
| Aspect Ratio | 16:9 (Native), 4:3 (Compatible) |
| Connectivity | 2 x HDMI, 2 x USB, AV, VGA, TF Card, Bluetooth |
| Audio Output | Built-in Dual Stereo Speakers, 3.5mm Audio Jack, Bluetooth Out |
| Built-in Player | DVD Player, Media Player (USB/TF) |
| Product Dimensions (L x W x H) | 8 x 6.6 x 3.8 inches |
| Item Weight | 2.31 pounds |
| Power Supply | AC 100-240V, 50/60Hz (via Power Adapter) |
| Remote Control Batteries | 2 x AAA (included) |

Figure 7.1: Physical dimensions of the Emerson EVP-2500 projector.
8. Warranty & Support
8.1 Warranty Information
The Emerson EVP-2500 projector comes with a limited manufacturer's warranty. Please refer to the included Warranty Card for detailed terms, conditions, and registration information. Keep your purchase receipt as proof of purchase for warranty claims.
8.2 Customer Support
For technical assistance, troubleshooting, or warranty inquiries, please contact Emerson customer support. Contact details can typically be found on the Warranty Card or the official Emerson website.
Manufacturer: Naxa Electronics, Inc.
Ask a question about this manual
Ask about setup, troubleshooting, compatibility, parts, safety, or missing instructions. Manuals+ will review the question and use this page’s manual context to help answer it.