RELAX4LIFE RELAX4LIFE 50-inch Electric Fireplace
RELAX4LIFE 50-inch Recessed and Wall-Mounted Electric Fireplace Instruction Manual
Model: 81d4d977-3fc3-4252-8663-389ce8fad844
1. Introduction
This manual provides essential information for the safe and efficient operation of your RELAX4LIFE 50-inch Recessed and Wall-Mounted Electric Fireplace. Please read all instructions carefully before installation and use. This electric fireplace offers versatile installation options, adjustable flame effects, and two heating levels to enhance your indoor environment.

Image 1.1: The RELAX4LIFE 50-inch Electric Fireplace and its remote control.
2. Safety Information
Adherence to these safety guidelines is crucial to prevent electric shock, fire, injury, or property damage.
- Read all instructions before installing or operating this heater.
- This appliance is hot when in use. To avoid burns, do not let bare skin touch hot surfaces.
- Keep combustible materials, such as furniture, pillows, bedding, papers, clothes, and curtains at least 3 feet (0.9 m) from the front of the heater.
- Extreme caution is necessary when any heater is used by or near children or invalids and whenever the heater is left operating and unattended.
- Do not operate any heater with a damaged cord or plug or after the heater malfunctions, has been dropped, or damaged in any manner.
- Do not run cord under carpeting. Do not cover cord with throw rugs, runners, or similar coverings. Arrange cord away from traffic area and where it will not be tripped over.
- To disconnect heater, turn controls to off, then remove plug from outlet.
- Do not insert or allow foreign objects to enter any ventilation or exhaust opening as this may cause an electric shock or fire, or damage the heater.
- To prevent a possible fire, do not block air intakes or exhaust in any manner.
- This product is equipped with overheat protection and ETL certification for enhanced safety. It also features a UL-certified power cord.
- The fireplace utilizes a three-hole airflow system for efficient heat distribution.

Image 2.1: Illustration of the fireplace's three-hole airflow system.
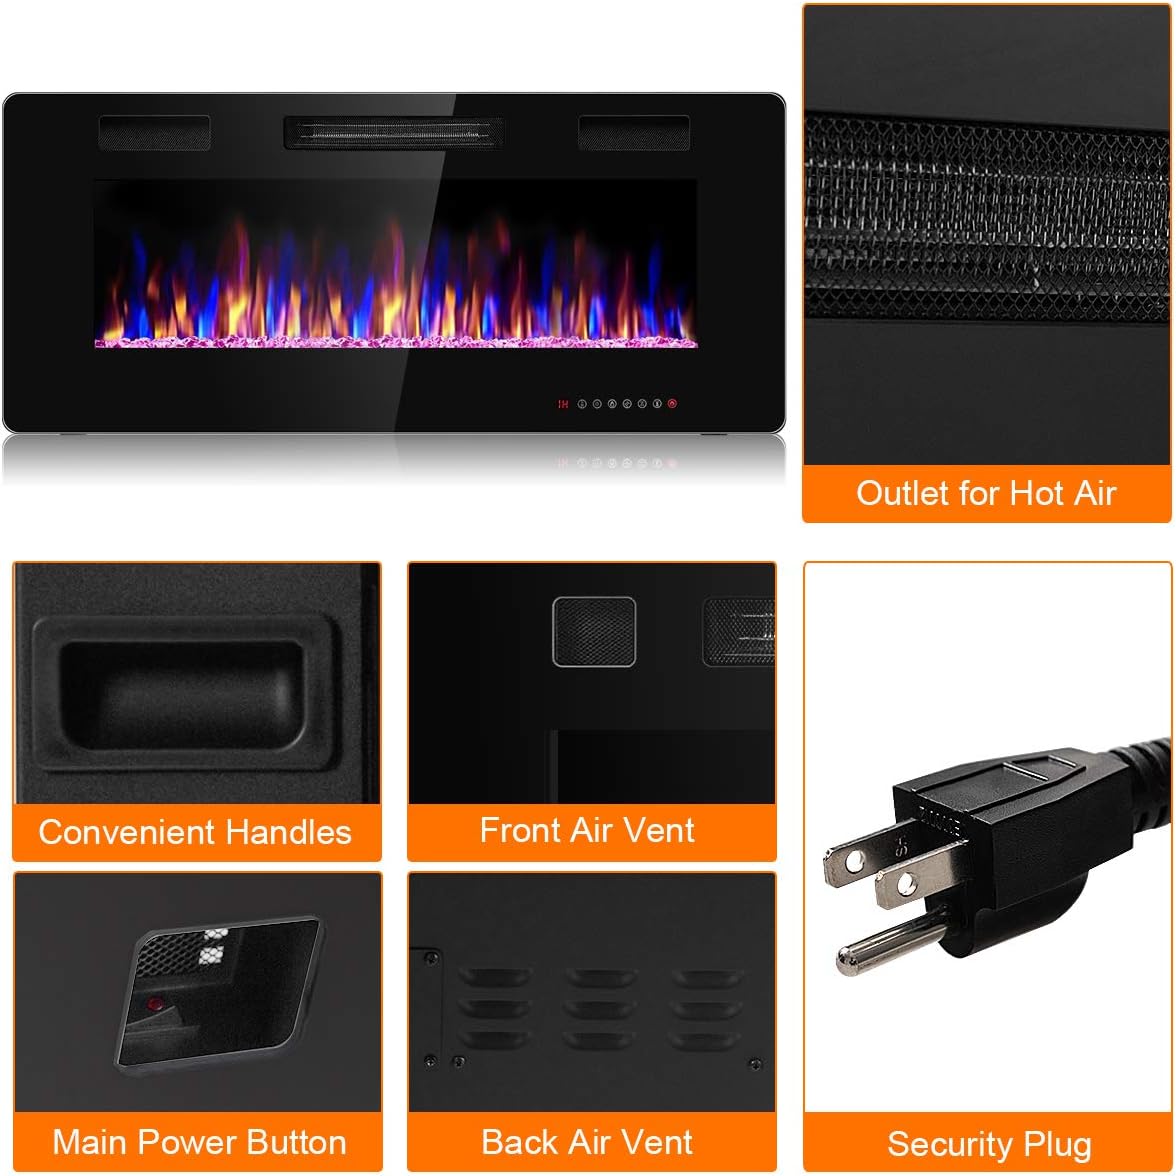
Image 2.2: Detailed view of fireplace components, including safety features like the security plug.
3. Package Contents
Verify that all components are present and undamaged before beginning assembly or installation. If any parts are missing or damaged, do not attempt to assemble or install the product. Contact customer support for assistance.
- 1 x Electric Fireplace (50-inch)
- 1 x Remote Control
- 1 x Bag of Crystals (for flame bed decoration)
- 1 x Screw Kit (for installation)
4. Specifications
| Feature | Specification |
|---|---|
| Brand | RELAX4LIFE |
| Model Name | 50" Recessed and Wall-Mounted Electric Fireplaces |
| Overall Dimensions (L x W x H) | 50" x 3.86" x 18" |
| Material | Tempered Glass, Crystal Glass, Steel |
| Power Source | Corded Electric |
| Power Settings | 750 W / 1500 W |
| Voltage | 120 V / 60 HZ |
| Heat Output | 5100 BTU |
| Heating Coverage | Up to 400 sq ft |
| Installation Type | Wall Mount / Recessed |
| Special Features | Adjustable Flame, Flame Effect, 1-8 Hour Timer, Touch Screen, Remote Control |
| Item Weight | 50 pounds |

Image 4.1: Heating coverage and capacity of the electric fireplace.
5. Installation
The RELAX4LIFE electric fireplace offers two installation methods: wall-mounted and recessed. Choose the method that best suits your space and follow the instructions carefully.

Image 5.1: Overview of installation methods and general dimensions.
5.1. Wall-Mounted Installation
For wall-mounted installation, ensure the wall material can support the weight of the fireplace. Use the provided mounting bracket and screws.
- Prepare the Wall: Choose a suitable location on a wall, ensuring there is a power outlet nearby. Mark the desired height and width for the fireplace.
- Attach Mounting Bracket: Securely fasten the wall mounting bracket to the wall using appropriate hardware for your wall type. Ensure it is level.
- Hang the Fireplace: Carefully lift the fireplace and hook it onto the wall mounting bracket. Ensure it is securely seated.
- Secure the Unit: Use the provided screws to secure the bottom of the fireplace to the wall, preventing accidental dislodgement.
5.2. Recessed Installation
For recessed installation, a cavity must be prepared in the wall or furniture to accommodate the fireplace dimensions. Ensure adequate ventilation around the unit.
- Prepare the Opening: Create a framed opening in your wall or cabinet according to the fireplace's dimensions (refer to specifications for exact measurements). Ensure the opening is slightly larger than the fireplace body for easy insertion.
- Insert Fireplace: Carefully slide the electric fireplace into the prepared opening.
- Secure the Unit: Fasten the fireplace to the framing using the provided screws through the designated mounting holes on the sides of the unit.
5.3. General Assembly Tips (for both installation types)
Before final installation, you may need to remove the glass frame to place the decorative crystals.
Video 5.1: This video demonstrates the process of removing and reattaching the glass frame, connecting internal cables, and placing the decorative crystals. It also shows how to secure the fireplace after installation.
Video 5.2: This video provides an overview of the RELAX4LIFE Recessed Electric Fireplace, showcasing its features and appearance in a home setting.
6. Operation
Your electric fireplace can be operated using either the touch screen control panel on the unit or the included remote control.
6.1. Control Panel

Image 6.1: Detailed view of the touch screen control panel functions.
- ON/OFF: Powers the unit on or off.
- Heat: Toggles between 750W and 1500W heating levels.
- Flame Color: Cycles through 12 different flame colors. Long press for 6 seconds to activate automatic color change.
- Bed Color: Cycles through 12 different flame bed colors.
- Speed: Adjusts the flame speed through 5 levels (V1 to V5).
- Dimmer: Adjusts the flame brightness through 5 levels (L1 to L5) and activates sleep mode.
- Timer: Sets the operating duration from 1 to 8 hours.
- LED Screen: Displays current settings.
6.2. Remote Control
The remote control provides convenient access to all fireplace functions from a distance.

Image 6.2: The remote control for the electric fireplace.
- All functions available on the touch screen panel are also accessible via the remote control.
- Ensure the remote control has working batteries and is pointed towards the fireplace's receiver.
6.3. Flame and Heat Settings
Customize your ambiance with a wide range of flame and heat options.
- Flame Colors: Choose from 12 distinct flame colors.
- Flame Bed Colors: Select from 12 distinct flame bed colors.
- Flame Speed: Adjust the speed of the flame effect across 5 levels.
- Brightness: Control the brightness of the flame effect with 5 levels.
- Heating Levels: Select between 750W (low heat) and 1500W (high heat) to meet your warmth requirements.
- The flame effect and heating function can be operated independently.
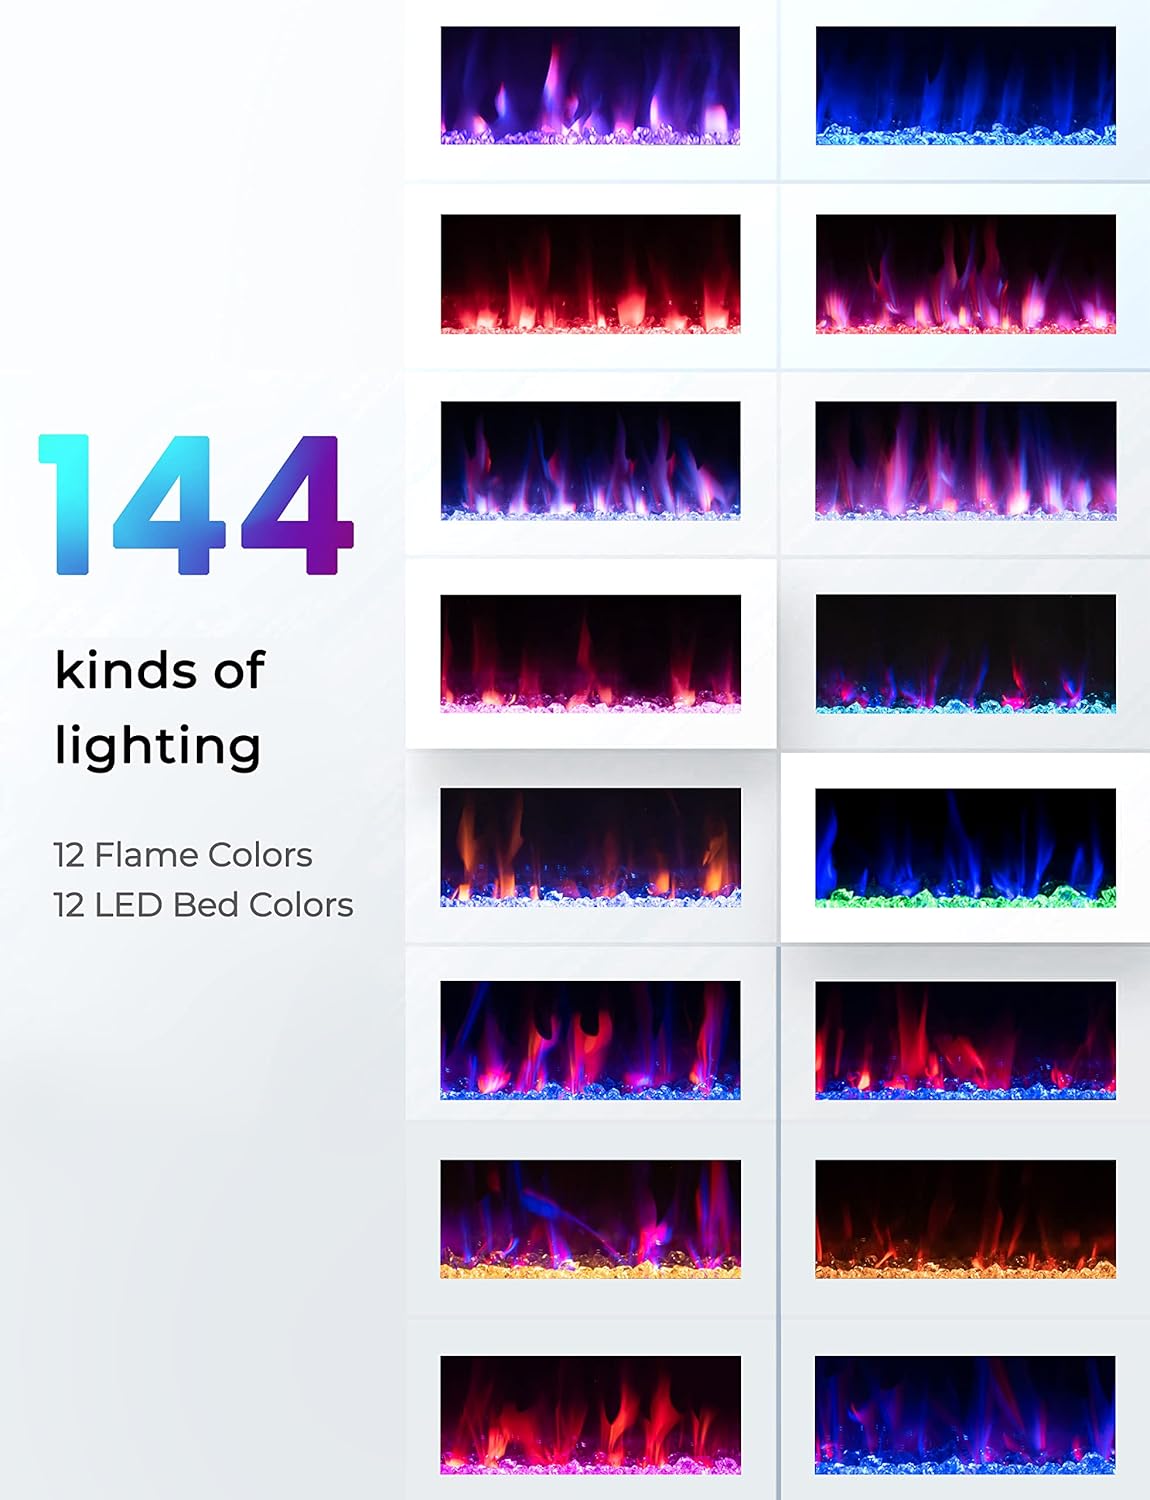
Image 6.3: Examples of the 144 flame and flame bed color combinations.
6.4. Timer Function
The integrated timer allows for energy-saving operation.
- Set the timer for automatic shutdown from 1 to 8 hours.
- This feature is useful for ensuring the fireplace turns off after a set period, such as when going to sleep.

Image 6.4: The fireplace's timer function promotes a comfortable environment.
7. Maintenance
Regular maintenance ensures the longevity and optimal performance of your electric fireplace.
- Cleaning: Always unplug the fireplace before cleaning. Use a soft, damp cloth to wipe down the exterior surfaces. Do not use abrasive cleaners or sprays.
- Glass Panel: Clean the glass panel with a soft cloth and a non-abrasive glass cleaner.
- Air Vents: Periodically vacuum the air intake and exhaust vents to prevent dust buildup, which can affect heating efficiency.
- Storage: If storing the fireplace for an extended period, ensure it is clean and dry. Store in a cool, dry place.
8. Troubleshooting
Refer to the following table for common issues and their potential solutions.
| Problem | Possible Cause | Solution |
|---|---|---|
| Fireplace does not turn on. | No power, main power switch off, remote batteries dead. | Check power cord connection, ensure main power switch is ON, replace remote batteries. |
| No heat output. | Heat function not activated, thermostat setting too low, overheat protection activated. | Activate heat function, increase thermostat setting, unplug unit for 5 minutes to reset overheat protection. |
| Flame effect not working. | Flame effect not activated, internal connection issue. | Activate flame effect. If issue persists after checking internal cable connection (refer to installation video), contact support. |
| Remote control not working. | Dead batteries, obstruction, remote not pointed at receiver. | Replace batteries, remove obstructions, point remote directly at the fireplace. |
| Unusual noise during operation. | Dust buildup in fan, loose components. | Clean air vents. If noise persists, discontinue use and contact customer support. |
9. Warranty and Support
For warranty information or technical support, please refer to the documentation included with your purchase or contact RELAX4LIFE customer service directly. The product is returnable until January 31, 2026, as per Amazon's policy at the time of purchase. Customer support is available for assistance.
Ask a question about this manual
Ask about setup, troubleshooting, compatibility, parts, safety, or missing instructions. Manuals+ will review the question and use this page’s manual context to help answer it.