1. Introduction
Thank you for choosing the Moulinex Easy Fry & Grill Vision. This innovative 2-in-1 appliance combines the benefits of an air fryer and a grill, allowing you to prepare a wide variety of delicious and healthy meals with minimal oil. This manual provides essential information for safe operation, setup, use, and maintenance of your appliance. Please read it thoroughly before first use and keep it for future reference.

Image 1: The Moulinex Easy Fry & Grill Vision preparing a variety of dishes, showcasing its dual functionality as an air fryer and grill.
2. Important Safety Instructions
When using electrical appliances, basic safety precautions should always be followed to reduce the risk of fire, electric shock, and injury to persons.
- Read all instructions before using the appliance.
- Do not touch hot surfaces. Use handles or knobs.
- To protect against electric shock, do not immerse cord, plugs, or main unit in water or other liquid.
- Close supervision is necessary when any appliance is used by or near children.
- Unplug from outlet when not in use and before cleaning. Allow to cool before putting on or taking off parts.
- Do not operate any appliance with a damaged cord or plug, or after the appliance malfunctions or has been damaged in any manner.
- The use of accessory attachments not recommended by the appliance manufacturer may cause injuries.
- Do not use outdoors.
- Do not let cord hang over edge of table or counter, or touch hot surfaces.
- Do not place on or near a hot gas or electric burner, or in a heated oven.
- Extreme caution must be used when moving an appliance containing hot oil or other hot liquids.
- Always attach plug to appliance first, then plug cord into the wall outlet. To disconnect, turn any control to 'off', then remove plug from wall outlet.
- Do not use appliance for other than intended use.
3. Product Overview
3.1 Components
- Main Unit with Control Panel
- Removable Cooking Basket
- Grill Plate
- Viewing Window
- Power Cord
3.2 Control Panel
The intuitive touchscreen control panel allows you to easily select cooking programs, adjust temperature, and set cooking time. It features dedicated buttons for Air Fry and Grill functions, as well as 8 automatic programs for various food types.

Image 2: The main unit of the Moulinex Easy Fry & Grill Vision, highlighting the digital control panel and the removable basket filled with fries.
4. Setup
4.1 Unpacking
- Carefully remove all packaging materials, stickers, and labels from the appliance.
- Ensure all components listed in Section 3.1 are present.
4.2 Before First Use
- Clean the cooking basket and grill plate with hot water, dish soap, and a non-abrasive sponge. Rinse thoroughly and dry.
- Wipe the inside and outside of the main unit with a damp cloth.
- Place the appliance on a stable, horizontal, and heat-resistant surface, away from walls or other appliances to ensure proper ventilation.
- Insert the cooking basket into the main unit.
5. Operating Instructions
5.1 General Operation
- Plug the appliance into a grounded wall outlet. The power button will illuminate.
- Press the power button to turn on the appliance.
- Preheating is recommended for best results. Select your desired function (Air Fry or Grill) and set the temperature. Allow 3-5 minutes for preheating.
5.2 Air Frying Function
- Place food in the cooking basket. Do not overfill; ensure air can circulate.
- Select the 'Air Fry' function on the control panel.
- Adjust the temperature and cooking time using the '+' and '-' buttons.
- Press the start button to begin cooking.
- For even cooking, shake the basket halfway through the cooking time for items like fries or nuggets.
- The appliance features Extra Crisp technology for golden and crispy results.

Image 3: The air fryer basket filled with perfectly golden and crispy fries, demonstrating the Extra Crisp technology.
5.3 Grill Function
- Insert the grill plate into the cooking basket.
- Place food directly onto the grill plate.
- Select the 'Grill' function on the control panel.
- Adjust temperature and cooking time as needed.
- Press the start button to begin grilling.

Image 4: A perfectly grilled steak on the grill plate, illustrating the appliance's grilling capability.
5.4 Automatic Programs
The appliance features 8 pre-set automatic programs for common dishes. To use:
- Place food in the appropriate cooking accessory (basket or grill plate).
- Press the 'Menu' button to cycle through the 8 automatic programs (e.g., Fries, Chicken, Fish, Vegetables, Cake).
- Once the desired program is selected, press the start button. The appliance will automatically set the optimal temperature and time.
5.5 Using the Vision Window
The integrated viewing window allows you to monitor your food's cooking progress without opening the basket, ensuring consistent temperature and optimal results. Simply look through the window to check on your meal.
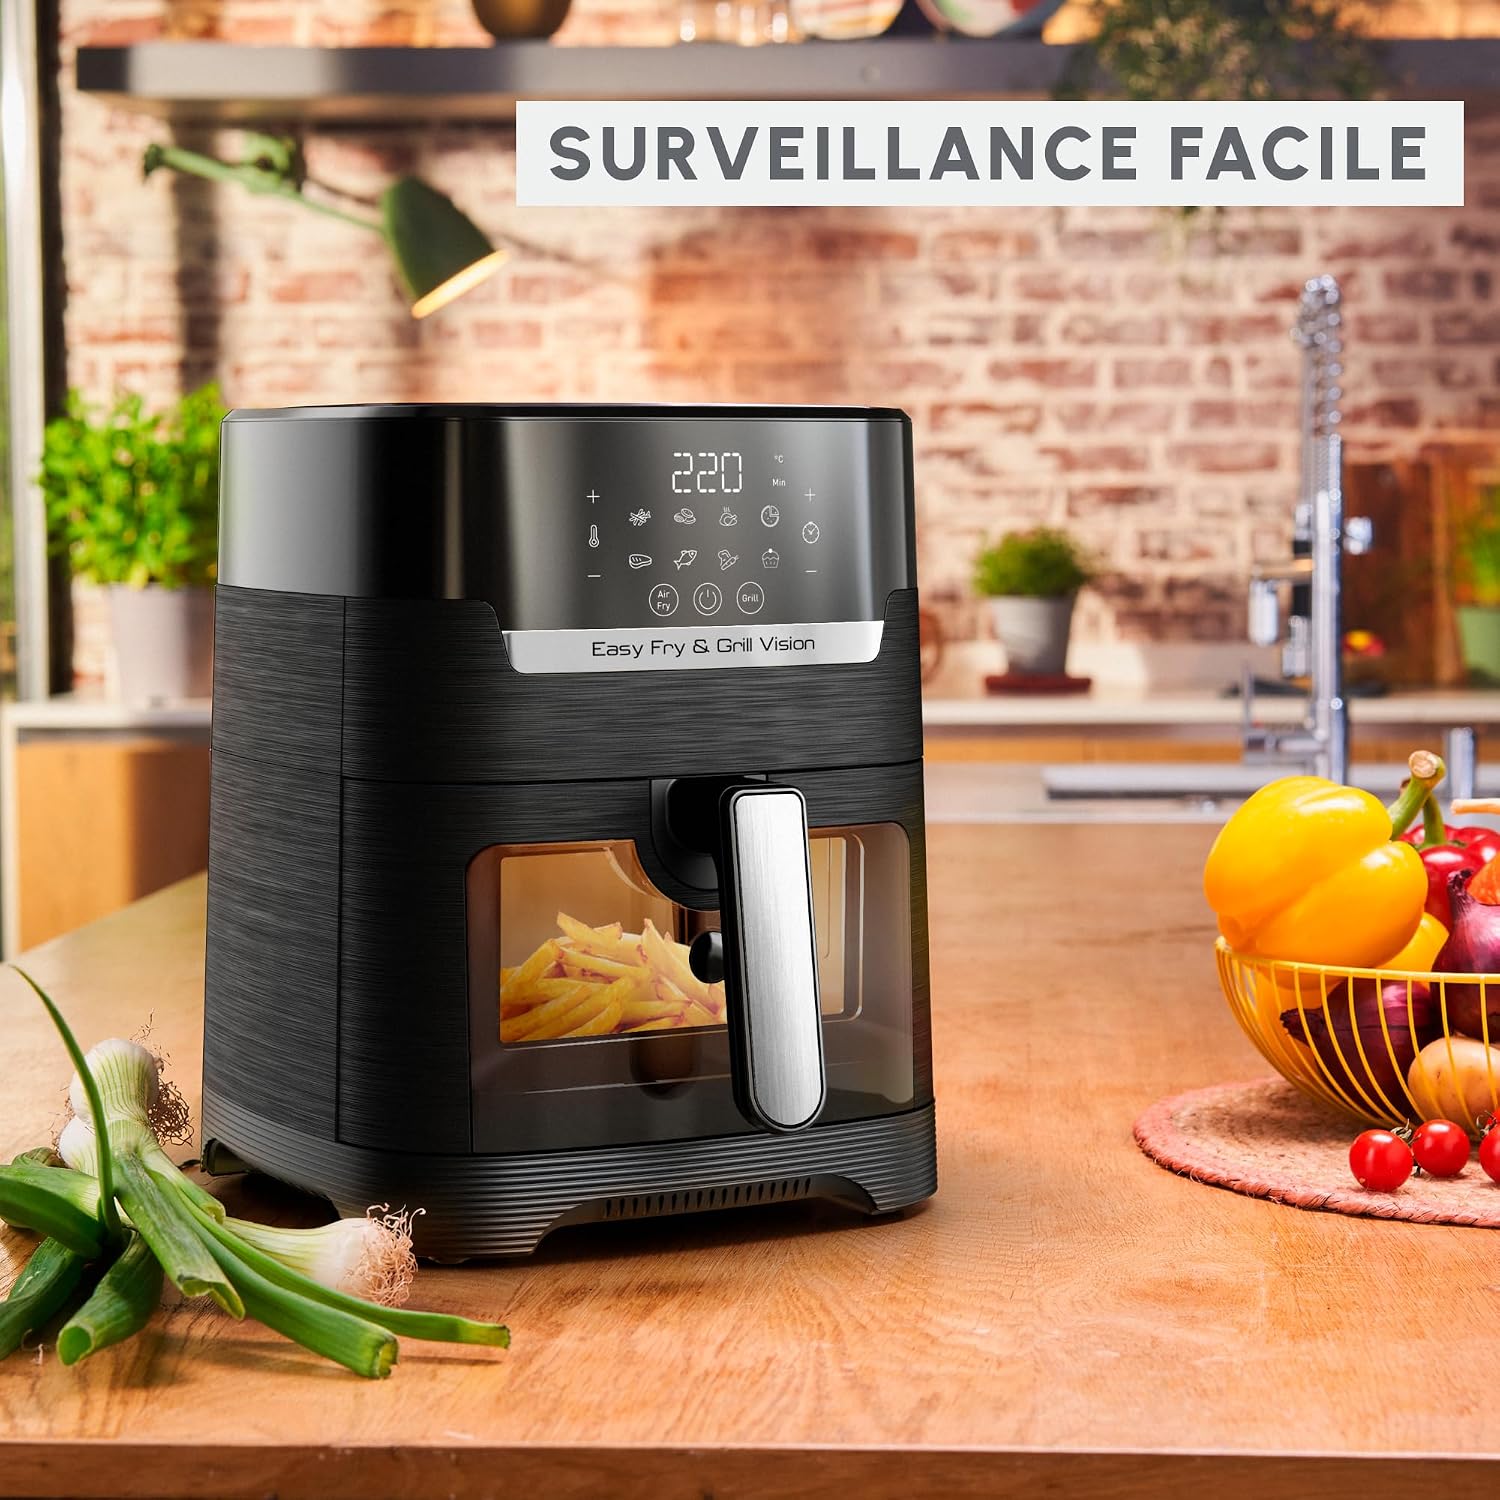
Image 5: The viewing window of the air fryer, allowing easy monitoring of food during cooking.
6. Cooking Tips
- For best results with frozen foods, follow package instructions for oven cooking, then adjust time and temperature as needed for air frying.
- Do not overcrowd the basket. Cook in smaller batches if necessary to ensure even cooking and crispiness.
- Lightly toss fresh vegetables or meats with a small amount of oil (1-2 teaspoons) before air frying for enhanced flavor and texture.
- Always preheat the appliance for 3-5 minutes before adding food.
7. Cleaning and Maintenance
7.1 Daily Cleaning
- Always unplug the appliance and allow it to cool completely before cleaning.
- The cooking basket and grill plate are dishwasher safe. Alternatively, wash them with hot water, dish soap, and a non-abrasive sponge.
- Ensure all parts are thoroughly dry before reassembling or storing.

Image 6: The removable cooking basket and grill plate placed in a dishwasher for easy cleaning.
7.2 Exterior Cleaning
- Wipe the exterior of the appliance with a damp cloth. Do not use abrasive cleaning agents or scourers.
- Never immerse the main unit in water or any other liquid.
8. Troubleshooting
| Problem | Possible Cause | Solution |
|---|---|---|
| Appliance does not turn on. | Not plugged in; power outlet issue. | Ensure the power cord is securely plugged into a working outlet. |
| Food is not crispy. | Basket overcrowded; insufficient cooking time/temperature. | Cook in smaller batches. Increase cooking time or temperature. Shake the basket more frequently. |
| White smoke coming from appliance. | Greasy food; residue from previous use. | Clean the basket and grill plate thoroughly. Remove excess fat from food. |
| Food is unevenly cooked. | Food not shaken or turned. | Shake the basket or turn food over halfway through cooking. |
9. Specifications
| Feature | Detail |
|---|---|
| Model Number | EZ506820 |
| Capacity | 4.5 Liters (suitable for up to 6 people) |
| Power | 1550 Watts |
| Voltage | 220 Volts (AC) |
| Dimensions (L x W x H) | 39.8 x 31.4 x 37 cm |
| Weight | 5.2 Kilograms |
| Material | Metal |
| Special Features | Viewing Window, 8 Automatic Programs, Extra Crisp Technology |
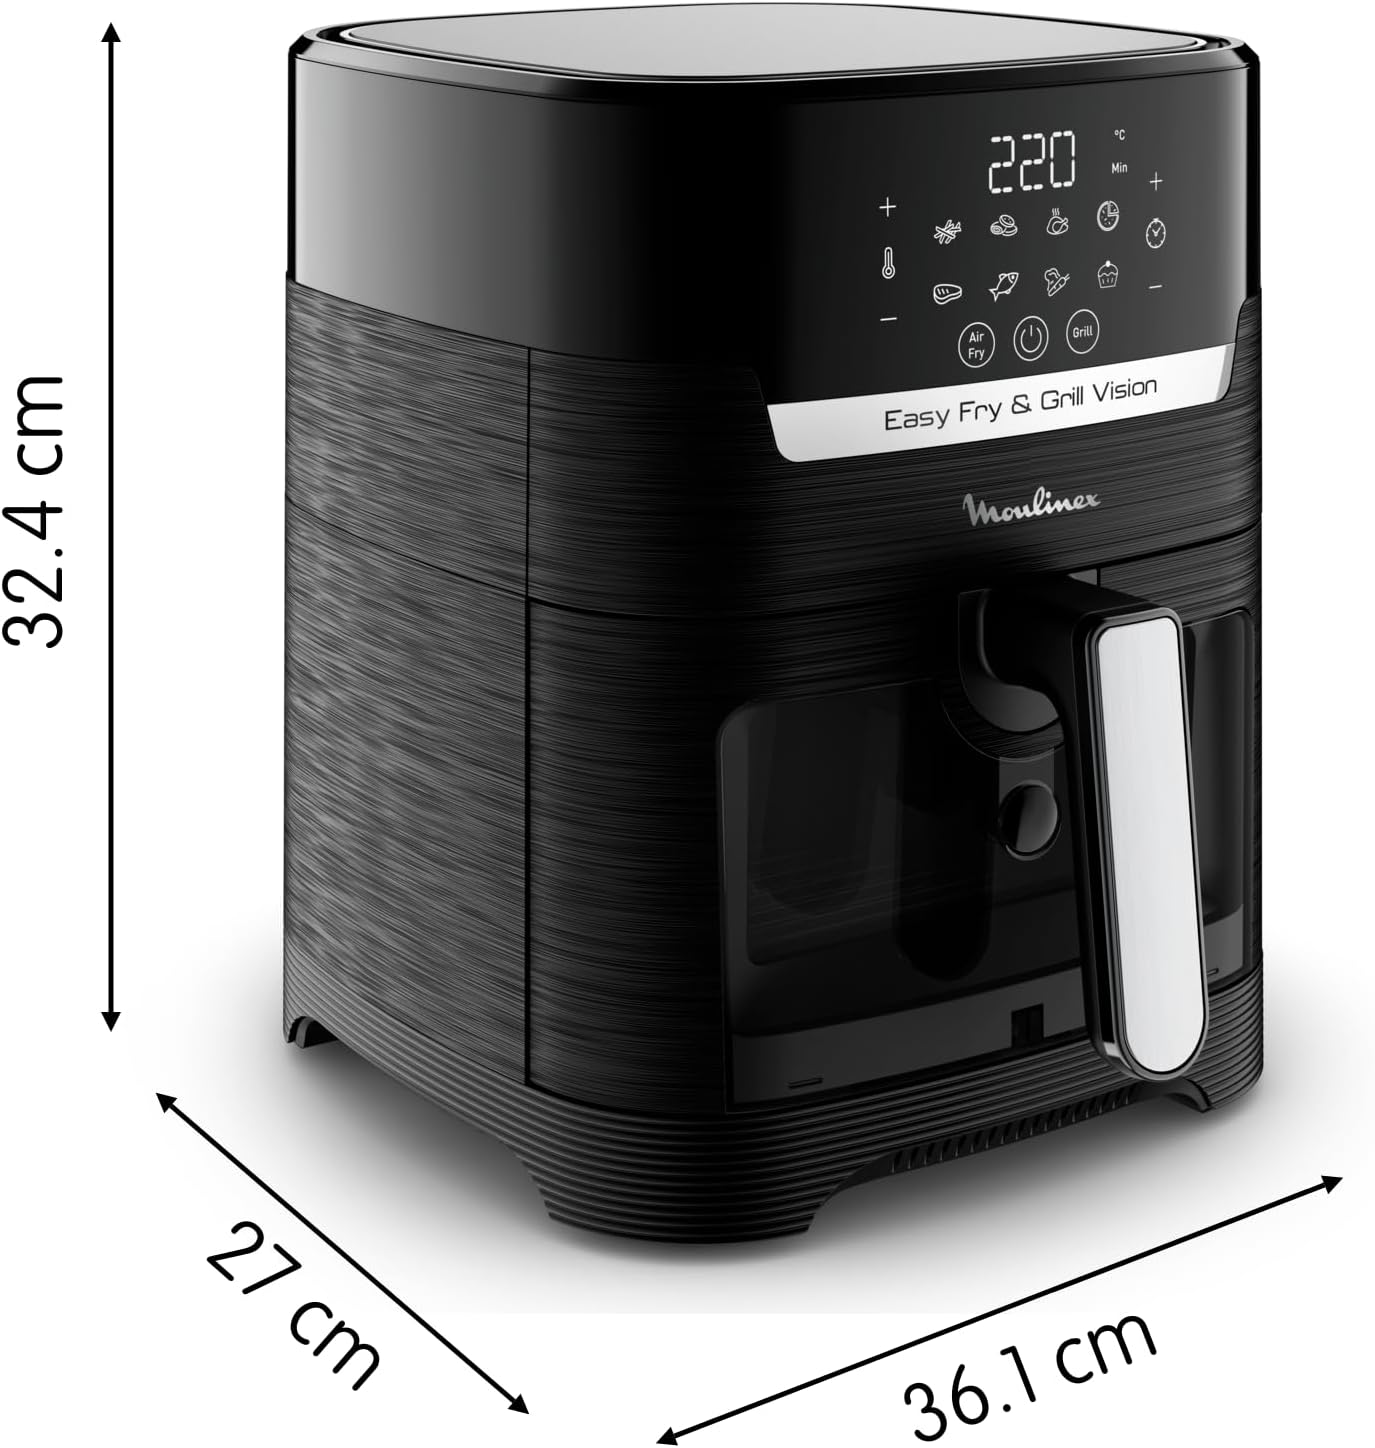
Image 7: Technical drawing of the Moulinex Easy Fry & Grill Vision with its key dimensions (length, width, height) clearly marked.
10. Warranty and Support
This product is covered by a manufacturer's warranty. For detailed warranty information, terms, and conditions, please refer to the warranty card included with your purchase or visit the official Moulinex website. For technical support, spare parts, or service inquiries, please contact Moulinex customer service.
You can find more information and support resources on the official Moulinex website: Moulinex Brand Store