BESTOPE PRO HH52006
BESTOPE PRO Cordless Dental Water Flosser
Model: HH52006
Introduction
Thank you for choosing the BESTOPE PRO Cordless Dental Water Flosser. This device is designed to provide effective oral hygiene, reaching areas brushing cannot. With its special DIY mode, 4 nozzle tips, 360° rotating nozzle, and IPX7 waterproof rating, it offers a personalized and convenient cleaning experience for home and travel use. This manual will guide you through the proper setup, operation, and maintenance of your water flosser to ensure optimal performance and longevity.

Image: The BESTOPE PRO Cordless Dental Water Flosser, showcasing its sleek design and included nozzle tips.
The BESTOPE PRO Water Flosser is engineered to address various oral health concerns, including preventing cavities, reducing gum bleeding, combating bad breath, and cleaning around braces and dental implants. Its powerful yet customizable water pressure ensures a thorough clean while being gentle on sensitive gums.
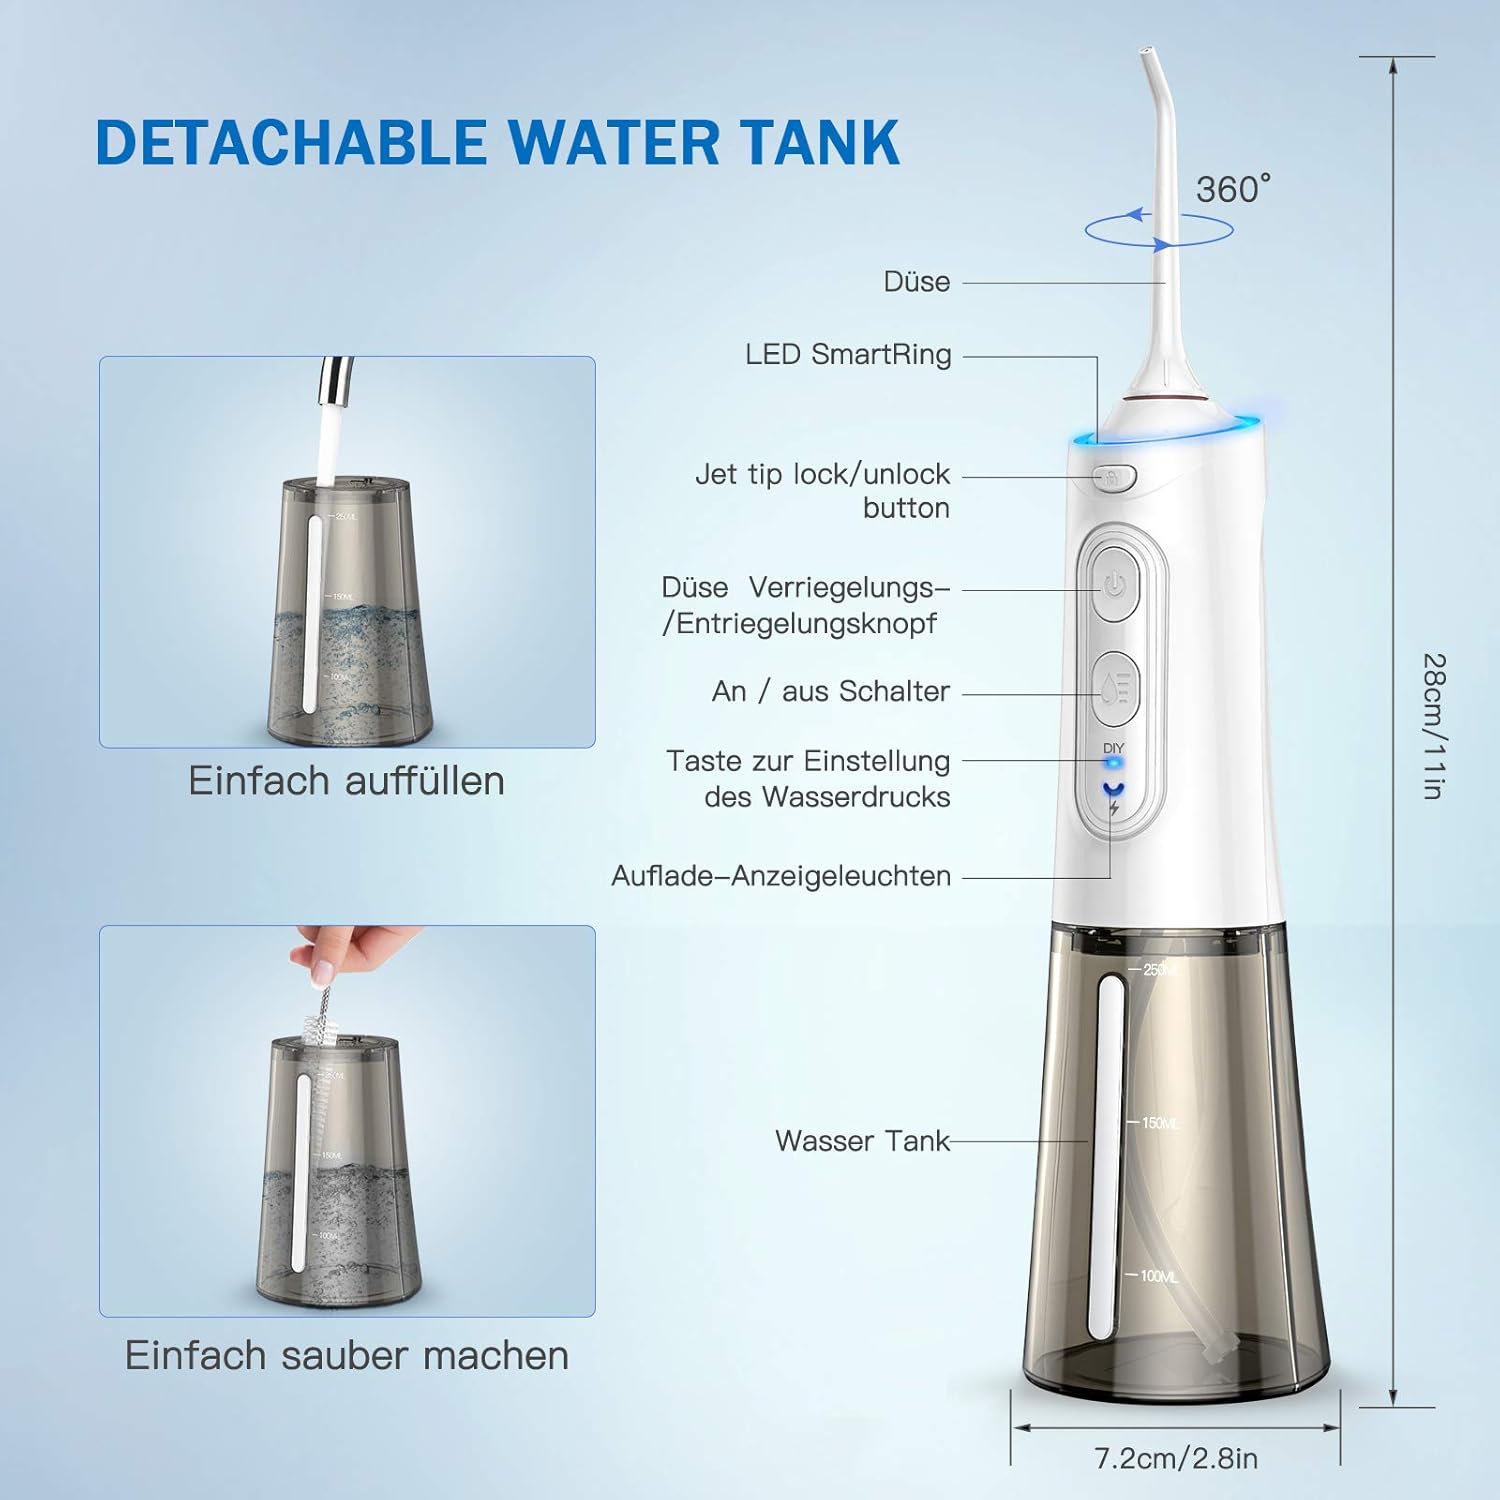
Image: Visual representation of oral health issues the water flosser helps prevent, such as cavities, gum bleeding, plaque, food residue, bad breath, and effective cleaning for braces.
Safety Information
Please read all safety instructions carefully before using the water flosser. Keep this manual for future reference.
- This appliance is not intended for use by persons (including children) with reduced physical, sensory, or mental capabilities, or lack of experience and knowledge, unless they have been given supervision or instruction concerning use of the appliance by a person responsible for their safety.
- Children should be supervised to ensure that they do not play with the appliance.
- Do not immerse the main unit in water or other liquids. The charging port must remain dry.
- Use only lukewarm water or dentist-recommended mouthwash. Do not use harsh chemicals or abrasive cleaners.
- If you have sensitive gums, dental implants, or other oral health concerns, consult your dentist before using this product.
- Do not direct water under the tongue, into the ear, nose, or other delicate areas. This product is designed for oral cleaning only.
- Avoid severe shocks and extreme temperatures to prevent damage to the device.
- Ensure the charging cable is not damaged and is used in a dry environment.
Package Contents
Your BESTOPE PRO Cordless Dental Water Flosser package includes the following items:
- 1 x BESTOPE PRO Cordless Dental Water Flosser Main Unit
- 2 x Classic Nozzle Tips (for daily use)
- 1 x Nozzle Tip for Implants, Crowns, Bridges, Braces (general use)
- 1 x Nozzle Tip for Periodontal Pockets (deep cleaning)
- 1 x USB Charging Cable
- 1 x User Manual
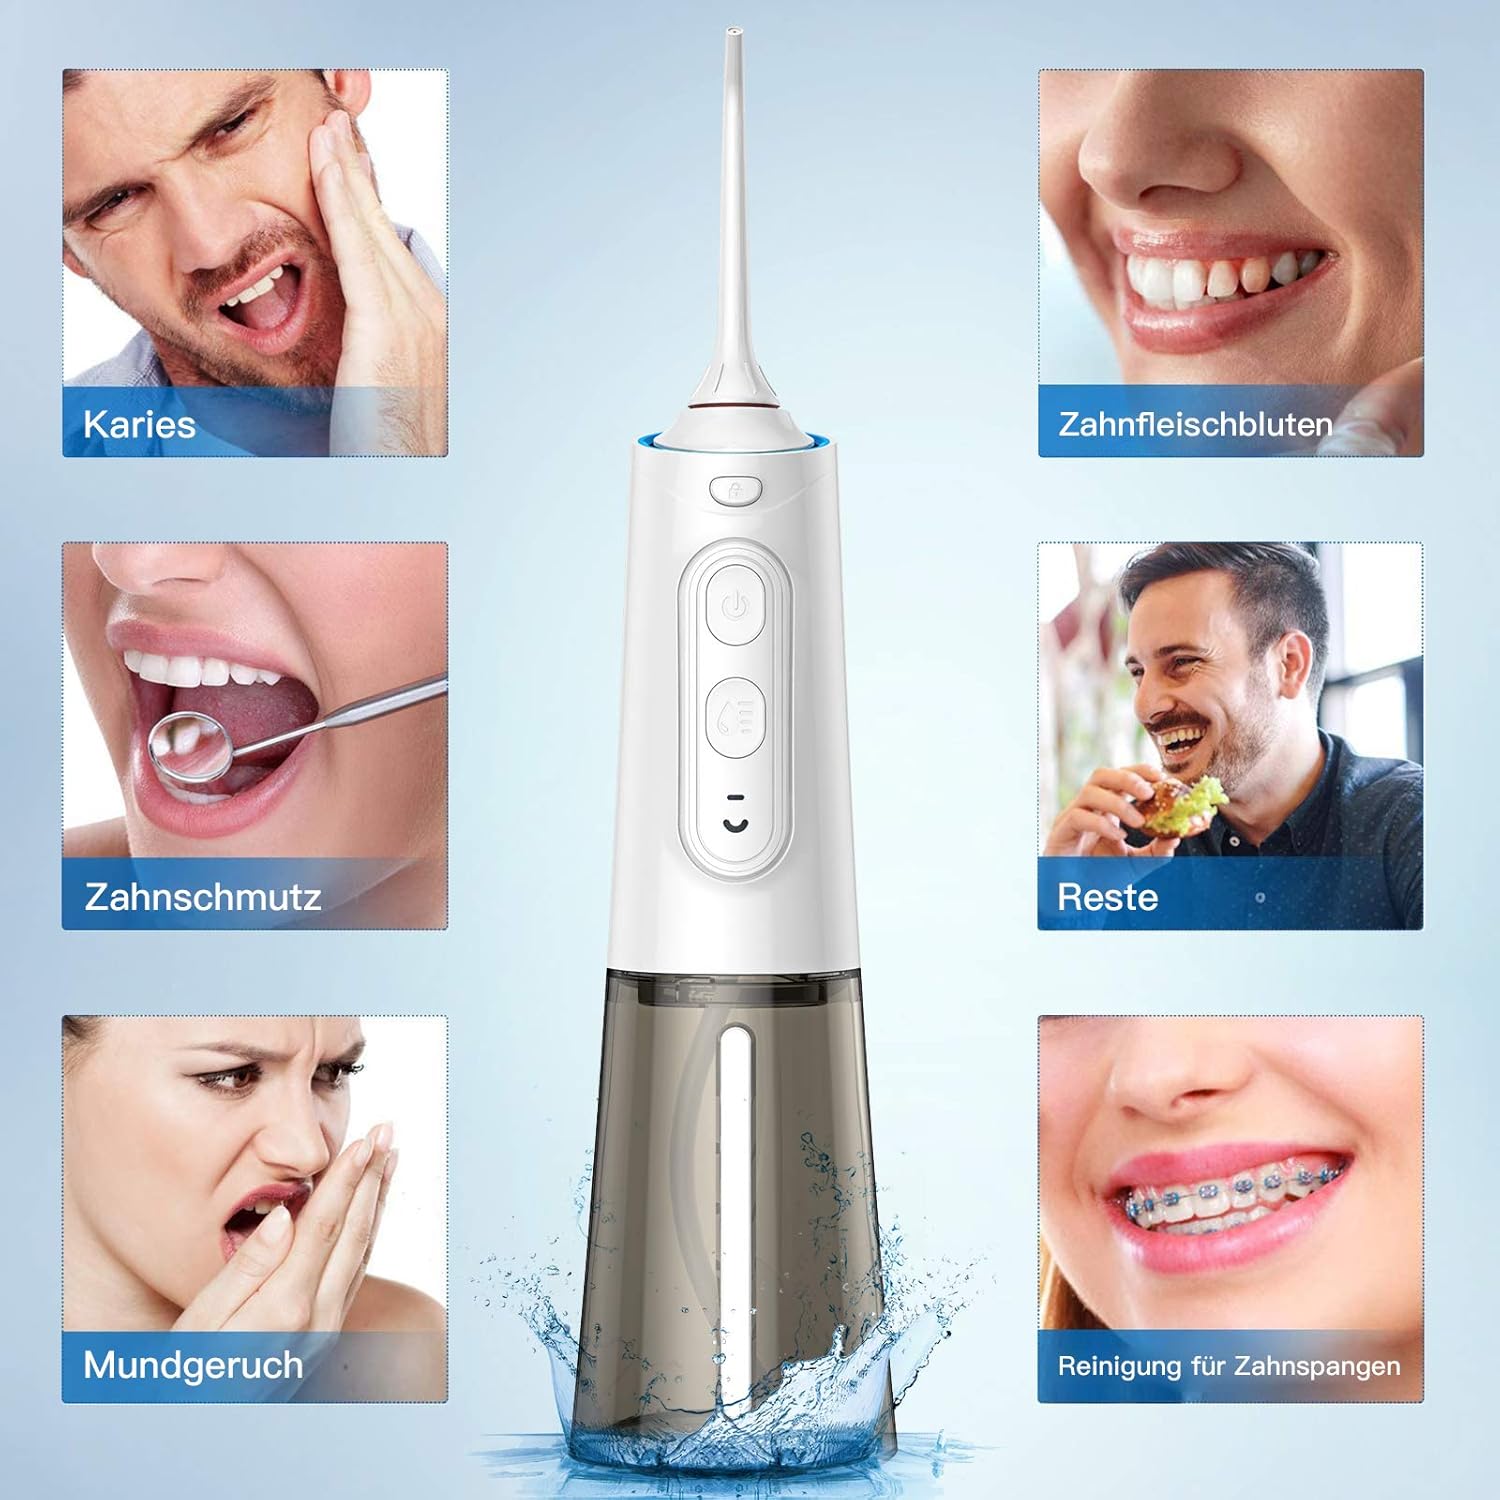
Image: A visual guide to the four different nozzle tips provided: two classic nozzles, one for implants/braces, and one for periodontal pockets.
Product Overview
Familiarize yourself with the components of your BESTOPE PRO Water Flosser:
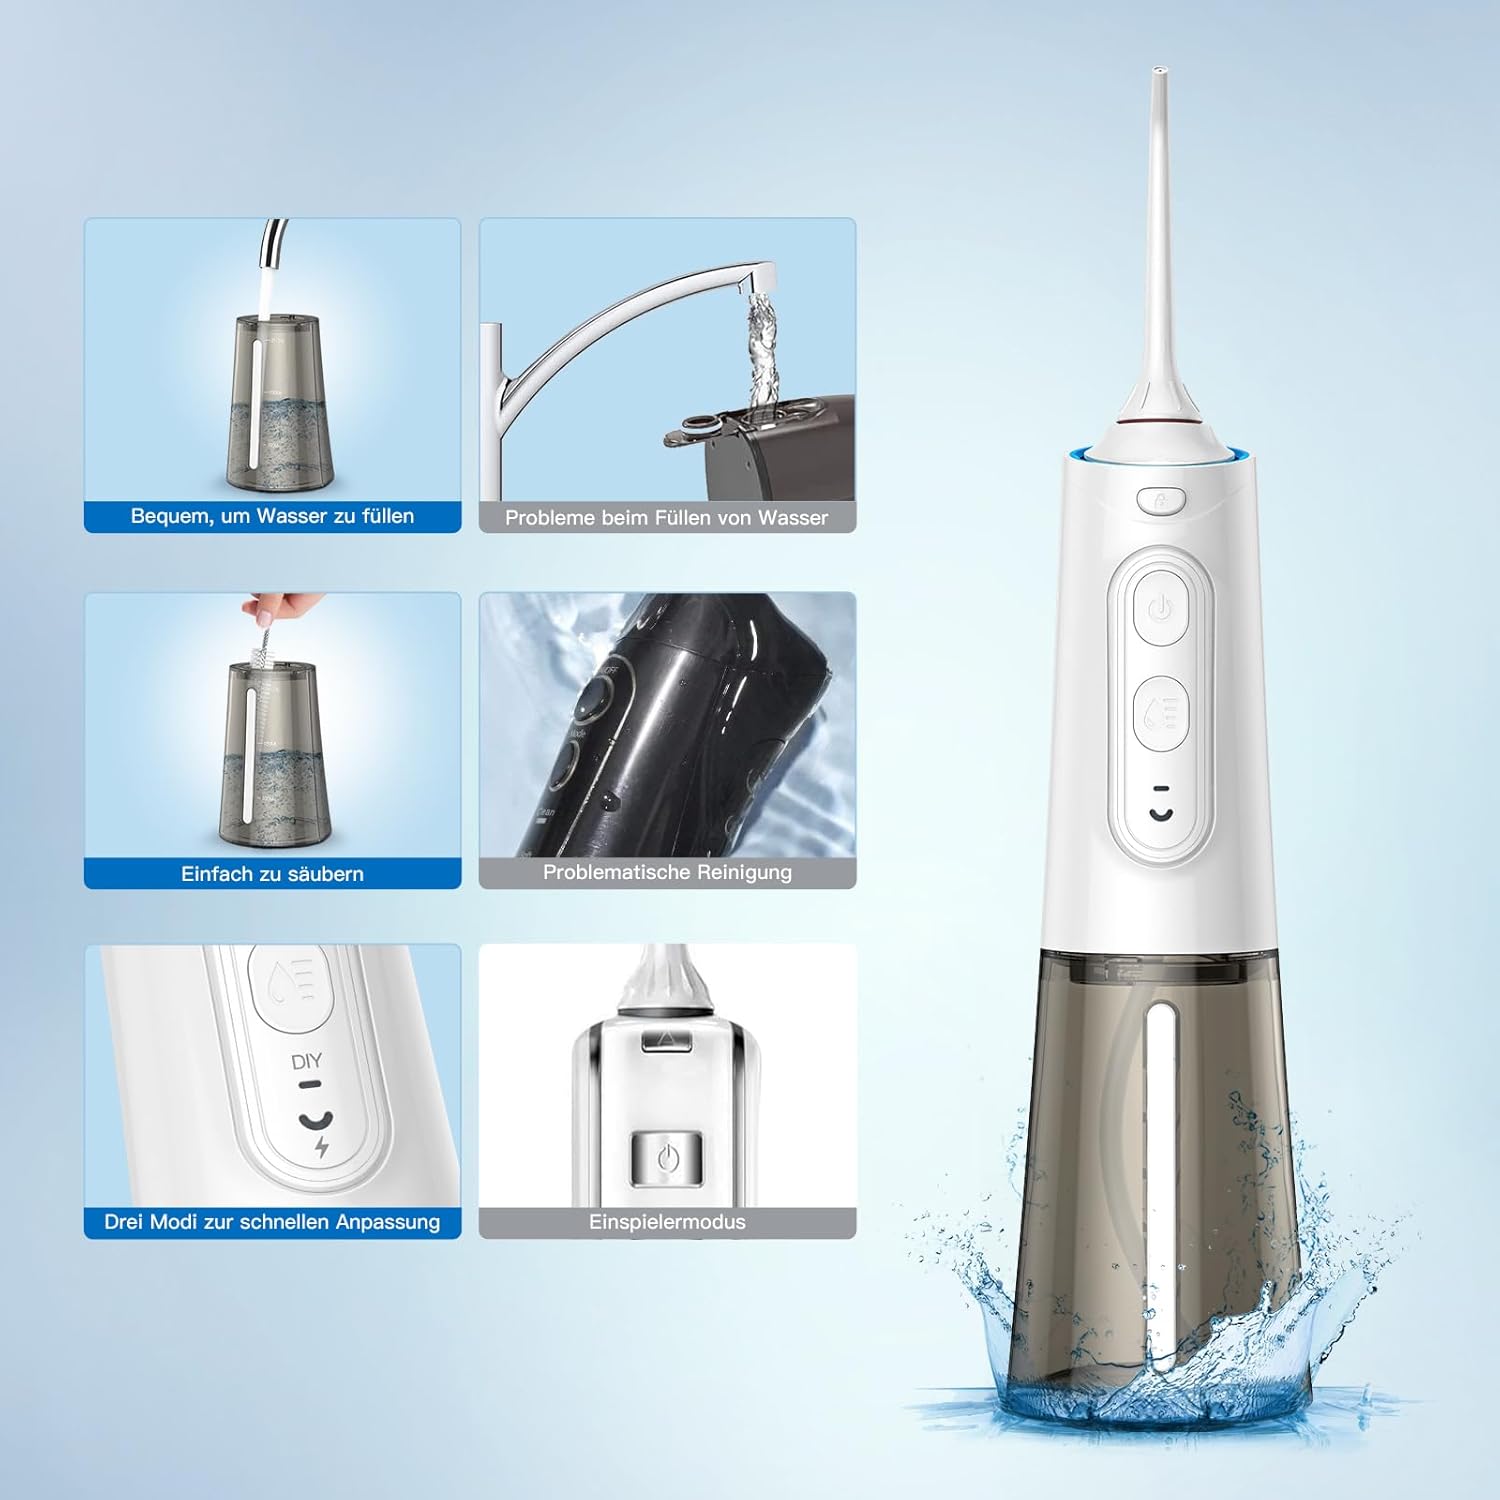
Image: Detailed diagram illustrating the main parts of the water flosser, including the nozzle, LED SmartRing, jet tip lock/unlock button, power button, water pressure adjustment button (DIY), charging indicator lights, and the detachable water tank.
- Nozzle: Directs the water stream. Rotates 360°.
- LED SmartRing: Indicates device status and mode.
- Jet Tip Lock/Unlock Button: Releases or secures the nozzle.
- Power Button: Turns the device ON/OFF.
- Water Pressure Adjustment Button (DIY): Cycles through pressure settings and activates DIY mode.
- Charging Indicator Lights: Shows battery status during charging and operation.
- Water Tank: Removable reservoir for water or mouthwash.
Setup
1. Charging the Device
Before first use, fully charge the water flosser. A full charge takes approximately 4 hours and provides up to 25 days of continuous use.
- Connect the USB charging cable to the charging port on the device.
- Plug the other end of the USB cable into a compatible USB power adapter (not included), power bank, computer, or laptop.
- The charging indicator lights will illuminate to show charging status. Once fully charged, the lights will indicate completion.
2. Filling the Water Tank
The water tank has a capacity of 250ml and is detachable for easy filling and cleaning.
- Remove the water tank by sliding it downwards from the main unit.
- Open the water tank cap.
- Fill the tank with lukewarm water. You may also add a dentist-recommended mouthwash. Do not overfill.
- Close the water tank cap securely and reattach the tank to the main unit, ensuring it clicks into place.
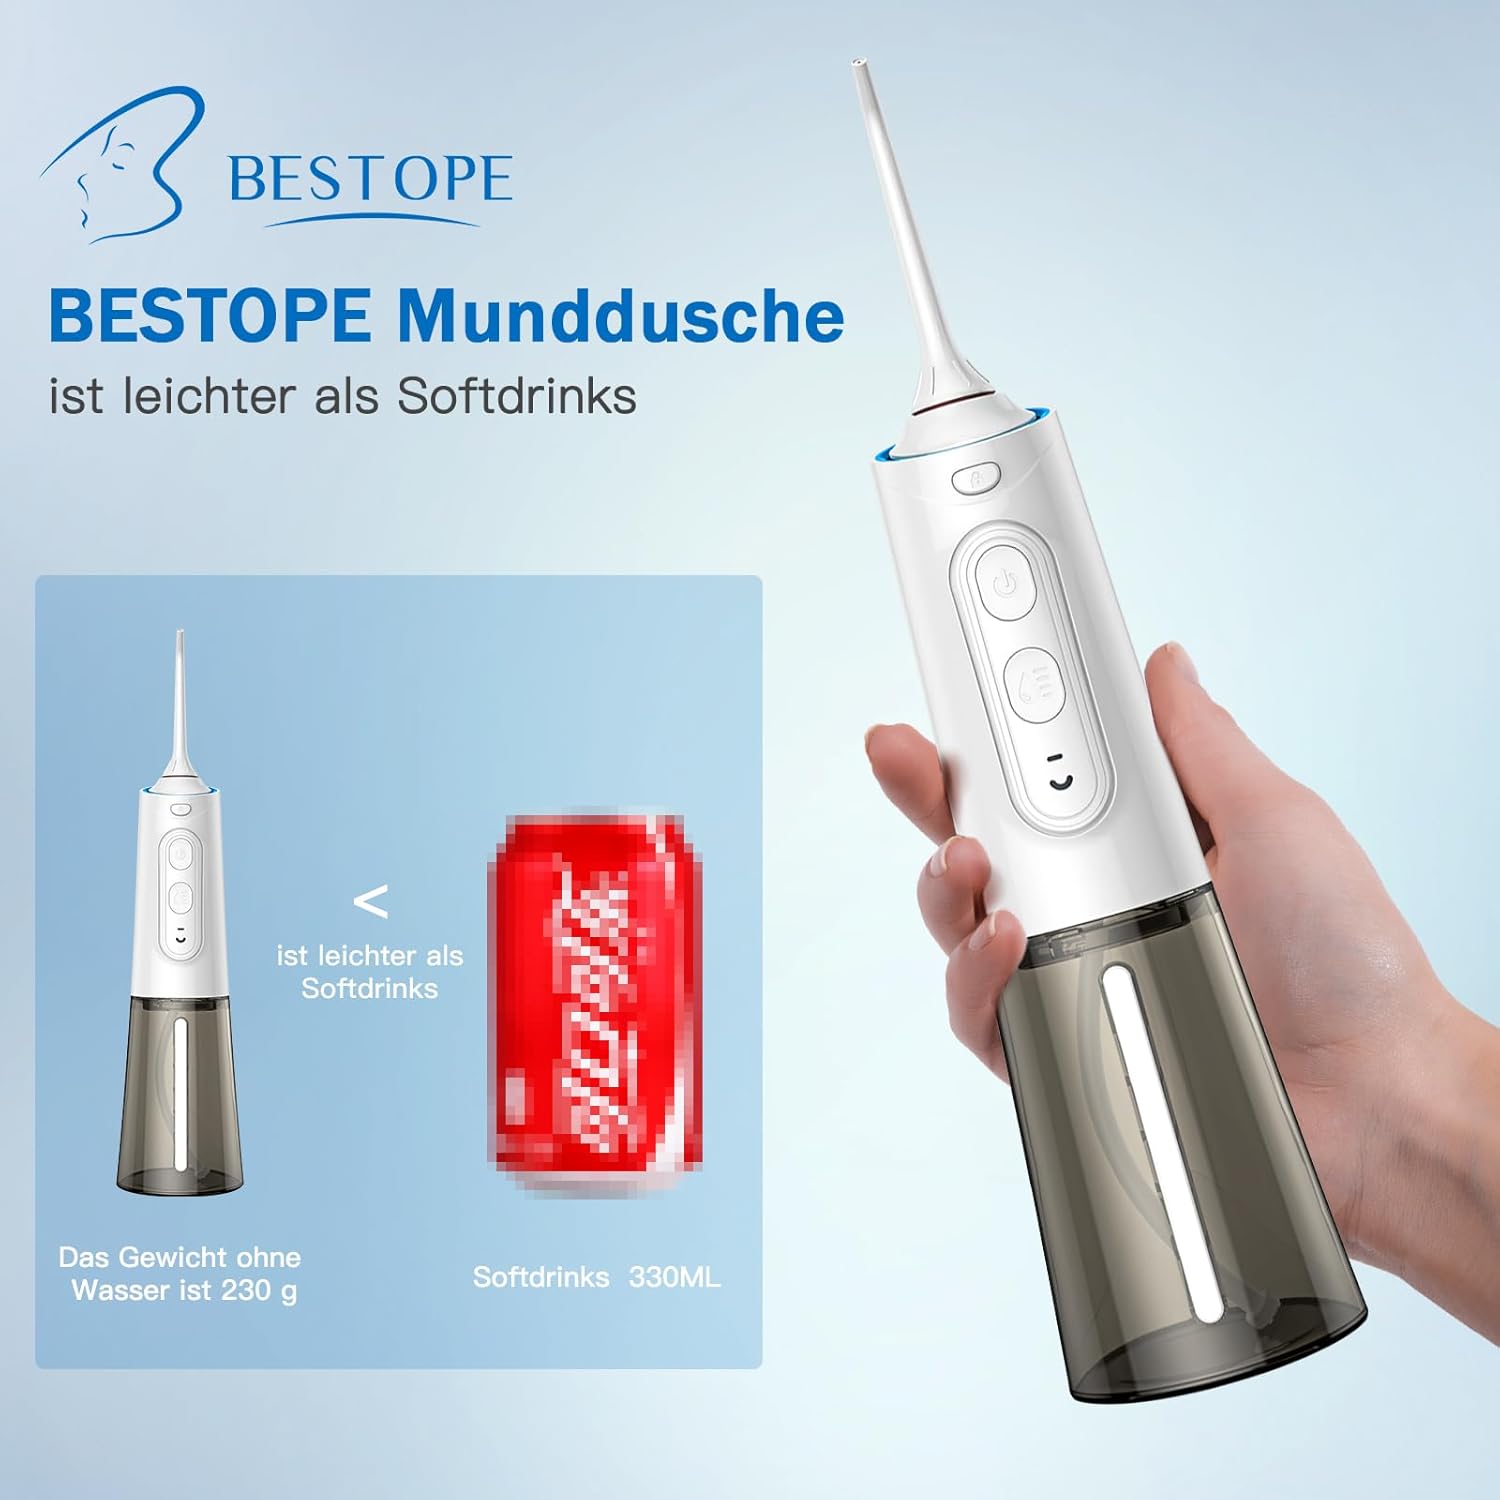
Image: Visual guide demonstrating the simple process of filling the water tank and how to detach it for cleaning.
3. Attaching the Nozzle
- Select the desired nozzle tip from the package.
- Insert the nozzle tip into the opening on the top of the main unit until it clicks firmly into place.
- To remove the nozzle, press the Jet Tip Lock/Unlock Button and pull the nozzle out.
Operating Instructions
1. Powering On/Off
- Press the Power Button to turn the device ON.
- Press the Power Button again to turn the device OFF.
2. Selecting Water Pressure Modes (DIY Mode)
The BESTOPE PRO Water Flosser features a special DIY mode, allowing you to customize the water pressure from 30 to 120 PSI.
- After turning on the device, press the Water Pressure Adjustment Button (DIY) to cycle through the preset modes.
- To enter DIY mode and adjust pressure, press and hold the Water Pressure Adjustment Button for 3 seconds. The device will enter DIY mode, and you can then press the button repeatedly to increase or decrease the pressure to your preferred level (30-120 PSI).
- This feature is particularly beneficial for sensitive teeth, bleeding gums, or for those with braces and dental work.
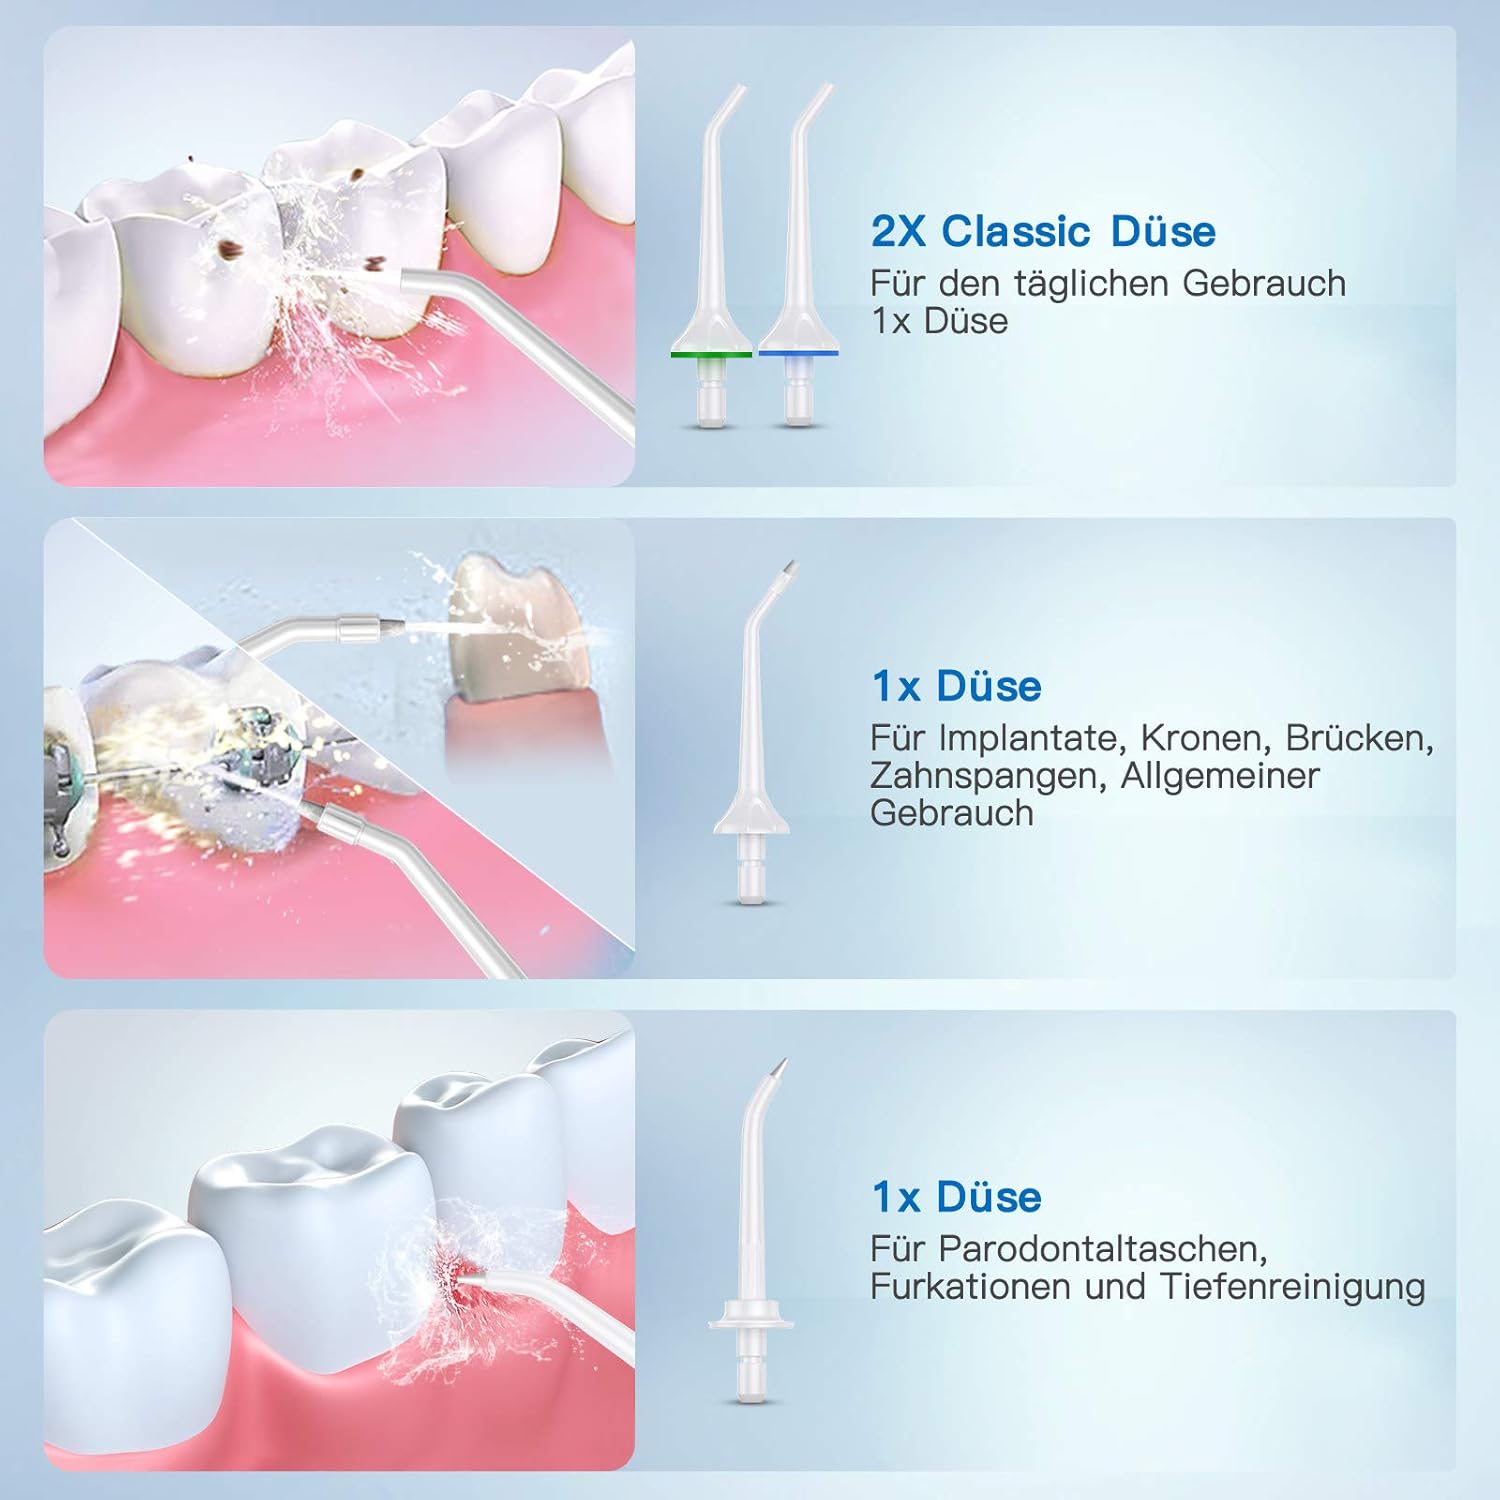
Image: Step-by-step guide on how to activate and adjust the DIY water pressure mode, illustrating the range from 30 PSI to 120 PSI.
3. Proper Usage Technique
- Lean over a sink and place the nozzle tip in your mouth.
- Close your lips slightly to prevent splashing, but allow water to flow from your mouth into the sink.
- Turn on the device and select your desired pressure setting. Start with the lowest pressure and gradually increase as you become comfortable.
- Direct the water stream at a 90-degree angle to your gumline. Move the nozzle along your gumline, pausing briefly between teeth.
- Ensure you clean both the front and back surfaces of your teeth, as well as between them. The 360° rotating nozzle allows for easy access to all areas.
- For best results, follow a systematic approach, cleaning one arch at a time, then moving to the next.
- Empty the water tank after each use.
Maintenance
1. Cleaning the Device
Regular cleaning ensures hygiene and extends the life of your water flosser.
- After each use, empty any remaining water from the tank.
- Remove the water tank and rinse it thoroughly with clean water. The detachable design allows for deep cleaning of the interior.
- Wipe the exterior of the main unit with a soft, damp cloth. Do not use abrasive cleaners or immerse the main unit in water.
- Run clean water through the device periodically to flush out any mineral deposits.
2. Replacing Nozzles
For optimal hygiene and performance, it is recommended to replace nozzle tips every 3-6 months, or sooner if they show signs of wear.
- To replace, press the Jet Tip Lock/Unlock Button and remove the old nozzle.
- Insert a new nozzle tip until it clicks into place.
3. Storage
- Store the water flosser in a dry, clean place away from direct sunlight and extreme temperatures.
- Ensure the water tank is empty and dry before storing to prevent mold formation.
- Avoid placing heavy objects on the device.
Troubleshooting
If you encounter any issues with your water flosser, please refer to the following table for common problems and solutions:
| Problem | Possible Cause | Solution |
|---|---|---|
| Device does not turn on. | Battery is low or depleted. | Charge the device fully (approx. 4 hours). |
| Weak or no water pressure. | Water tank is empty or low. Incorrect mode selected. Nozzle is clogged. | Refill the water tank. Adjust to a higher pressure setting or DIY mode. Remove and clean the nozzle. |
| Water leakage from the device. | Water tank not properly attached. Nozzle not securely inserted. | Ensure the water tank is firmly clicked into place. Reinsert the nozzle until it clicks. |
| Device stops working during use. | Battery is depleted. | Recharge the device. |
If the problem persists after trying these solutions, please contact customer support.
Specifications
| Feature | Detail |
|---|---|
| Brand | BESTOPE PRO |
| Model Number | HH52006 |
| Power Source | Battery Powered (1 Lithium-ion battery included) |
| Water Tank Capacity | 250 ml |
| Water Pressure Range | 30 - 120 PSI (DIY Mode) |
| Nozzle Tips Included | 4 (2 Classic, 1 for Implants/Braces, 1 for Periodontal Pockets) |
| Special Features | DIY Mode, 360° Rotating Nozzle, IPX7 Waterproof, Detachable Water Tank |
| Dimensions (Package) | 22.3 x 7.9 x 7.7 cm |
| Weight (Device) | 360 grams |
| Color | White |
| Material | Plastic |
Warranty and Support
BESTOPE PRO products are manufactured to the highest quality standards. This product comes with a standard manufacturer's warranty against defects in materials and workmanship. Please refer to the warranty card included in your package for specific terms and conditions.
For technical support, troubleshooting assistance, or warranty claims, please contact BESTOPE PRO customer service through the retailer where you purchased the product or visit the official BESTOPE PRO website for contact information.
Please have your model number (HH52006) and proof of purchase ready when contacting support.