Equator Advanced Appliances 4700
Equator All-in-one 4700 Washer Dryer User Manual
Model: 4700 | Brand: Equator Advanced Appliances
Introduction
This manual provides comprehensive instructions for the safe and efficient operation, installation, and maintenance of your Equator All-in-one 4700 Washer Dryer. Please read this manual thoroughly before using the appliance and retain it for future reference. This appliance combines washing and drying functions into a single unit, designed for convenience and space-saving in various living environments.
Safety Information
Always adhere to basic safety precautions when using electrical appliances to reduce the risk of fire, electric shock, or injury to persons.
- Ensure the appliance is properly grounded.
- Do not operate the appliance if it is damaged or malfunctioning.
- Keep flammable materials away from the appliance.
- Supervise children when the appliance is in use.
- Disconnect power before performing any maintenance or cleaning.
Setup and Installation
Proper installation is crucial for the optimal performance and longevity of your washer dryer. Follow these steps carefully.
Unboxing and Inspection
Carefully unbox the unit. Verify that all components listed in the packing list are present and undamaged. Report any missing or damaged parts to your retailer immediately.

Figure 1: Front view of the Equator All-in-one 4700 Washer Dryer, showcasing its sleek black design and control panel.
Removing Shipping Rods
Before operation, it is essential to remove the shipping rods located at the rear of the appliance. These rods secure the drum during transit and must be removed to prevent damage during operation.

Figure 2: Rear view of the appliance, highlighting the shipping rods that need to be removed before first use. Also visible are the water inlet and outlet connections.
Refer to the video below for a visual guide on removing the shipping rods and connecting the water hoses.
Video 1: Installation guide for the Equator All-in-one Washer Dryer, demonstrating the removal of shipping rods and connection of water lines.
Leveling the Appliance
Place the unit on a firm, level surface. Adjust the leveling feet at the bottom of the appliance to ensure it is stable and does not wobble. Proper leveling minimizes vibration and noise during operation.

Figure 3: Appliance dimensions (21.8"D x 23.6"W x 33.5"H) for planning installation space. Ensure adequate clearance for proper operation, though this model features zero clearance on sides, back, and top.
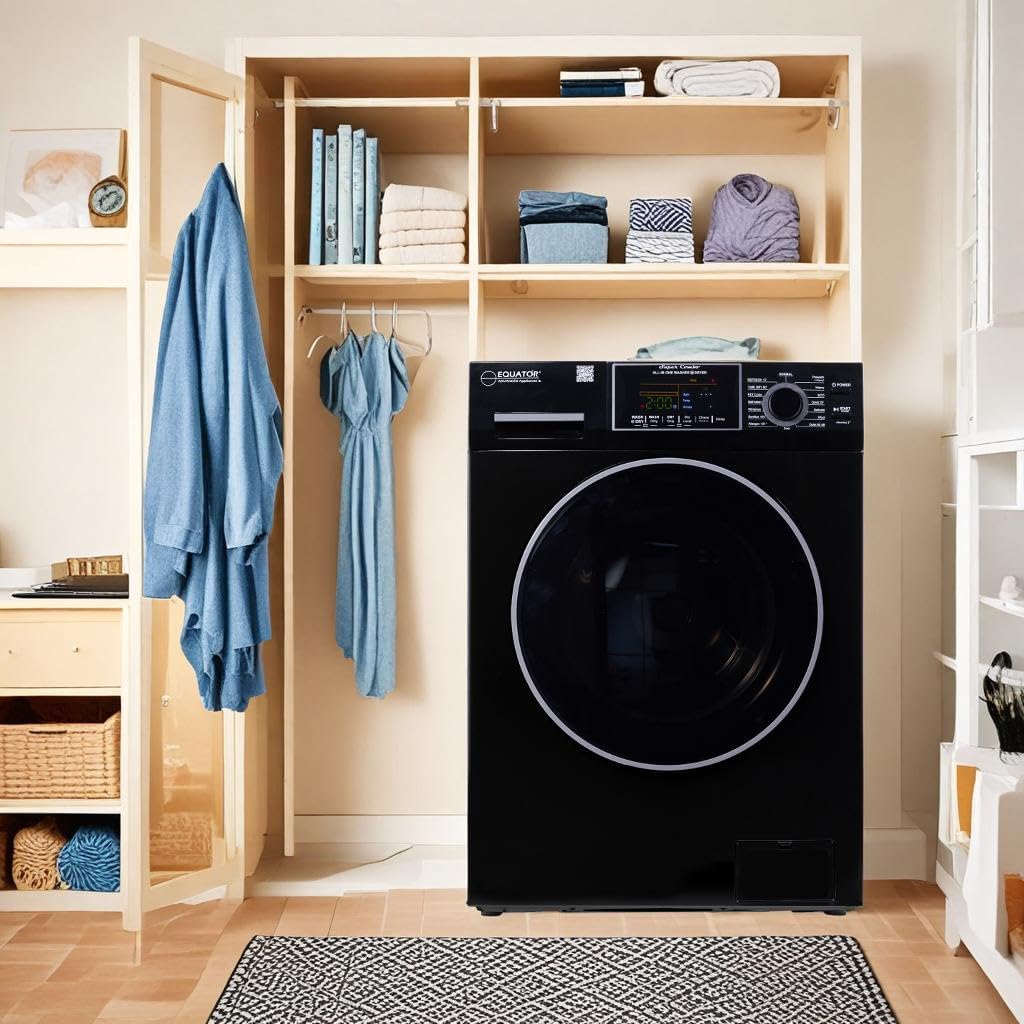
Figure 4: Example of the washer dryer installed as a built-in unit, highlighting its zero-clearance design for seamless integration into tight spaces or cabinetry.
Water and Power Connections
Connect the hot and cold water inlet hoses to their respective taps and to the appliance. Ensure connections are tight to prevent leaks. The drain hose should be securely placed into a standpipe or laundry tub. Plug the appliance into a standard 110V electrical outlet.

Figure 5: Detailed view of key features, including the hot and cold water inlet valves, electronic touch controls, 1.62 cu. ft. capacity drum, pearl design stainless drum, detergent drawer, and easy-to-open coin trap.
Operating Instructions
Your Equator All-in-one Washer Dryer is designed for intuitive use. Familiarize yourself with the control panel and available programs.
Control Panel Overview
The appliance features an LED display with touch button controls for streamlined operation. Use the rotary knob to select programs and the touch buttons for additional settings like wash/dry only, dry level, chime, and delay start.
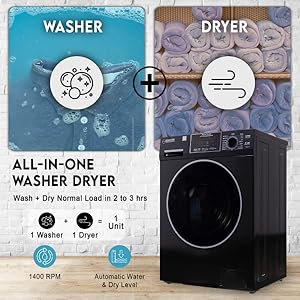
Figure 6: The electronic touch control panel, illustrating options such as Delay Start, Child Lock, Diagnostics, and Oversuds Control for enhanced user experience.
Loading Laundry
Open the door and load your laundry into the drum. Do not overload the machine to ensure effective washing and drying. The appliance has a capacity of 1.62 cubic feet (15 lbs).

Figure 7: Visual representation of the 1.62 cubic feet capacity and the water inlet options (cold/hot) for optimal wash performance.
Wash and Dry Programs
Select from 15 wash and dry programs to suit your laundry needs. These include Normal, Prewash + Heavy, ECO, Quick 20, Delicate, Salt Wash, Quiet (60 dB), Time Dry (60 min), Refresh (12 min), Drain, Self Clean, and a dedicated Pet Cycle for hair removal.
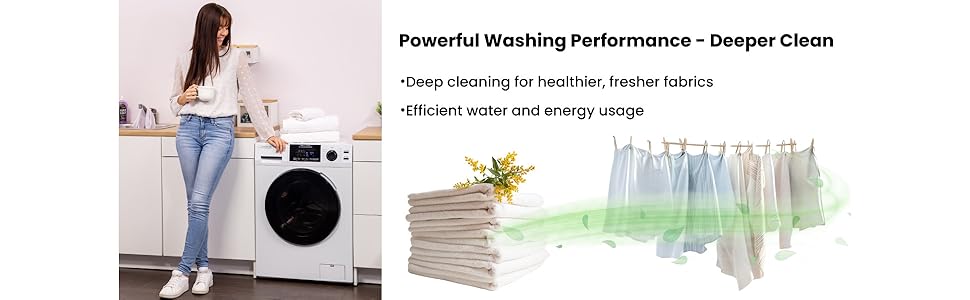
Figure 8: Overview of flexible drying cycles, including Time Dry, Sensor Dry, and Adjustable Heat Levels, allowing precise control over the drying process to prevent over-drying.
The 1400 RPM spin speed extracts maximum water during the rinse cycle, reducing overall drying time.
Maintenance
Regular maintenance ensures the longevity and efficiency of your appliance.
Cleaning the Coin Trap
Periodically clean the coin trap to remove lint, coins, or other small items that may accumulate and affect drainage. The coin trap is designed for easy access.
Self Clean Cycle
Utilize the "Self Clean" program to maintain the cleanliness of the drum and internal components, preventing odor buildup and ensuring hygienic washing.
Winterize Cycle
If the appliance will be exposed to freezing temperatures, use the "Winterize" cycle to drain all water and prevent damage from freezing. This process takes approximately 2 minutes.
Troubleshooting
If you encounter issues with your appliance, refer to the following common troubleshooting tips. For more complex problems, consult the full user manual or contact customer support.
- Appliance not turning on: Check if the power cord is securely plugged into a 110V outlet. Ensure the power button is pressed.
- Excessive vibration/noise: Verify the appliance is level and all four adjustable feet are firmly on the ground. Ensure shipping rods have been removed.
- Clothes not drying completely: Do not overload the machine. Select an appropriate dry level or time dry setting. Ensure the coin trap is clean.
- Water leaks: Check all water inlet and drain hose connections for tightness. Ensure hoses are not kinked or damaged.
Specifications
| Feature | Specification |
|---|---|
| Brand | Equator Advanced Appliances |
| Model Number | 4700 (EZ4700C) |
| Capacity | 1.62 Cubic Feet / 15 lbs |
| Color | Black |
| Product Dimensions (D x W x H) | 21.8" x 23.6" x 33.5" |
| Item Weight | 161 Pounds |
| Voltage | 110 Volts |
| Maximum Rotational Speed | 1400 RPM |
| Number of Wash/Dry Cycles | 15 |
| Drum Material | Stainless Steel |
| Form Factor | Built-In (Zero Clearance) |
| Door Hinges | Left |
| UPC | 747037146065 |
Warranty and Support
For warranty information and customer support, please refer to the official Equator Advanced Appliances website or contact the seller, Eco Appliances Inc. They offer customer support and 30-day easy returns.
You may also consider purchasing extended protection plans for additional coverage.
Important Documents
Additional resources are available for detailed information:
Ask a question about this manual
Ask about setup, troubleshooting, compatibility, parts, safety, or missing instructions. Manuals+ will review the question and use this page’s manual context to help answer it.