
OELFFOW SVP-63A
OELFFOW Adjustable Voltage and Current Protector (SVP-63A) User Manual
Brand: OELFFOW | Model: SVP-63A
1. Introduction
The OELFFOW Adjustable Voltage and Current Protector (SVP-63A) is designed to safeguard your electrical appliances and systems from voltage fluctuations and overcurrent conditions. This intelligent relay features overvoltage, undervoltage, and overcurrent protection, along with an auto-reset function to restore power automatically once conditions normalize. Its high fire-resistant PC material casing ensures safe operation, offering sensitive and precise measurements with minimal heat generation.
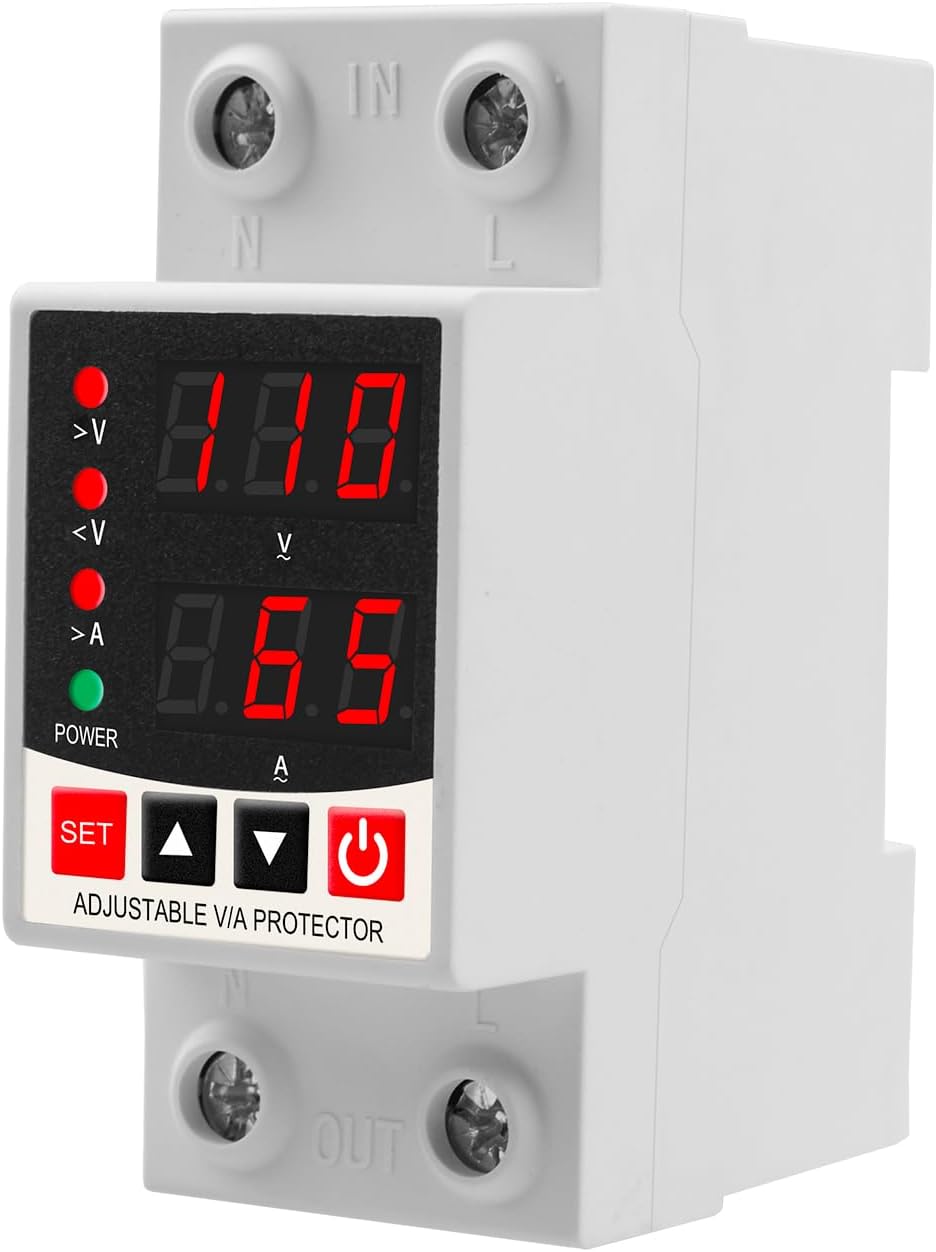
Figure 1: Main view of the OELFFOW Adjustable Voltage and Current Protector (SVP-63A).
2. Safety Information
- Professional Installation Recommended: Installation should be performed by qualified personnel to ensure safety and proper function.
- Power Disconnection: Always disconnect power before installation, wiring, or maintenance to prevent electric shock.
- Operating Environment: Ensure the device is installed in a dry, well-ventilated area, away from direct sunlight, high temperatures, and corrosive gases.
- Load Capacity: Do not exceed the rated current and voltage of the device. Overloading can cause damage or fire.
- Material Safety: The device casing is made of high fire-resistant PC material. Do not attempt to modify or tamper with the casing.
3. Product Overview and Features
The SVP-63A protector offers comprehensive monitoring and protection for your electrical systems. Key features include:
- High-Quality Material: Made from high fire-resistant PC material for safe usage.
- Multiple Functions: Overcurrent, overvoltage, and undervoltage protection.
- Auto-Reset Function: Automatically restores power when voltage and current return to normal.
- Easy Installation: Din rail-mounted design simplifies installation.
- Versatile Applications: Suitable for motor protection, electrical control systems, household appliances, industrial equipment, and lighting systems.
- Digital Display: High-definition sensitive digital display panel for real-time voltage and current readings.

Figure 2: Digital display panel and control buttons. Indicators for overvoltage (>V), undervoltage (<V), overcurrent (>A), and normal operation (POWER) are visible. Buttons include SET, Up, Down, and ON/OFF.

Figure 3: Wide range of applications for the protector, ensuring stable operation and safety.
4. Specifications
| Attribute | Value |
|---|---|
| Rated Supply Voltage | AC 110V; DC 85-300V |
| Rated Frequency | 40/50/60/70Hz |
| Overvoltage Trip Delay | 0.5s |
| Max. Operating Current | 63A |
| Overvoltage Setting Range (>U) | AC130-300V; DC130-300V |
| Undervoltage Setting Range (<U) | AC80-210V; DC85-210V |
| Voltage Hysteresis | 5V |
| Max. Operating Phase Voltage | 350V |
| Function | Lightning protection |
| Permissible Relative Humidity | ≤50% at 40°C (without condensation) |
| Ambient Temperature | -25°C ~ +55°C |
| Installation Type | Din Rail Mount |
| Item Weight | 5.6 ounces |
| Package Dimensions | 3.62 x 3.07 x 1.73 inches |
5. Setup and Installation
The OELFFOW SVP-63A is designed for easy Din rail mounting. Follow these steps for proper installation:
- Power Off: Ensure all power to the circuit is disconnected before beginning installation.
- Mounting: Securely attach the protector to a standard Din rail.
- Wiring: Connect the input (IN) terminals to the power source and the output (OUT) terminals to the load according to the wiring diagram. Ensure correct polarity for DC applications (if applicable) and proper connection of Live (L) and Neutral (N) wires for AC.
- Secure Connections: Tighten all terminal screws to prevent loose connections, which can cause overheating or malfunction.
- Power On: Once installation is complete and verified, restore power to the circuit.
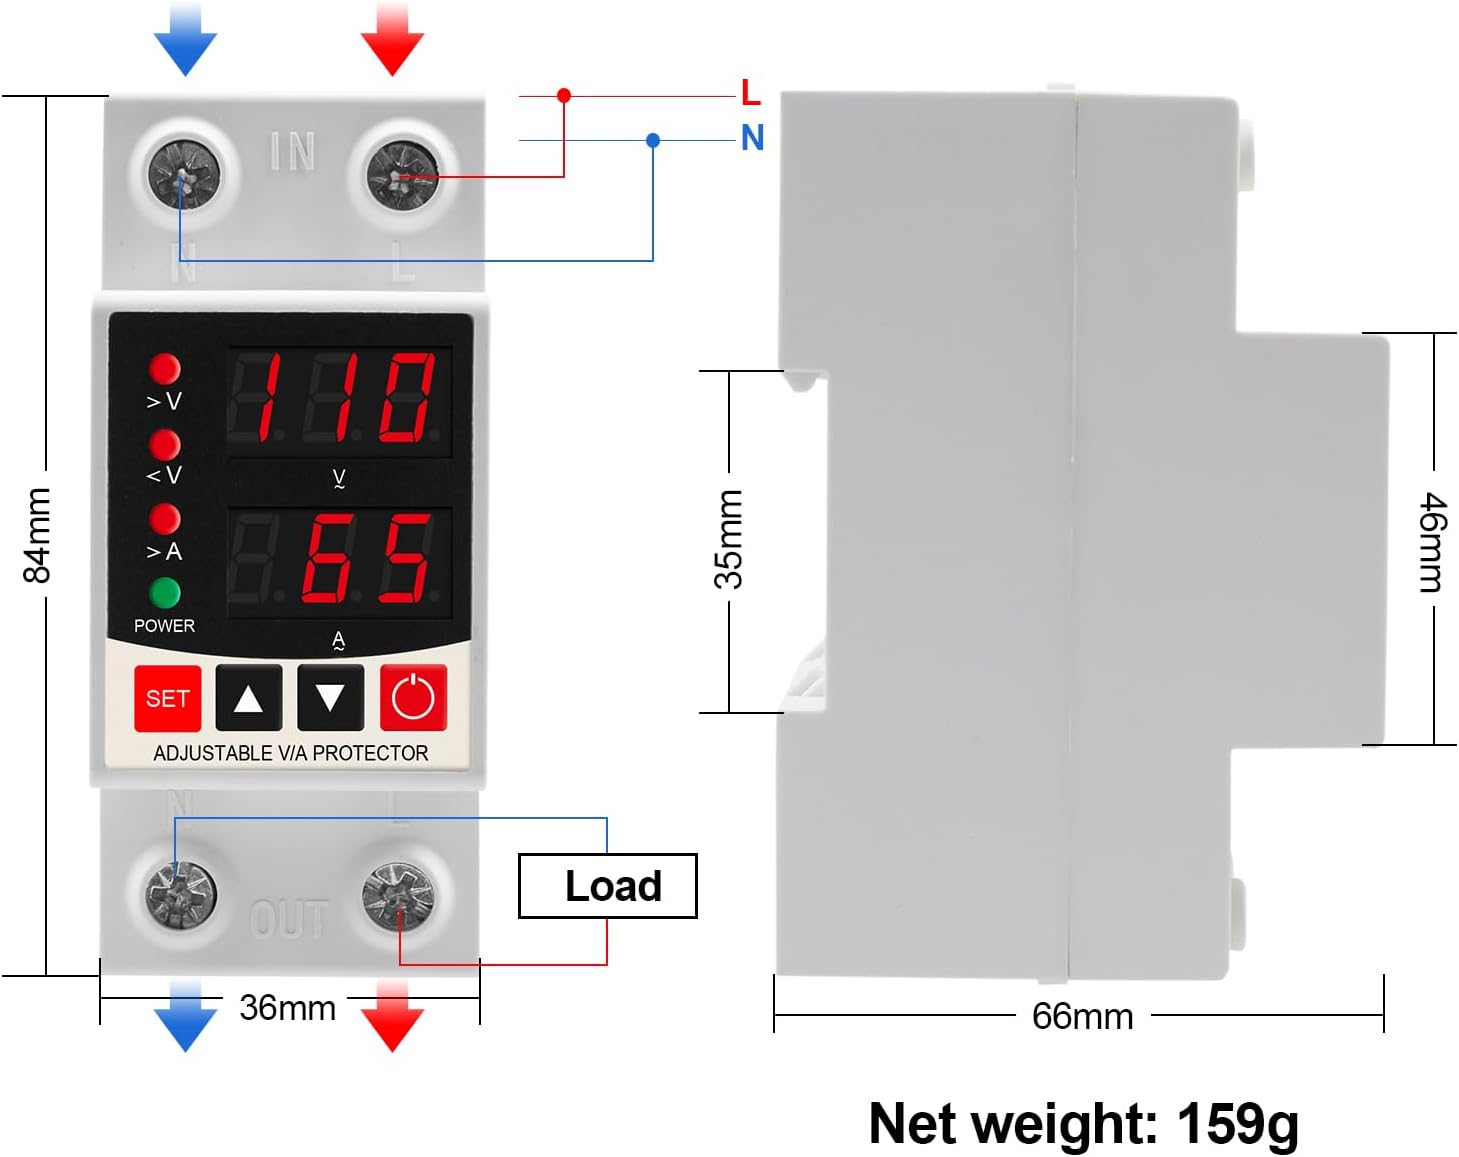
Figure 4: Wiring Diagram. Connect 'IN' to the power source and 'OUT' to the electrical load.
Video 1: Demonstration of the OELFFOW Adjustable V/A Protector, including installation and basic functionality. This video is provided by Minyu Store (Seller).
Video 2: Overview of the functional characteristics and usage of a similar product, provided by BXST (Seller).
6. Operating Instructions
The SVP-63A features a digital display and control buttons for setting protection parameters. Refer to Figure 2 for button identification.
6.1. Parameter Setting
Press the SET button to enter the parameter setting mode. Use the Up (▲) and Down (▼) buttons to navigate through parameters (P01-P19) and adjust their values. Press SET again to confirm and move to the next parameter or exit the setting mode.
- P01: Power-on Delay: Sets the delay before power is supplied after startup (e.g., 5 seconds).
- P02: Restoration Delay: Sets the delay before power is restored after a protection event (e.g., 3 seconds).
- P03: Overvoltage Setting: Adjust the maximum permissible voltage.
- P04: Overvoltage Restoration Value: Sets the voltage level at which power is restored after an overvoltage event (e.g., 5V return difference).
- P05: Undervoltage Setting: Adjust the minimum permissible voltage.
- P06: Undervoltage Restoration Value: Sets the voltage level at which power is restored after an undervoltage event.
- P07: Overvoltage Action Delay: Sets the delay before the device acts on an overvoltage event.
- P08: Voltage Correction: Allows for fine-tuning of voltage readings.
- P09: Overcurrent Setting: Adjust the maximum permissible current.
- P10: Overcurrent Action Delay: Sets the delay before the device acts on an overcurrent event.
- P11: Overcurrent Action Count: Records the number of overcurrent occurrences.
- P12: Current Correction: Allows for fine-tuning of current readings.
- P13: Frequency Display: Shows the current frequency.
- P14: Fast Power-off Protection: Enables or disables fast power-off.
- P15: Mode Switch: Selects operating mode (1 Standard, 2 Manual, 3 Automatic).
- P16: Automatic Reset: Enables or disables automatic reset.
- P17: Knife Switch Mode: Set to OFF for knife switch mode.
- P18: Power-saving Mode: Automatically dims the screen after inactivity.
- P19: Password Setting: For setting a password to protect settings.
6.2. Manual On/Off
Press the ON/OFF (Power) button to manually switch the power output on or off.
Video 3: Demonstration of adjustable voltage protection features and settings, provided by SINOTIMER (Seller).
7. Maintenance
- Regular Inspection: Periodically check the device for any signs of physical damage, loose connections, or discoloration.
- Cleaning: Use a dry, soft cloth to clean the exterior of the device. Do not use liquid cleaners or solvents.
- Firmware Updates: (If applicable) Check the manufacturer's website for any available firmware updates.
- Storage: If storing the device for an extended period, ensure it is kept in a dry, cool place away from direct sunlight.
8. Troubleshooting
| Problem | Possible Cause | Solution |
|---|---|---|
| Device not powering on. | No input power; incorrect wiring; internal fault. | Check power source and connections. Verify wiring against diagram. If problem persists, contact support. |
| Display blinking red (no readings). | Incorrect power supply type (e.g., DC power with current display enabled); device in protection mode. | For DC power, current display will show "DC". Check if voltage/current is outside set limits. Adjust settings if necessary. |
| Power not restoring after protection event. | Conditions still outside safe limits; auto-reset function disabled; restoration delay not yet complete. | Verify voltage/current has returned to normal. Check P16 (Automatic Reset) setting. Wait for restoration delay to complete. |
| Difficulty navigating settings. | Unfamiliarity with menu structure. | Refer to Section 6.1 Parameter Setting for detailed instructions on navigating and adjusting parameters. |
9. Warranty and Support
OELFFOW is committed to providing high-quality products and excellent user experience. For any product-related inquiries, technical support, or warranty claims, please contact your retailer or the manufacturer directly. Keep your purchase receipt as proof of purchase.
Ask a question about this manual
Ask about setup, troubleshooting, compatibility, parts, safety, or missing instructions. Manuals+ will review the question and use this page’s manual context to help answer it.