EcoTypee 10 layers Food Dehydrator
EcoTypee Food Dehydrator User Manual
Model: 10 layers Food Dehydrator
1. Introduction
Thank you for choosing the EcoTypee Food Dehydrator. This appliance is designed to efficiently dry a variety of foods, including fruits, vegetables, meats, and herbs, preserving their nutrients and creating healthy snacks. With its 10 stainless steel trays and precise digital controls, you can easily customize the drying process to achieve optimal results.

Figure 1: EcoTypee 10-layer Food Dehydrator, showcasing its stainless steel exterior and clear viewing door.
2. Important Safety Instructions
Please read all instructions carefully before using the dehydrator. Failure to follow these instructions may result in electric shock, fire, or serious injury.
- Always unplug the dehydrator from the power outlet when not in use, before cleaning, or if a malfunction occurs.
- Do not immerse the appliance, cord, or plug in water or any other liquid.
- Keep the appliance out of reach of children and pets.
- Ensure the power cord is not damaged and does not hang over the edge of a table or counter.
- Do not operate the dehydrator if it has been damaged in any way. Contact customer support for assistance.
- Use the appliance only for its intended purpose as described in this manual.
- Ensure proper ventilation around the dehydrator during operation. Do not block air vents.
- The dehydrator operates at high temperatures. Use caution when handling trays and food during and after operation.
3. Product Components
The EcoTypee Food Dehydrator comes with the following components:
- Main Dehydrator Unit (with control panel and internal fans)
- 10 Stainless Steel Drying Trays
- 1 Drip Tray (for collecting residue)
- User Manual

Figure 2: Interior view of the dehydrator with all 10 stainless steel trays in place.
4. Setup and First Use
- Unpacking: Carefully remove all packaging materials and inspect the dehydrator for any damage.
- Cleaning: Before first use, wash all stainless steel trays and the drip tray with warm, soapy water. Rinse thoroughly and dry completely. Wipe the interior and exterior of the main unit with a damp cloth.
- Placement: Place the dehydrator on a stable, heat-resistant surface, away from walls and other appliances to ensure proper air circulation. Ensure the rear fans are not obstructed.
- Power Connection: Plug the power cord into a grounded electrical outlet.
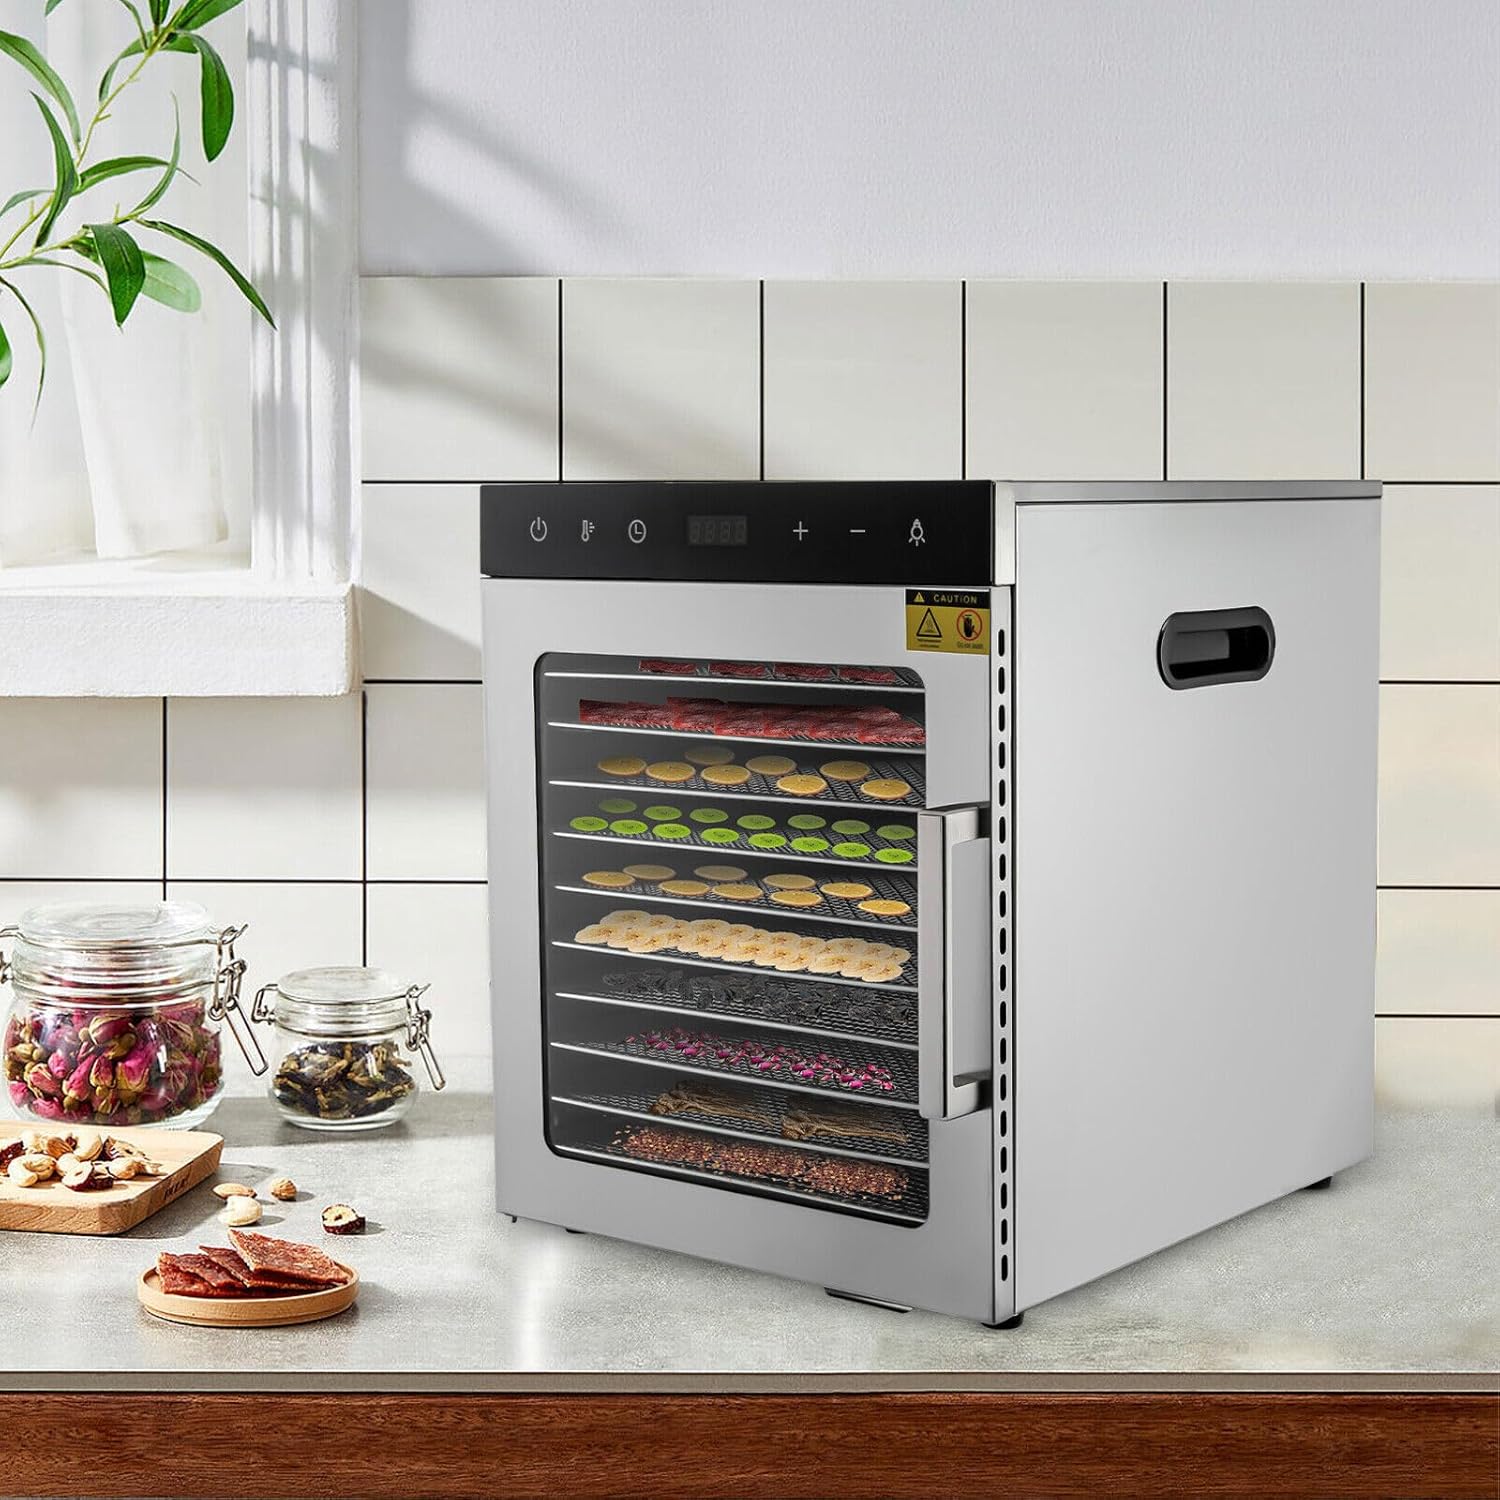
Figure 3: Proper placement of the dehydrator on a kitchen counter, ensuring adequate space for ventilation.
5. Operating Instructions
5.1 Control Panel Overview
The dehydrator features an intuitive LED display control panel for easy operation.

Figure 4: Close-up of the intelligent control panel, showing temperature and duration settings.
- Power Button (⏻): Turns the unit on/off.
- Temperature Button (☽): Toggles between temperature setting mode.
- Timer Button (⏱): Toggles between timer setting mode.
- Plus (+) / Minus (-) Buttons: Adjust temperature and time values.
- Light Button (💡): Activates the internal LED light for better observation of the drying process.
- LED Display: Shows current temperature and remaining time.
5.2 Preparing Food for Dehydration
For best results, prepare food uniformly. Slice items to a consistent thickness to ensure even drying. The video below demonstrates food preparation and loading.
Video 1: Demonstration of food preparation and loading trays into the EcoTypee Food Dehydrator. This video shows how to slice various fruits like apples, dragon fruit, and bananas, and how to place them on the stainless steel trays. It also illustrates the process of making fruit leather by blending ingredients and spreading them on a non-stick sheet before placing it in the dehydrator.
After preparing your food, arrange it in a single layer on the stainless steel trays. Do not overlap items to allow for optimal airflow. Insert the loaded trays into the dehydrator unit.

Figure 5: Trays loaded with sliced fruits, ready for the dehydration process.
5.3 Setting Temperature and Time
The dehydrator allows for precise control over temperature and time. The temperature range is 86°F-194°F (30°C-90°C), and the timer can be set from 30 minutes to 24 hours.
- Press the Power button to turn on the dehydrator.
- Press the Temperature button (☽) to enter temperature setting mode. Use the Plus (+) and Minus (-) buttons to adjust the desired temperature.
- Press the Timer button (⏱) to enter time setting mode. Use the Plus (+) and Minus (-) buttons to adjust the desired drying time.
- The dehydrator will automatically start once the settings are confirmed.
- To observe the drying process, press the Light button (💡) to turn on the internal LED light.

Figure 6: The digital control panel displaying current settings during operation.
6. Food Dehydration Guidelines
The following table provides general guidelines for dehydrating common food items. Drying times may vary based on food thickness, moisture content, and ambient humidity.
| Food Item | Recommended Temperature | Approximate Drying Time |
|---|---|---|
| Fruits (e.g., Apples, Bananas, Berries) | 130-140°F (54-60°C) | 6-12 hours |
| Vegetables (e.g., Carrots, Mushrooms, Tomatoes) | 120-130°F (49-54°C) | 4-10 hours |
| Meats (e.g., Jerky) | 155-165°F (68-74°C) | 8-15 hours |
| Herbs and Flowers | 85-95°F (29-35°C) | 2-6 hours |
| Fruit Leather | 135°F (57°C) | 6-10 hours |
Always ensure food is completely dry before storage to prevent spoilage. Dried food should be pliable but not sticky, or crisp and brittle depending on the food type.
Figure 7: Visual guide for recommended temperatures for various food categories.
7. Maintenance and Cleaning
Regular cleaning ensures optimal performance and extends the life of your dehydrator.
- Before Cleaning: Always unplug the dehydrator and allow it to cool completely before cleaning.
- Trays and Drip Tray: The stainless steel trays and drip tray are dishwasher safe. Alternatively, wash them with warm, soapy water, rinse thoroughly, and dry completely.
- Main Unit: Wipe the exterior and interior of the dehydrator with a damp cloth. For stubborn stains, use a mild detergent. Do not use abrasive cleaners or scouring pads.
- Storage: Store the dehydrator in a clean, dry place when not in use.
8. Troubleshooting
| Problem | Possible Cause | Solution |
|---|---|---|
| Dehydrator does not turn on. | Not plugged in; power outlet malfunction; power button not pressed. | Ensure the unit is securely plugged into a working outlet. Press the power button. Check the circuit breaker. |
| Food is not drying evenly. | Food slices are uneven; trays overloaded; poor air circulation. | Slice food to consistent thickness. Do not overload trays. Ensure dehydrator is placed with adequate ventilation. Rotate trays periodically if needed. |
| Drying takes too long. | Temperature set too low; high humidity; food too thick. | Increase temperature setting. Ensure food is sliced thinly. Consider ambient humidity. |
| Unusual noise during operation. | Loose component; fan obstruction. | Unplug and inspect for any loose parts or obstructions near the fan. If noise persists, contact customer support. Note: The unit operates at ≤ 48 decibels, some fan noise is normal. |
9. Specifications
- Brand: EcoTypee
- Model: 10 layers Food Dehydrator
- Material: Stainless Steel
- Wattage: 800 watts
- Product Dimensions: 13.58"D x 15.16"W x 16.73"H
- Voltage: 110 Volts
- Number of Trays: 10
- Temperature Range: 86°F-194°F (30-90°C)
- Timer Range: 0.5 - 24 hours
- Noise Level: ≤ 48 decibels
- Dishwasher Safe Trays: Yes

Figure 8: Product dimensions for proper space planning.
10. Warranty and Customer Support
For warranty information, technical support, or any questions regarding your EcoTypee Food Dehydrator, please contact our customer service team. Refer to the product packaging or our official website for contact details.
We are committed to providing high-quality products and excellent customer service.
Ask a question about this manual
Ask about setup, troubleshooting, compatibility, parts, safety, or missing instructions. Manuals+ will review the question and use this page’s manual context to help answer it.