1. Introduction
Thank you for choosing Fun Memories Rustic Grey Floating Shelves. This manual provides essential information for the safe and proper installation, use, and maintenance of your new shelves. Please read these instructions carefully before assembly and retain them for future reference.
2. Safety Information
WARNING: CHOKING HAZARD – Small parts. Not for children under 3 years. Keep all small components and packaging materials away from children during assembly.
Ensure the shelves are securely mounted to a suitable wall structure to prevent falling and potential injury or damage. Do not exceed the maximum weight limit of 30 pounds per shelf.
3. Package Contents
Please verify that all components are present before beginning assembly:
- 2 x Shelf Boards (16"W x 6.7"D x 1.4"H)
- 2 x Metal Hanging Brackets
- 4 x Set Screws
- 11 x Drywall Anchors
- 11 x Screws
- 1 x Small Leveling Device (may be included)
If any parts are missing or damaged, please contact customer support.
4. Specifications
| Brand | Fun Memories |
| Model Name | Rustic Grey Wall Shelf |
| Product Dimensions | 6.7"D x 16"W x 1.4"H |
| Number of Shelves | 2 |
| Weight Limit (per shelf) | 30 Pounds |
| Material | Engineered Wood (MDF) |
| Finish Type | Matte |
| Installation Type | Wall Mount (Invisible Brackets) |
| Assembly Required | Yes |
| Item Weight | 4.36 pounds (total for set) |
These shelves are designed for various indoor environments including bathrooms, bedrooms, kitchens, living rooms, and offices.
5. Setup (Installation)
Follow these steps for proper installation of your floating shelves. It is recommended to have a drill, screwdriver, and a level for accurate installation.
- Prepare the Wall: Choose a suitable location on your wall. Ensure there are no electrical wires or plumbing behind the drilling area.
- Mark Drilling Points: Hold a metal hanging bracket against the wall at your desired height. Use a pencil to mark the positions for the drill holes. Use a level to ensure the marks are perfectly horizontal.
- Drill Pilot Holes: Drill pilot holes at the marked points. For drywall, use a drill bit appropriate for the provided drywall anchors. For wood studs, drill smaller pilot holes.
- Install Anchors (if needed): If installing into drywall, screw the drywall anchors into the pilot holes until flush with the wall. If installing into wood studs, anchors are typically not required.
- Mount the Bracket: Align the metal hanging bracket with the installed anchors or pilot holes. Insert the screws through the bracket and tighten them securely into the anchors or studs. Ensure the bracket is firmly attached and level.
- Slide the Shelf: Carefully slide the shelf board onto the metal bracket rods. The shelf is designed to fit snugly over the invisible brackets.
- Secure the Shelf: Locate the small holes on the underside of the shelf board. Insert the provided set screws into these holes and tighten them to fix the shelf to the support rods of the bracket. This prevents the shelf from sliding or lifting.
- Repeat for Second Shelf: Follow the same steps to install the second shelf, ensuring proper spacing and alignment if installing them together.

Figure 5.1: Shelf dimensions (16"W x 6.7"D x 1.4"H).
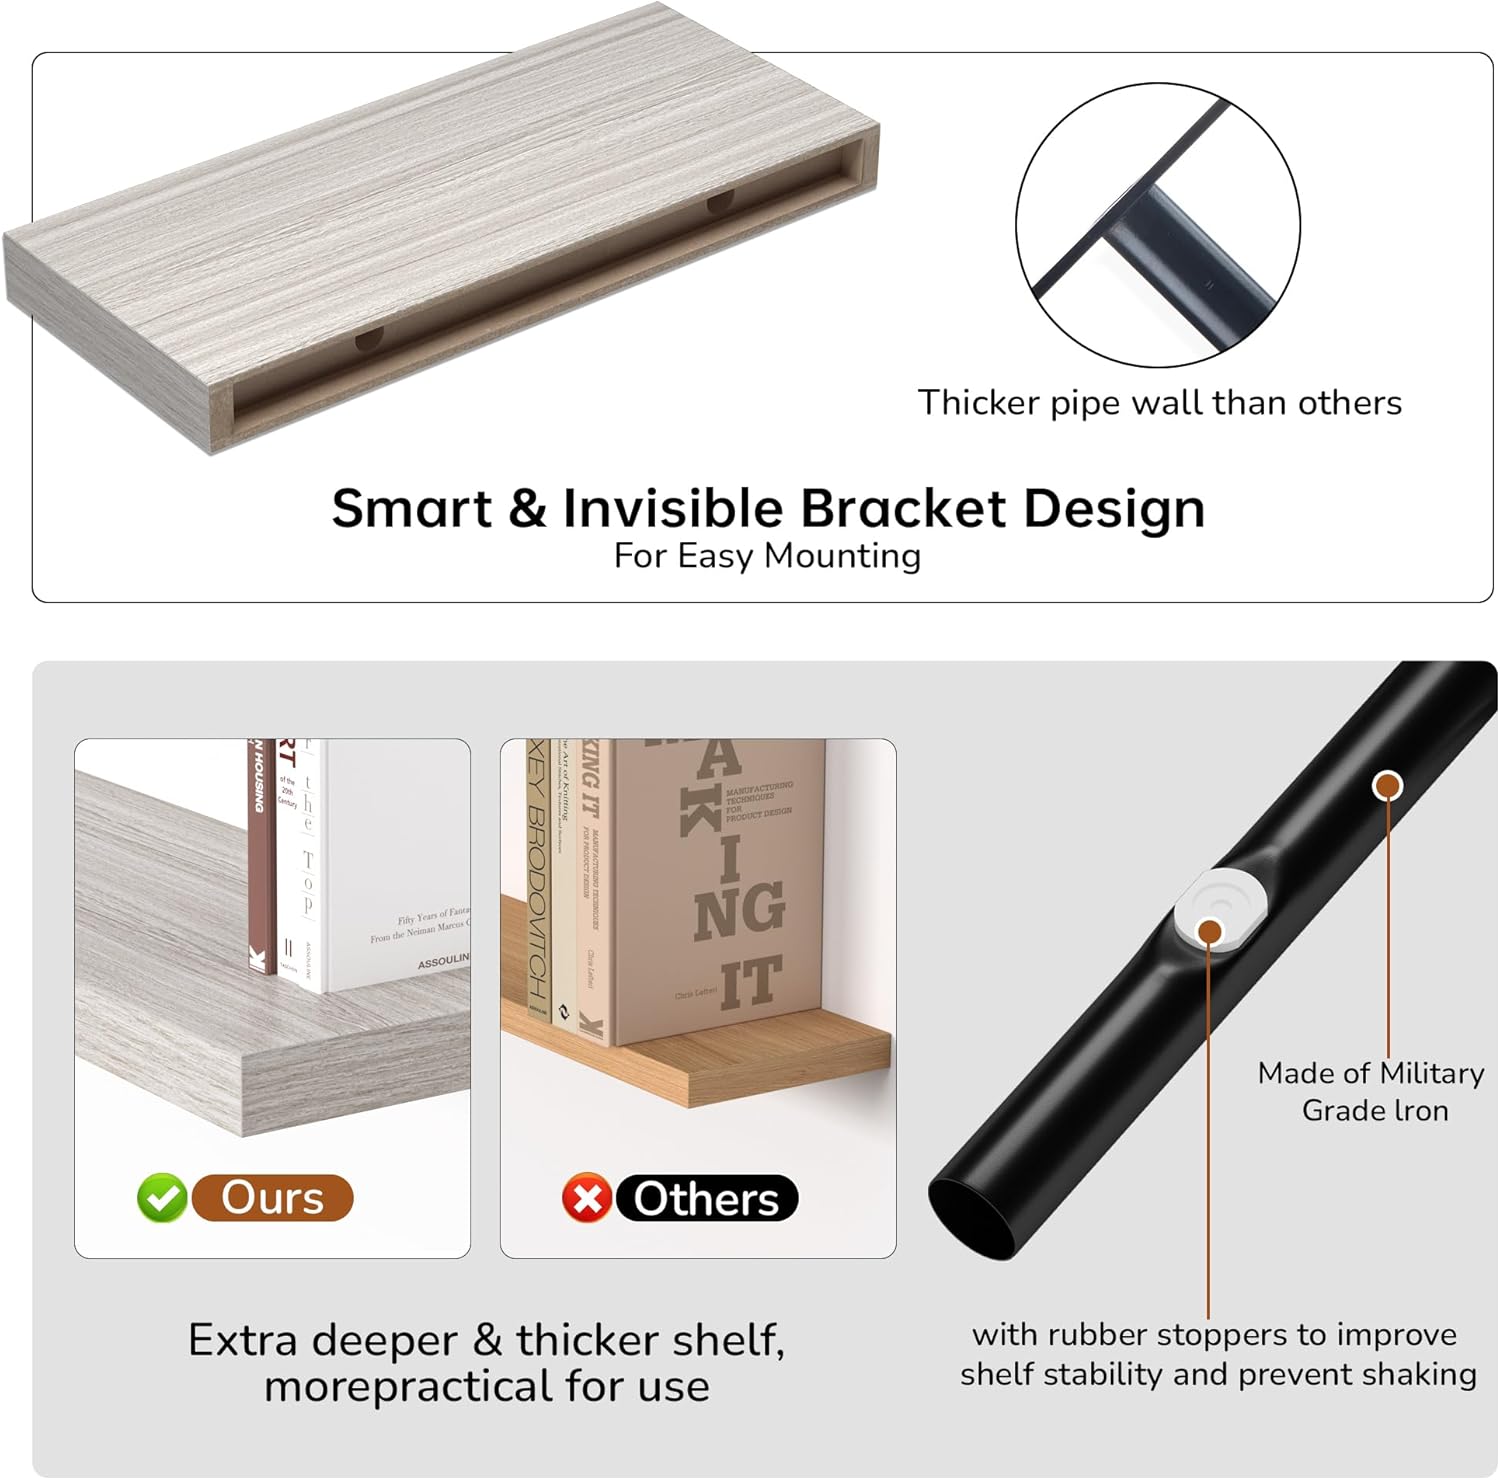
Figure 5.2: Illustration of the invisible bracket design with rubber stoppers for stability.
6. Operating (Usage)
Your Fun Memories floating shelves are designed to maximize storage and display space in various rooms. Each shelf can hold up to 30 pounds.
- Living Room: Display picture frames, small plants, decorative items, or your favorite collection.
- Bedroom: Organize books, cosmetics, or personal items.
- Kitchen: Store spices, jars, or small kitchen utensils.
- Bathroom: Hold beauty products, toiletries, or aromatherapy items.
The extra deep and thick design provides ample surface area for your items.

Figure 6.1: Floating shelves displaying decorative items in a living space.

Figure 6.2: Floating shelves used for storage and organization in a kitchen.

Figure 6.3: Shelf demonstrating its capacity to hold items up to 30 lbs.
7. Maintenance
To maintain the appearance and longevity of your floating shelves:
- Cleaning: Wipe clean with a dry cloth. Avoid abrasive cleaners or harsh chemicals that may damage the finish.
- Inspection: Periodically check the mounting screws and set screws to ensure they remain tight and secure.
- Avoid Moisture: While the shelves are textured and water-resistant, prolonged exposure to excessive moisture should be avoided.
8. Troubleshooting
| Problem | Possible Cause | Solution |
| Shelf is not level | Mounting bracket not installed level; wall surface uneven. | Ensure the bracket is perfectly level during installation using a spirit level. If the wall is uneven, shims may be needed behind the bracket. |
| Shelf feels wobbly or unstable | Screws or anchors not fully tightened; inappropriate wall anchors used; shelf not secured to bracket with set screws. | Tighten all mounting screws and set screws. Ensure appropriate wall anchors are used for your wall type (e.g., toggle bolts for drywall if studs are not available). Verify the shelf is fully pushed onto the bracket rods and secured with the set screws from underneath. |
| Shelf sags under weight | Exceeding weight limit; improper installation; weak wall structure. | Do not exceed the 30-pound weight limit per shelf. Re-check installation to ensure all screws are tight and anchors are secure. If possible, mount into wall studs for maximum support. |
If you encounter issues not listed here or require further assistance, please contact our product support team.
9. Warranty & Support
Specific warranty details are not provided in this manual. For information regarding product warranty, please refer to your purchase documentation or contact Fun Memories customer service.
For any questions, concerns, or support needs, please reach out to the Fun Memories product support team. Contact information can typically be found on the product packaging or the retailer's website where the item was purchased.