1. Introduction
This manual provides instructions for the assembly, operation, and maintenance of your ROCKBROS Adjustable Bike Floor Stand. This stand is designed to securely hold bicycles with tire widths between 2.6 cm and 8 cm (1.02 inches - 3.15 inches), offering a stable solution for indoor bike storage.

Figure 1: ROCKBROS Adjustable Bike Floor Stand with a road bike, illustrating its design and key features like weight capacity and adjustable width.
2. Safety Information
- Ensure the stand is placed on a flat, stable surface before use.
- Verify that the bike's tire width is within the adjustable range of 2.6-8 cm (1.02-3.15 inches).
- Do not exceed the maximum weight capacity of 13 kg (28.6 lbs).
- Always ensure the bike is securely seated in the stand before releasing it.
- Keep hands and fingers clear of moving parts during assembly and adjustment.
- This stand is for storage and light maintenance; avoid heavy repairs that could destabilize the bike.
3. Package Contents
Please check the package to ensure all components are present:
- 1x Parking Rack (main stand components)
- 1x Hex Wrench (for assembly/adjustment)

Figure 2: Included components: the bike parking rack and a hex wrench.
4. Setup and Assembly
The ROCKBROS Bike Floor Stand features a rapid assembly and dismantling structure for convenience.
- Identify Components: Separate the main curved support pieces from the base pieces.
- Snap-in Installation: Align the designated slots on the curved support pieces with the corresponding tabs on the base pieces. Gently push until they snap securely into place. Look for matching numbers (e.g., L1 to L1, R1 to R1) to ensure correct orientation.
- Secure Connection: Ensure all connections are firm and there is no wobbling.
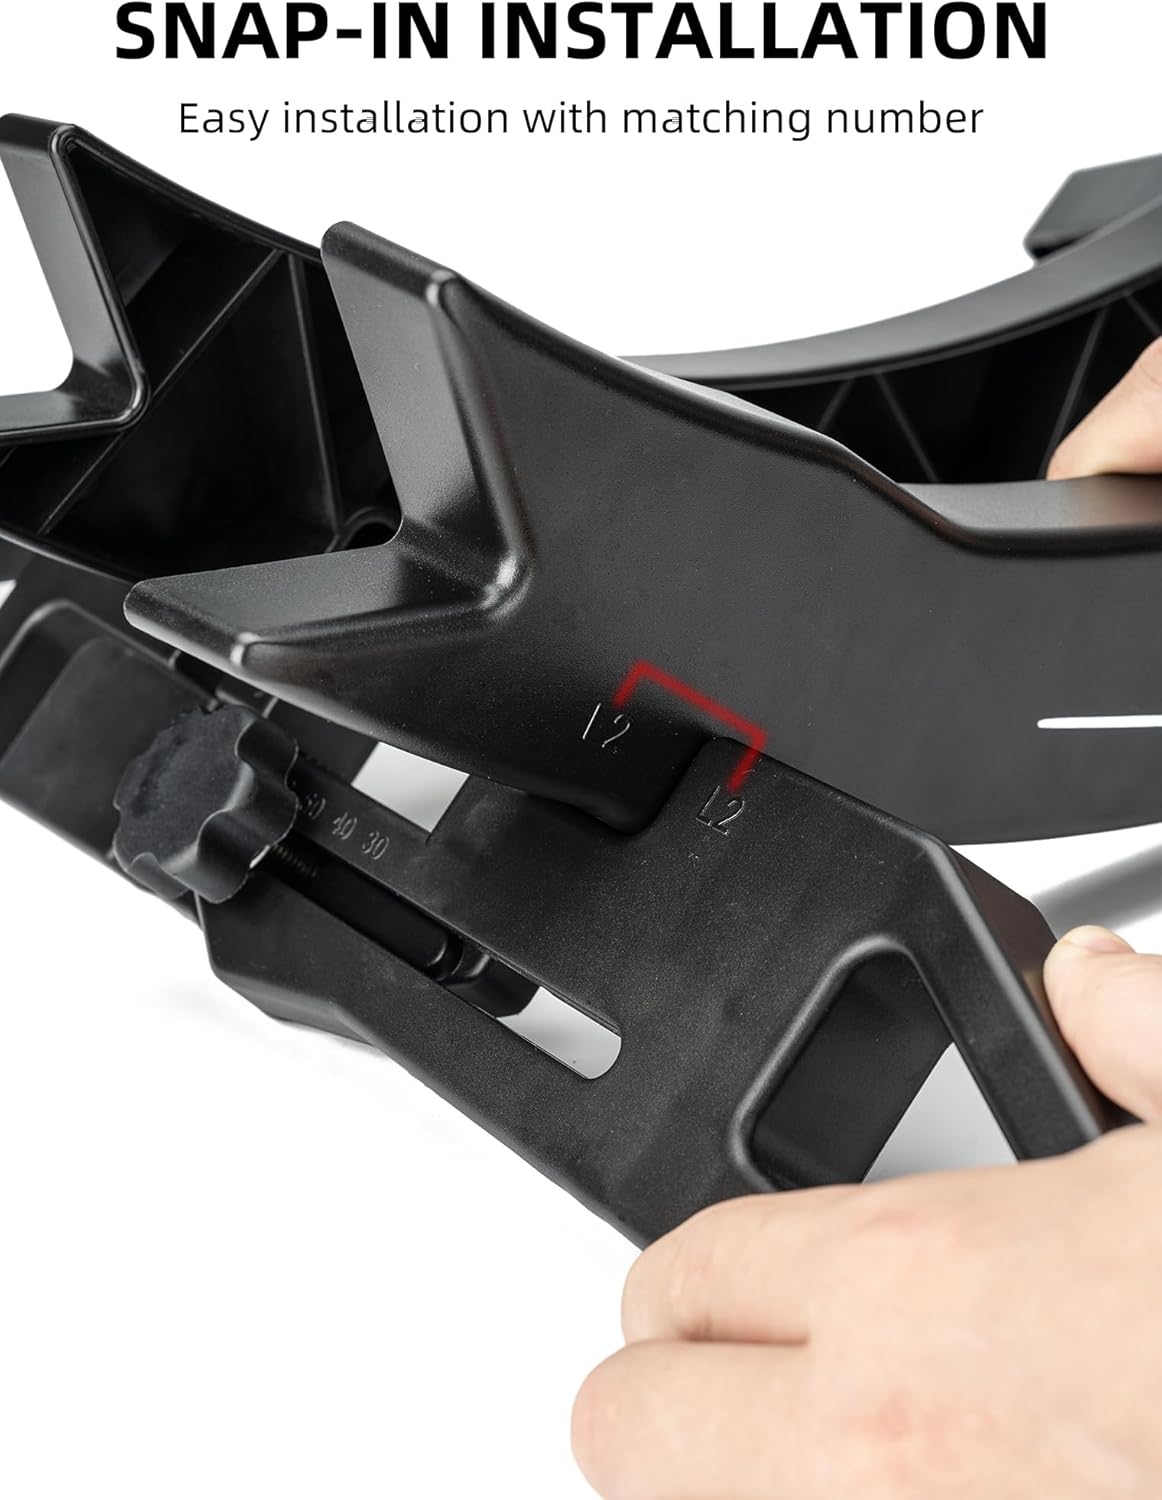
Figure 3: Snap-in installation process, aligning components using matching numbers for easy assembly.

Figure 4: The stand's components separated, demonstrating its portable design for easy assembly and dismantling.
5. Operating Instructions
To use the bike stand:
- Adjust Width: Before placing your bike, ensure the stand's width is adjusted to comfortably fit your tire (refer to Section 6 for adjustment details).
- Position Bike: Roll your bike's wheel into the stand. For optimal stability, insert the wheel with the taller end of the holder facing towards the pedals.
- Secure Placement: The stand's 3D force relief structure and anti-slip silicones are designed to evenly disperse force and provide stability. Ensure the tire is fully seated within the stand's cradle.

Figure 5: A bicycle secured in the stand, demonstrating the anti-slip silicones that enhance stability.

Figure 6: Visual representation of the 3D force relief structure, designed to distribute the bike's weight evenly for maximum stability.
6. Adjustment
The stand's width is adjustable to accommodate various tire sizes from 2.6 cm to 8 cm (1.02 inches to 3.15 inches).
- Measure Tire Width: Before adjustment, measure your bike's tire width to determine the required setting.
- Locate Adjustment Knob: Find the adjustment knob located on the base of the stand.
- Adjust Width: Loosen the knob, slide the adjustable part to the desired width, and then tighten the knob to secure the setting. The stand has markings (e.g., 30, 40, 80mm) to guide your adjustment.

Figure 7: The adjustable mechanism, allowing the stand to fit tire widths between 30mm and 80mm.

Figure 8: Guide on measuring your bike's tire width and checking tire specifications for compatibility with the stand.
7. Maintenance
Regular maintenance ensures the longevity and proper function of your bike stand.
- Cleaning: Wipe the stand with a damp cloth to remove dust and dirt. Avoid harsh chemicals.
- Inspection: Periodically check all connections and adjustment points to ensure they are secure. Tighten any loose screws or knobs.
- Storage: When not in use, especially for extended periods, the stand can be disassembled for compact storage (refer to Section 4).
8. Troubleshooting
- Bike is unstable:
- Ensure the stand's width is correctly adjusted to your tire size. A loose fit can cause instability.
- Verify the bike's weight does not exceed 13 kg (28.6 lbs).
- Check that the stand is on a flat, level surface.
- Ensure the wheel is fully inserted and properly oriented within the stand. The taller end of the holder should face towards the pedals for maximum stability.
- Difficulty assembling:
- Refer to Section 4 and ensure matching numbers on components are aligned for snap-in installation.
- Apply gentle, even pressure during assembly.
- Stand slides on floor:
- Ensure the anti-slip silicones on the base are clean and intact.
- Place the stand on a surface that provides good grip.
9. Specifications
| Feature | Detail |
|---|---|
| Model Number | 27210013001 |
| Material | Plastic |
| Color | Black |
| Product Dimensions (L x W x H) | 18.2 x 7.75 x 22 inches (approx. 46.2 x 19.7 x 55.9 cm) |
| Item Weight | 2.97 pounds (approx. 1.35 kg) |
| Max. Weight Capacity | 13 kg (28.6 lbs) |
| Adjustable Tire Width | 2.6 cm - 8 cm (1.02 inches - 3.15 inches) |
| Assembly Required | Yes |
| Special Features | Adjustable, Easy to Install, Lockable, 3D Structural Stability, Anti-slip Silicones |
10. Warranty and Support
ROCKBROS offers a lifetime warranty for all quality problems associated with this product. For warranty claims, technical support, or any inquiries, please contact ROCKBROS customer service through the retailer where the product was purchased or visit the official ROCKBROS website.


