1. Introduction
Thank you for choosing the SPORTARC Automatic Head-Up Display (HUD). This device projects important vehicle data directly onto your windshield, allowing you to monitor key information without diverting your eyes from the road. It is designed for use with compatible OBD2 gasoline vehicles.
This manual provides detailed instructions for the installation, operation, and maintenance of your HUD. Please read it thoroughly before use to ensure proper functionality and safety.

Image 1.1: The SPORTARC Automatic Head-Up Display unit, showing digital speed (76 Km/H) and RPM bar graph.
2. Safety Information
- Ensure the device is securely mounted and does not obstruct your view of the road or interfere with vehicle controls.
- Do not attempt to disassemble or modify the device. This may void the warranty and cause damage.
- Keep the device away from water, extreme temperatures, and direct sunlight for prolonged periods.
- Always prioritize driving safety. Adjust settings or view detailed information only when the vehicle is stationary and it is safe to do so.
- Use only the provided power cord and accessories.
3. Package Contents
Verify that all items are present in the package:
- 1 x SPORTARC Automatic Head-Up Display Unit
- 1 x Power Cord (OBD2 cable)
- 1 x User Manual (this document)
4. Specifications
| Brand | SPORTARC |
| Model Number | 086435 |
| Material | Acrylonitrile Butadiene Styrene (ABS) |
| Dimensions (L x W x H) | 18 x 14 x 5 cm |
| Weight | 250 grams |
| Interface | OBD2 |
5. Compatibility
The SPORTARC HUD is compatible with:
- OBD2 gasoline vehicles produced in the United States after 2004.
- OBD2 gasoline vehicles produced in other countries after 2008.
Note: If you are unsure about your vehicle's compatibility, please consult your vehicle's manual or contact the manufacturer.
6. Setup and Installation
Follow these steps to install your SPORTARC HUD:
- Locate the OBD2 Port: The OBD2 port is typically located under the dashboard on the driver's side, usually near the steering column. Refer to your vehicle's manual if you cannot find it.
- Connect the Power Cord: Plug one end of the provided power cord into the OBD2 port of your vehicle.
- Connect to HUD Unit: Plug the other end of the power cord into the designated port on the SPORTARC HUD unit.
- Position the HUD: Place the HUD unit on your dashboard in a position that does not obstruct your view of the road. Ensure it is stable and does not slide during driving. The device is designed to project information onto the windshield.
- Secure the Cable: Route the power cord neatly to avoid interference with driving controls and to prevent it from becoming a hazard. Use cable clips if necessary (not included).
- Start Vehicle: Start your vehicle's engine. The HUD should power on automatically and begin displaying data.
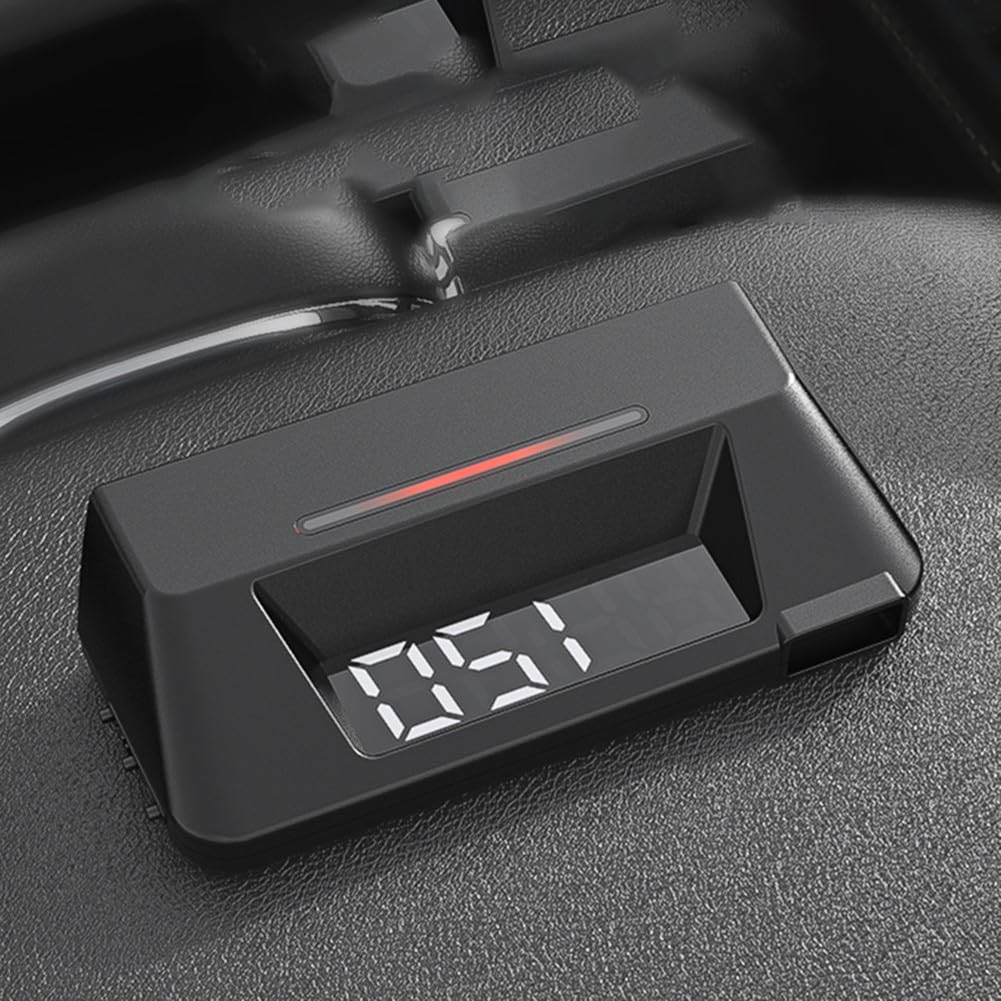
Image 6.1: Side view of the HUD unit, illustrating its compact design and potential connection point.
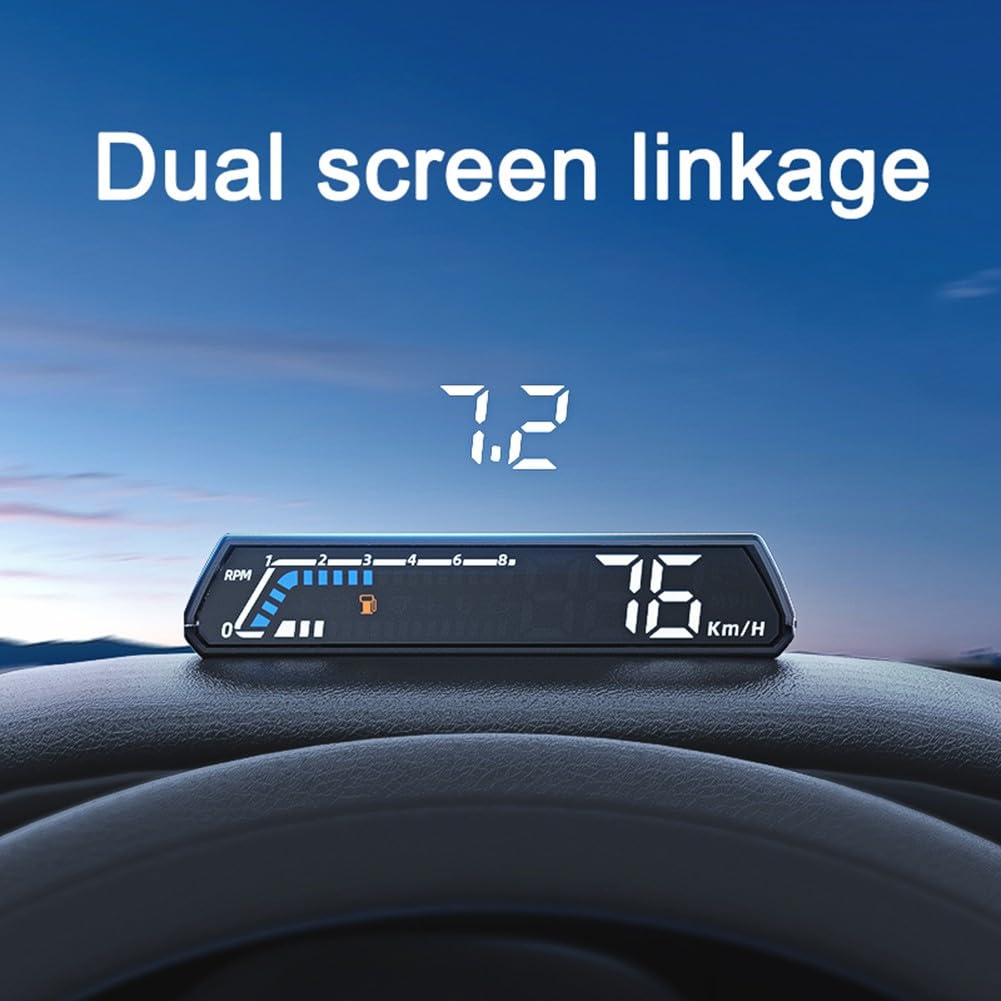
Image 6.2: The HUD unit positioned on a car dashboard, demonstrating the projected display on the windshield.
7. Operating Instructions
The SPORTARC HUD automatically displays various vehicle parameters once connected and powered on. The device features both a direct display on the unit and a projected display on the windshield.
7.1 Displayed Functions
The HUD can display the following information:
- Vehicle Speed
- Rotational Speed (RPM)
- Water Temperature
- Voltage
- Oil Consumption
- Turbine Pressure
- Oil Temperature
- Transmission Oil Temperature
- Oil Pressure
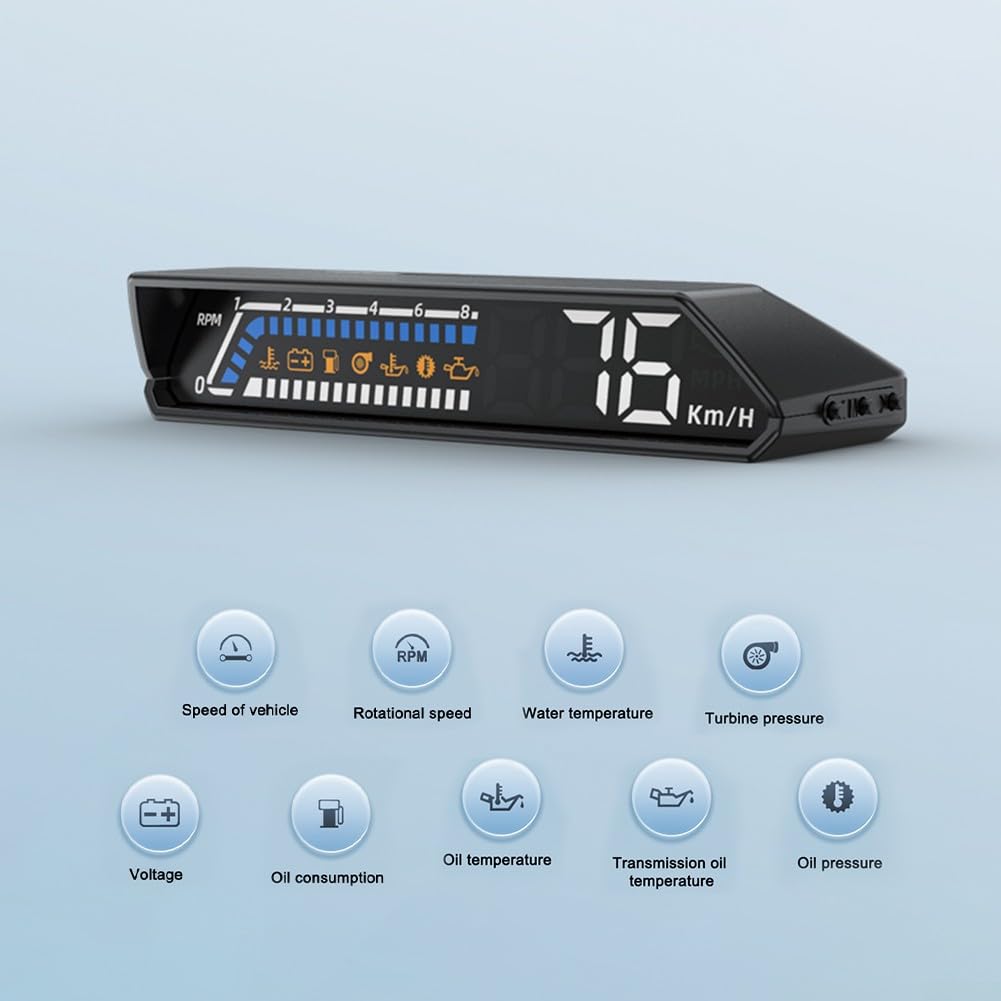
Image 7.1: Visual representation of the various vehicle parameters the HUD can monitor and display, including speed, RPM, temperatures, and pressures.
7.2 Dual Screen Linkage and Projection
The device offers a "Dual Screen Linkage" feature, meaning information is shown on the unit's screen and simultaneously projected onto your windshield for easy viewing.
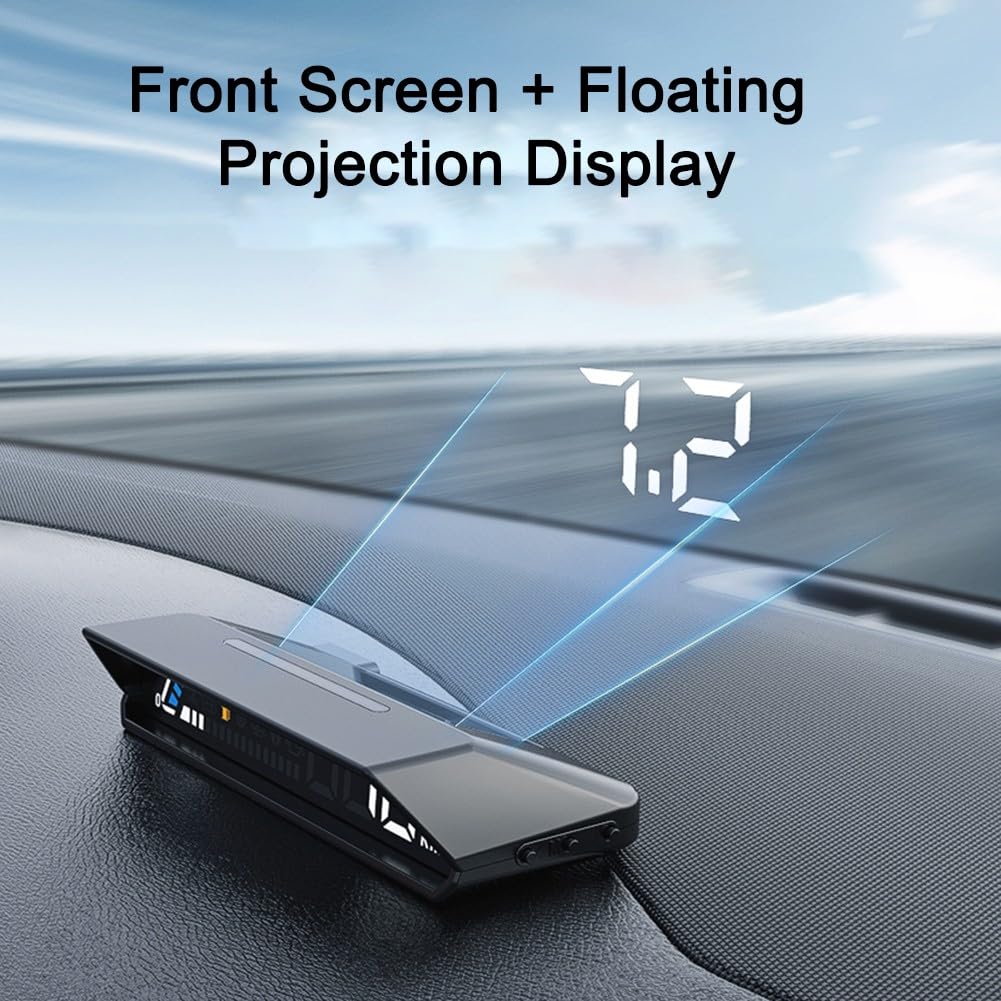
Image 7.2: The HUD unit displaying information on its integrated screen and projecting the same data as a floating image onto the windshield.
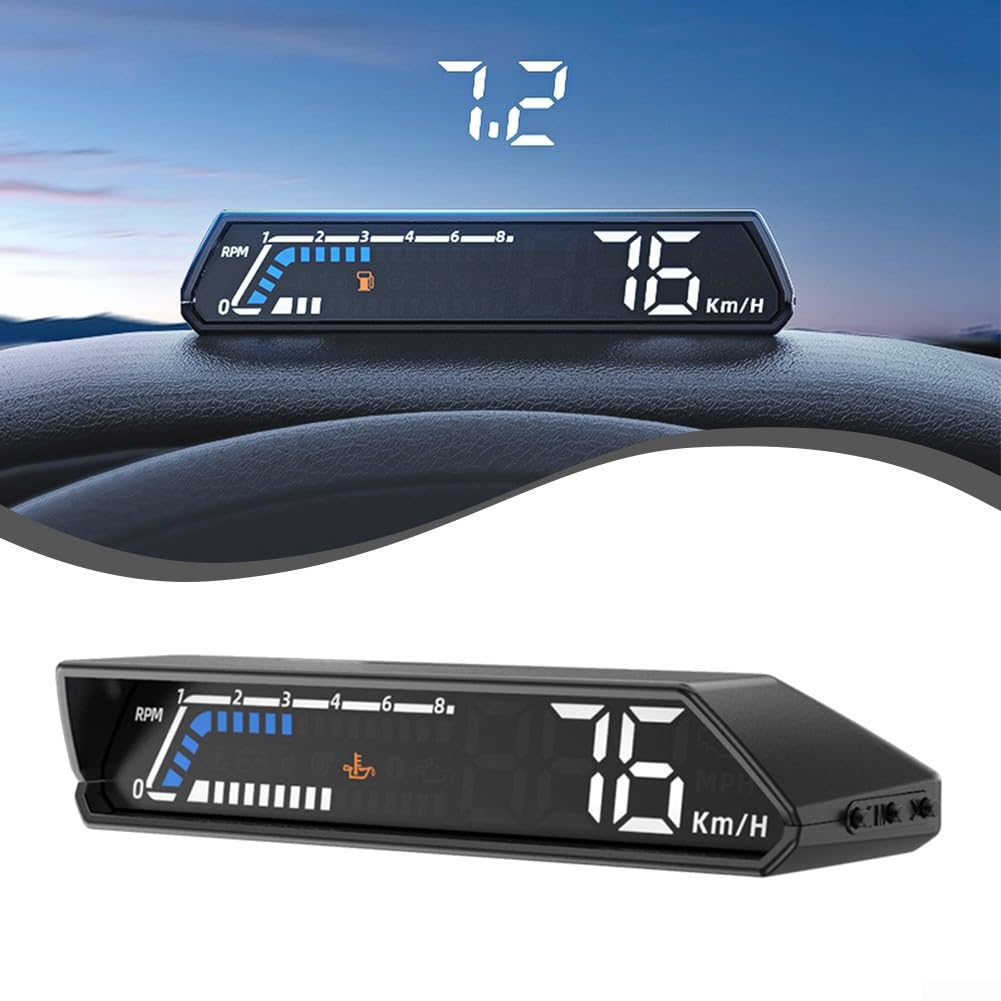
Image 7.3: A visual comparison demonstrating how the information appears directly on the HUD unit versus its projected appearance on the windshield.
7.3 Adjusting Settings (if applicable)
While the product description mentions "buttons" on the side, specific instructions for adjusting settings (e.g., display brightness, units, or which parameters to show) are not provided in the available information. Typically, these devices have small buttons or a scroll wheel for navigation and selection. Refer to the quick start guide or packaging for detailed button functions if available.
8. Maintenance
- Cleaning: Use a soft, dry cloth to clean the HUD unit. Do not use abrasive cleaners or solvents, as they may damage the surface.
- Storage: If storing the device for an extended period, disconnect it from the OBD2 port and store it in a cool, dry place.
- Cable Inspection: Periodically check the power cord for any signs of wear or damage. Replace if necessary.
9. Troubleshooting
| Problem | Possible Cause | Solution |
|---|---|---|
| HUD does not power on. |
|
|
| Incorrect data displayed. |
|
|
| Projection is blurry or unclear. |
|
|
10. Warranty and Support
Specific warranty details are not provided in the product information. For warranty claims or technical support, please contact the retailer or manufacturer directly. Keep your purchase receipt as proof of purchase.
Manufacturer: SPORTARC
ASIN: B0CFTX5Q8M