1. Introduction
This instruction manual provides essential information for the proper installation, operation, and maintenance of your new DEUSES Carburetor. To ensure optimal performance and longevity, please read this manual thoroughly before attempting any installation or adjustment. This carburetor is designed as a replacement part for specific Lada models.
2. Product Overview
The DEUSES Carburetor (OEM 2105-1107010-20) is a high-performance engine component engineered for reliable fuel delivery. It features robust metal construction designed for durability and consistent operation. This unit is intended to directly replace the original equipment carburetor, aiming to restore or improve engine performance.
Key Features:
- High-quality construction for durability.
- Designed for direct replacement of original equipment.
- Aids in maintaining fuel efficiency while enhancing power output.
- Reliable and easy to install.
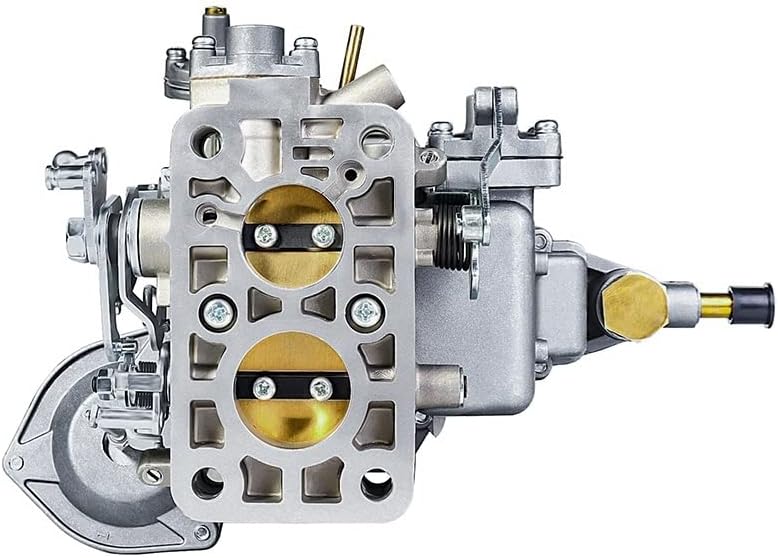
Image 1: Top-down view of the DEUSES Carburetor, showing the air intake and primary/secondary barrels.
3. Compatibility
This carburetor is compatible with the following vehicle models and engine displacements. It is crucial to verify the OEM part number (2105-1107010-20) against your existing carburetor to ensure correct fitment.
- Lada 1200ccm
- Lada 1300ccm
- Lada Niva Base Sport Utility 2-Door 1.6L (1590CC, 97Cu. In. l4 GAS Naturally Aspirated) for model years 1988-1992.
- Lada 2101-2107 series.
Important: Always cross-reference the part number 2105-1107010-20 with your vehicle's original equipment to confirm compatibility before installation.
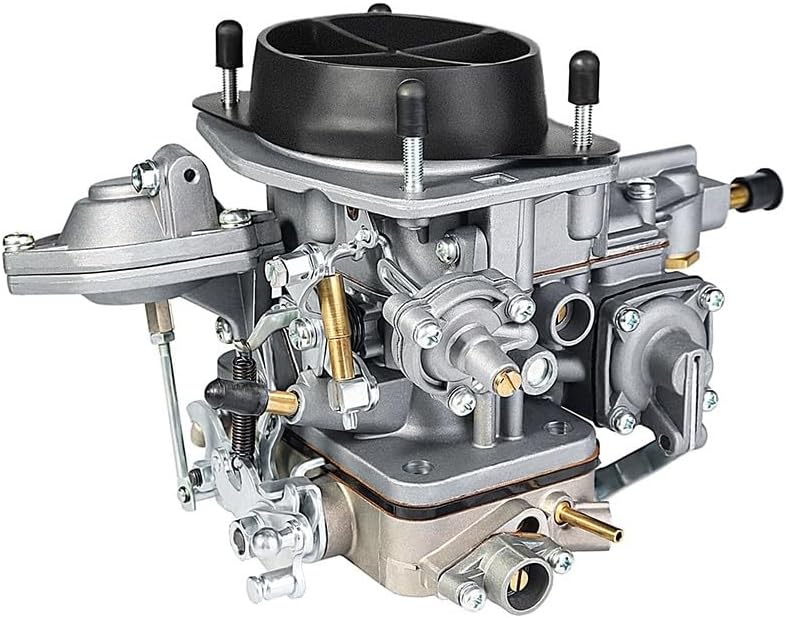
Image 2: Angled front view of the DEUSES Carburetor, showing various linkages and fuel inlet.
4. Installation
Installation of a carburetor requires mechanical knowledge and appropriate tools. If you are not confident in your ability to perform this procedure, it is recommended to seek assistance from a qualified mechanic.
General Installation Steps:
- Safety First: Disconnect the vehicle's battery. Ensure the engine is cool.
- Drain Fuel: Relieve fuel pressure and drain any fuel from the fuel lines to prevent spills.
- Remove Air Cleaner: Detach the air cleaner assembly from the old carburetor.
- Disconnect Linkages and Hoses: Carefully disconnect all fuel lines, vacuum hoses, and throttle/choke linkages from the old carburetor. Label them if necessary for reassembly.
- Remove Old Carburetor: Unbolt the old carburetor from the intake manifold. Remove the old gasket.
- Prepare for New Carburetor: Clean the intake manifold surface thoroughly. Place a new carburetor gasket onto the manifold.
- Install New Carburetor: Carefully place the new DEUSES Carburetor onto the gasket and secure it with the mounting bolts. Tighten bolts evenly to prevent warping.
- Reconnect Components: Reattach all fuel lines, vacuum hoses, and throttle/choke linkages to the new carburetor. Ensure all connections are secure and free of leaks.
- Install Air Cleaner: Reinstall the air cleaner assembly.
- Reconnect Battery: Reconnect the vehicle's battery.
- Initial Start-up and Adjustment: Start the engine and check for fuel leaks. Allow the engine to reach operating temperature. Perform initial idle speed and mixture adjustments as required for your specific vehicle model.

Image 3: Side view of the DEUSES Carburetor, highlighting the fuel inlet and various adjustment screws.
5. Operation
Once installed and properly adjusted, the carburetor will regulate the air-fuel mixture supplied to the engine. Proper operation relies on correct initial setup and regular maintenance.
Key Operational Aspects:
- Cold Start: Utilize the choke mechanism (if applicable) for easier starting in cold weather.
- Warm-up: Allow the engine to warm up to operating temperature before driving to ensure stable idle and optimal performance.
- Throttle Response: The carburetor should provide smooth and responsive acceleration.
- Idle Stability: A properly adjusted carburetor will maintain a consistent engine idle speed.

Image 4: Rear view of the DEUSES Carburetor, showing the throttle linkage and mounting points.
6. Maintenance
Regular maintenance is crucial for the longevity and efficient operation of your carburetor. Adhere to your vehicle's manufacturer recommendations for service intervals.
Maintenance Tips:
- Air Filter: Regularly inspect and replace the air filter to prevent dirt and debris from entering the carburetor.
- Fuel Filter: Ensure the fuel filter is clean and functioning correctly to prevent contaminants from reaching the carburetor.
- Linkage Lubrication: Periodically lubricate throttle and choke linkages to ensure smooth operation.
- Visual Inspection: Check for any loose connections, cracked hoses, or fuel leaks around the carburetor.
- Cleaning: If performance issues arise, a professional carburetor cleaning may be necessary. Avoid using harsh chemicals that could damage seals or components.

Image 5: Front view of the DEUSES Carburetor, showing the main body and various ports.
7. Troubleshooting
This section addresses common issues that may arise with carburetor operation. For complex problems, consult a qualified automotive technician.
Common Issues and Solutions:
- Engine Cranks but Won't Start:
- Check fuel supply to the carburetor.
- Verify choke operation.
- Inspect for vacuum leaks.
- Rough Idle or Stalling:
- Adjust idle speed and mixture screws.
- Check for vacuum leaks.
- Ensure fuel filter is clean.
- Poor Acceleration or Hesitation:
- Inspect accelerator pump operation.
- Check for clogged fuel passages.
- Verify proper choke disengagement.
- Excessive Fuel Consumption:
- Check float level adjustment.
- Ensure mixture screws are correctly set.
- Inspect for fuel leaks.
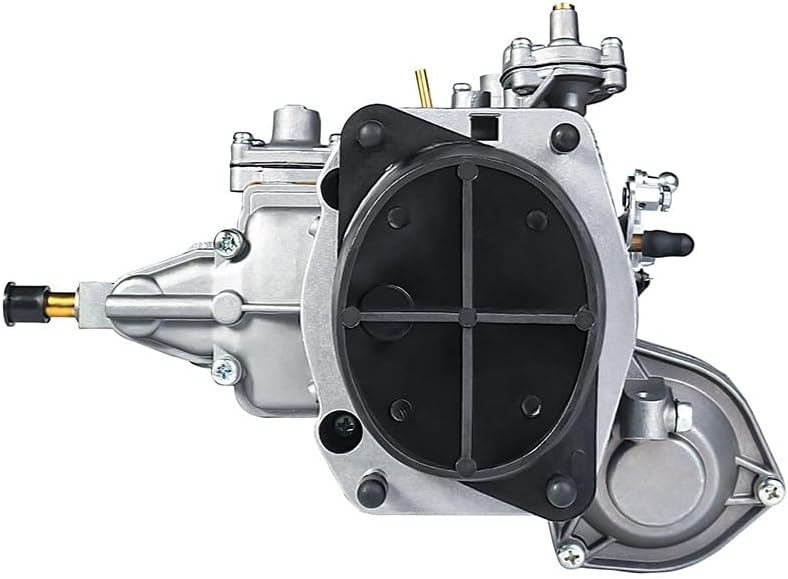
Image 6: Bottom view of the DEUSES Carburetor, showing the base plate and mounting holes.
8. Specifications
| Attribute | Detail |
|---|---|
| Manufacturer | DEUSES |
| OEM Part Number | 2105-1107010-20 |
| Compatible Engine Displacements | 1200ccm, 1300ccm, 1.6L (1590CC) |
| Compatible Vehicle Models | Lada 2101-2107, Lada Niva (1988-1992) |
| Item Weight | 0.035 ounces (Note: This weight seems unusually low for a carburetor and may be a data entry error. Please refer to actual product for accurate weight.) |
| ASIN | B0CFTHSPG3 |
9. Warranty and Support
For warranty information or technical support, please refer to the documentation provided with your purchase or contact the DEUSES customer service department. Keep your purchase receipt as proof of purchase.
For further assistance, please visit the DEUSES official website or contact your authorized dealer.