1. Introduction
This manual provides detailed instructions for the installation, operation, and maintenance of your Mumusuki Smart Energy Meter, Model Mumusuki2mf1ikz3uv. This device is designed for real-time monitoring of electricity consumption, offering convenient energy management through a mobile application.
2. Product Features
- Real-Time Monitoring: Intelligent metering switch electricity meter for real-time monitoring of electricity consumption, providing detailed electricity usage data.
- APP Remote Control: Supports mobile APP remote control, allowing you to control the on/off status of the electricity meter anytime and anywhere, achieving convenient energy management.
- Multiple Functions: Primarily used for metering electrical energy, with voltage monitoring and power analysis functions to meet various user needs.
- Smart Technology: Utilizes Tuya intelligent technology to ensure the safety and reliability of the energy meter, preventing energy waste and device overload.
- Easy Installation: Compact structure, convenient and fast installation, suitable for home use without requiring professional assistance.
3. Package Contents
Upon opening the package, please verify that all items listed below are present and in good condition:
- 1 x Mumusuki Smart Energy Meter
- 1 x English User Manual (this document)
- 4 x Decorative Covers
- 1 x Cover Opener
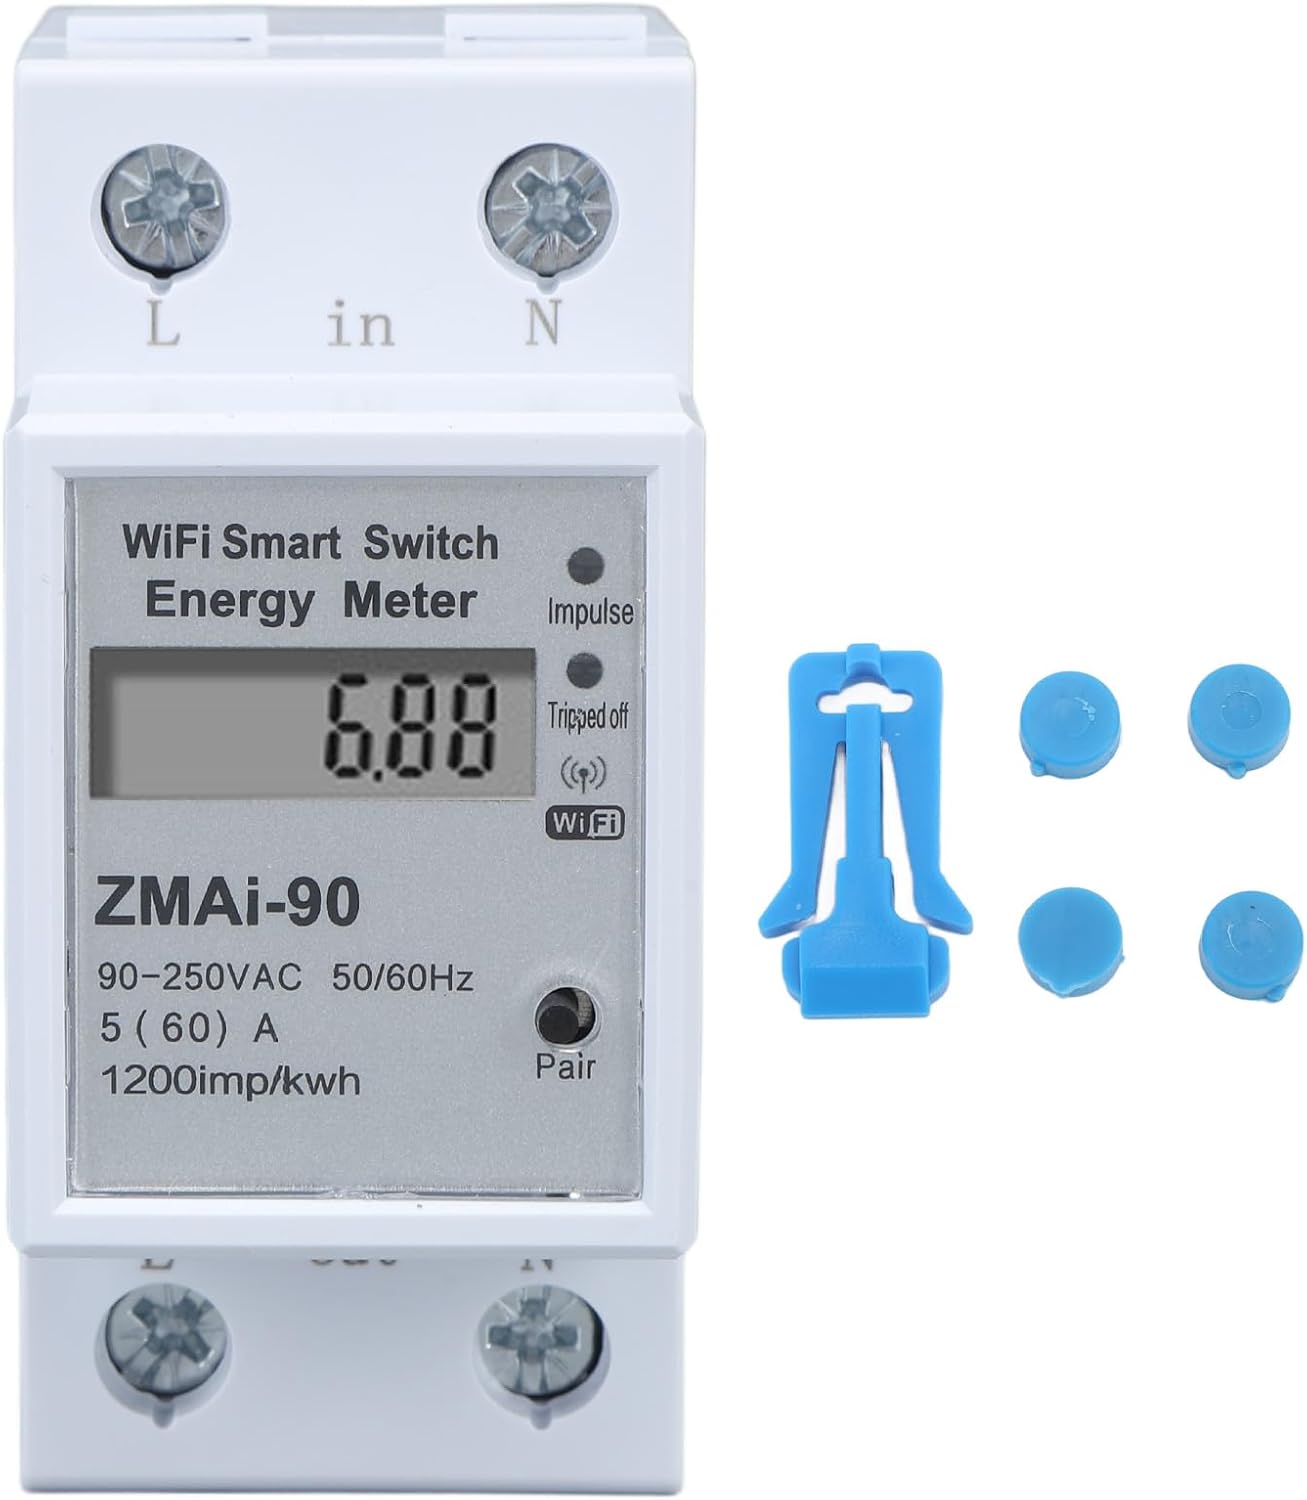
Figure 3.1: Front view of the Smart Energy Meter, showing the display, Wi-Fi indicator, and terminals, alongside a blue clip and four blue decorative covers.
4. Specifications
| Parameter | Value |
|---|---|
| Brand | Mumusuki |
| Model Number | Mumusuki2mf1ikz3uv |
| Reference Voltage | 110-230V |
| Material | ABS |
| Item Weight | Approx. 160g / 5.6oz (Product only), 3 pounds (Shipping weight) |
| Product Dimensions | Approx. 36 x 79 x 66mm / 1.4 x 3.1 x 2.6in |
| Package Dimensions | 3.54 x 3.15 x 1.57 inches |
| Batteries Required | No |
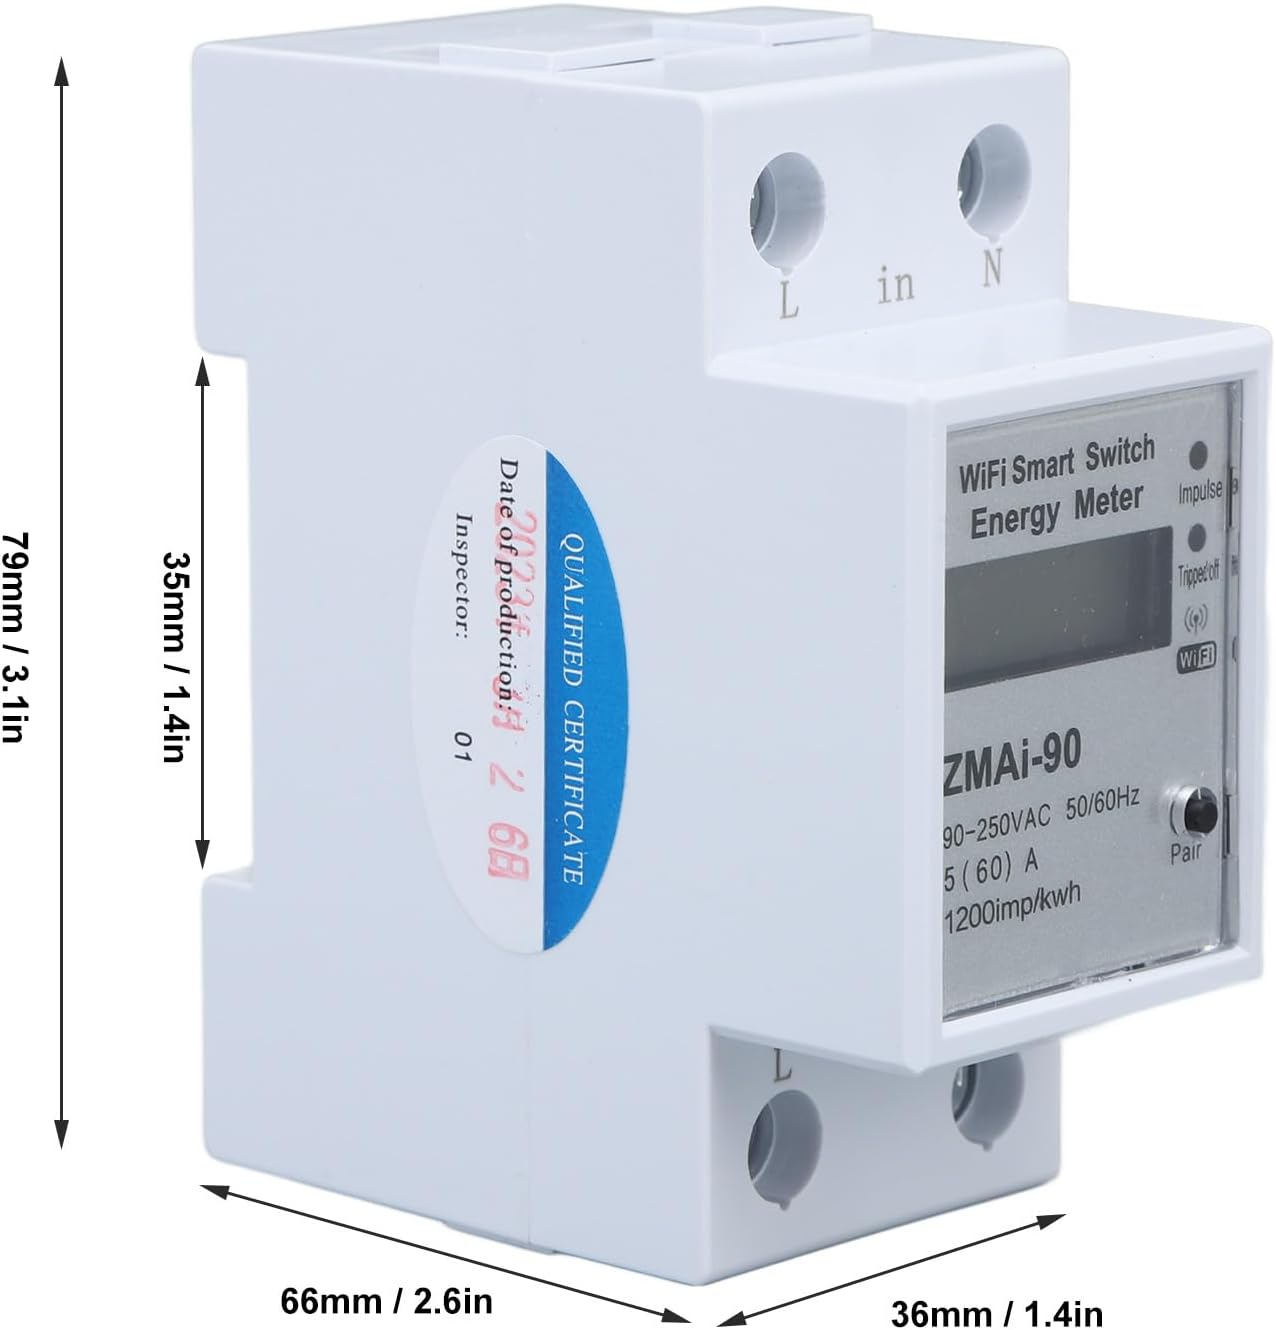
Figure 4.1: Diagram illustrating the dimensions of the Smart Energy Meter: 79mm (3.1in) height, 66mm (2.6in) depth, and 36mm (1.4in) width.
5. Safety Information
WARNING: Electrical installation should only be performed by qualified personnel. Ensure power is disconnected before installation to prevent electric shock.
- Always disconnect power at the main circuit breaker before installing or servicing the device.
- Ensure wiring connections are secure and comply with local electrical codes.
- Do not operate the device if it appears damaged.
- Keep the device away from water and excessive moisture.
- This device is designed for indoor use only.
6. Setup and Installation
The Mumusuki Smart Energy Meter is designed for easy installation in a standard electrical panel. Follow these steps carefully:
- Power Disconnection: Locate the main circuit breaker for the circuit where the meter will be installed and turn it OFF. Verify that the power is off using a voltage tester.
- Mounting: Mount the energy meter onto a standard DIN rail within your electrical panel. Ensure it is securely clipped into place.
- Wiring:
- Connect the incoming Live (L) wire to the 'L in' terminal.
- Connect the incoming Neutral (N) wire to the 'N in' terminal.
- Connect the outgoing Live (L) wire to the 'L out' terminal.
- Connect the outgoing Neutral (N) wire to the 'N out' terminal.
Refer to the wiring diagram on the device for correct connections. Ensure all connections are tight to prevent loose contacts and overheating.
- Power Restoration: Once all wiring is complete and secure, restore power by turning the main circuit breaker ON. The meter's display should illuminate.

Figure 6.1: Angled view of the Smart Energy Meter, highlighting the 'L in', 'N in', 'L out', and 'N out' terminals for electrical connections.
7. Operating Instructions
7.1. Initial Setup and APP Connection
- Download APP: Download the "Tuya Smart" or "Smart Life" app from your mobile device's app store (iOS or Android).
- Register/Login: Open the app and register a new account or log in if you already have one.
- Add Device: In the app, tap the "+" icon to add a new device. Select "Electrical Engineering" -> "Energy Meter (Wi-Fi)".
- Pairing Mode: On the energy meter, press and hold the "Pair" button (usually located near the Wi-Fi indicator) until the Wi-Fi indicator starts blinking rapidly. This indicates pairing mode.
- Connect to Wi-Fi: Follow the on-screen instructions in the app to connect the meter to your 2.4GHz Wi-Fi network. Ensure your phone is also connected to the same 2.4GHz Wi-Fi network.
- Device Added: Once successfully paired, the app will confirm "Device added successfully". You can then rename the device for easy identification.

Figure 7.1: A mobile phone screen showing the "SINO TIMER WiFi Smart Switch" app interface, demonstrating remote control functionality with a large power button indicating the socket is on.
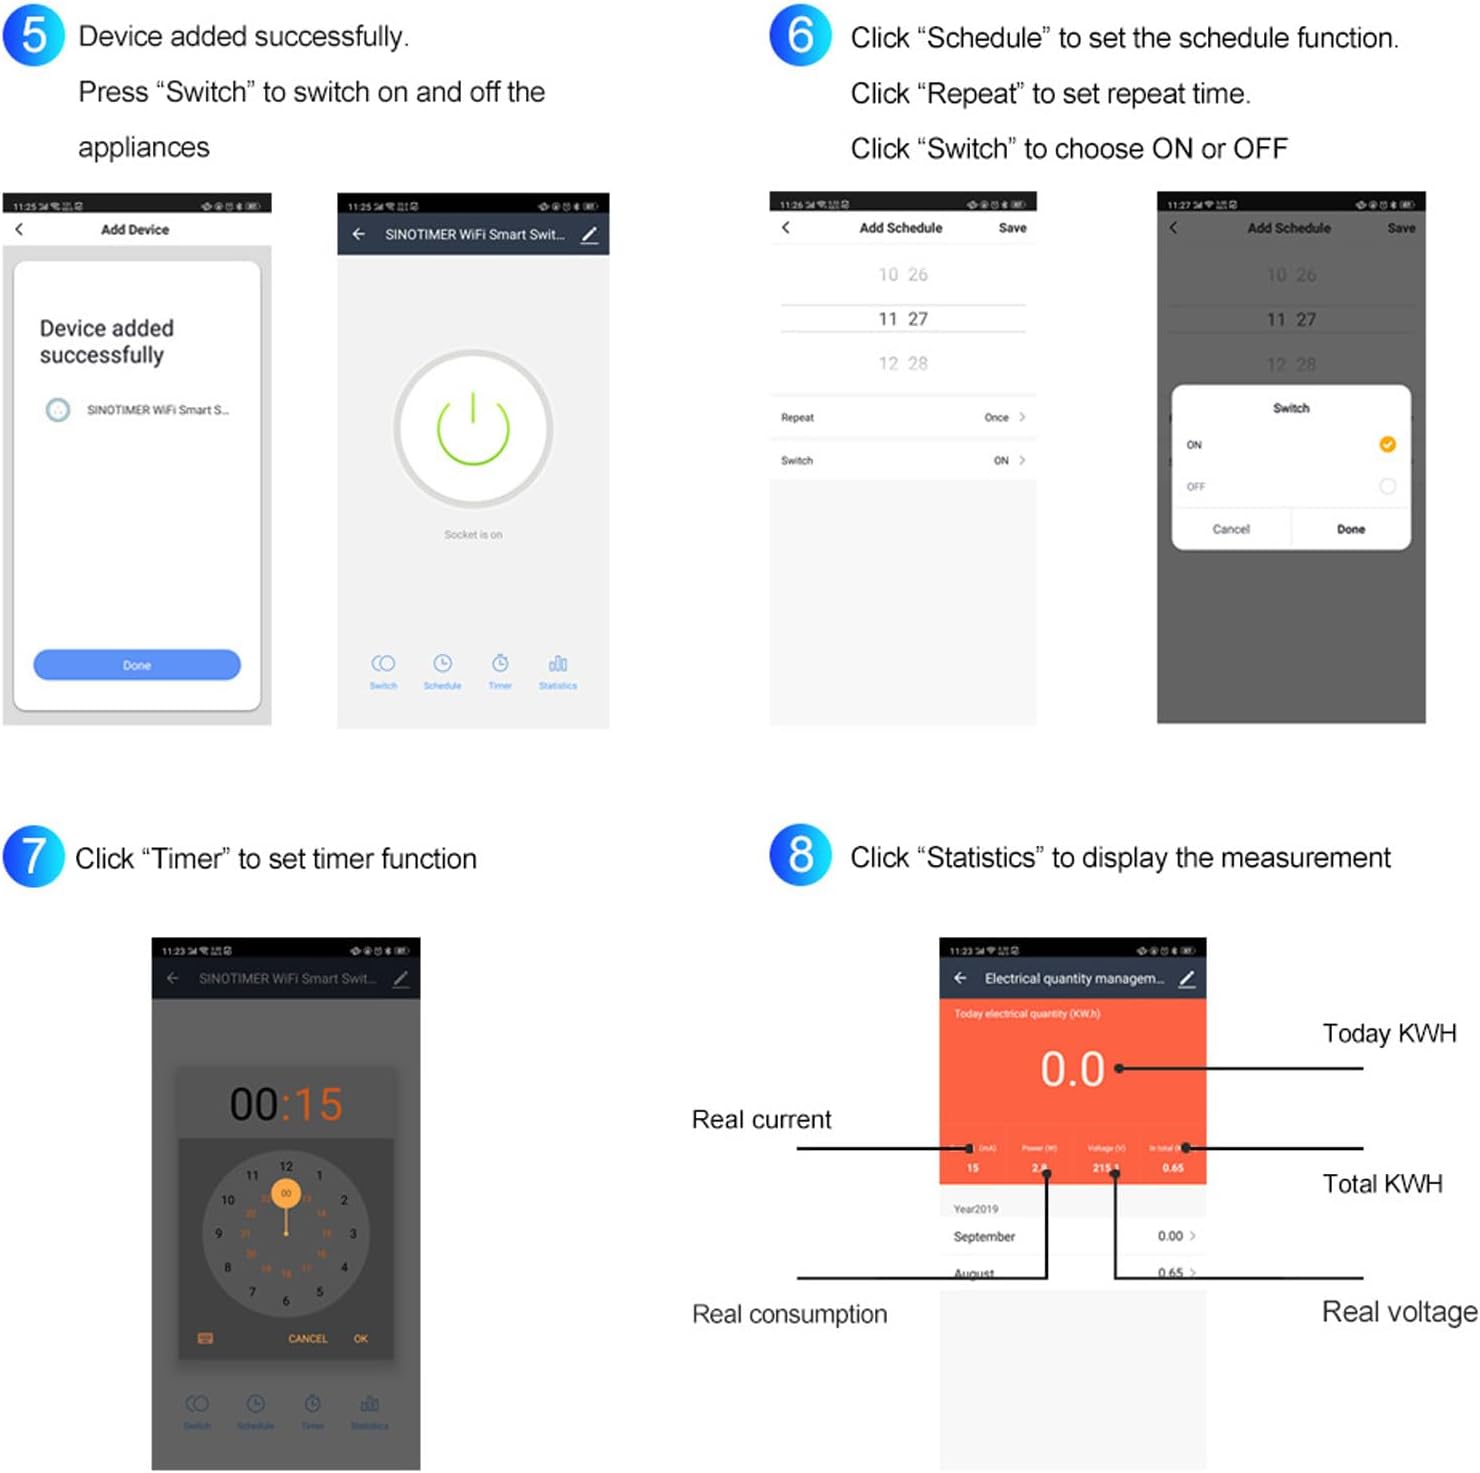
Figure 7.2: A composite image showing various app screens: 1) Device added successfully, 2) Main control screen with Switch, Schedule, Timer, Statistics options, 3) Setting a schedule with time and repeat options, 4) Choosing ON or OFF for a scheduled event, 5) Setting a timer, and 6) Displaying electrical quantity management with real current, power, voltage, and KWH data.
7.2. Real-Time Monitoring and Data Analysis
After successful connection, you can monitor your electricity usage in real-time through the app:
- Open the app and select your energy meter device.
- The main screen will display current power consumption, voltage, and current.
- Navigate to the "Statistics" or "Electrical quantity management" section to view historical data, including daily, monthly, and yearly KWH consumption.
- The app provides insights into real current, real consumption, total KWH, and real voltage.
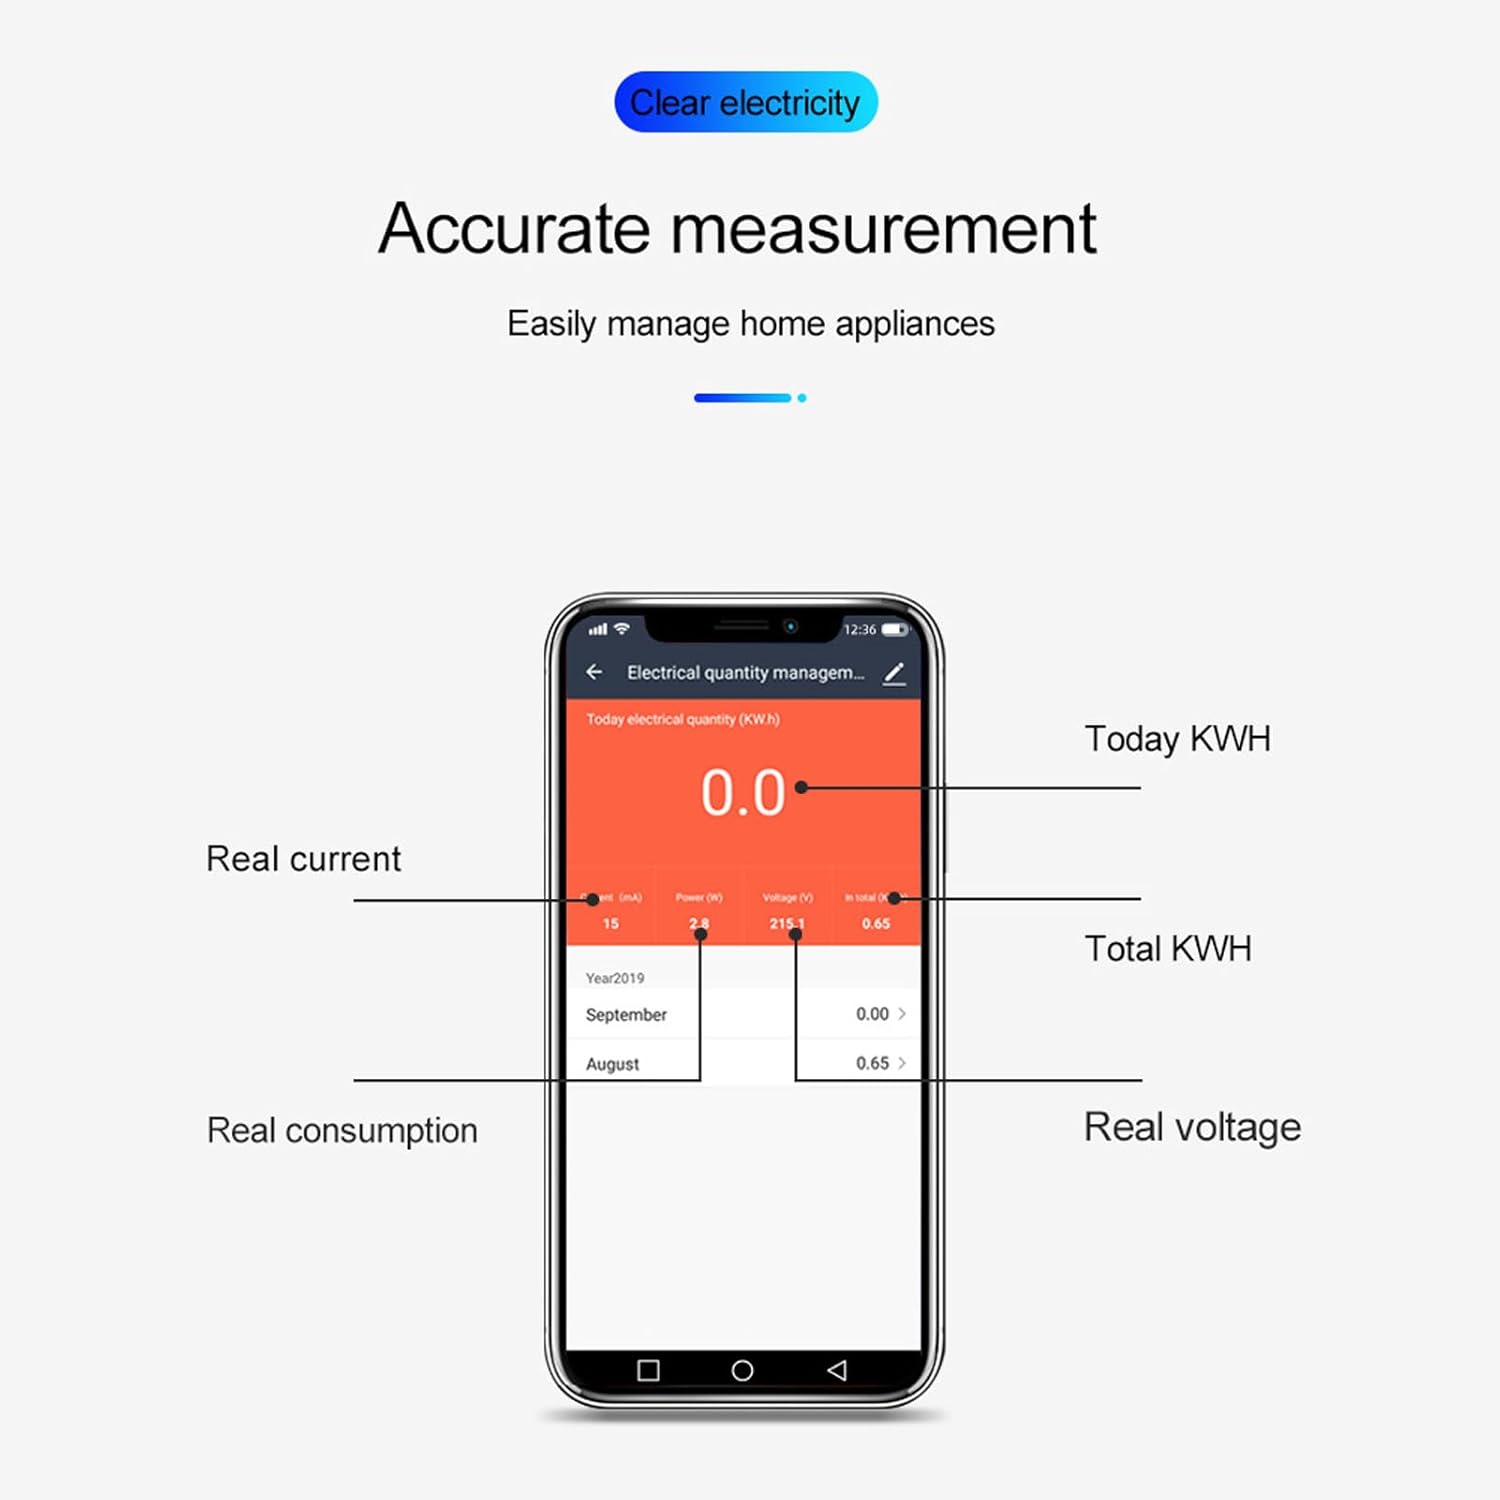
Figure 7.3: A mobile phone screen showing the "Electrical quantity management" interface, detailing real current, power, voltage, total KWH, and historical consumption data.
7.3. Scheduling and Timer Functions
The app allows you to set schedules and timers for automated control of connected appliances:
- Scheduling:
- From the device control screen, tap "Schedule".
- Set the desired time for the action (e.g., turn on/off).
- Choose the "Repeat" option for daily, weekly, or custom repetitions.
- Select "Switch" to choose whether the action is ON or OFF.
- Save the schedule.
Example: Automatically turn on your water heater before you go home every day.
- Timer:
- From the device control screen, tap "Timer".
- Set a countdown duration. The device will perform the opposite of its current state (e.g., if ON, it will turn OFF after the timer; if OFF, it will turn ON).
- Start the timer.
Example: Automatically turn off your air conditioning after you go to sleep.
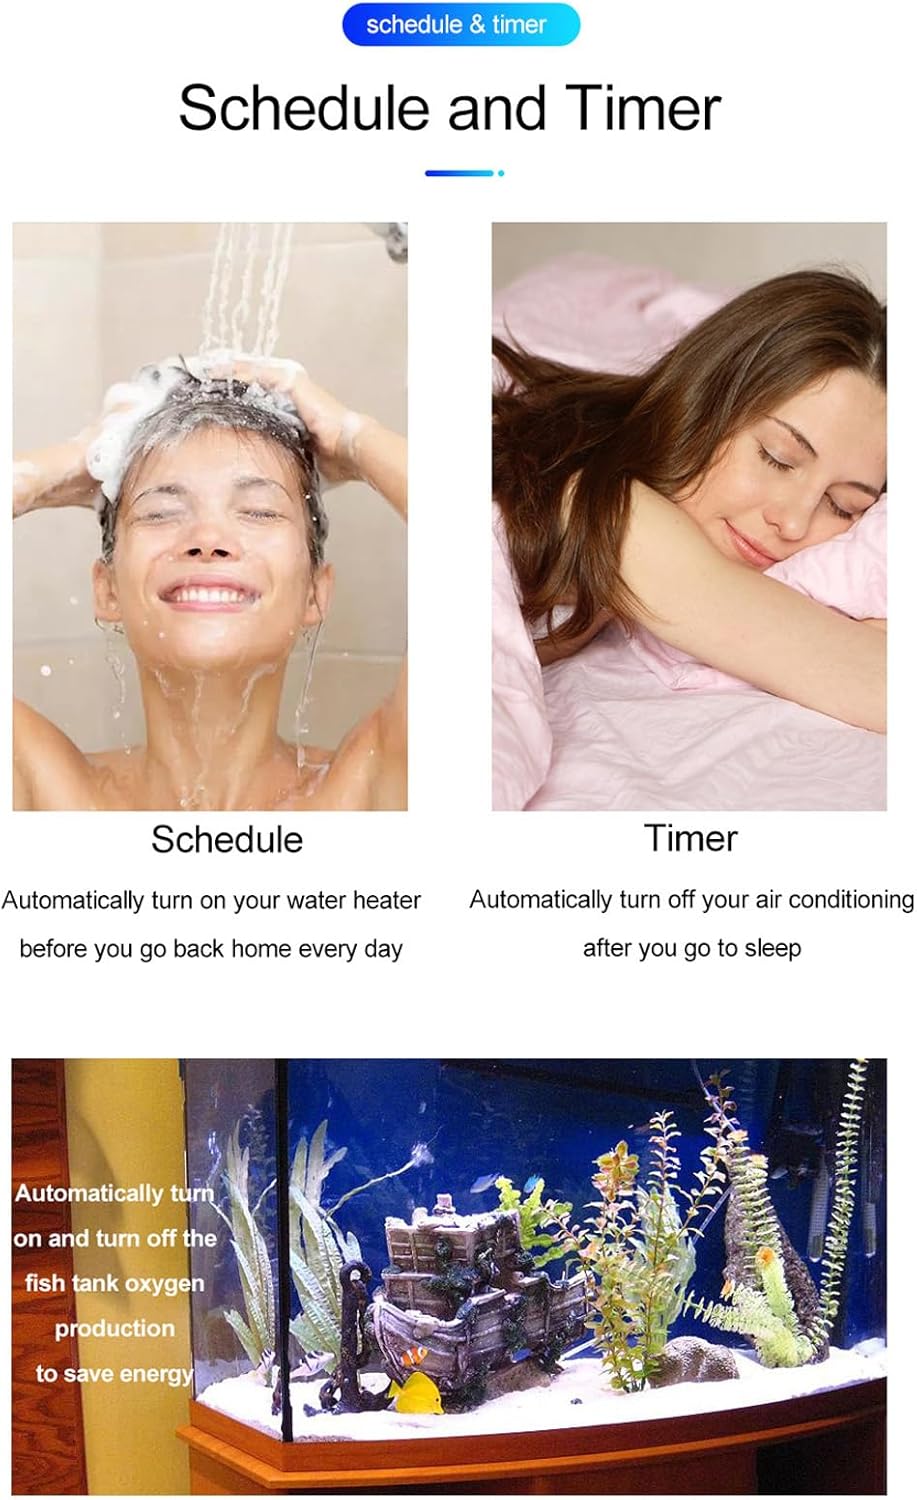
Figure 7.4: Visual examples of scheduling (turning on a water heater) and timer functions (turning off air conditioning), along with an example of automating fish tank oxygen production.
8. Maintenance
The Mumusuki Smart Energy Meter requires minimal maintenance to ensure optimal performance and longevity:
- Cleaning: Gently wipe the device with a dry, soft cloth. Do not use abrasive cleaners or solvents. Ensure power is disconnected before cleaning.
- Firmware Updates: Periodically check the mobile app for any available firmware updates for the device. Updates can improve performance, add features, or fix bugs.
- Connection Check: Occasionally verify that the electrical connections are still tight and secure.
- Environmental Conditions: Ensure the device is operating within its specified temperature and humidity ranges to prevent damage.
9. Troubleshooting
| Problem | Possible Cause | Solution |
|---|---|---|
| Device not powering on. | No power to the circuit; incorrect wiring. | Check the circuit breaker. Verify all wiring connections are correct and secure (refer to Section 6). |
| Wi-Fi indicator not blinking or not connecting. | Not in pairing mode; incorrect Wi-Fi password; 5GHz Wi-Fi network. | Press and hold the "Pair" button to enter pairing mode. Ensure you are connecting to a 2.4GHz Wi-Fi network. Double-check the Wi-Fi password. Move the device closer to the router. |
| Inaccurate readings or no data in app. | Loose electrical connections; app synchronization issue. | Ensure all electrical connections are tight. Restart the app. If the issue persists, try re-pairing the device with the app. |
| Remote control not working. | No internet connection; device offline in app. | Check your home internet connection. Ensure the device is showing as "Online" in the app. Restart your router and the energy meter. |
10. Warranty and Support
For warranty information and technical support, please refer to the documentation provided with your purchase or visit the official Mumusuki website. Keep your purchase receipt as proof of purchase.
For further assistance, you may contact Mumusuki customer service through their official channels.
Note: Protection plans may be available for purchase separately. Please check with your retailer for details.