1. Introduction
This manual provides instructions for the setup, operation, and maintenance of your onlyfly Smart WiFi Weather Station. This device offers accurate indoor and outdoor temperature and humidity monitoring, along with a 5-day weather forecast, a large color display, and smart app connectivity.
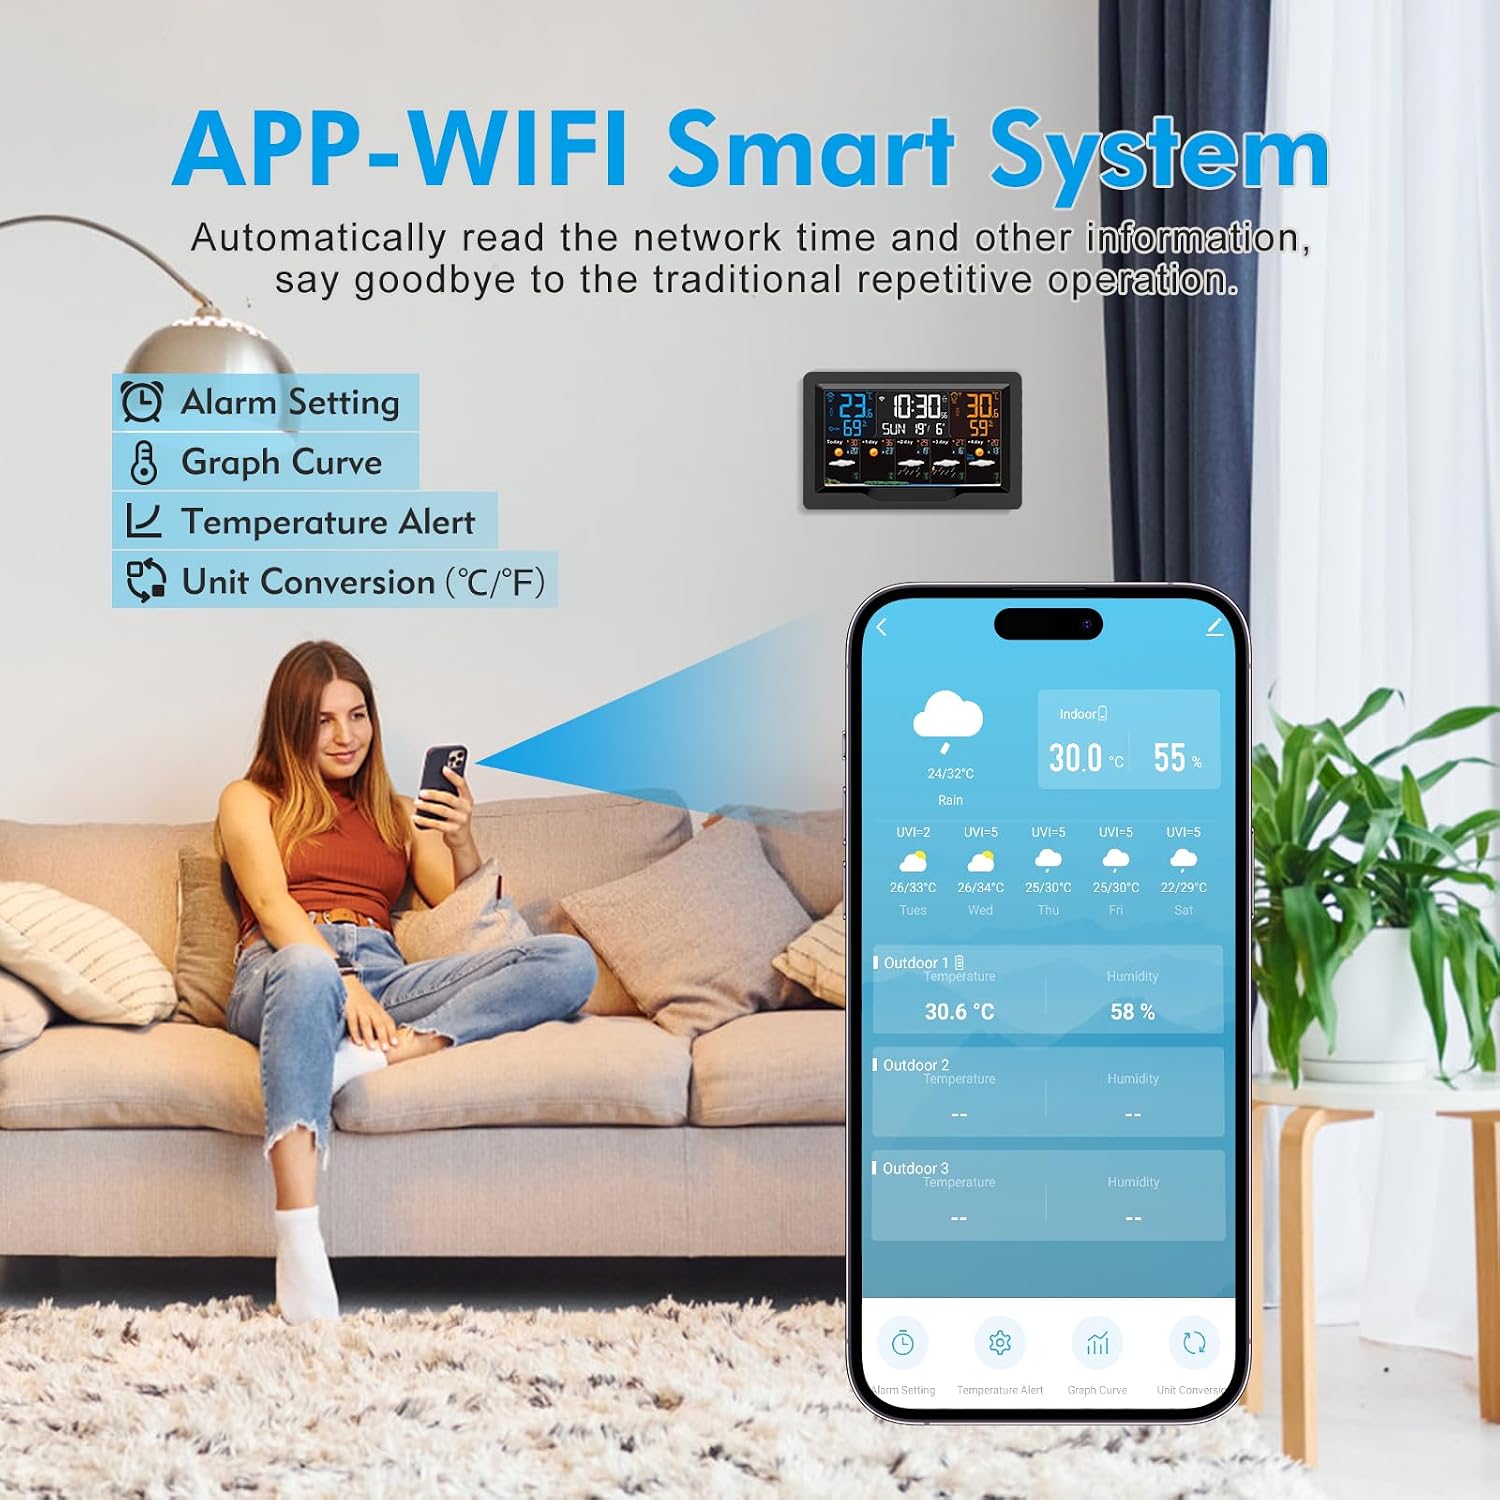
Image: The onlyfly Smart WiFi Weather Station main unit and its wireless outdoor sensor.
2. Package Contents
Please verify that all items are present in your package:
- 1x onlyfly Smart WiFi Weather Station (Main Unit)
- 1x Wireless Outdoor Sensor
- 1x AC Power Adapter
- 1x User Manual
3. Product Features
- Integrated WiFi and Tuya Smart App control for automatic time, date, and weather data synchronization.
- Monitors indoor/outdoor temperature and humidity.
- Provides current day and next 4-day weather forecasts, including min/max temperature and UV index.
- 7.5-inch large color display with clear interface.
- Four adjustable backlight levels (High, Medium, Low, Off).
- Three daily alarms with snooze function.
- Supports connection with up to 3 outdoor sensors (one sensor included).
- Temperature unit selection (Celsius/Fahrenheit).
- Perpetual calendar up to 2099 and 12/24 hour time format.
- Temperature alert function.
- Indoor comfort level display.
- USB port for charging electronic devices.
- Dual power modes: AC adapter or 2 AA batteries (main unit); 2 AAA batteries (wireless sensor).
4. Setup
4.1 Powering the Weather Station
The main weather station unit can be powered by the included AC adapter or by 2 AA batteries (not included).
- For continuous power, connect the provided AC adapter to the DC-IN port on the back of the weather station and plug it into a power outlet.
- For battery backup or portable use, open the battery compartment on the back and insert 2 AA batteries, observing polarity.

Image: The weather station can be powered by 2 AA batteries or the DC power adapter. It also features a USB charging socket.
4.2 Installing Wireless Sensor Batteries
The wireless outdoor sensor requires 2 AAA batteries (not included).
- Open the battery compartment on the wireless sensor.
- Insert 2 AAA batteries, ensuring correct polarity.
- Close the battery compartment securely.
- Place the sensor in a suitable outdoor location, protected from direct sunlight and rain, within 60 meters of the main unit.
4.3 Connecting to Wi-Fi (Tuya Smart App)
The weather station uses the Tuya Smart app for advanced features and automatic time synchronization.

Image: The weather station connects to the Tuya Smart app via WiFi for smart system features.
- Download the App: Search for "Tuya Smart" in your mobile device's app store (iOS or Android) and install it.
- Power On: Ensure your weather station is powered on.
- Enter Pairing Mode: On the weather station, press and hold the "▼/" button for more than 3 seconds until the Wi-Fi icon on the display starts flashing, indicating pairing mode.
- Open App: Launch the Tuya Smart app on your phone.
- Add Device: In the app, tap the "+" icon to add a new device. Select "Weather 3" or search for "Weather Station".
- Wi-Fi Information: Follow the on-screen instructions in the app to enter your 2.4 GHz Wi-Fi network name and password. Note: The device only supports 2.4 GHz Wi-Fi networks. If you have a dual-band router, ensure your phone is connected to the 2.4 GHz band during setup.
- Complete Pairing: Wait for the app to complete the pairing process. Once successful, the Wi-Fi icon on the weather station display will become solid.
5. Operating Instructions
5.1 Understanding the Display
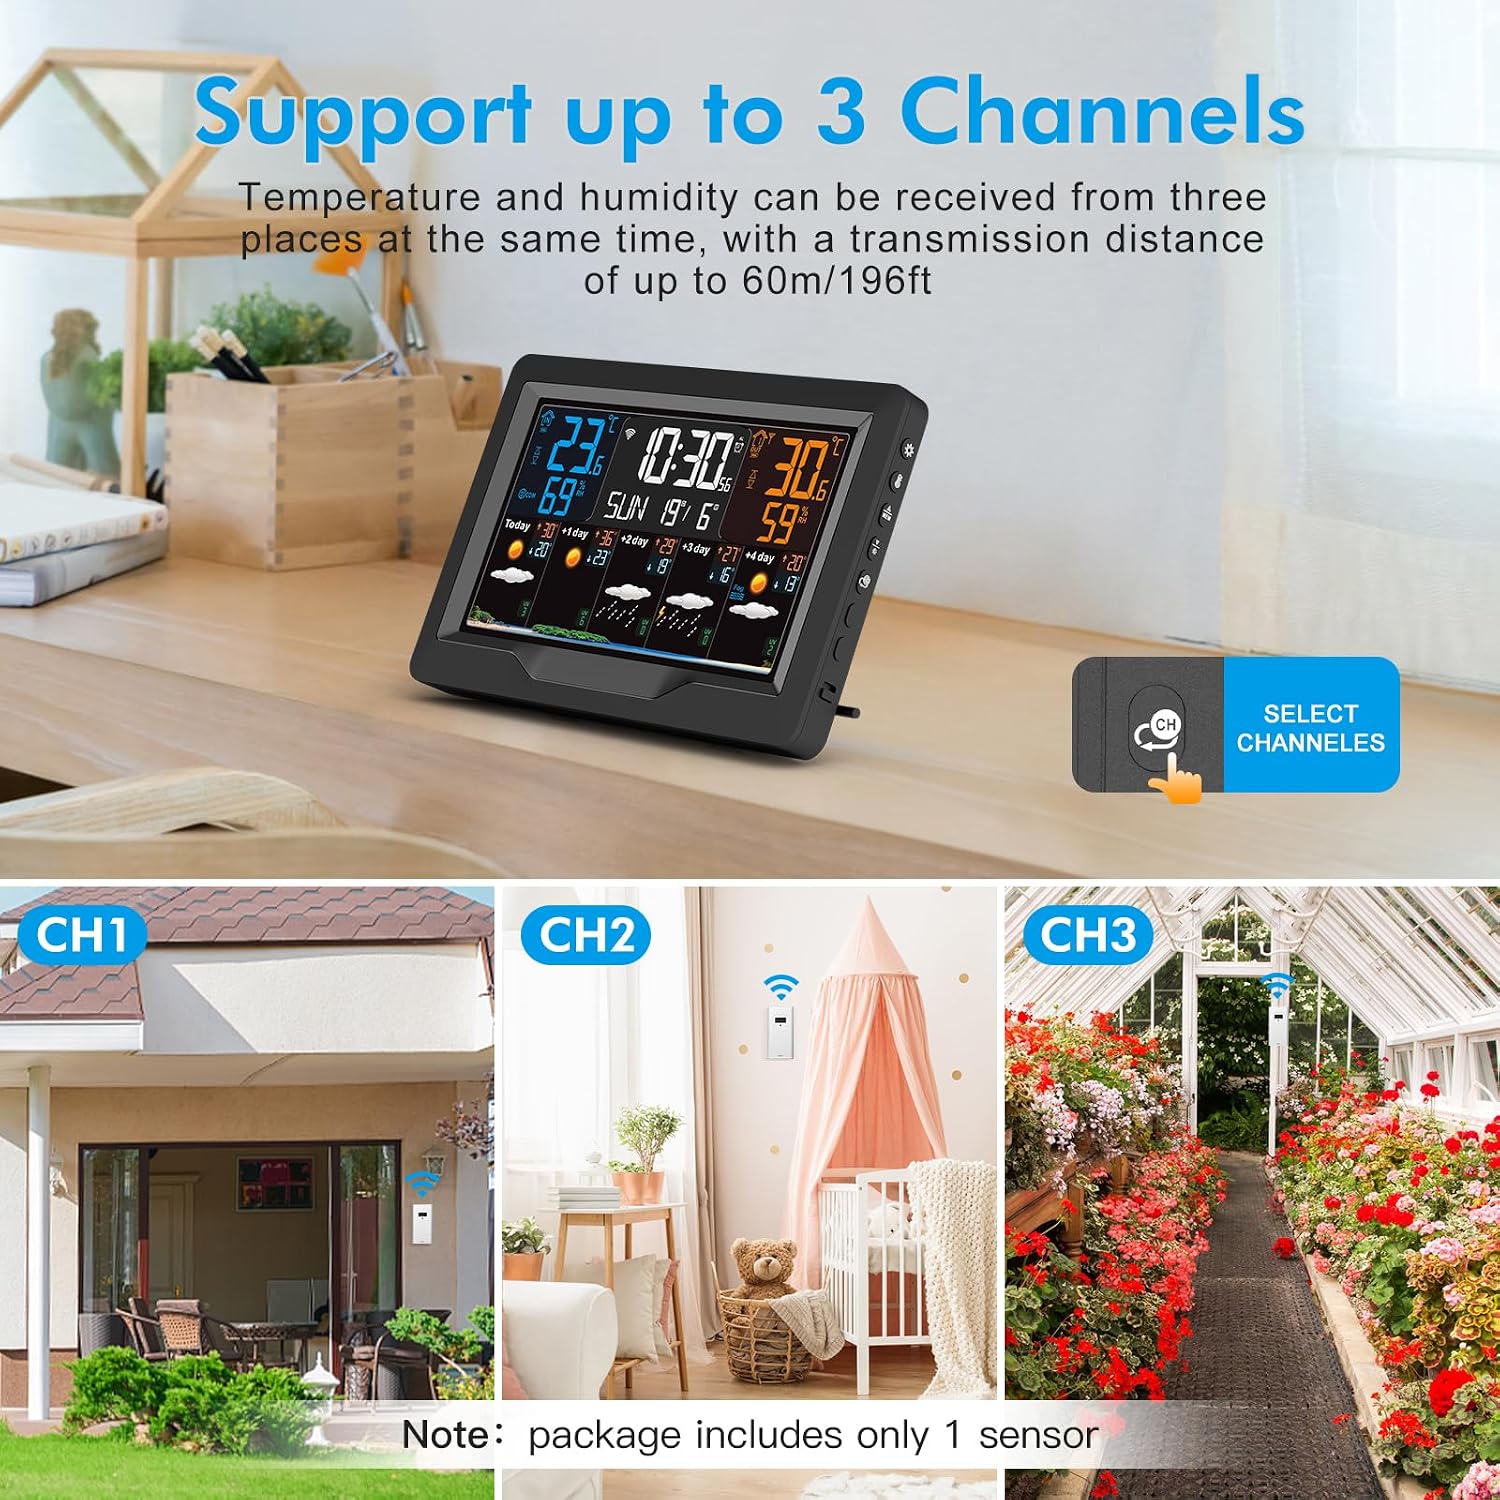
Image: Detailed view of the weather station display with labels for each information area.
The 7.5-inch color display provides comprehensive weather and time information:
- A1: Time
- A2: Indoor Temperature
- A3: Week for Today
- A4: Indoor Humidity
- A5: Remote Wireless Channel (for outdoor sensor data)
- A6: Outdoor Temperature
- A7: Calendar
- A8: Outdoor Humidity
- A9: Predicted Maximum Temperature (today and next 1-4 days)
- A10: Predicted Minimum Temperature (today and next 1-4 days)
- A11: Weather Forecast (for today and next 1-4 days)
- A12: UV Index
5.2 Adjusting Backlight
The display backlight has four adjustable levels.

Image: The weather station offers four adjustable backlight levels for various lighting conditions.
Press the dedicated backlight button (often labeled with a sun icon or similar) on the weather station to cycle through High, Medium, Low, and Off brightness settings.
5.3 Setting Alarms
The weather station supports up to three daily alarms with a snooze function.

Image: The weather station features 3 sets of alarm clocks with a snooze function.
Refer to the specific buttons on your device (usually labeled 'ALARM' or similar) and the detailed instructions in the included printed manual for setting and managing alarms. To activate snooze, touch the top of the weather station when an alarm sounds. The snooze duration is five minutes.
5.4 Temperature Unit Selection
You can switch between Celsius (℃) and Fahrenheit (℉).
Locate the ℃/℉ button on the weather station (often combined with another function button) and press it to toggle between the two temperature units.
5.5 Monitoring Multiple Sensors
The weather station can connect to up to three outdoor sensors.
Image: The weather station supports up to 3 channels, allowing temperature and humidity data from three locations simultaneously.
If you have additional outdoor sensors (purchased separately), ensure they are powered on. The main unit will automatically detect and display data from available sensors. Use the 'CHANNEL' button on the weather station to cycle through the data from different sensors (CH1, CH2, CH3).
6. Maintenance
- Cleaning: Wipe the weather station and sensor with a soft, dry cloth. Do not use abrasive cleaners or solvents.
- Battery Replacement: Replace batteries in the main unit and wireless sensor when the low battery indicator appears on the display. Ensure correct battery type and polarity.
- Sensor Placement: Periodically check the outdoor sensor's placement to ensure it remains protected from direct weather elements for accurate readings.
7. Troubleshooting
7.1 No Display / Power Issues
- Ensure the AC adapter is securely plugged into both the weather station and a working power outlet.
- If using batteries, check that they are inserted correctly with the right polarity and are not depleted. Replace if necessary.
7.2 Wi-Fi Connection Failure
- 2.4 GHz Network: Confirm your Wi-Fi network is 2.4 GHz. The weather station does not support 5 GHz networks. If you have a dual-band router, ensure your phone is connected to the 2.4 GHz band during setup.
- Password Accuracy: Double-check that the Wi-Fi password entered in the Tuya Smart app is correct.
- Proximity: Ensure the weather station is close to your Wi-Fi router during the initial setup process.
- Router Reboot: Try restarting your Wi-Fi router.
- Reset Pairing Mode: If the Wi-Fi icon is not flashing, press and hold the "▼/" button for more than 3 seconds to re-enter pairing mode.
- App Issues: Ensure your Tuya Smart app is updated to the latest version.
7.3 Outdoor Sensor Not Displaying Data
- Batteries: Check and replace the AAA batteries in the wireless sensor.
- Range: Ensure the sensor is within the 60-meter transmission range of the main unit and there are no major obstructions (thick walls, metal objects) between them.
- Interference: Move the sensor or main unit away from potential sources of electromagnetic interference (e.g., other wireless devices, large electronics).
- Re-sync: Power cycle both the main unit and the outdoor sensor. The main unit should automatically search for and connect to the sensor.
7.4 Inaccurate Readings
- Sensor Placement: Ensure the outdoor sensor is not in direct sunlight, near heat sources, or exposed to heavy rain, which can affect accuracy.
- Ventilation: Ensure both indoor and outdoor sensors have adequate airflow around them.
8. Specifications
| Feature | Specification |
|---|---|
| Model Number | XHQM-3305418-EM3390TF |
| Material | ABS + LCD |
| APP Support | Tuya Smart APP |
| WLAN Frequency | 2.4 GHz |
| Indoor Temperature Range | -10℃~50℃ / 14℉-122℉ |
| Outdoor Temperature Range | -40℃~70℃ / -40℉-158℉ |
| Humidity Range (Indoor & Outdoor) | 1% to 99% RH |
| Temperature Unit | ℃/℉ (Optional) |
| Weather Forecast | Current day + next 4 days |
| Backlight Levels | 4 (High, Medium, Low, Off) |
| Calendar | Perpetual up to 2099 |
| Time Format | 12/24 hour (Optional) |
| Alarms | 3 daily alarms with snooze |
| Sensor Transmission Range | Approx. 60 meters |
| Weather Station Power | 2 AA batteries (not included) or AC adapter (included) |
| Wireless Sensor Power | 2 AAA batteries (not included) |
| Product Dimensions | 2.54 x 2.54 x 12.7 cm |
| Weight | 530 grams |
9. Warranty and Support
This product comes with a standard manufacturer's warranty. For detailed warranty information, please refer to the documentation provided with your purchase or contact the retailer. For technical support or further assistance, please reach out to the customer service department of your place of purchase.


