1. Introduction
This manual provides essential instructions for the setup, operation, and maintenance of your AIRDOCTOR AD2000 and AD1000 4-in-1 Air Purifiers. Please read this manual thoroughly before using your air purifiers to ensure safe and efficient operation.

Image 1.1: The AIRDOCTOR AD2000 (left) and AD1000 (right) Air Purifiers.
2. Important Safety Instructions
To reduce the risk of fire, electric shock, or injury, observe the following:
- Read all instructions before operating the appliance.
- Always unplug the air purifier before moving, cleaning, or replacing filters.
- Do not operate any appliance with a damaged cord or plug.
- Keep the cord away from heated surfaces.
- Do not use the air purifier outdoors.
- Do not use the air purifier in wet environments or near water.
- Do not insert foreign objects into any ventilation or exhaust opening.
- Ensure the air purifier is placed on a firm, level surface.
3. Product Components and Features
3.1 AIRDOCTOR AD2000 Overview
The AD2000 features a compact design suitable for small to medium rooms. It includes a 3-stage filtration system and a user-friendly control panel.

Image 3.1: The AIRDOCTOR AD2000 with its dimensions (18.72 in / 47.55 cm height, 13.85 in / 35.18 cm width). Recessed handles are visible for portability.
3.2 AIRDOCTOR AD1000 Overview
The AD1000 is designed with a sleek tower form factor, ideal for smaller spaces like guest rooms or home offices. It also incorporates a 3-stage filtration system.

Image 3.2: The AIRDOCTOR AD1000 in a bedroom, showcasing its sleek tower design.
3.3 3-Stage Filtration System
Both AD2000 and AD1000 models utilize a 3-stage filtration system:
- Pre-Filter: Designed to capture larger contaminants such as dust and animal hair.
- UltraHEPA Filter: Independently tested to capture airborne particles as small as 0.003 microns, including ultra-fine dust, pollen, mold spores, smoke, pet hair, dander, bacteria, and viruses.
- Carbon/Gas Trap/VOC Filter: Reduces toxic ozone, gases, odors, and Volatile Organic Compounds (VOCs) from sources like cooking, cleaners, furniture, carpet, paint off-gassing, and hairspray.

Image 3.3: Exploded view of the AIRDOCTOR AD2000's 3-stage filtration system, showing the Pre-Filter, UltraHEPA Filter, and Carbon/Gas Trap/VOC Filter.

Image 3.4: Exploded view of the AIRDOCTOR AD1000's 3-stage filtration system, showing the Pre-Filter, UltraHEPA Filter, and Carbon/Gas Trap/VOC Filter.
4. Setup Guide
4.1 Unpacking
Carefully remove the air purifier from its packaging. Retain the packaging for future storage or transport.
4.2 Filter Installation
The filters are typically pre-installed but may be wrapped in protective plastic. Remove all plastic packaging from the filters before first use.
- Locate the filter compartment cover (usually on the back or side of the unit).
- Open the cover and remove the filters.
- Remove any plastic wrapping from the Pre-Filter, UltraHEPA Filter, and Carbon/Gas Trap/VOC Filter.
- Reinsert the filters in the correct order, ensuring they are seated properly. Refer to the diagrams in Section 3.3 for filter orientation.
- Close the filter compartment cover securely.
4.3 Placement
Place the air purifier on a firm, level surface. Ensure there is adequate space around the unit (at least 6 inches) for proper air circulation. Avoid placing it directly against walls or furniture that could obstruct air intake or output.
4.4 Power Connection
Plug the power cord into a standard electrical outlet. The unit is now ready for operation.
5. Operating Instructions
5.1 Control Panel Overview (AD2000)
The AD2000 features a touch control panel for easy operation.
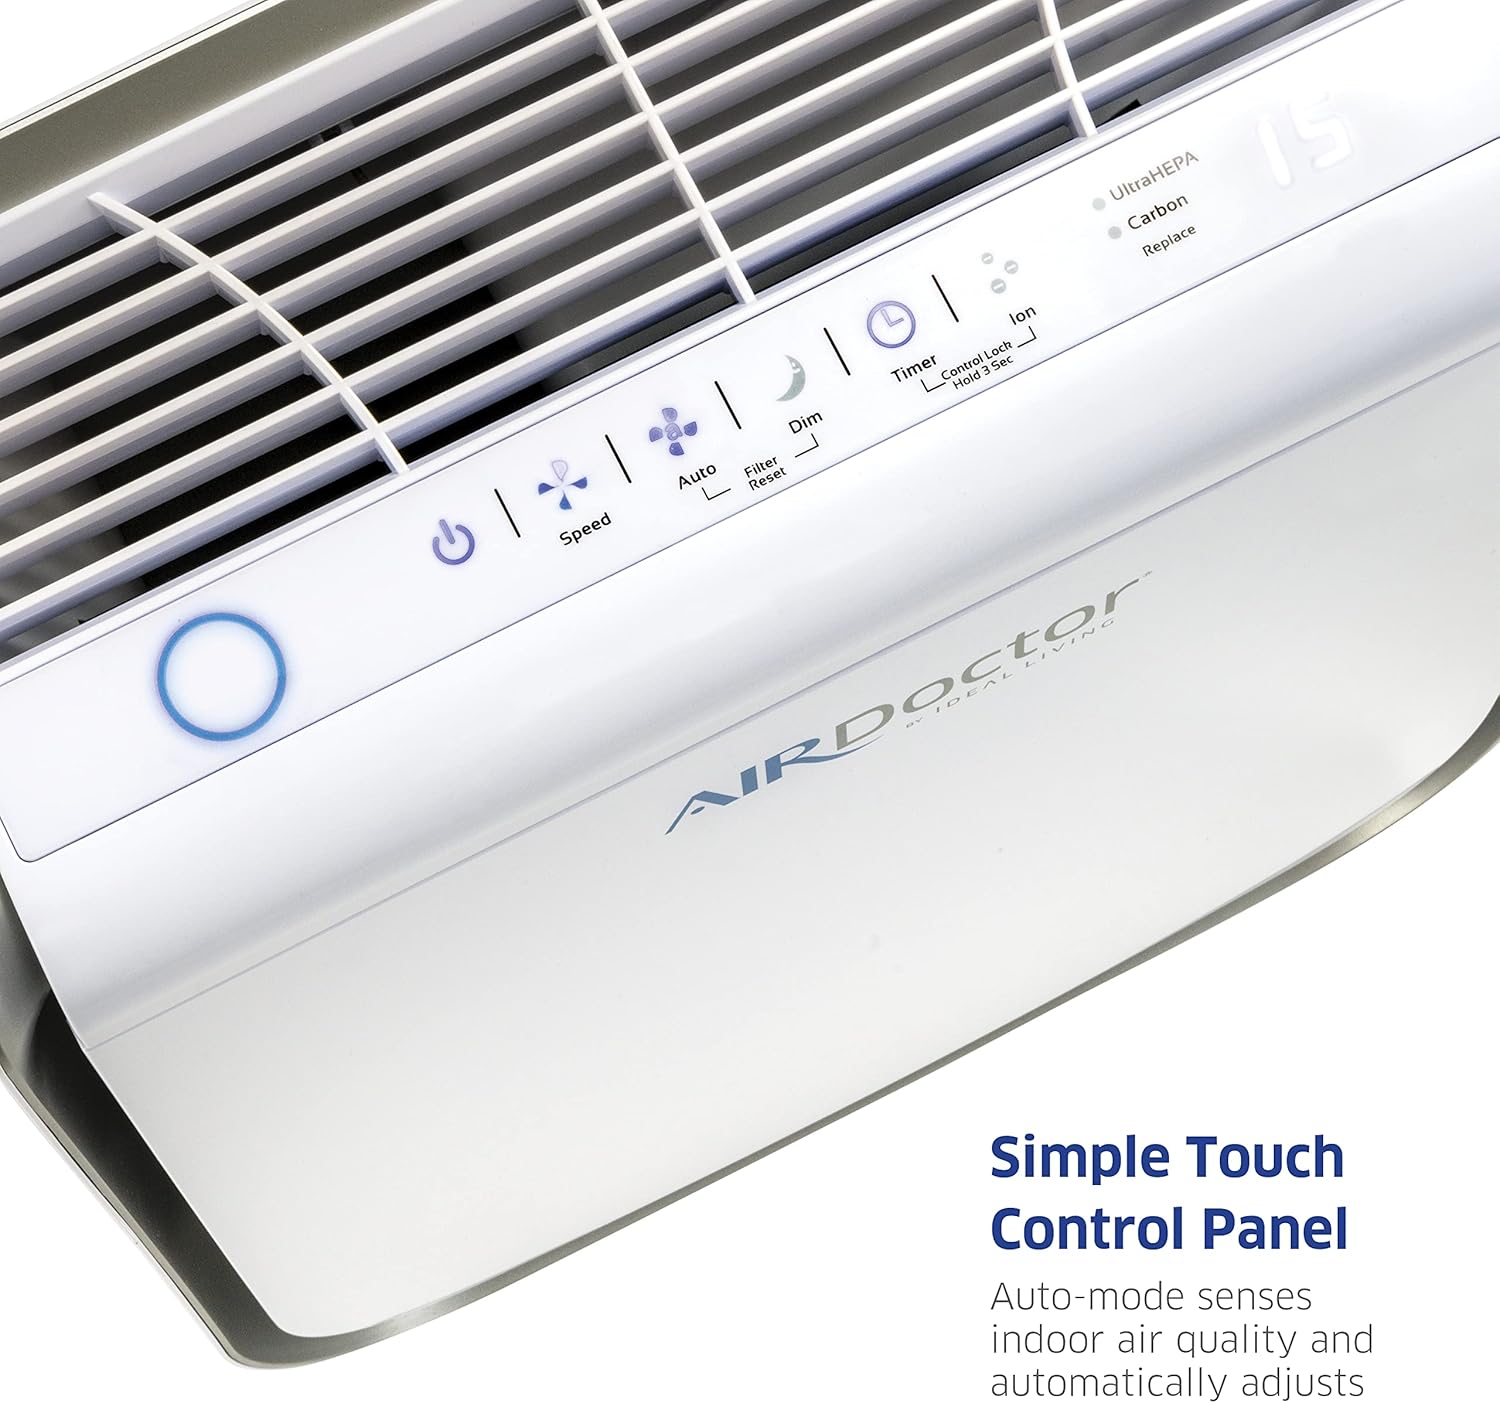
Image 5.1: Close-up of the AIRDOCTOR AD2000's simple touch control panel.
5.2 Power On/Off
Press the Power button (usually indicated by a circle with a vertical line) to turn the unit on or off.
5.3 Fan Speed Adjustment
Press the Speed button to cycle through different fan speeds (e.g., Low, Medium, High, Turbo). The current speed setting will be indicated on the control panel.
5.4 Auto Mode
Press the Auto button to activate Auto Mode. In this mode, the air purifier's built-in sensor detects indoor air quality and automatically adjusts the fan speed to optimize purification.
5.5 Timer Function
Press the Timer button to set the operating duration (e.g., 2 hours, 4 hours, 8 hours). The unit will automatically turn off after the selected time.
5.6 Air Quality Indicator
Both models feature a real-time air quality monitor that uses colored rings or lights to indicate the current air quality:
- Blue/Green: Good Air Quality (Low Speed in Auto Mode)
- Orange/Yellow: Moderate Air Quality (Medium Speed in Auto Mode)
- Red: Poor Air Quality (Maximum Speed in Auto Mode)

Image 5.2: The AIRDOCTOR AD2000's air quality monitor showing color indicators for Poor, Moderate, and Good air quality.

Image 5.3: The AIRDOCTOR AD1000's air quality monitor showing color indicators for Poor, Moderate, and Good air quality.
6. Maintenance
6.1 Filter Replacement
The air purifiers are equipped with filter replacement indicators (UltraHEPA and Carbon) on the control panel. When a filter needs replacement, its indicator light will illuminate.
Important: Only use genuine AIRDOCTOR UltraHEPA and Carbon VOC filters. Using non-genuine filters may void your warranty and affect performance.
- Unplug the air purifier from the power outlet.
- Open the filter compartment cover.
- Remove the old filters. Dispose of them according to local regulations.
- Install new, genuine AIRDOCTOR filters, ensuring all plastic packaging is removed.
- Close the filter compartment cover.
- Plug the unit back in.
- To reset the filter indicator, press and hold the Filter Reset button (or indicated button) for 3-5 seconds until the light turns off.
6.2 Cleaning the Unit
Regular cleaning helps maintain optimal performance.
- Exterior: Wipe the exterior surfaces with a soft, dry cloth. Do not use abrasive cleaners or solvents.
- Air Intake/Output Vents: Use a soft brush or vacuum cleaner with a brush attachment to gently clean dust from the air intake and output vents.
- Pre-Filter: The pre-filter can often be gently vacuumed to remove accumulated dust and debris between replacements. Refer to specific filter instructions for reusability.
7. Troubleshooting
| Problem | Possible Cause | Solution |
|---|---|---|
| Unit does not turn on | No power; Power cord not fully plugged in | Check power outlet; Ensure power cord is securely plugged in. |
| Reduced airflow or purification efficiency | Clogged filters; Obstruction of air intake/output | Check and replace filters if necessary; Ensure vents are clear. |
| Filter replacement indicator remains on after filter change | Filter reset not performed | Press and hold the Filter Reset button for 3-5 seconds. |
| Air quality indicator always shows 'Poor' | Sensor is dirty; High level of pollutants | Clean the air quality sensor (refer to manual for location); Ensure proper ventilation in the room. |
8. Specifications
8.1 AIRDOCTOR AD2000
- Filtration: 3-stage (Pre-Filter, UltraHEPA, Carbon/VOC)
- Room Coverage: Circulates air in 305 sq. ft. 4x/hour or 610 sq. ft. 2x/hour.
- Filter Compatibility: Only compatible with AIRDOCTOR UltraHEPA and Carbon VOC filters.
- Controller Type: Button Control
8.2 AIRDOCTOR AD1000
- Filtration: 3-stage (Pre-Filter, UltraHEPA, Carbon/VOC)
- Room Coverage: Circulates air in 285 sq. ft. 4x/hour or 570 sq. ft. 2x/hour.
- Filter Compatibility: Only compatible with AIRDOCTOR UltraHEPA and Carbon VOC filters.
- Controller Type: Button Control
9. Warranty Information
AIRDOCTOR products typically come with a limited warranty. Please refer to the warranty card included with your product or visit the official AIRDOCTOR website for detailed warranty terms and conditions. Keep your proof of purchase for warranty claims.
10. Customer Support
For technical assistance, troubleshooting not covered in this manual, or to order replacement filters, please contact AIRDOCTOR customer support. Contact information can typically be found on the official AIRDOCTOR website or on the product packaging.


