1. Introduction
Thank you for choosing HD Ridez Drop Down Style Running Boards. These running boards are designed to provide a secure and convenient step for accessing your vehicle, enhancing both functionality and appearance. Constructed from durable carbon steel with a matte black powder-coated finish, they offer robust support and long-lasting performance.
Compatibility:
- Dodge Sprinter 2007-2009 Full Size Van
- Mercedes-Benz Sprinter 2010-2024 (Excludes Passenger Van with Rear A/C and 2015 4X4 models)
2. Package Contents
Please verify that all components are present before beginning installation. If any parts are missing or damaged, contact HD Ridez customer support.
- Running Boards (Driver and Passenger Side)
- Mounting Hardware Kit (bolts, washers, nuts, brackets)
- Instruction Manual (this document)

Figure 2.1: Two HD Ridez Drop Down Style Running Boards, showcasing their design and matte black finish.
3. Specifications
| Feature | Specification |
|---|---|
| Model Number | HDR-WN57N5762 |
| Material | Carbon Steel |
| Color | Black |
| Exterior Finish | Powder Coated Matte Black |
| Dimensions (L x W x H) | 100 x 7.5 x 6 inches (approximate) |
| Item Weight | 54.9 pounds |
| Weight Limit | 300 Pounds |
| Fit Type | Vehicle Specific Fit |

Figure 3.1: Technical diagram showing the dimensions of the running boards, including overall length (2428mm), step width, and tube diameters (51mm OD and 38mm OD).

Figure 3.2: A white Mercedes-Benz Sprinter van with the running boards installed, accompanied by a top-down diagram of a van interior indicating a 96-inch length for both driver and passenger side running boards. Note: The product is designed to have a specific fit for each side.
4. Setup and Installation
Installation of these running boards is a bolt-on process, however, drilling is required for proper mounting. It is recommended to have basic mechanical knowledge and tools. Always ensure the vehicle is on a stable, level surface and use appropriate safety gear.
4.1. Tools Required (Not Included)
- Socket Wrench Set (metric sizes, e.g., 10mm, 13mm, 16mm, 17mm)
- Open-end Wrench Set
- Drill and Drill Bits (appropriate sizes for pilot and final holes)
- Measuring Tape
- Marker or Pencil
- Safety Glasses and Gloves
- Creepers or Jack Stands (for under-vehicle access, if needed)
4.2. Installation Steps
- Preparation: Park the vehicle on a flat, stable surface. Engage the parking brake. For easier access, consider using a creeper or raising the vehicle safely with jack stands.
- Identify Sides: Determine the driver side and passenger side running boards. They are designed for specific sides of the vehicle.
- Position Brackets: Locate the factory mounting points or areas on the vehicle's frame where the carbon steel mounting brackets will attach. Some drilling into the vehicle's pinch seam or frame may be required. Refer to the included hardware diagram for specific bracket placement.
- Mark and Drill: Carefully align the brackets with the running board and the vehicle. Mark the precise locations for drilling. Start with a smaller pilot hole, then enlarge to the required size for the mounting bolts. Apply rust-preventative paint to all drilled holes to protect against corrosion.
- Attach Brackets: Securely attach the carbon steel mounting brackets to the vehicle's frame using the provided hardware. Ensure all bolts are hand-tightened initially.
- Mount Running Boards: Carefully lift the running board and align it with the attached brackets. Secure the running board to the brackets using the remaining hardware.
- Final Tightening: Once both running boards are in place and all hardware is installed, systematically tighten all bolts to the manufacturer's recommended torque specifications (if available, otherwise ensure they are very secure). Double-check all connections for tightness and stability.
- Repeat for Other Side: Follow the same steps for the opposite side of the vehicle.

Figure 4.1: A white Mercedes-Benz Sprinter van with the HD Ridez running boards installed, demonstrating their appearance on a vehicle. An inset graphic highlights the 7.5-inch width of the step surface.
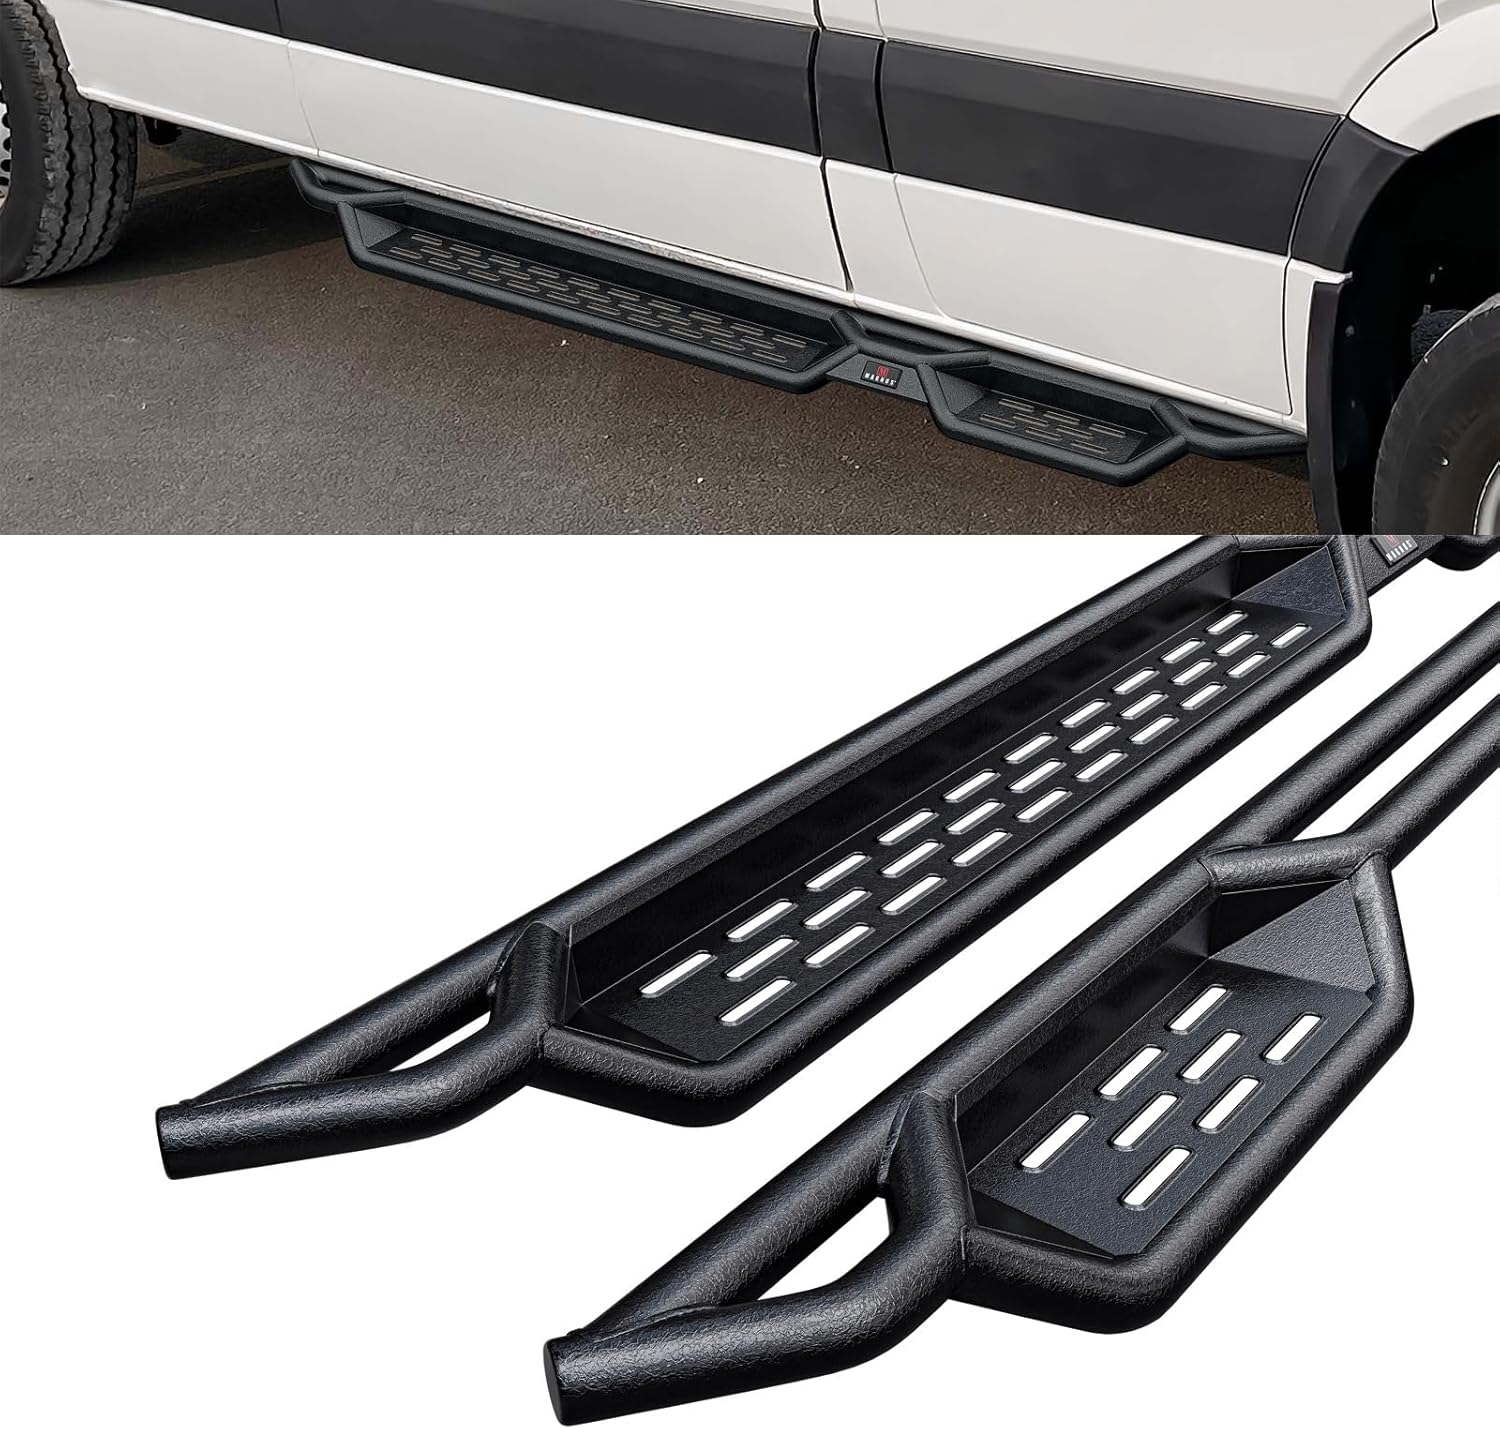
Figure 4.2: A white Mercedes-Benz Sprinter van equipped with the running boards, providing a side profile view. Below, a larger image of the running boards themselves.

Figure 4.3: A detailed view of the running board components, illustrating the drop step design, the carbon steel material, and the textured wrinkle finish.
5. Operating Instructions
The HD Ridez Drop Down Style Running Boards are designed for easy and safe vehicle entry and exit. Simply step onto the textured surface of the running board when entering or exiting your vehicle. The anti-slip step surface with formed raised holes provides secure footing in various weather conditions.
Ensure that the weight limit of 300 pounds per running board is not exceeded to maintain safety and product integrity.
6. Maintenance
To ensure the longevity and appearance of your HD Ridez running boards, follow these maintenance guidelines:
- Regular Cleaning: Clean the running boards regularly with mild soap and water. Avoid abrasive cleaners or harsh chemicals that could damage the powder-coated finish. Rinse thoroughly and dry to prevent water spots.
- Inspect Hardware: Periodically check all mounting hardware (bolts, nuts, brackets) for tightness. Vibrations from driving can loosen fasteners over time. Re-tighten as necessary.
- Corrosion Protection: The carbon steel brackets feature triple-layer rust protection. However, in areas with high humidity, road salt, or harsh weather, it is advisable to inspect for any signs of rust or wear. Touch up any exposed metal with rust-inhibiting paint if needed.
- Damage Inspection: Inspect the running boards for any signs of damage, such as bends, cracks, or significant scratches, especially after off-road use or impacts. Address any damage promptly to prevent further issues.
7. Troubleshooting
This section addresses common issues you might encounter.
7.1. Running Board Feels Loose After Installation
- Solution: Re-check all mounting bolts and nuts. Ensure they are tightened securely to the vehicle frame and to the running board itself. Over time, vibrations can cause fasteners to loosen, requiring periodic re-tightening.
7.2. Difficulty Aligning Mounting Holes
- Solution: Ensure you have correctly identified the driver and passenger side running boards and brackets. Sometimes, minor adjustments or slight persuasion may be needed during initial alignment. Verify that the correct mounting points on the vehicle are being used as per the installation instructions.
7.3. Missing or Damaged Hardware
- Solution: Before starting installation, perform a complete inventory of all included hardware against the package contents list. If any parts are missing or damaged, contact HD Ridez customer support immediately for assistance.
8. Warranty Information
HD Ridez provides a 5-year Limited Warranty against manufacturing defects for these Drop Down Style Running Boards. This warranty covers defects in materials and workmanship under normal use and service. It does not cover damage resulting from improper installation, accident, misuse, abuse, neglect, normal wear and tear, or unauthorized modification.
Please retain your proof of purchase for warranty claims. For warranty service, contact HD Ridez customer support.
9. Customer Support
For any questions, technical assistance, or warranty inquiries, please contact HD Ridez customer support through the retailer where the product was purchased or visit the official HD Ridez website for contact information.
We are committed to providing high-quality products and support to our customers.