1. Introduction
This manual provides essential information for the installation, operation, and maintenance of the Generic MO-301 Complete Tension Assembly Replacement. The tension assembly is a critical component of a sewing machine, responsible for regulating the tension of the upper thread, which directly impacts stitch quality. Proper installation and adjustment are necessary for optimal sewing performance.
2. Safety Information
- Always disconnect the sewing machine from the power supply before performing any maintenance or part replacement.
- Use appropriate tools for installation to avoid damage to the part or the sewing machine.
- Keep small parts away from children.
- If unsure about any step, consult a qualified sewing machine technician.
3. Package Contents
Verify that your package contains the following item:
- 1 x Generic MO-301 Complete Tension Assembly Replacement
4. Installation and Replacement
This section outlines the general steps for replacing the tension assembly. Specific procedures may vary slightly depending on your sewing machine model. Refer to your sewing machine's original manual for detailed instructions on accessing and replacing the tension unit.
4.1 Preparation
- Disconnect Power: Ensure the sewing machine is unplugged from the electrical outlet.
- Clear Work Area: Remove any thread, fabric, or accessories from the needle area.
- Access Old Assembly: Locate the existing tension assembly. This typically involves removing a faceplate or cover on the sewing machine.
4.2 Removal of Old Tension Assembly
- Carefully observe how the old tension assembly is connected. Note the orientation of any springs or levers.
- Loosen any screws or clips securing the old assembly in place.
- Gently pull the old tension assembly out of its housing.
4.3 Installation of New MO-301 Tension Assembly
- Align the new MO-301 tension assembly with the opening in the sewing machine. Ensure the pull-up mechanism and tension discs are correctly oriented.
- Push the assembly firmly into place until it seats securely.
- Secure the assembly with any screws or clips that were removed earlier. Do not overtighten.
- Replace any covers or faceplates that were removed.

Figure 1: Front view of the MO-301 tension assembly, showing the numbered dial for tension adjustment.

Figure 2: Angled view of the MO-301 tension assembly, providing a clearer look at the tension dial and its numerical markings.
5. Operating and Adjusting Thread Tension
After installation, it is crucial to properly adjust the thread tension for balanced stitches.
- Thread the Machine: Thread your sewing machine as usual, ensuring the thread passes correctly through all guides and the new tension assembly.
- Set Initial Tension: Turn the numbered dial on the tension assembly to a middle setting, typically between 3 and 5, as a starting point.
- Test Stitch: Sew a test seam on a scrap piece of fabric similar to your project material.
- Examine Stitches:
- If the top thread lies flat on the fabric and the bobbin thread shows loops on the top, the upper tension is too loose. Turn the dial to a higher number.
- If the bobbin thread lies flat on the fabric and the top thread shows loops on the bottom, the upper tension is too tight. Turn the dial to a lower number.
- Ideal tension results in stitches that look identical on both sides of the fabric, with the threads interlocking neatly within the fabric layers.
- Fine-Tune: Make small adjustments to the tension dial (half a number at a time) and test stitch until the desired stitch quality is achieved.

Figure 3: Another angled view of the MO-301 tension assembly, illustrating the overall structure including the tension dial and its housing.
6. Maintenance
Regular maintenance ensures the longevity and proper function of your tension assembly.
- Cleaning: Periodically clean the tension discs and surrounding area with a soft brush or lint-free cloth to remove any lint, dust, or thread fragments that can accumulate and affect tension.
- Inspection: Visually inspect the tension assembly for any signs of wear, damage, or bent components.
- Avoid Lubrication: Do not apply oil or lubricants directly to the tension discs, as this can attract lint and cause tension inconsistencies.

Figure 4: Side view of the MO-301 tension assembly, detailing the spring mechanism and the threaded shaft that controls tension.

Figure 5: Top-down view of the MO-301 tension assembly, providing a perspective on the central shaft and the arrangement of internal components.
7. Troubleshooting Common Tension Issues
If you encounter issues with stitch quality after installing the new tension assembly, consider the following:
- Incorrect Threading: Re-thread the entire machine, ensuring the thread is seated correctly in all guides and between the tension discs.
- Lint or Debris: Check for any lint or thread bits caught between the tension discs. Even a small piece can prevent proper tension.
- Bobbin Tension: While this assembly controls upper tension, an issue with bobbin tension can also affect overall stitch balance. Consult your sewing machine manual for bobbin tension adjustment.
- Needle Condition: A bent or dull needle can cause skipped stitches or uneven tension. Replace the needle if necessary.
- Thread Quality: Poor quality or old thread can break easily or cause inconsistent tension.

Figure 6: Opposite side view of the MO-301 tension assembly, showing the spring mechanism and the outer housing from a different angle.
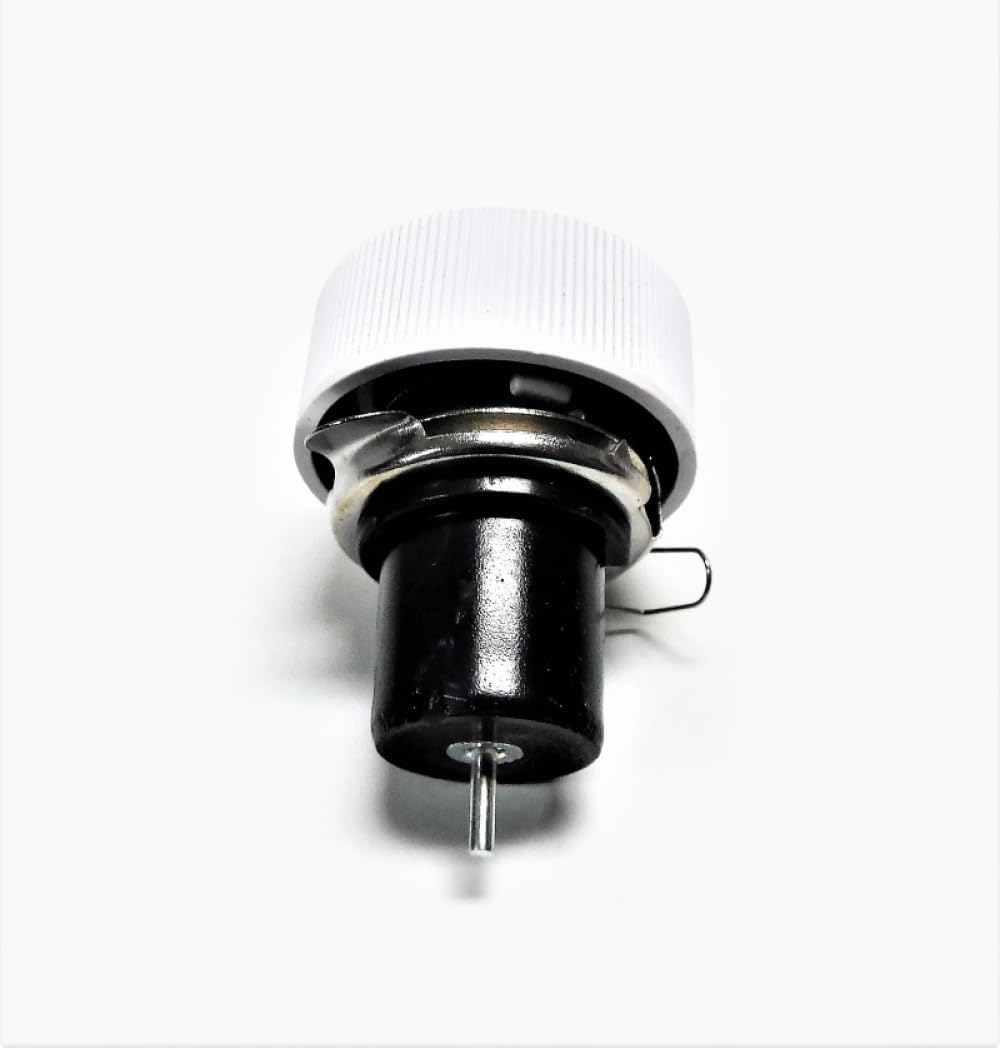
Figure 7: Bottom view of the MO-301 tension assembly, illustrating the shaft and the point where it connects to the sewing machine's internal mechanism.
8. Specifications
| Feature | Detail |
|---|---|
| Model Number | MO-301 |
| Product Dimensions | 1.5 x 1.5 x 1.5 inches |
| Type | Complete Tension Assembly Replacement (Pull-Up) |
9. Compatibility
The MO-301 Complete Tension Assembly Replacement is compatible with a wide range of sewing machine models, including but not limited to:
- BROTHER: B661, B651
- MORSE: 4100, 4300
- NECCHI: 3204FB, 3205FA
- RICCAR: 1900, 301Z, 303SS, 469FA, 504, 514, 580, 590, 601, 603, 608, 653, 663, 670, 6714, 693, 701, 703, 753, 763, 793, 900, R1570, R1570FB, R250, R1900, R900, SZ702
- SIMPLICITY: SL6220
- TACONY: FA524, FA580, FA590, FA602, FA670, FA6702, FA6714, FA693
- WHITE: 1315, 1620, 1630, 165, 1655, 167, 263, 265
This list is provided for reference. Always verify compatibility with your specific sewing machine model before purchase and installation.
10. Support
For further assistance or inquiries regarding the MO-301 Tension Assembly, please contact your product supplier or a qualified sewing machine technician.


