1. Introduction
This manual provides detailed instructions for the proper installation, operation, and maintenance of your ZEZEFUFU P6FG 2.4G 6 Channel Receiver with Gyro. Please read this manual thoroughly before using the product to ensure safe and efficient operation. This receiver is designed for use with RC X6 Transmitters in various RC models including cars, trucks, buggies, boats, planes, and helicopters.
2. Product Overview
The ZEZEFUFU P6FG receiver is a compact and reliable 2.4GHz 6-channel receiver featuring an integrated gyroscope for enhanced stability. It offers stable performance and a strong signal distance, making it suitable for a wide range of remote-controlled vehicles.
2.1 Key Features
- Reliable, interference-free 2.4GHz signal operation.
- Quick and extremely stable performance.
- Integrated Gyro for improved control and stability.
- Easy binding process for fast link-up.
- Strong signal distance (more than 400 meters).
- Compatible with RC X6 Transmitters.
- Suitable for RC cars, trucks, buggies, boats, planes, and helicopters.
2.2 Package Contents
- 1 x ZEZEFUFU P6FG Receiver (with Gyro)

Figure 1: Top-down view of the ZEZEFUFU P6FG Receiver, showing the main body, antenna, and channel ports.
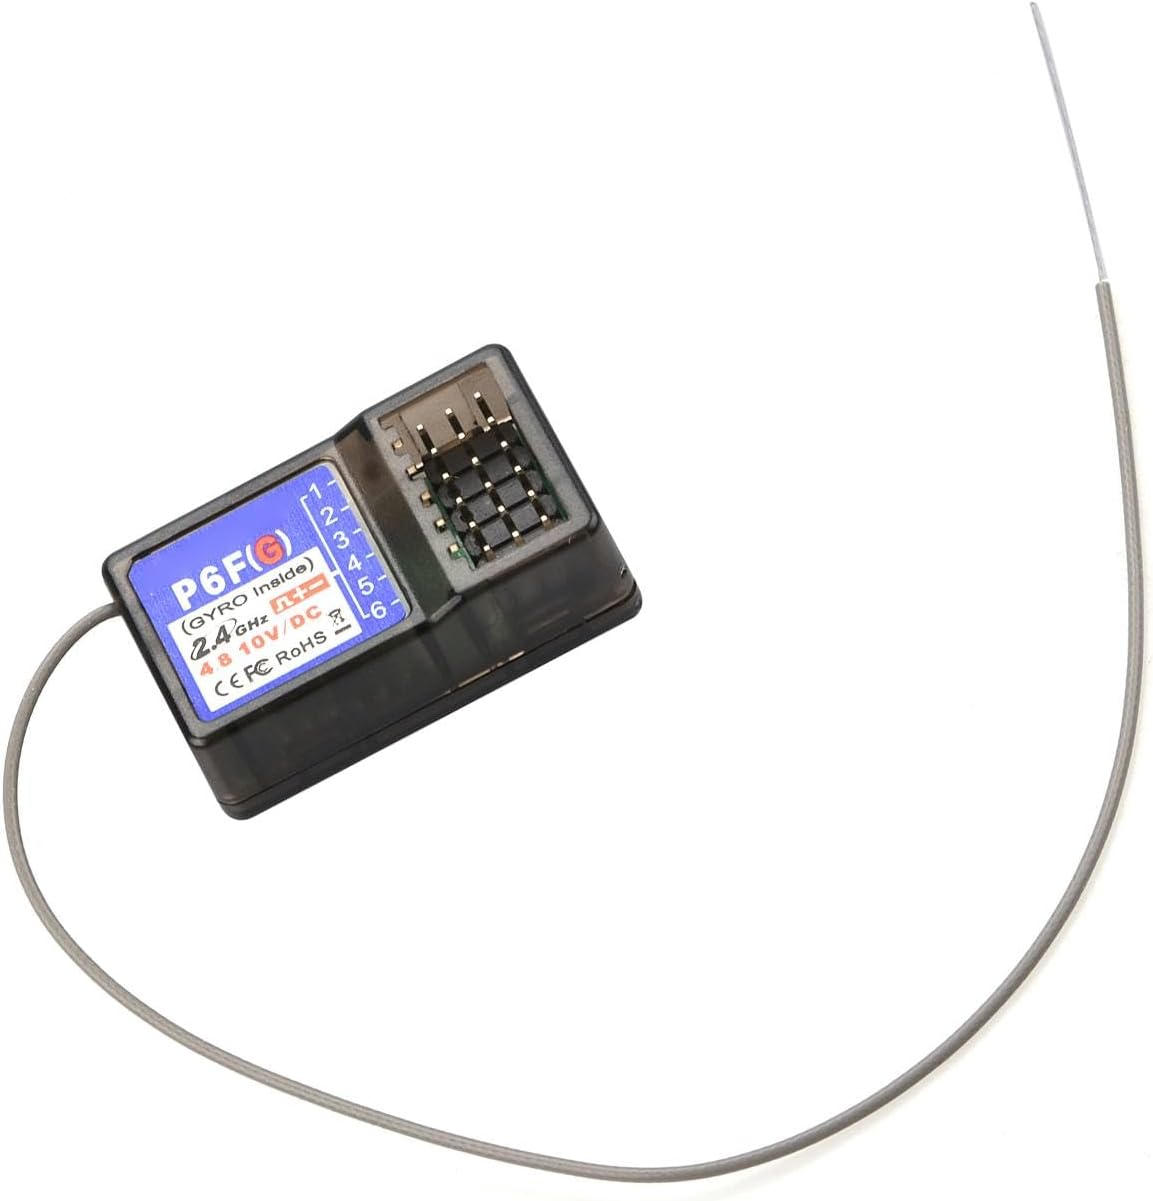
Figure 2: Angled view of the P6FG receiver, highlighting its compact design and port layout.
3. Specifications
| Specification | Value |
|---|---|
| Item Number | P6FG |
| Item Name | Receiver |
| Product Size | 35 x 20 x 13 mm (1.38 x 0.79 x 0.51 inches) |
| Antenna Length | 106 mm (4.17 inches) |
| Channel | 6CH |
| Model Compatibility | Car/Boat/Tank (also compatible with RC Plane/Helicopter) |
| Modulation Mode | GFSK |
| Spread Spectrum | FHSS |
| Control Distance | More than 400 meters |
| Voltage Range | 3.3-10V DC |
| Working Current | 30mA |
| Compatible Transmitter | X6 Transmitter |
| Colour | Gray |
| Material | Plastic |
| Item Weight | 1.41 ounces (approximately 40 grams) |

Figure 3: Dimensions of the P6FG receiver, showing approximate length and width measurements.
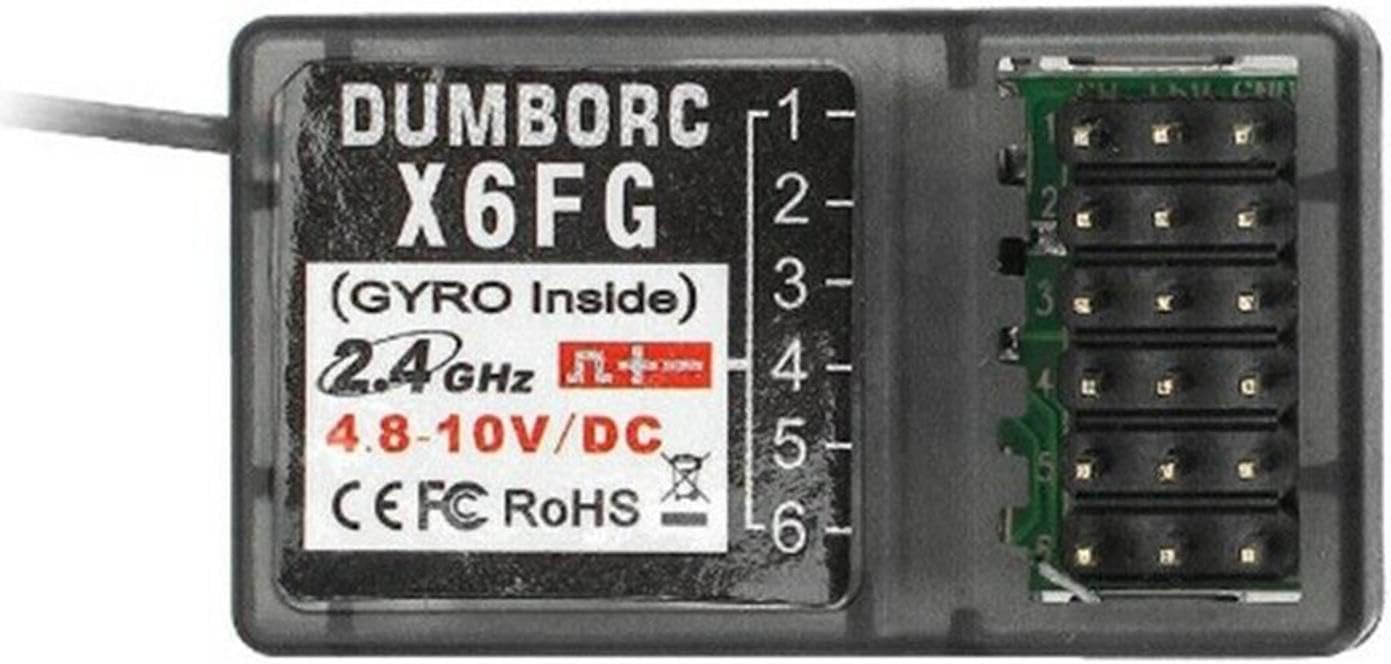
Figure 4: Close-up view of the receiver's label, indicating "P6F(G) (GYRO Inside)", 2.4GHz, and voltage range.
4. Setup and Installation
Proper setup is crucial for optimal performance and safety. Follow these steps carefully.
4.1 Connecting Components
Connect your servos, Electronic Speed Controllers (ESCs), and other accessories to the appropriate channels on the P6FG receiver. Refer to the diagrams below for typical connection configurations.

Figure 5: Detailed connection diagram for the P6FG receiver, showing signal, positive, and negative pins, along with channel assignments (CH1 Rudder, CH2 Throttle, CH3-CH6 Assist) and indicators (Green light, Gyro indicator).

Figure 6: Example wiring diagrams for the P6FG receiver in an RC model, illustrating connections for direction servo, differential servo, ESCs, winch/motor, and LED lights across channels CH1-CH6.
- CH1 (Rudder): Typically for steering servo (cars/boats) or rudder servo (planes).
- CH2 (Throttle): For ESC (Electronic Speed Controller) controlling motor/engine.
- CH3-CH6 (Assist): For auxiliary functions such as differential servo, winch, LED lights, or other optional accessories.
- Ensure correct polarity when connecting components. The signal pin is usually at the top, followed by positive (+), and negative (-) at the bottom.
4.2 Binding the Receiver to the Transmitter
The P6FG receiver must be bound to your RC X6 Transmitter before use. The binding process establishes a secure communication link between the two devices.
- Ensure your RC X6 Transmitter is powered off.
- Connect a bind plug (not included, typically comes with transmitter or other receivers) to the "Code key" port on the P6FG receiver (refer to Figure 5).
- Apply power to the receiver (e.g., via an ESC or a separate receiver battery). The receiver's indicator light should start flashing rapidly, indicating it is in binding mode.
- Turn on your RC X6 Transmitter. Navigate to the binding function in your transmitter's menu (refer to your X6 Transmitter manual for specific instructions).
- Initiate the binding process on the transmitter.
- Once binding is successful, the receiver's indicator light will turn solid, indicating a stable connection.
- Power off the receiver, then remove the bind plug.
- Power off the transmitter.
- Power on the transmitter first, then the receiver, to confirm the binding is successful. The receiver light should be solid.
4.3 Gyro Calibration (if applicable)
The integrated gyroscope helps stabilize your RC model. Some transmitters or receivers may require a calibration step for the gyro. Refer to your RC X6 Transmitter manual for specific gyro calibration procedures. Generally, ensure the model is on a flat, stable surface during power-up for initial gyro initialization.
5. Operating Instructions
After successful setup and binding, you can begin operating your RC model.
5.1 Power-Up Sequence
- Always turn on your RC X6 Transmitter first.
- Then, power on your RC model, which will power the P6FG receiver.
- Observe the receiver's indicator light. A solid light indicates a successful connection.
- Before operating, perform a range check and verify all control surfaces/functions respond correctly to transmitter inputs.
5.2 Gyro Functionality
The integrated gyro provides stability assistance. For RC cars/boats, it typically helps maintain straight-line stability and assists in cornering by counteracting unwanted yaw. For RC planes/helicopters, it aids in maintaining attitude. The sensitivity of the gyro may be adjustable via your X6 Transmitter, if supported.
- Green Light: Indicates general receiver status.
- Gyro Indicator (Red): Illuminates when the gyro is active and functioning.
5.3 Power-Down Sequence
- Always power off your RC model first.
- Then, turn off your RC X6 Transmitter.
6. Maintenance
To ensure the longevity and reliable performance of your P6FG receiver, follow these maintenance guidelines:
- Cleaning: Keep the receiver clean and free from dust, dirt, and moisture. Use a soft, dry brush or cloth to gently clean the exterior. Avoid using solvents or harsh chemicals.
- Moisture Protection: The receiver is not waterproof. Protect it from water, humidity, and extreme temperatures. If operating in damp conditions, consider using a waterproof enclosure.
- Antenna Care: Ensure the antenna is not cut, kinked, or damaged. Position the antenna correctly for optimal signal reception, typically away from metal objects and parallel to the ground.
- Storage: Store the receiver in a cool, dry place when not in use. Avoid direct sunlight and environments with high vibration.
- Connection Checks: Periodically inspect all wire connections for looseness or damage. Ensure plugs are securely seated in their respective ports.
7. Troubleshooting
If you encounter issues with your P6FG receiver, refer to the following common problems and solutions:
| Problem | Possible Cause | Solution |
|---|---|---|
| Receiver light not solid after power-up | Not bound to transmitter, power issue, or transmitter off. | Ensure transmitter is on. Re-perform the binding procedure (Section 4.2). Check power connections to the receiver. |
| No control response | Binding lost, incorrect wiring, faulty servo/ESC, or low battery. | Verify binding. Check all wiring connections (Figure 5, Figure 6). Test servos/ESCs independently. Ensure transmitter and model batteries are charged. |
| Short control range or intermittent signal | Antenna damage/poor placement, interference, or low transmitter battery. | Inspect antenna for damage and ensure it's positioned correctly, away from metal. Avoid operating near strong interference sources. Charge transmitter battery. |
| Gyro not functioning or erratic behavior | Incorrect calibration, vibration, or faulty gyro. | Ensure model is stable during power-up for gyro initialization. Check for excessive vibrations in the model. Refer to transmitter manual for gyro settings. |
8. Safety Information
Always prioritize safety when operating RC equipment. Failure to follow safety guidelines can result in injury or damage to property.
- Age Recommendation: This product is recommended for users 16 years and up.
- Operating Environment: Operate RC models in open areas, away from people, animals, and obstacles. Avoid public roads and areas with high pedestrian traffic.
- Power Supply: Ensure the receiver's voltage range (3.3-10V DC) is respected. Using incorrect voltage can damage the receiver.
- Battery Safety: Always follow battery manufacturer's instructions for charging, discharging, and storage. Never mix old and new batteries, or different types of batteries (e.g., alkaline, standard, rechargeable) in the same device.
- Pre-Flight/Pre-Run Checks: Before each use, perform a thorough check of all components, including battery levels, control responses, and physical integrity.
- Interference: Avoid operating near other 2.4GHz devices or strong electromagnetic interference sources that could disrupt the signal.
- Modifications: Do not modify the receiver or its components. Unauthorized modifications can lead to malfunction and void any potential warranty.

Figure 7: Packaging insert showing general battery safety warnings, including not mixing old and new batteries or different types (alkaline, standard, rechargeable).
9. Warranty and Support
For warranty information or technical support, please contact the seller or manufacturer directly. Keep your purchase receipt as proof of purchase. General support inquiries can often be resolved by referring to this manual or the manual for your compatible RC X6 Transmitter.