ErgoFocus B0CFFFBC4S
ErgoFocus Triple Monitor Stand User Manual
Model: B0CFFFBC4S
1. Introduction
This user manual provides comprehensive instructions for the installation, operation, and maintenance of your ErgoFocus Triple Monitor Stand. Designed for optimal ergonomic viewing and desk space optimization, this stand supports three monitors up to 32 inches each, with a maximum weight capacity of 17.6 lbs per arm. Please read this manual thoroughly before installation to ensure safe and correct usage.
2. Safety Information
- Ensure all components are present and undamaged before assembly. Do not use if any parts are missing or broken.
- Verify that your desk surface is strong enough to support the combined weight of the stand and three monitors.
- Do not exceed the maximum weight capacity of 17.6 lbs (8 kg) per monitor arm.
- Ensure VESA compatibility (75x75mm or 100x100mm) for your monitors.
- Tighten all screws firmly, but do not overtighten to avoid stripping threads or damaging components.
- Keep children and pets away during installation.
- Always seek professional assistance if you are unsure about any part of the installation process.
3. Package Contents
Please check the package contents against the list below. If any items are missing or damaged, contact customer support.

Image: All components of the ErgoFocus Triple Monitor Stand, including the central pole, three articulating arms, and options for C-clamp and grommet mounting.
- Main Support Pole
- Three Monitor Arms with VESA Plates
- Desk Clamp Assembly
- Grommet Mount Assembly
- Cable Management Clips
- Hardware Kit (screws, washers, Allen wrenches)
- Instruction Manual
4. Setup and Installation
Follow these steps carefully for proper installation. Two mounting options are provided: C-clamp and Grommet mount.
4.1 Choose Your Mounting Option
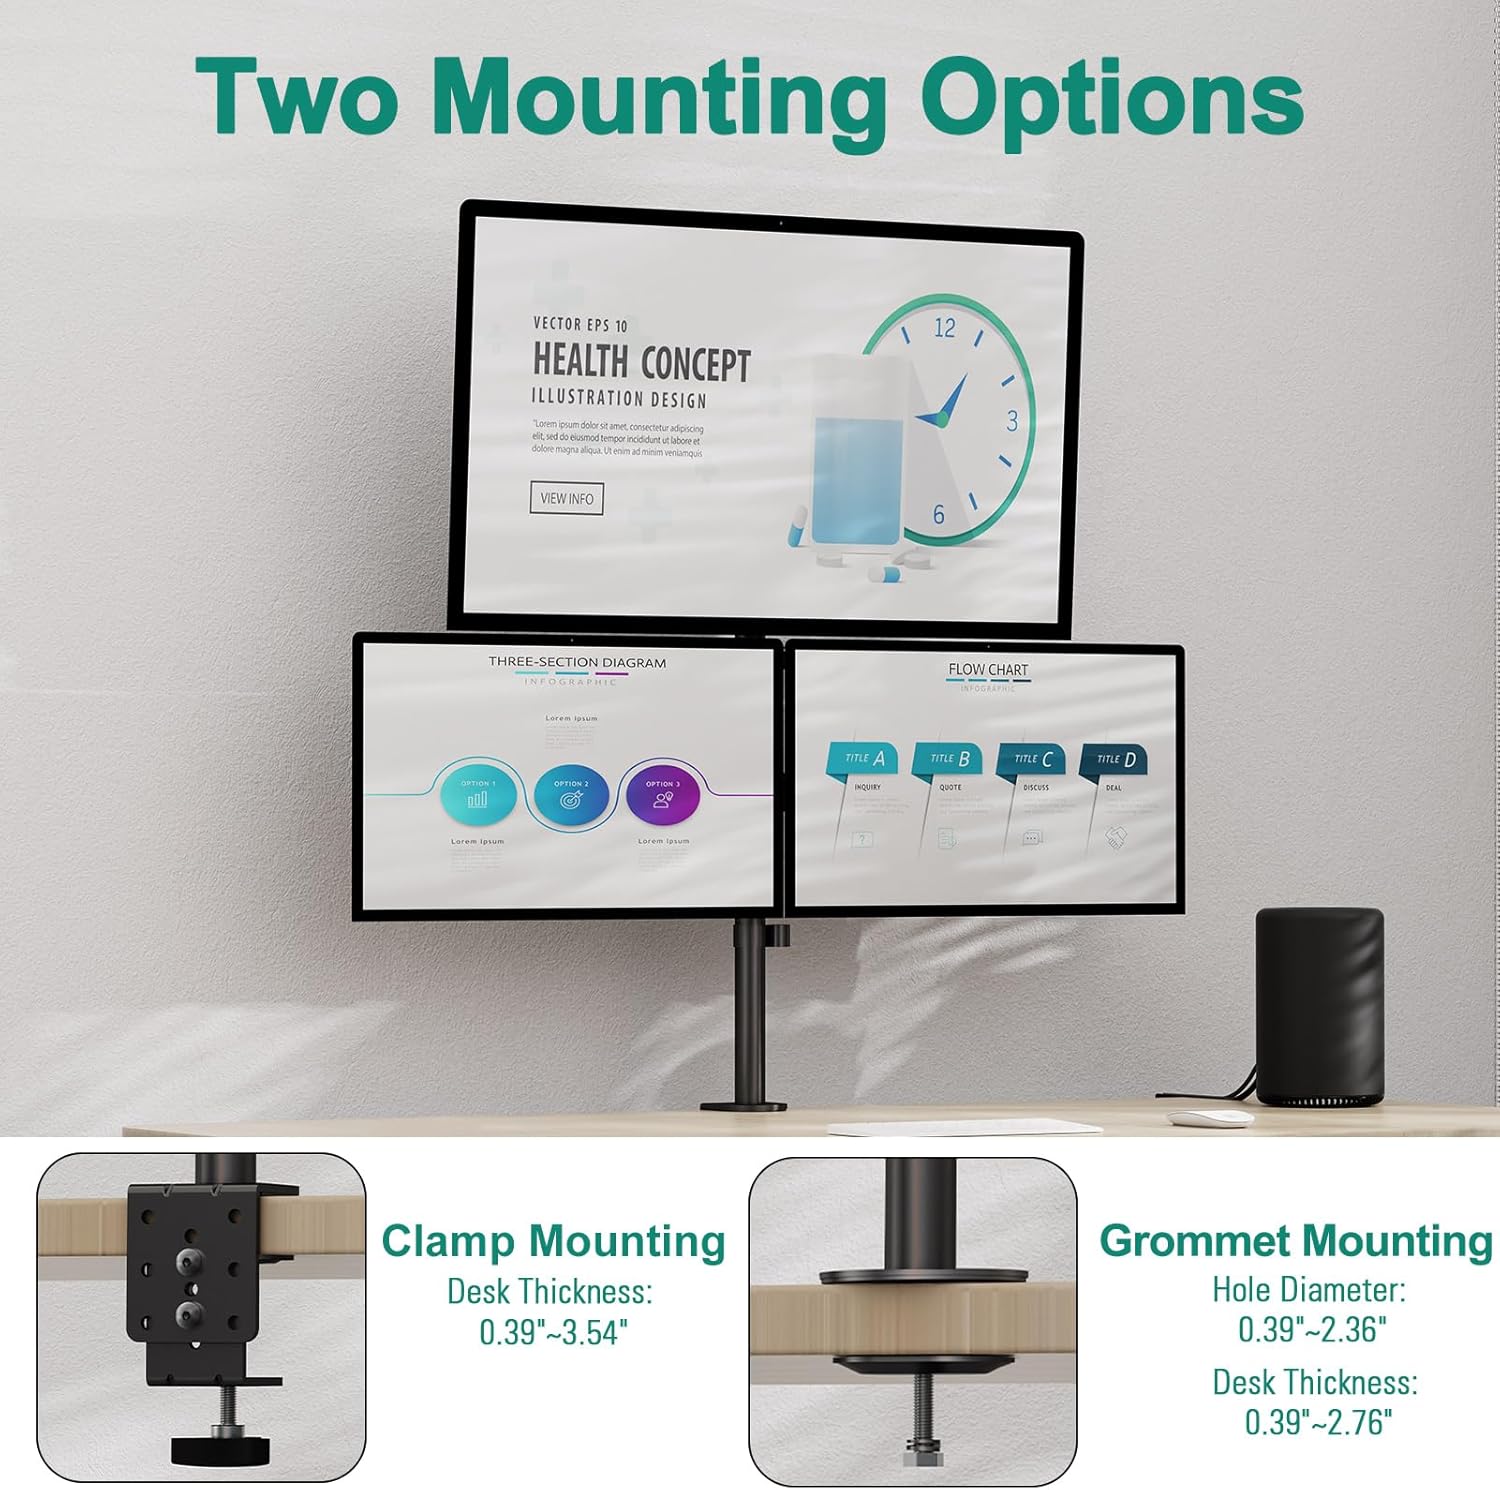
Image: Illustration of the C-clamp mounting method (for desk thickness 0.39"-3.54") and the Grommet mounting method (for desk thickness 0.39"-2.76" and hole diameter 0.39"-2.36").
- C-Clamp Mounting: Ideal for desks without a pre-drilled hole. Attach the C-clamp to the edge of your desk. Ensure your desk thickness is between 0.39" and 3.54".
- Grommet Mounting: Requires a hole in your desk. Use this option if your desk has a grommet hole with a diameter between 0.39" and 2.36" and a thickness between 0.39" and 2.76".
4.2 Assemble the Pole and Mount to Desk
- Attach the chosen mounting base (C-clamp or Grommet) to the bottom of the main support pole.
- Securely fasten the pole to your desk using the appropriate method. For C-clamp, tighten the knob until the stand is stable. For grommet, pass the bolt through the desk hole and tighten the nut from underneath.
4.3 Attach Monitor Arms
- Slide the monitor arms onto the main support pole. The arms can be positioned at desired heights.
- Tighten the set screws on each arm to secure them in place on the pole.
4.4 Mount Monitors
- Attach the VESA plate from each arm to the back of your monitors using the provided screws. Ensure the screws are compatible with your monitor's VESA holes.
- Carefully slide the monitor with the attached VESA plate onto the corresponding arm. Ensure it clicks securely into place.
- Repeat for all three monitors.
4.5 Cable Management
Utilize the integrated cable management clips along the arms and pole to route your monitor cables neatly. This helps maintain a clean and organized workspace.
5. Operating Instructions
The ErgoFocus Triple Monitor Stand offers extensive adjustability for optimal viewing comfort.
5.1 Height Adjustment
The monitors can be adjusted vertically along the 31.7-inch tall pole. Loosen the set screw on the arm collar, slide the arm to the desired height, and re-tighten the screw firmly.

Image: Product dimensions illustrating the overall height of 31.7 inches and the horizontal span of 30 inches for the monitor arms.
5.2 Tilt Adjustment
Each monitor can be tilted +90° to -90° (or -35° to +35° for the top monitor, and -90° to +70° for the side monitors as shown in some diagrams) to reduce glare and optimize viewing angles. Use the provided Allen wrench to adjust the tilt tension if needed.

Image: Visual representation of the tilt adjustment capabilities, allowing monitors to be angled up or down for ergonomic viewing.
5.3 Swivel Adjustment
The monitor arms can swivel 180° horizontally, allowing you to position your screens for collaborative work or individual viewing preferences.
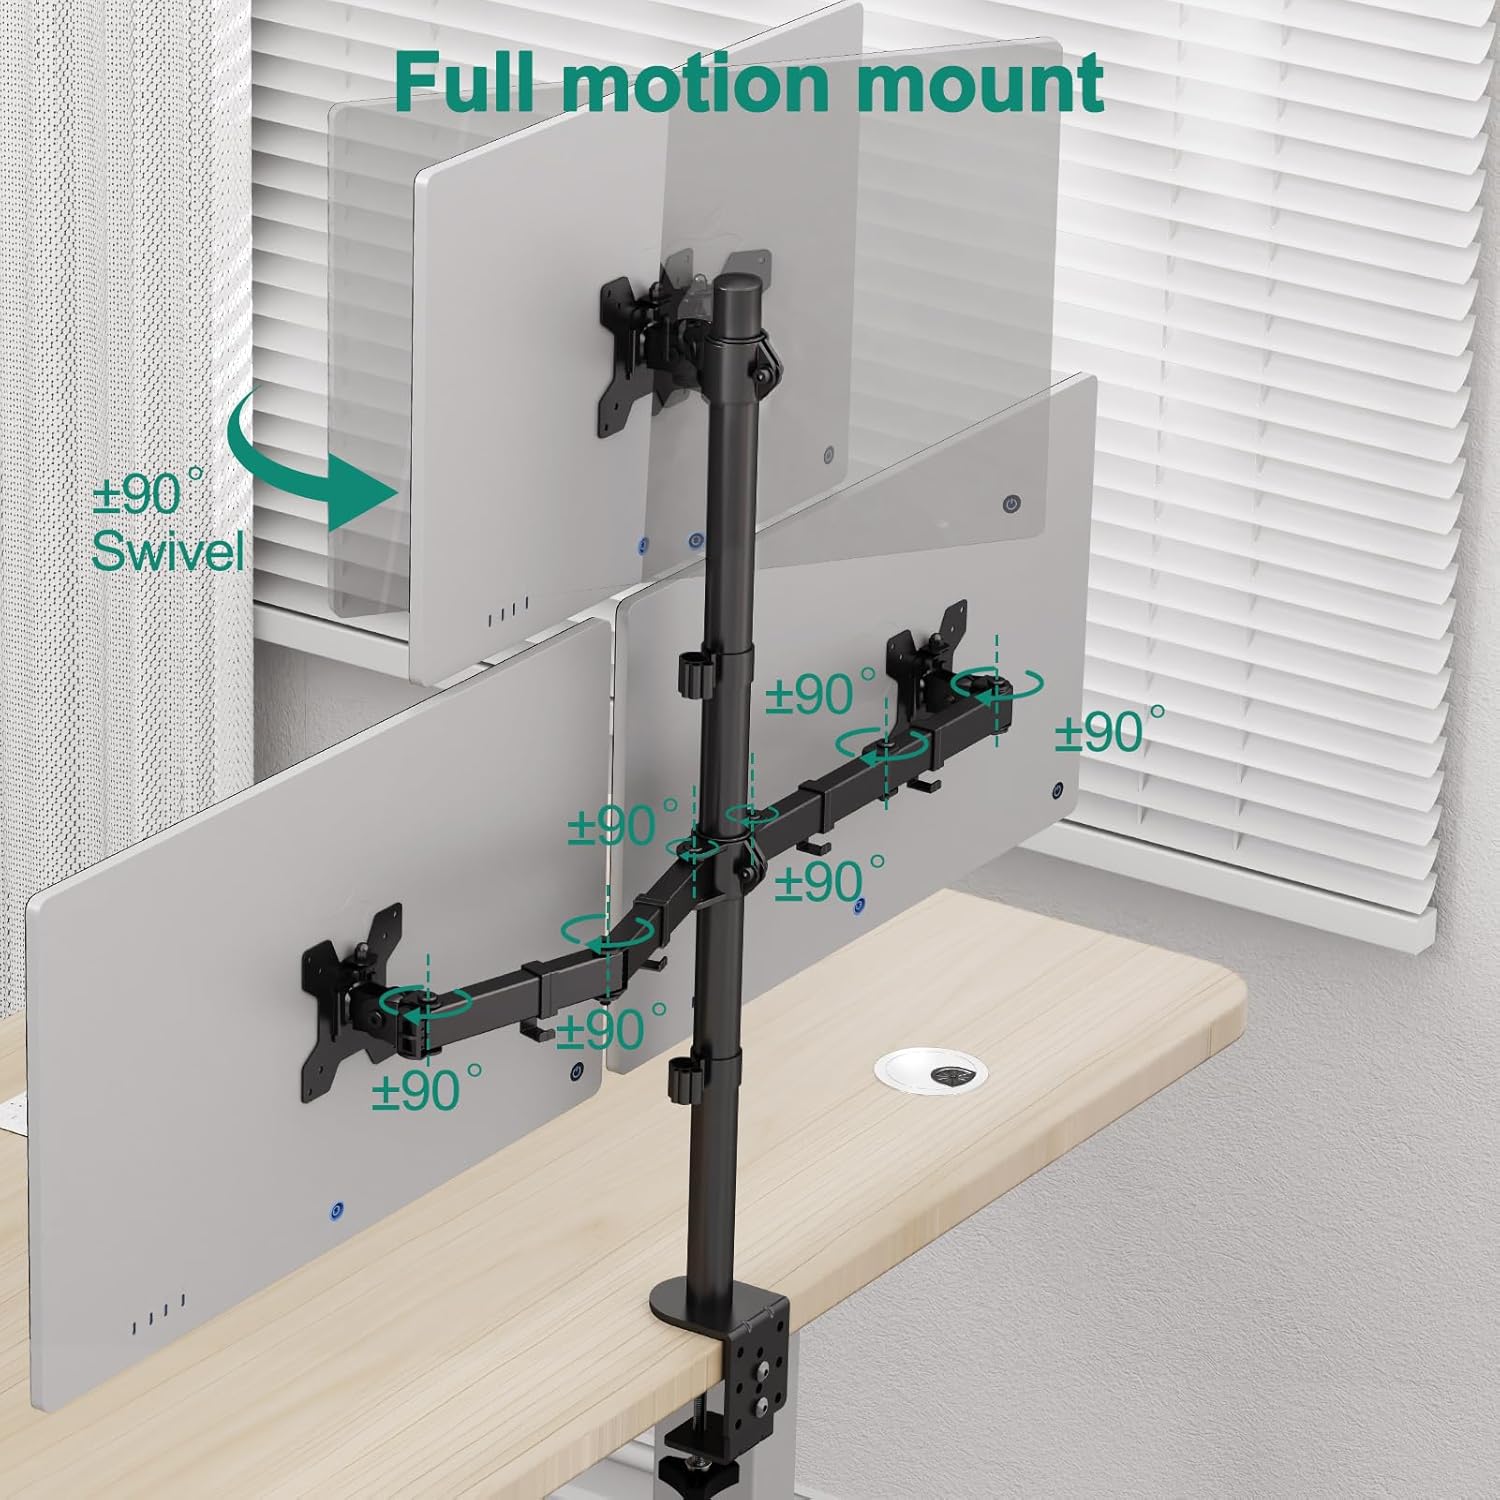
Image: Depiction of the monitor arms swiveling, demonstrating the flexibility to adjust screen orientation horizontally.
5.4 Rotation Adjustment
Each monitor can be rotated 360° from landscape to portrait orientation without removing the monitor. Simply grasp the monitor and rotate it to the desired orientation.
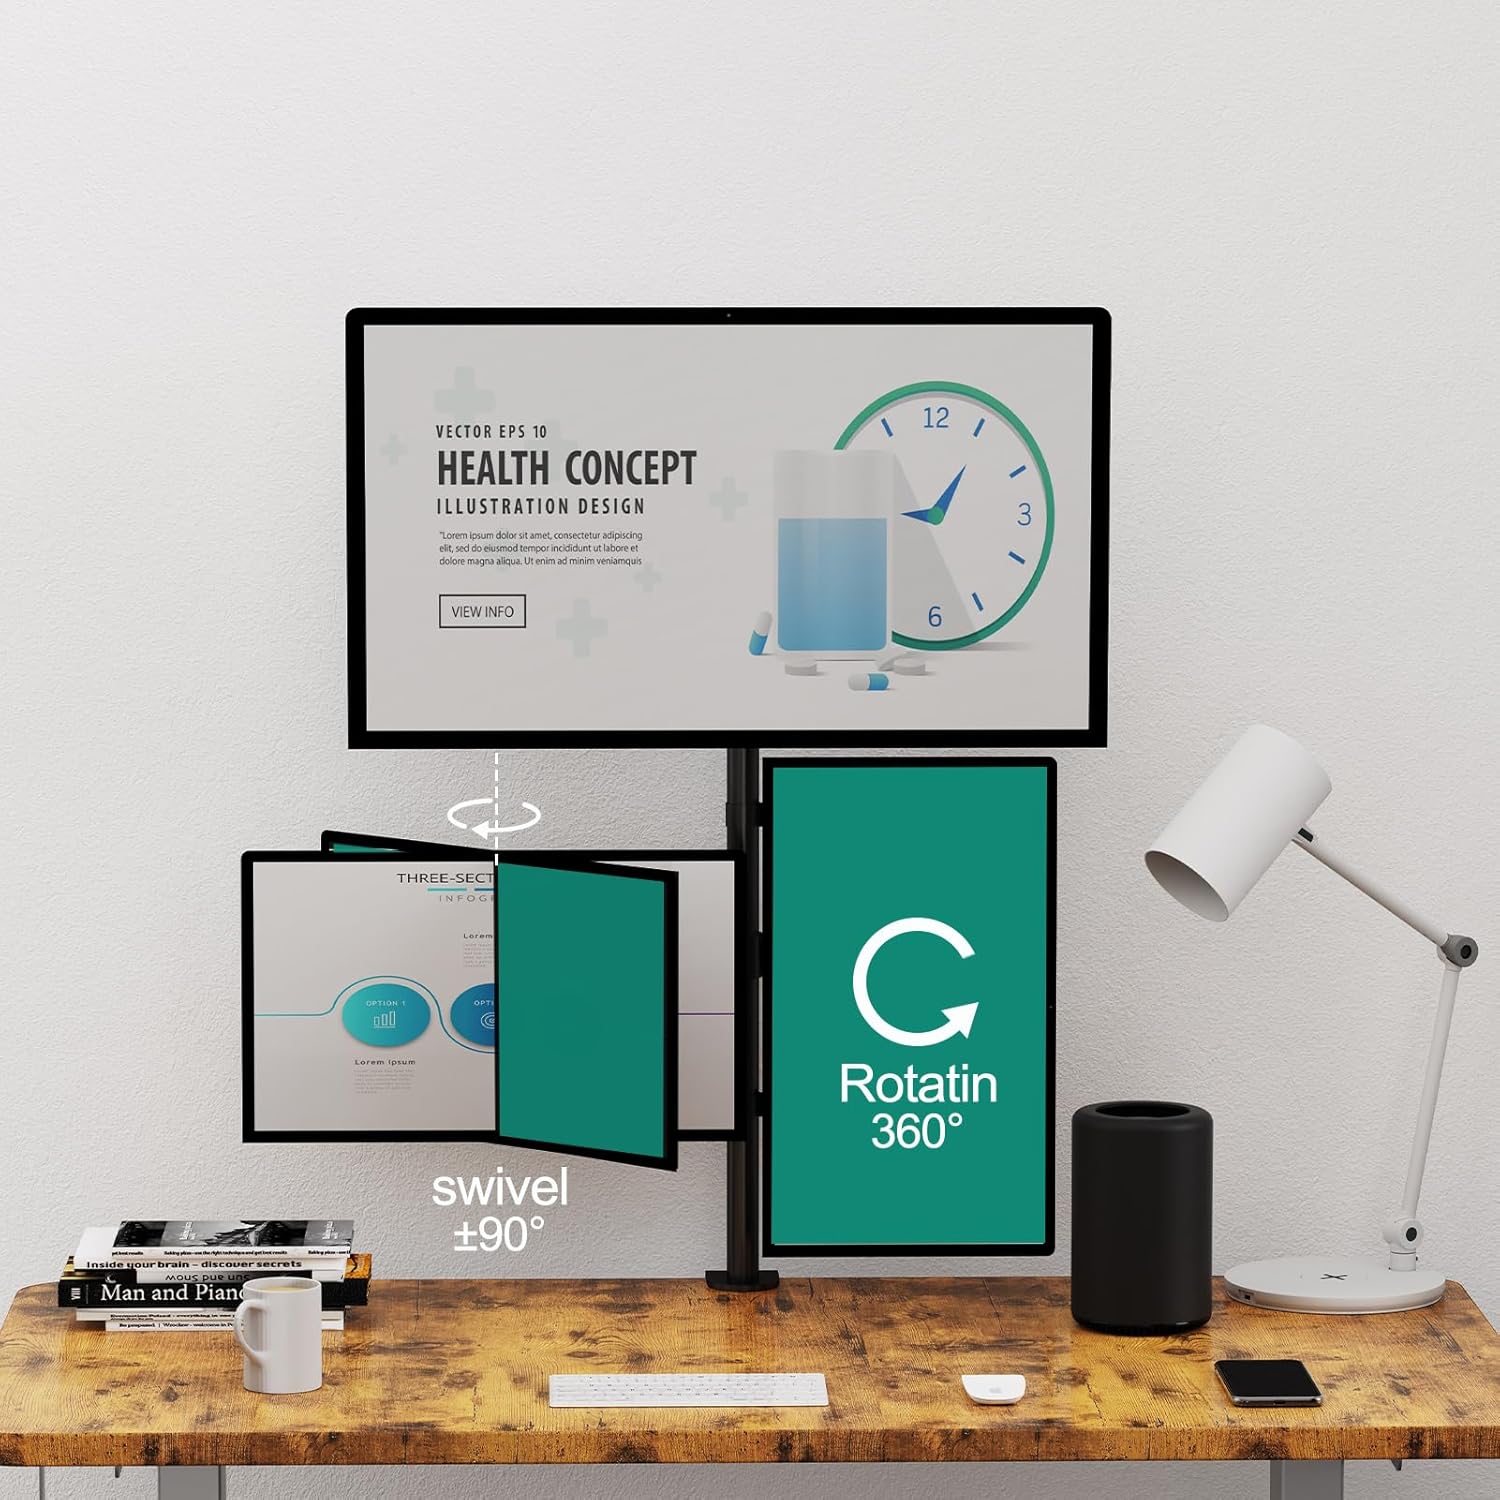
Image: A monitor being rotated 360 degrees, illustrating the ability to switch between landscape and portrait modes.
6. Maintenance
- Cleaning: Wipe the stand with a soft, damp cloth. Avoid abrasive cleaners or solvents.
- Periodic Checks: Regularly check all screws and connections to ensure they remain tight and secure. Re-tighten if necessary.
- Cable Management: Periodically inspect cables routed through the management clips for any signs of wear or pinching.
7. Troubleshooting
| Problem | Possible Cause | Solution |
|---|---|---|
| Monitors are not level. | Uneven tightening of VESA plate screws or arm height. | Adjust the small hex grub screw on the VESA mount for fine height tuning. Ensure all arm height screws are tightened evenly. |
| Stand feels unstable. | Mounting clamp/grommet not tightened sufficiently. Desk surface too thin or weak. | Ensure the C-clamp or grommet mount is fully tightened to the desk. Verify desk thickness is within specified limits. |
| Monitor arm sags or won't hold position. | Weight capacity exceeded. Tilt tension too loose. | Verify monitor weight is within 17.6 lbs. Tighten the tilt adjustment screw on the VESA plate joint with an Allen wrench. |
| Cables are messy. | Cable management not utilized. | Route cables through the integrated cable clips on the arms and pole. |
8. Specifications

Image: Key specifications including VESA patterns, maximum monitor size, and weight limit per arm.
- Brand: ErgoFocus
- Model: Basic (B0CFFFBC4S)
- Material: Metal
- Color: Black
- Monitor Compatibility: 13" to 32" flat and curved screens
- Weight Capacity: Max 17.6 lbs (8 kg) per arm
- VESA Compatibility: 75x75mm, 100x100mm
- Height Adjustment: Up to 31.7 inches (from desk surface)
- Tilt Range: +90° to -90° (specific ranges may vary per arm position, refer to operating instructions)
- Swivel Range: 180°
- Rotation: 360° (Landscape to Portrait)
- Desk Thickness (C-clamp): 0.39" - 3.45"
- Desk Thickness (Grommet): 0.39" - 2.76"
- Grommet Hole Diameter: 0.39" - 2.36"
9. Warranty and Support
ErgoFocus products are manufactured with quality and durability in mind. For specific warranty details, please refer to the warranty card included with your product or visit the official ErgoFocus website.
If you have any questions, require technical assistance, or need to report a missing/damaged part, please contact ErgoFocus customer support through the retailer where you purchased the product or visit the ErgoFocus Store on Amazon.
Ask a question about this manual
Ask about setup, troubleshooting, compatibility, parts, safety, or missing instructions. Manuals+ will review the question and use this page’s manual context to help answer it.