
1. Introduction
This manual provides detailed instructions for the installation, operation, and maintenance of the FVRITO Rear Wheel Assembly. This product is designed as a direct replacement part for compatible Razor Pocket Mod electric scooters, ensuring optimal performance and safety.
2. Product Overview
The FVRITO Rear Wheel Assembly is a pre-assembled unit that simplifies the replacement process for your Razor Pocket Mod scooter. It includes all necessary components for a complete rear wheel replacement, designed for durability and performance.
- Complete Assembly: Includes rim, tire, inner tube, band brake assembly, chain sprocket/free wheel (fly wheel), axle (with wheel bearings), spacers, and a red stem valve cap.
- Durable Construction: Made from high-quality rubber and metal components, offering good wear resistance and premium shock absorption.
- Enhanced Traction: Features an X-pattern tire design for improved anti-skid properties and increased friction on various surfaces.
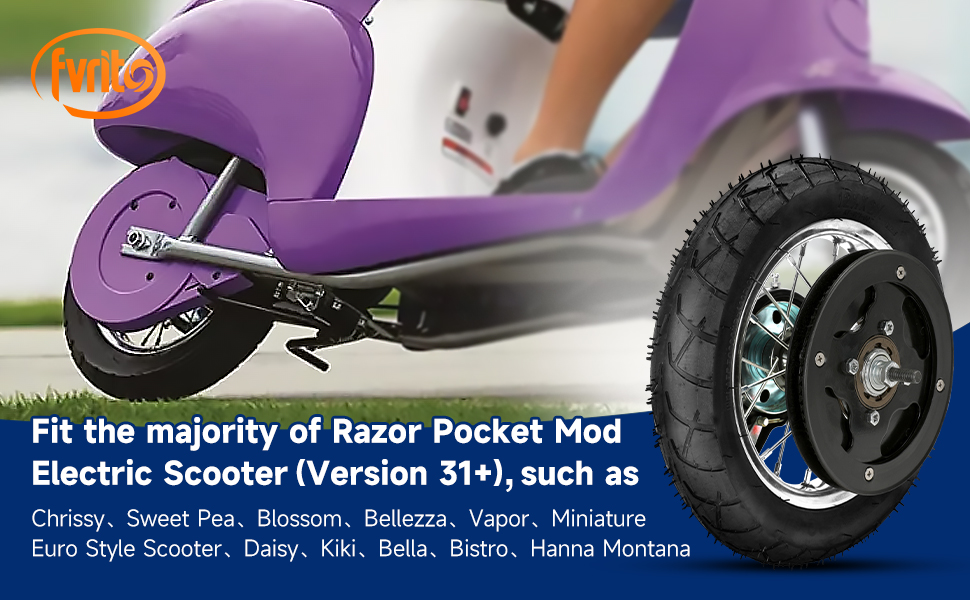
Image 2.1: FVRITO Rear Wheel Assembly, showing the complete unit with tire, rim, brake, and sprocket.
3. Compatibility
This rear wheel assembly is compatible with the majority of Razor Pocket Mod Electric Scooters, specifically Versions 31 and above. This includes models such as:
- Razor Pocket Mod Chrissy
- Razor Pocket Mod Sweet Pea
- Razor Pocket Mod Blossom
- Razor Pocket Mod Vapor
- Razor Pocket Mod Miniature Euro Style Scooter
- Razor Pocket Mod Daisy
- Razor Pocket Mod Kiki
- Razor Pocket Mod Bella
- Razor Pocket Mod Bistro
- Razor Pocket Mod Hanna Montana

Image 3.1: Visual representation of compatible Razor Pocket Mod scooter models.
4. Safety Information
Before and after installation, always prioritize safety. Failure to follow safety guidelines can result in injury or damage to the scooter.
- Always wear appropriate safety gear, including a helmet, when operating a scooter.
- Ensure the tire is properly inflated to the recommended pressure before each ride.
- Regularly inspect the entire wheel assembly for any signs of wear, damage, or loose components.
- Do not use the scooter if the wheel assembly is damaged or improperly installed.
- Keep hands and clothing clear of moving parts, especially the chain and sprocket.
5. Setup and Installation
Replacing the entire rear wheel assembly is generally simpler and faster than replacing individual components like the tire or inner tube. Follow these general steps for installation:
- Prepare the Scooter: Turn off the scooter and disconnect the battery for safety. Place the scooter on a stable surface, such as a stand, to elevate the rear wheel.
- Remove Old Wheel: Carefully loosen and remove the nuts and bolts securing the old rear wheel assembly. Disconnect the brake cable and chain from the old assembly. Note the position of any spacers.
- Install New Wheel: Position the new FVRITO Rear Wheel Assembly into the scooter's frame. Ensure the axle, brake assembly, and sprocket align correctly.
- Connect Brake and Chain: Reattach the chain to the sprocket and connect the brake cable to the band brake assembly.
- Secure Assembly: Reinstall the nuts and bolts, ensuring all components are securely fastened. Do not overtighten.
- Adjust Brake: Adjust the brake spring and ensure the brake handle functions correctly, providing adequate stopping power without dragging.
- Inflate Tire: Before riding, inflate the tire to the recommended pressure (see Section 6).

Image 5.1: Illustration of adjusting the brake spring and fastening the brake handle during installation.
6. Operating Instructions
Once the FVRITO Rear Wheel Assembly is installed, proper tire inflation is crucial for safe and efficient operation.
- Tire Inflation: The wheel assembly's tire is not fully inflated upon receipt. It is essential to fill the tube with air before riding.
- Recommended Pressure: Inflate the tire to 280 KPa (40 PSI). Use a tire pressure gauge to ensure accuracy.
- Maximum Load: The tire has a maximum load capacity of 350 lbs. Do not exceed this limit.

Image 6.1: Visual guide for inflating the tire to 40 PSI using a pressure gauge.
7. Maintenance
Regular maintenance will extend the life of your FVRITO Rear Wheel Assembly and ensure safe riding.
- Tire Pressure: Check tire pressure regularly, ideally before each ride, and maintain it at 40 PSI.
- Visual Inspection: Periodically inspect the tire for cuts, punctures, or excessive wear. Check the rim for any damage or bends.
- Brake System: Ensure the band brake assembly is clean and functioning smoothly. Check the brake cable for fraying or damage.
- Axle and Bearings: Listen for any unusual noises from the wheel bearings. If the wheel does not spin freely or has excessive play, inspect the bearings and axle.
- Cleaning: Keep the wheel assembly clean from dirt and debris, especially around the brake and sprocket areas.
8. Troubleshooting
If you encounter issues with your FVRITO Rear Wheel Assembly, consider the following common problems and solutions:
- Flat Tire/Low Pressure: Check for punctures and inflate to 40 PSI. If a puncture is found, the inner tube may need to be replaced.
- Brake Not Engaging/Dragging: Inspect the brake cable for proper tension and ensure the brake spring is correctly adjusted. Clean any debris from the brake drum.
- Wheel Wobble: Check that the axle nuts are securely tightened. Inspect the rim for damage or bent spokes.
- Unusual Noises: Investigate the source of the noise. It could be loose components, worn bearings, or issues with the chain/sprocket.
For persistent issues or if you require further assistance, please contact FVRITO customer support.
9. Specifications
| Feature | Specification |
|---|---|
| Tire/Tube Size | 12-1/2" x 2-1/4" (12.5 x 2.25) |
| Band Drum Brake Diameter | 80mm |
| Valve Stem Type | TR13 Straight Valve Stem |
| Maximum Tire Pressure | 280 KPa (40 PSI) |
| Maximum Load Capacity | 350 lbs |
| Bearing Diameter | 1.03" (2.62 cm) |
| Tire Diameter | 12.5" (31.75 cm) |
| Tire Width | 2.25" (5.7 cm) |
| Material | Metal, Rubber |
| Color | Black |
| Model Number | ZC-Mod-R |

Image 9.1: Detailed tire specifications and dimensional measurements.
10. Warranty Information
Specific warranty details for the FVRITO Rear Wheel Assembly are not provided in the product information. Please refer to the seller's return policy or contact FVRITO customer support for warranty inquiries.
11. Support
For any questions, technical assistance, or concerns regarding your FVRITO Rear Wheel Assembly, please contact FVRITO customer support through the platform where the product was purchased. Ensure you have your purchase details and product model number (ZC-Mod-R) available when contacting support.