
LXLQZXW CJ05
LXLQZXW LED Strip Lights User Manual
Model: CJ05
1. Introduction
Thank you for choosing the LXLQZXW LED Strip Lights. This 16.4FT (5M) flexible LED strip is designed to enhance your living spaces with versatile and customizable lighting. Featuring three adjustable color temperatures (Warm White 2800K, Daylight White 4000K, Cool White 6500K) and dimmable brightness, it is perfect for various applications such as TV backlighting, cabinet lighting, stair illumination, and more. This manual provides essential information for safe installation, operation, and maintenance of your LED strip lights.

Figure 1.1: Product Overview and Application Examples
2. Setup and Installation
Follow these steps for proper installation of your LED strip lights:
- Preparation: Ensure the installation surface is clean, dry, and smooth. Dust, dirt, or moisture can affect the adhesive's effectiveness.
- Measure and Cut (Optional): If the strip length exceeds your requirement, you can cut it along the designated cutting marks (usually indicated by a scissor icon or copper pads). Cut only at these marked points to avoid damaging the circuit.
- Peel and Stick: Carefully peel off the protective backing from the adhesive tape on the back of the LED strip. Press the strip firmly onto the desired surface, ensuring good contact along its entire length.
- Connect Power: Plug the USB connector into a compatible 5V USB power source, such as a USB phone charger, power bank, computer USB port, or TV USB port.

Figure 2.1: Installation Steps

Figure 2.2: USB Power Source Options
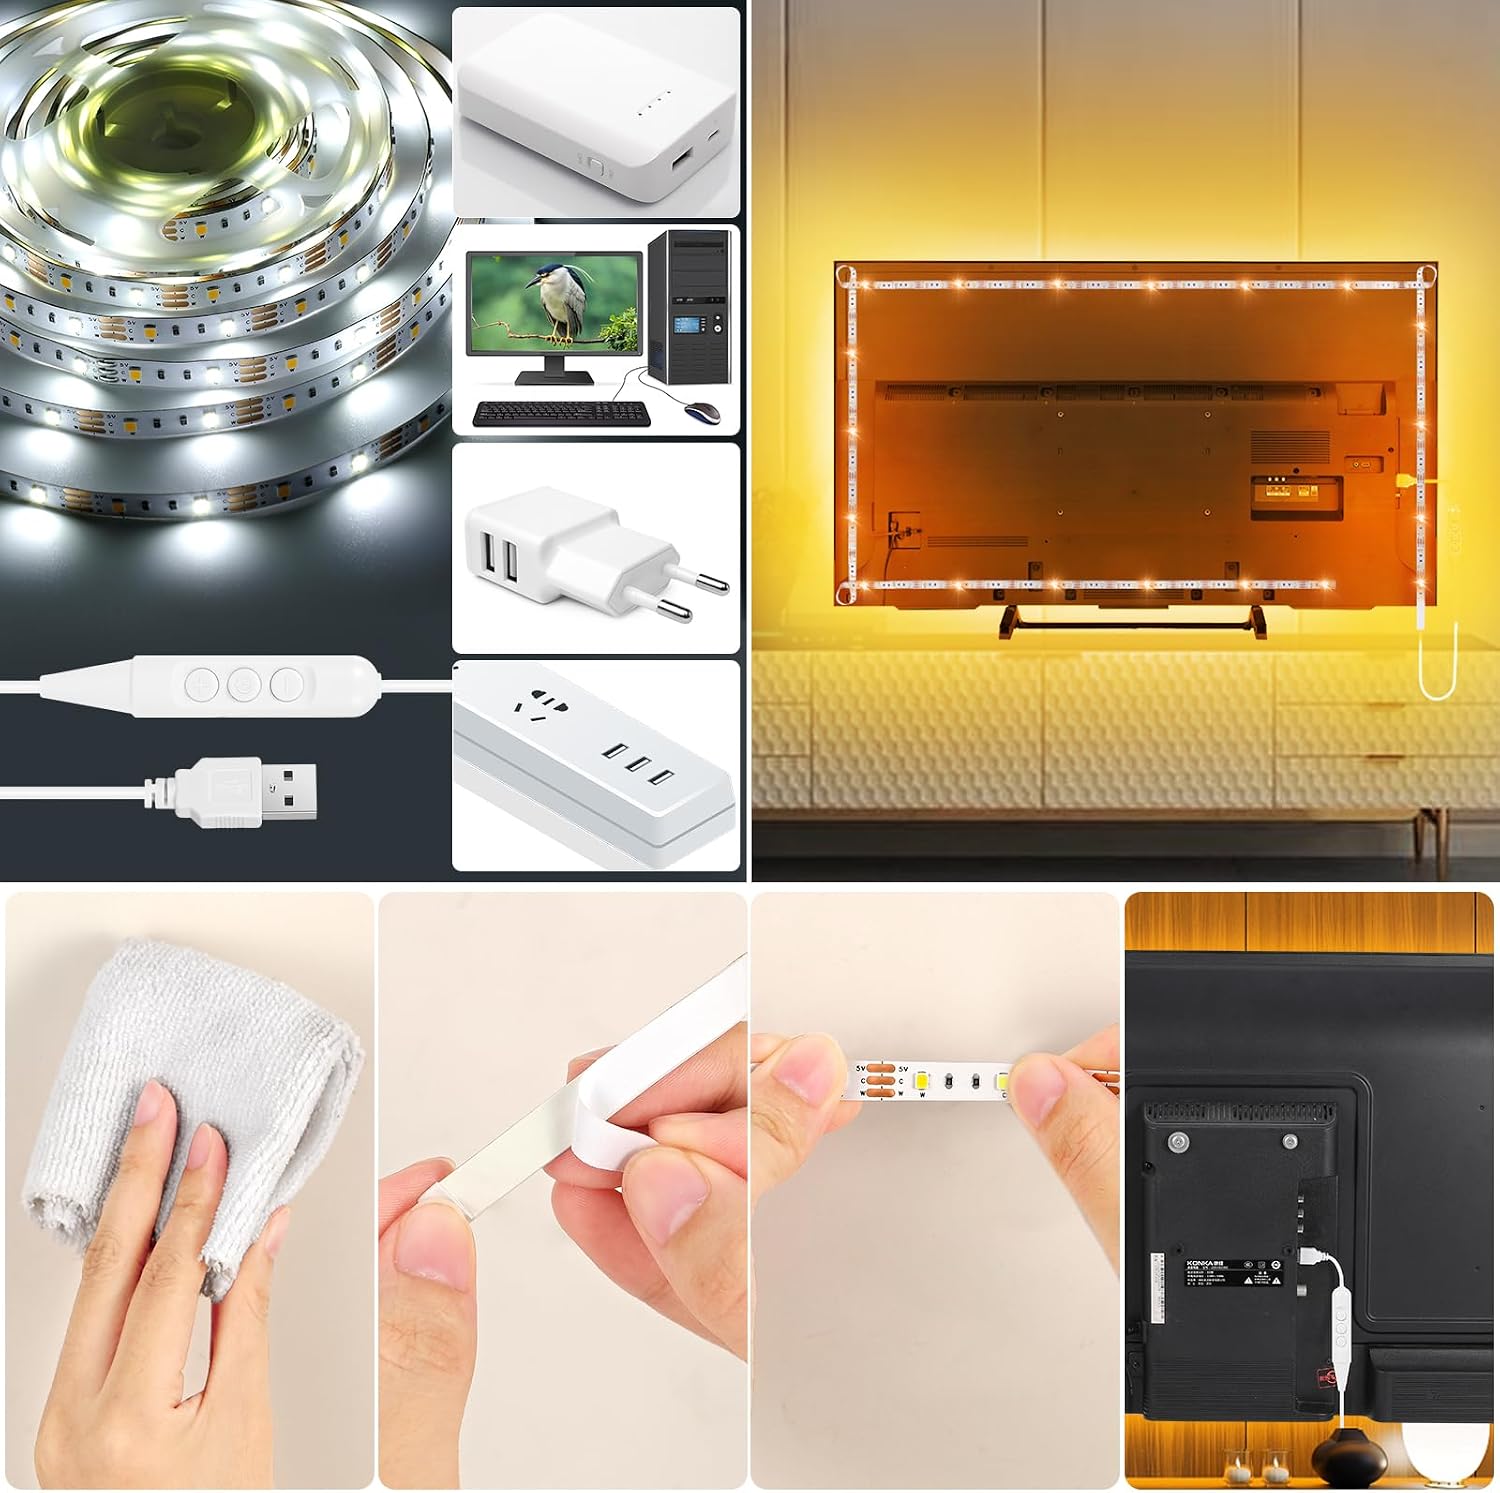
Figure 2.3: Cuttable LED Strip
3. Operating Instructions
The LED strip lights are controlled via an inline 3-button controller:
- Middle Button (Power/Mode):
- Short press to turn the lights ON or OFF.
- Consecutive short presses cycle through the three color temperatures: Warm White (2800K), Daylight White (4000K), and Cool White (6500K).
- Long press (approximately 3 seconds) to activate a 60-second auto-off timer. The light strip will flash once to confirm, then turn off after 60 seconds.
- "+" Button (Brightness Up): Short press to increase brightness. Long press for stepless brightness increase.
- "-" Button (Brightness Down): Short press to decrease brightness. Long press for stepless brightness decrease.

Figure 3.1: Controller Functions

Figure 3.2: Adjustable Color Temperatures
4. Maintenance
To ensure the longevity and optimal performance of your LED strip lights, follow these maintenance guidelines:
- Cleaning: Gently wipe the LED strip with a soft, dry cloth to remove dust or debris. Do not use harsh chemicals or abrasive cleaners.
- Avoid Water: The LED strip is designed for indoor use and is not water-resistant. Avoid exposing it to water or high humidity.
- Temperature: Do not install the lights in areas with extreme temperatures, as this can affect performance and lifespan.
- Handle with Care: Avoid bending the strip sharply or applying excessive force, which could damage the LEDs or circuitry.
5. Troubleshooting
If you encounter issues with your LED strip lights, refer to the following common problems and solutions:
| Problem | Possible Cause | Solution |
|---|---|---|
| Lights do not turn on. | No power, loose connection, faulty USB port. | Check USB connection. Try a different USB power source or port. Ensure the middle button on the controller is pressed to turn on. |
| Lights flicker or are dim. | Insufficient power, loose connection, damaged strip. | Ensure the USB power source provides adequate power (5V). Check all connections. If a section is damaged, it may need replacement. |
| Adhesive is not holding. | Surface not clean/dry, improper application, unsuitable surface. | Ensure surface is thoroughly cleaned and dry before application. Apply firm pressure along the strip during installation. For rough or porous surfaces, consider additional mounting clips (not included). |
| Cannot change color temperature or dim. | Controller malfunction. | Ensure you are using the correct buttons as described in Section 3. Disconnect and reconnect power to reset the controller. |
6. Specifications
- Model: CJ05
- Length: 16.4 FT (5 Meters)
- Number of LEDs: 150
- Color Temperatures: 2800K (Warm White), 4000K (Daylight White), 6500K (Cool White)
- Power Source: USB Powered
- Voltage: 5 Volts
- Wattage: 5 Watts
- Controller Type: 3-Button Inline Controller
- Material: Plastic, Rubber
- Indoor/Outdoor Usage: Indoor Only
- Special Features: Dimmable, Cuttable, Self-Adhesive
7. Warranty and Support
For any questions, concerns, or technical support regarding your LXLQZXW LED Strip Lights, please contact our customer service. We are committed to providing assistance and ensuring your satisfaction with our products.
Please refer to your purchase documentation for specific warranty details and contact information.
Ask a question about this manual
Ask about setup, troubleshooting, compatibility, parts, safety, or missing instructions. Manuals+ will review the question and use this page’s manual context to help answer it.