1. Product Overview
The Whirlpool W7FHS51X MaxiSpace is a 60 cm freestanding dishwasher designed for efficient and quiet dish cleaning. It features innovative technology for super quiet operation and excellent cleaning performance, indicated by a beep sound at the end of each cycle.
- Dimensions: 60 x 60 x 85 cm (L x W x H)
- Weight: 47 Kilograms
- Capacity: 15 place settings
- Noise Level: 41 dB
- Controls: Tactile (Touch)
- Energy Consumption: 65 Kilowatt-hours per 100 cycles
- Included Components: Power cord

Figure 1.1: Front view of the Whirlpool W7FHS51X MaxiSpace dishwasher. This image shows the sleek stainless steel finish and the integrated touch control panel at the top.
2. Setup and Installation
The Whirlpool W7FHS51X MaxiSpace is a freestanding dishwasher, allowing for flexible placement in your kitchen. Ensure proper electrical and water connections are made by a qualified technician.
2.1 Unpacking
Carefully remove all packaging materials. Inspect the dishwasher for any transit damage. Keep packaging for potential future transport or recycling.
2.2 Placement
Position the dishwasher on a stable, level surface. Ensure there is adequate space for the door to open fully and for proper ventilation. The appliance dimensions are 60 cm (L) x 60 cm (W) x 85 cm (H).
2.3 Connections
- Water Supply: Connect the water inlet hose to a cold water tap with a 3/4-inch thread. Ensure the connection is tight to prevent leaks.
- Drainage: Connect the drain hose to a suitable drain pipe or sink trap, ensuring it is securely fastened and allows for proper water flow without kinks.
- Electrical: Plug the provided power cord into a grounded 220 Volt electrical outlet. Do not use extension cords or adapters.

Figure 2.1: Rear view of the dishwasher, illustrating the water inlet and drain hose connections. Proper installation of these hoses is crucial for the dishwasher's functionality.
3. Operating Instructions
This section guides you through the daily operation of your Whirlpool W7FHS51X MaxiSpace dishwasher.
3.1 Loading the Dishwasher
Proper loading ensures optimal cleaning results and efficient use of space.
- Lower Rack: Ideal for large items like plates, bowls, pots, and pans. Place items facing the center of the dishwasher for best spray coverage.
- Upper Rack: Suitable for glasses, cups, and smaller bowls. Ensure items are stable and do not block the spray arms.
- Cutlery Tray: Use the dedicated cutlery tray for forks, knives, and spoons. Arrange them separately to prevent nesting and ensure thorough cleaning.

Figure 3.1: The dishwasher interior with racks extended, demonstrating the spacious design and flexible loading options.

Figure 3.2: A top-down view of the lower rack, illustrating how to effectively load larger items like dinner plates and cooking pots for optimal cleaning.

Figure 3.3: A top-down view of the upper rack, showing the arrangement of glasses and smaller bowls to ensure proper water circulation.
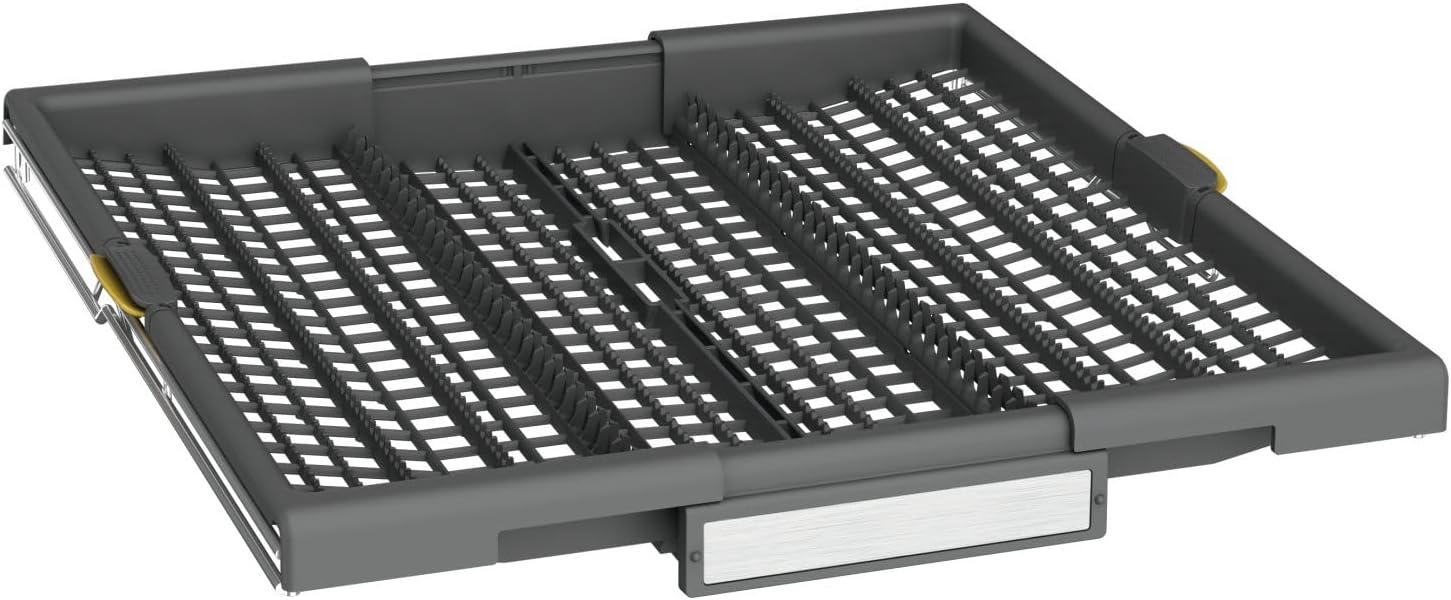
Figure 3.4: A close-up of the dedicated cutlery tray, designed to keep utensils separated for a more thorough wash.
3.2 Adding Detergent and Rinse Aid
Fill the detergent dispenser with the appropriate amount of dishwasher detergent. If using rinse aid, ensure the rinse aid dispenser is filled to the recommended level. The dishwasher has a dedicated indicator for rinse aid.
3.3 Selecting a Program
The dishwasher offers 8 different wash programs. Use the tactile control panel to select the desired program based on the soil level and type of dishes. Refer to the program guide in the quick start manual for detailed descriptions of each cycle.
3.4 Starting a Cycle
Close the dishwasher door firmly. Press the Start button on the control panel to begin the selected wash cycle. The display will show the remaining time.
4. Maintenance and Care
Regular maintenance ensures the longevity and optimal performance of your dishwasher.
4.1 Cleaning the Filters
The dishwasher's filter system should be cleaned regularly to prevent food particles from recirculating and affecting wash performance. Twist and remove the cylindrical filter, then remove the flat filter. Rinse both under running water to remove debris. Reassemble and replace securely.
4.2 Refilling Salt
The dishwasher requires special dishwasher salt to soften hard water and prevent limescale buildup. The salt indicator light on the control panel will illuminate when the salt reservoir needs refilling. Unscrew the cap of the salt reservoir (usually located at the bottom of the dishwasher tub) and fill with dishwasher salt using a funnel. Replace the cap firmly.
4.3 Cleaning the Spray Arms
Periodically check the spray arm nozzles for blockages. If any holes are clogged, clear them with a toothpick or similar small object. The spray arms can usually be removed by unscrewing a retaining nut or clip for easier cleaning.

Figure 4.1: A detailed view of the 'Power Clean' spray arm, highlighting the nozzles that require periodic cleaning to ensure effective water distribution.
4.4 Exterior and Interior Cleaning
Wipe the exterior of the dishwasher with a soft, damp cloth. For the interior, run a dishwasher cleaner cycle periodically to remove grease and limescale buildup.
5. Troubleshooting
This section addresses common issues you might encounter with your dishwasher.
| Problem | Possible Cause | Solution |
|---|---|---|
| Salt indicator light remains on after refilling. | Sensor calibration or residual salt in the sensor area. | This is often normal. The sensor may take several wash cycles (up to 20) to recalibrate and turn off the light after refilling. Ensure the cap is tightly closed. |
| Dishes are not drying completely. | Insufficient rinse aid, incorrect program, or improper loading. | Check rinse aid level and refill if necessary. Select a program with a drying phase. Ensure dishes are loaded to allow proper air circulation. Open the door slightly after the cycle to aid drying. |
| Dishwasher does not start. | Door not closed properly, power supply issue, or program not selected. | Ensure the door is latched securely. Check if the power cord is plugged in and the circuit breaker hasn't tripped. Select a wash program and press Start. |
| Poor cleaning results. | Clogged filters/spray arms, improper loading, or insufficient detergent. | Clean filters and spray arms. Reload dishes correctly, avoiding overcrowding. Use the recommended amount of detergent. |
6. Specifications
Detailed technical specifications for the Whirlpool W7FHS51X MaxiSpace dishwasher.
- Model Name: W7FHS51X
- Product Dimensions (L x W x H): 60 x 60 x 85 cm
- Item Weight: 47 Kilograms
- Installation Type: Freestanding
- Material: Stainless Steel
- Finish Type: Chrome
- Voltage: 220 Volts
- Energy Consumption (per 100 cycles): 65 Kilowatt-hours
- BEE Rating: B
- Number of Place Settings: 15
- Number of Programs: 8
- Noise Level: 41 dB
- Controls Type: Tactile
- Special Features: Innovative technology for super quiet operation, excellent cleaning capacity, and end-of-cycle beep.
- Recommended Uses: Daily dishwashing, glasses, pots, and pans.
7. Warranty and Support
For warranty information and customer support, please refer to the documentation provided with your purchase or visit the official Whirlpool website. Keep your proof of purchase for any warranty claims.
If you encounter issues not covered in this manual, please contact Whirlpool customer service or an authorized service technician.