1. Introduction
This manual provides detailed instructions for the installation, operation, and maintenance of your Lian Li VG4-4-V2X Universal 4-Slot Vertical GPU Kit. This kit allows for vertical mounting of a graphics processing unit (GPU) within compatible computer cases, utilizing a premium PCIe 4.0 x16 riser cable for high-speed data transfer. It is designed for compatibility with E-ATX and ATX cases, including specific Lian Li O11 EVO XL models.
Please read this manual thoroughly before installation to ensure correct setup and optimal performance.

Image 1.1: The Lian Li Universal 4-Slot Vertical GPU Kit VG4-V2 installed in a computer case, showcasing a vertically mounted GPU.
2. Package Contents
Verify that all components listed below are present in your package. If any items are missing or damaged, please contact your retailer or Lian Li support.
- Vertical GPU Mounting Bracket (Black)
- PCIe 4.0 x16 Riser Cable (200mm, Black)
- Mounting Screws and Hardware
- Support Brackets
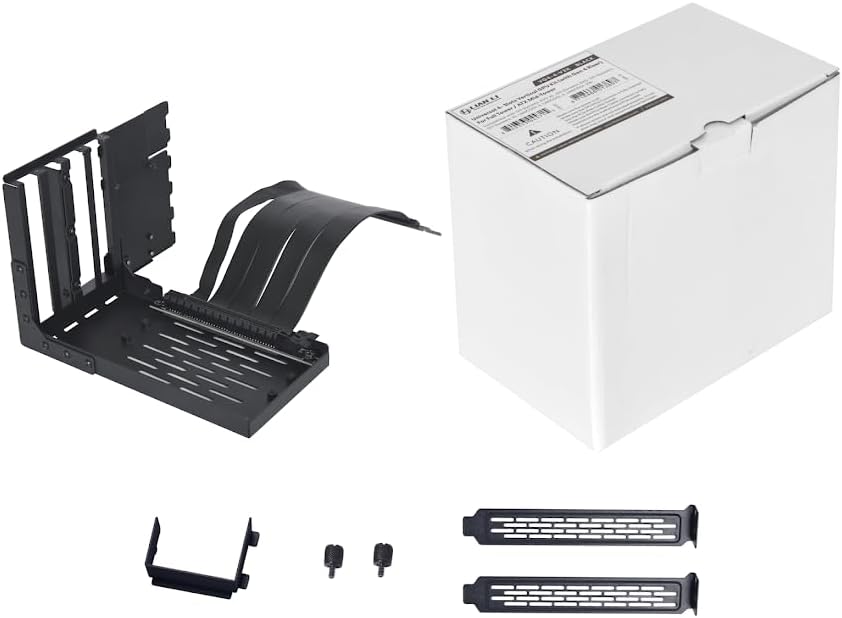
Image 2.1: Overview of the Lian Li VG4-4-V2X Vertical GPU Kit components, including the mounting bracket, riser cable, and accessory hardware, alongside its retail packaging.
3. Setup and Installation
Follow these steps carefully to install the vertical GPU kit into your computer case.
3.1 Compatibility Check
Ensure your computer case is compatible with vertical GPU mounting kits. This kit is designed for ATX and E-ATX cases. It supports up to 4-slot thick GPUs.

Image 3.1: Visual representation of the vertical GPU kit's compatibility with different ATX cases, such as LANCOOL III, O11D XL, and O11D EVO.
3.2 Preparing Your Case
- Power off your computer and disconnect all cables.
- Open your computer case and remove any existing GPU or PCIe devices from the primary PCIe x16 slot.
- Remove any necessary PCIe slot covers from the rear of your case to accommodate the vertical GPU bracket.
3.3 Attaching the GPU to the Bracket
- Carefully align your graphics card with the PCIe slot on the vertical GPU mounting bracket.
- Gently press the graphics card into the slot until it is fully seated.
- Secure the graphics card to the bracket using the provided screws.
3.4 Installing the Assembly into the Case
- Position the assembled GPU and bracket inside your case. The kit features a toolless, adjustable design, allowing horizontal adjustment up to 65mm and side panel adjustment up to 30mm.
- Align the mounting points of the bracket with the designated screw holes in your case.
- Secure the bracket to the case using the appropriate mounting hardware. Ensure all screws are tightened to prevent movement or sag.
- Connect the PCIe 4.0 x16 riser cable from the vertical GPU bracket to the primary PCIe x16 slot on your motherboard. Ensure a firm connection at both ends.
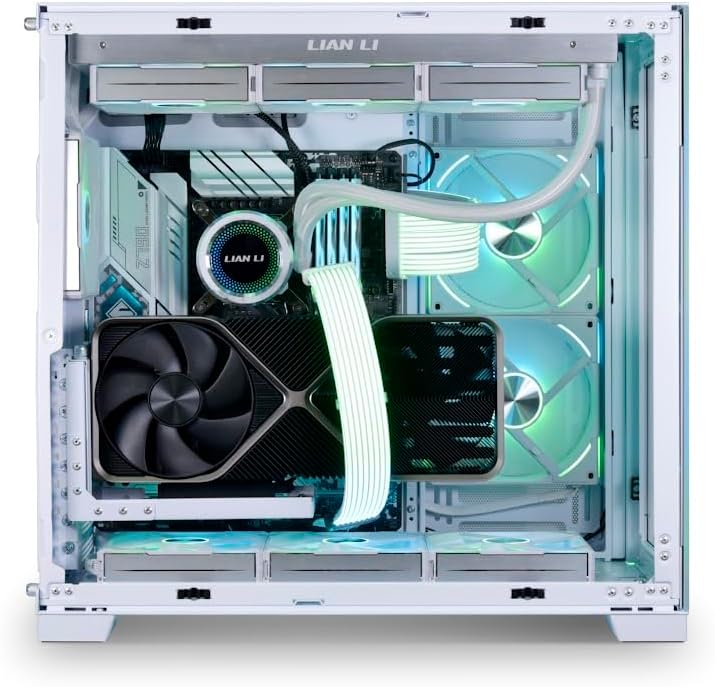
Image 3.2: A graphics card vertically installed using the kit within a white computer case, demonstrating the aesthetic and functional integration.

Image 3.3: Illustrative diagram of a graphics card vertically mounted inside a computer case, highlighting the position and orientation.
4. Operation
Once installed, the Lian Li VG4-4-V2X kit operates passively, facilitating the connection between your GPU and motherboard. No additional software or drivers are required for the kit itself.
- Ensure your system's BIOS/UEFI settings are configured to support PCIe 4.0 if your motherboard and GPU are compatible. The riser cable is backward compatible with PCIe 3.0.
- Verify that your graphics card drivers are up to date for optimal performance.
5. Maintenance
Regular maintenance helps ensure the longevity and performance of your vertical GPU kit.
- Cleaning: Periodically clean the kit and riser cable to prevent dust buildup, which can affect airflow and potentially cause overheating. Use compressed air or a soft, dry cloth.
- Connection Check: Occasionally inspect the connections of the riser cable to the motherboard and GPU to ensure they remain secure.
- Structural Integrity: Verify that all mounting screws are tight and that the bracket remains stable, especially if using a heavy graphics card.
6. Troubleshooting
If you encounter issues with your vertical GPU kit, refer to the following troubleshooting tips:
- GPU Not Detected:
- Ensure the riser cable is fully seated in both the motherboard's PCIe slot and the GPU.
- Check your motherboard's BIOS/UEFI settings. Some motherboards may require setting the primary PCIe slot to a specific generation (e.g., PCIe Gen 4 or Gen 3) manually, rather than 'Auto', for optimal compatibility with riser cables.
- Verify that the GPU is receiving adequate power from the power supply.
- Graphics Card Sagging:
- Ensure all mounting screws for the vertical GPU bracket are securely tightened.
- The kit is designed with a sturdy structure to minimize sag, but for extremely heavy GPUs, additional support may be considered if sagging persists.
- Performance Issues:
- Confirm that the riser cable is correctly connected and not bent or damaged.
- Ensure your motherboard's BIOS/UEFI is configured for the correct PCIe generation (e.g., PCIe 4.0) if your components support it.
7. Specifications
| Feature | Description |
|---|---|
| Brand | Lian Li |
| Model Name | VG4-4-V2X |
| PCIe Version | PCIe 4.0 x16 (Backward compatible with PCIe 3.0) |
| Riser Cable Length | 200mm |
| GPU Slot Support | Up to 4 slots thick |
| Compatibility | E-ATX, ATX Cases (e.g., O11 EVO XL, O11 Dynamic EVO, LANCOOL series) |
| Material | Alloy Steel |
| Color | Black |
| Item Weight | 1.26 pounds |
| Product Dimensions (LxWxH) | 7.4 x 4.72 x 6.38 inches |

Image 7.1: Detailed view of the 200mm PCIe 4.0 x16 riser cable, highlighting its bandwidth capabilities compared to PCIe 3.0.
8. Warranty and Support
For warranty information, please refer to the official Lian Li website or the documentation included with your purchase. Specific warranty terms and conditions may vary by region and retailer.
For technical support, product inquiries, or assistance with installation, please visit the official Lian Li support page or contact their customer service channels. You can typically find contact information on the Lian Li website: www.lian-li.com


