
CUSIMAX CMAF-003
CUSIMAX 10-in-1 Convection Oven, 24QT Air Fryer Combo (Model: CMAF-003) Instruction Manual
Your comprehensive guide to operating and maintaining your CUSIMAX appliance.
Introduction
Thank you for choosing the CUSIMAX 10-in-1 Convection Oven, 24QT Air Fryer Combo. This appliance is designed to provide versatile cooking options, including air frying, convection baking, rotisserie, and dehydrating. Please read this manual thoroughly before initial use to ensure safe and efficient operation.
Important Safety Instructions
- Read all instructions before using the appliance.
- Do not touch hot surfaces. Use handles or knobs.
- To protect against electrical shock, do not immerse cord, plugs, or the appliance in water or other liquid.
- Close supervision is necessary when any appliance is used by or near children.
- Unplug from outlet when not in use and before cleaning. Allow to cool before putting on or taking off parts.
- Do not operate any appliance with a damaged cord or plug or after the appliance malfunctions or has been damaged in any manner.
- The use of accessory attachments not recommended by the appliance manufacturer may cause injuries.
- Do not use outdoors.
- Do not let cord hang over edge of table or counter, or touch hot surfaces.
- Do not place on or near a hot gas or electric burner, or in a heated oven.
- Extreme caution must be used when moving an appliance containing hot oil or other hot liquids.
- Always attach plug to appliance first, then plug cord into the wall outlet. To disconnect, turn any control to "off", then remove plug from wall outlet.
- Do not use appliance for other than intended use.
- Oversized foods or metal utensils must not be inserted in a toaster oven as they may create a fire or risk of electric shock.
- A fire may occur if the oven is covered or touching flammable material, including curtains, draperies, walls, and the like, when in operation.
- Do not place any materials other than manufacturer's recommended accessories in the oven when not in use.
- Do not place any of the following materials in the oven: paper, cardboard, plastic, and similar products.
- Do not cover crumb tray or any part of the oven with metal foil. This will cause overheating of the oven.
- Exercise extreme caution when removing tray or disposing of hot grease.
- Always wear protective, insulated oven mitts when inserting or removing items from the hot oven.
Product Overview
The CUSIMAX 10-in-1 Convection Oven is a versatile kitchen appliance designed for various cooking methods. It features a digital control panel and multiple accessories to enhance your cooking experience.
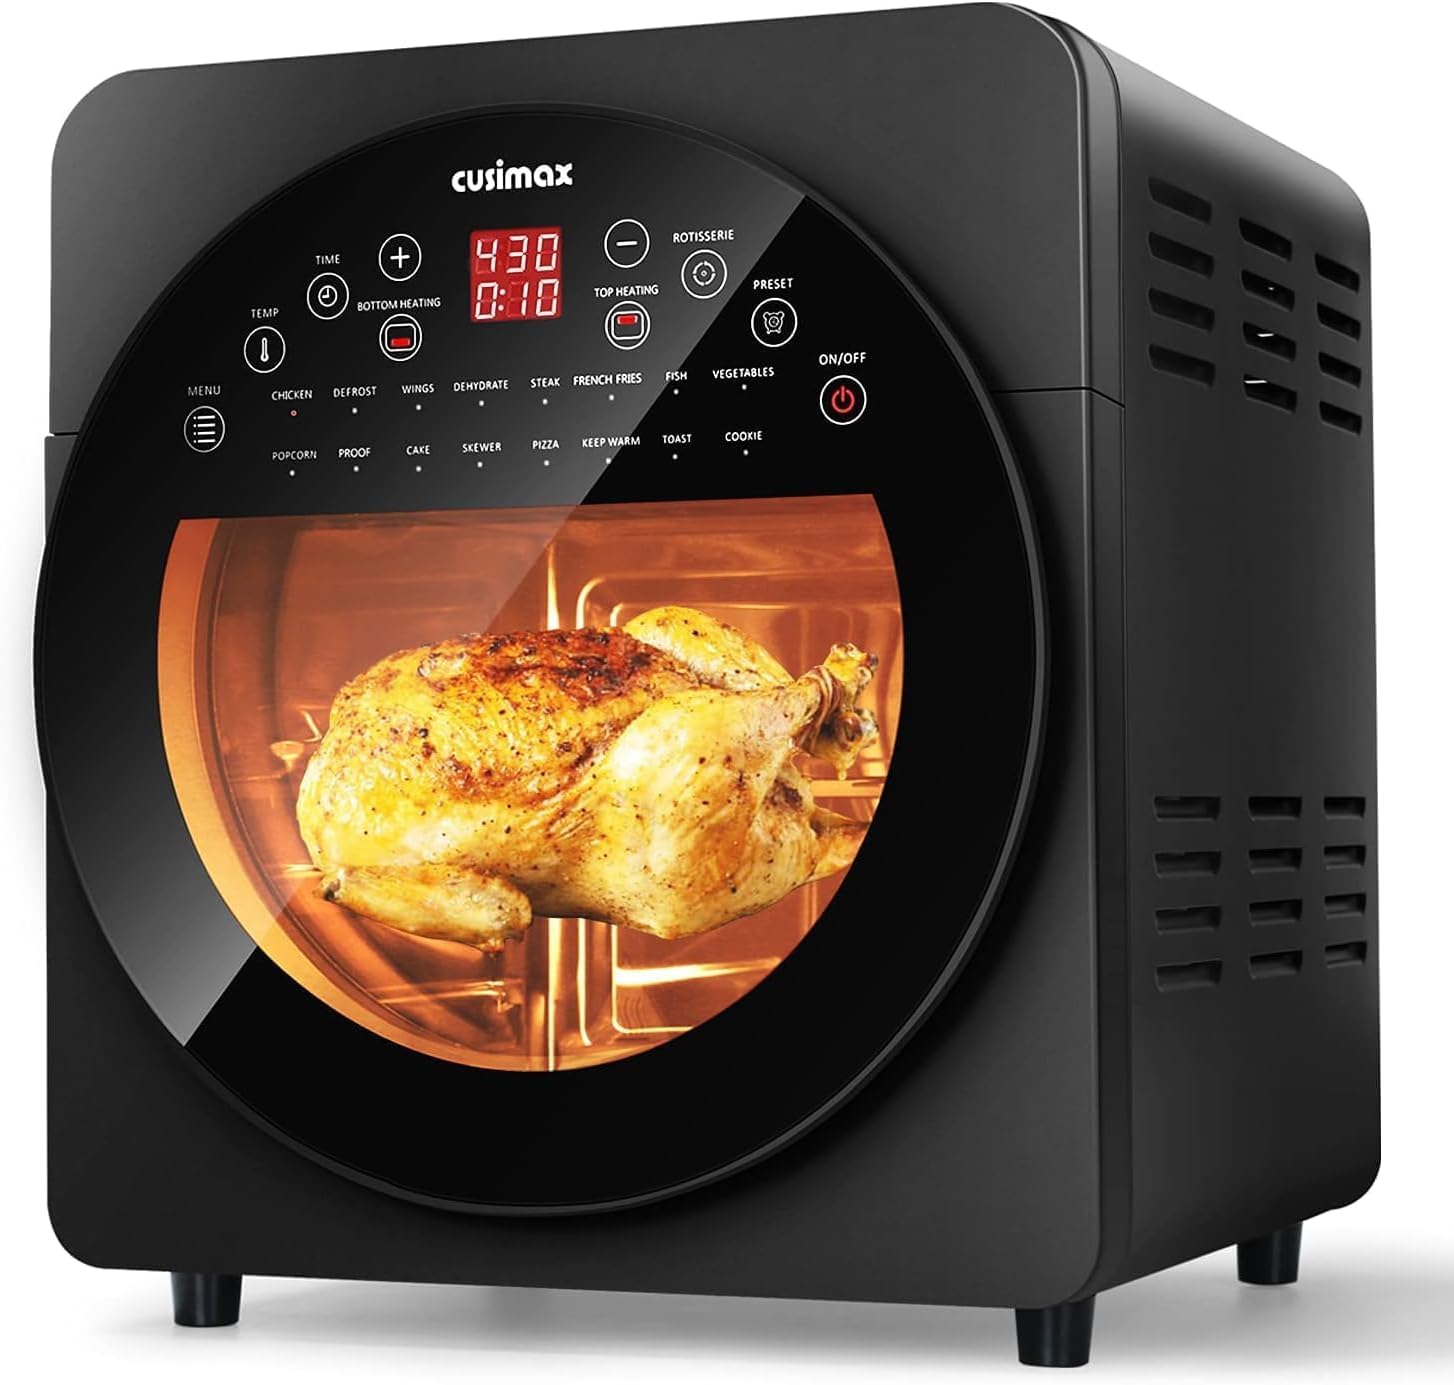
Figure 1: Front view of the CUSIMAX 10-in-1 Convection Oven, showing the control panel and viewing window with a chicken cooking inside.

Figure 2: Included accessories: Mesh Basket, Wire Rack, Rotisserie Fork, Cage Tong, and Drip Tray, alongside examples of food prepared with each.

Figure 3: Dimensions of the CUSIMAX 10-in-1 Convection Oven, showing approximate measurements of 14.6 inches (height), 13 inches (width), and 15 inches (depth).
Components and Accessories
- Main Unit: The primary oven body with control panel and viewing window.
- Air Fry Basket: For air frying foods like fries and wings.
- Baking Pan: For baking and roasting.
- Crumb Tray: Collects crumbs and drips for easy cleaning.
- Frying Rack (Wire Rack): For general cooking and supporting other accessories.
- Removal Handle: For safely inserting and removing hot accessories.
- Rotisserie Rod: For rotisserie cooking of whole chickens or roasts.
Setup and First Use
- Unpacking: Carefully remove all packaging materials and accessories from the box.
- Cleaning: Wipe down the interior and exterior of the oven with a damp cloth. Wash all accessories (Air Fry Basket, Baking Pan, Crumb Tray, Frying Rack, Removal Handle, Rotisserie Rod) with warm, soapy water. Rinse thoroughly and dry completely.
- Placement: Place the oven on a stable, heat-resistant, and level surface. Ensure there is at least 6 inches (15 cm) of clearance on all sides and above the oven for proper ventilation. Do not place near flammable materials.
- Power Connection: Plug the power cord into a grounded electrical outlet. Ensure the outlet meets the appliance's power requirements (120V, 60Hz).
- Initial Burn-in: Before cooking food, operate the oven empty for approximately 15 minutes at 400°F (200°C) to burn off any manufacturing residues. A slight odor or smoke may be present during this process; this is normal. Ensure adequate ventilation.
Operating Instructions
The CUSIMAX 10-in-1 Convection Oven features a digital control panel with various presets and manual settings.
Control Panel Overview

Figure 4: Detailed view of the control panel, showing temperature, time, and various cooking presets.
- ON/OFF Button: Powers the unit on or off.
- Menu Button: Cycles through various cooking presets.
- Temperature Control (TEMP): Adjusts cooking temperature.
- Time Control (TIME): Adjusts cooking duration.
- Rotisserie Button: Activates the rotisserie function.
- Top Heating / Bottom Heating: Selects heating elements.
- Preset Button: Accesses pre-programmed cooking functions.
General Operation
- Power On: Press the ON/OFF button. The display will illuminate.
- Select Function:
- Using Presets: Press the "Menu" or "Preset" button to cycle through options like Chicken, Wings, Dehydrate, Steak, French Fries, Fish, Vegetables, Pizza, Toast, etc. Once a preset is selected, the default time and temperature will display.
- Manual Setting: If a preset is not desired, manually set the temperature using the "TEMP" button and the time using the "TIME" button.
- Adjust Settings: Use the '+' and '-' buttons to increase or decrease the selected temperature or time.
- Start Cooking: Once settings are confirmed, press the ON/OFF button again to start the cooking cycle.
- Monitoring: The internal light can be turned on to check food progress without opening the door.
- Completion: The oven will beep when the cooking cycle is complete. Carefully remove food using the removal handle or oven mitts.
Specific Cooking Functions
- Air Frying: Place food in the Air Fry Basket. Insert the basket into the oven. Select an air fry preset (e.g., French Fries, Wings) or manually set temperature (typically 350-400°F) and time.
- Rotisserie: Secure food (e.g., whole chicken) onto the Rotisserie Rod. Insert the rod into the designated slots inside the oven. Select the Rotisserie function and set time/temperature. Ensure the food rotates freely.
- Baking/Roasting: Use the Baking Pan or Frying Rack. Select a baking/roasting preset or manually set temperature and time.
- Dehydrating: Arrange thinly sliced food on the Frying Racks. Select the Dehydrate preset. This function typically uses lower temperatures over longer periods.

Figure 5: Visual representation of 16 cooking presets available on the CUSIMAX 10-in-1 Convection Oven, including French Fries, Chicken, Steak, Fish, Vegetables, Pizza, and Dried Fruit.
Cleaning and Maintenance
Regular cleaning ensures optimal performance and extends the life of your appliance.
- Before Cleaning: Always unplug the oven from the power outlet and allow it to cool completely before cleaning.
- Crumb Tray: Remove the crumb tray from the bottom of the oven and discard any crumbs. Wash the tray with warm, soapy water, rinse, and dry thoroughly.
- Accessories: All removable accessories (Air Fry Basket, Baking Pan, Crumb Tray, Frying Rack, Removal Handle, Rotisserie Rod) are dishwasher safe or can be hand-washed with warm, soapy water. Avoid abrasive cleaners or scouring pads.
- Interior: Wipe the interior walls and glass door with a damp cloth and mild detergent. For stubborn stains, a non-abrasive cleaner designed for oven interiors can be used. Ensure all cleaner residue is removed.
- Exterior: Wipe the exterior of the oven with a soft, damp cloth. Do not use abrasive cleaners or immerse the unit in water.
- Storage: Ensure the oven and all accessories are clean and dry before storing. Store in a cool, dry place.
Troubleshooting
| Problem | Possible Cause | Solution |
|---|---|---|
| Oven does not turn on. | Not plugged in; power outage; faulty outlet. | Ensure power cord is securely plugged into a working outlet. Check household circuit breaker. |
| Food is not cooking evenly. | Overcrowding; incorrect temperature/time; food placement. | Do not overcrowd the oven. Ensure food is arranged in a single layer where possible. Adjust temperature and time as needed. Rotate food halfway through cooking. |
| White smoke coming from oven. | Excess oil/grease on heating elements or crumb tray; initial burn-in. | This is normal during initial use. For subsequent uses, ensure crumb tray and interior are clean. Reduce amount of oil used. |
| Rotisserie function not working. | Rotisserie rod not properly installed; food too large/heavy. | Ensure the rotisserie rod is correctly seated in the drive and support slots. Do not overload the rotisserie. |
| Appliance radiates excessive heat. | Normal operation for high-temperature cooking; insufficient clearance. | Ensure adequate clearance (at least 6 inches) around all sides of the oven. This is a high-power appliance and will generate heat. |
Specifications
| Feature | Detail |
|---|---|
| Brand | CUSIMAX |
| Model Number | CMAF-003 |
| Capacity | 24QT (approximately 22.7 Liters) |
| Functions | 10-in-1 (Air Fry, Convection Bake, Roast, Broil, Toast, Dehydrate, Rotisserie, Warm, Reheat, Pizza) |
| Control Type | Knob with Digital Display |
| Power Source | AC adapter (Standard 120V, 60Hz for US market) |
| Item Weight | 23 pounds (approximately 10.4 kg) |
| Product Dimensions | Approximately 15"D x 13"W x 14.6"H |
| Color | Ebony Silver |
Note: Product dimensions provided in the original data (46"D x 46"W x 46"H) appear to be incorrect. The dimensions listed above are based on visual information from product images, which show approximately 15 inches (depth), 13 inches (width), and 14.6 inches (height).
Warranty and Support
For warranty information, product support, or to inquire about replacement parts, please contact CUSIMAX customer service. Refer to the product packaging or the official CUSIMAX website for the most current contact details.
Note: Some customer reviews mention an 18-month warranty period. Please verify this information with CUSIMAX directly.
Related documentsCMAF-003

Ask a question about this manual
Ask about setup, troubleshooting, compatibility, parts, safety, or missing instructions. Manuals+ will review the question and use this page’s manual context to help answer it.