folosem PE2 0.10 Joule
folosem Electric Fence Energizer Plus 250 User Manual
Model: PE2 0.10 Joule
1. Introduction
The folosem PE2 Electric Fence Energizer is a 110-volt A/C plug-in unit designed for effective containment of livestock and poultry, while also deterring small nuisance animals from entering your property. This manual provides essential information for the safe and efficient installation, operation, and maintenance of your electric fence system.
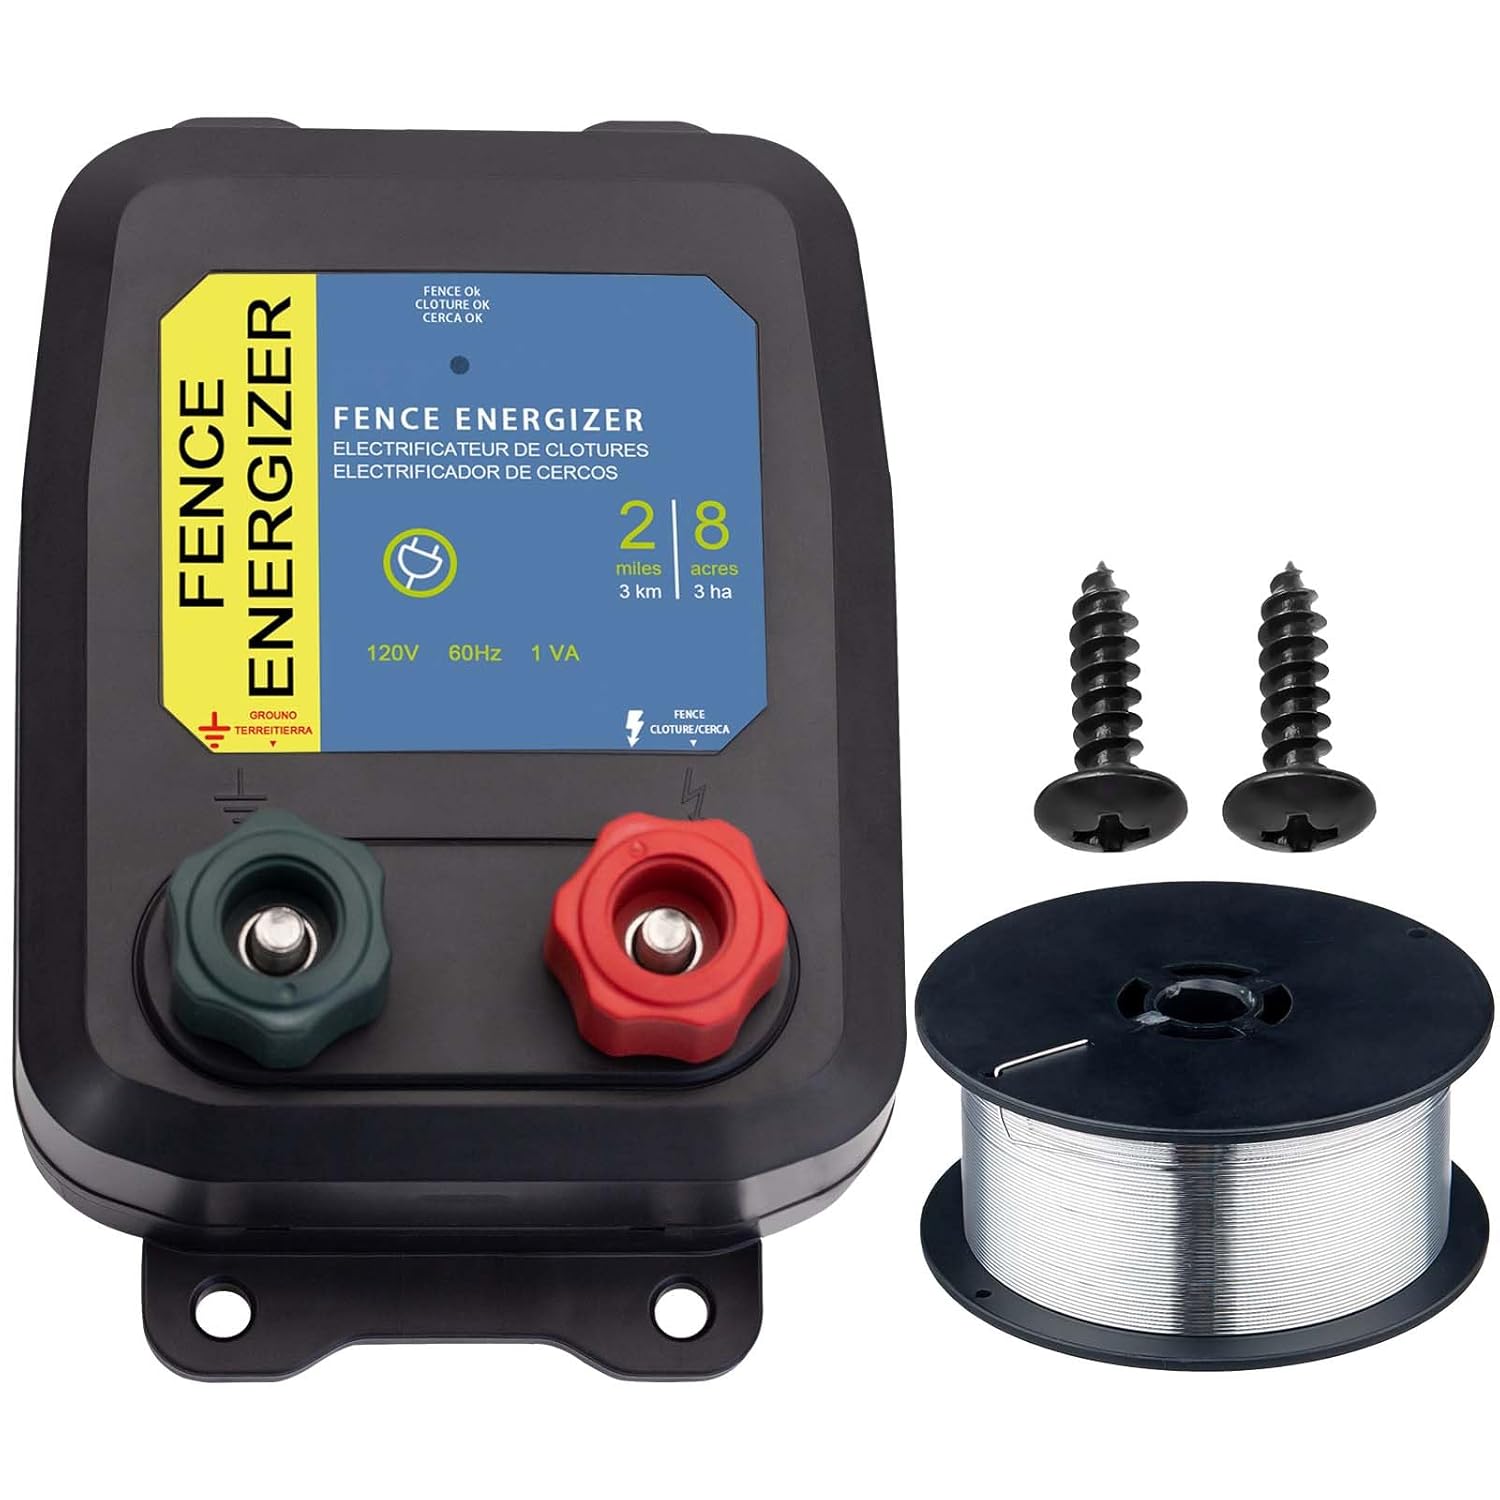
Image 1.1: The folosem Electric Fence Energizer Plus 250, showing the main unit, a spool of 17-gauge aluminum wire, and two mounting screws.
2. Safety Instructions
Please read and understand all safety instructions before installing and operating the energizer. Failure to follow these instructions may result in electric shock, injury, or damage to the equipment.
- Grounding: The ground system for the energizer should be located at least 33 feet (10 meters) away from any electric or telephone ground systems to prevent interference.
- Ground Rods: Ensure a sufficient number of ground rods are used. If uncertain, use at least three ground rods. More ground rods may be necessary in poor soil conditions. Ground rods should be a minimum of 6 feet 6 inches (2 meters) long. A single long ground rod is more effective than several shorter ones.
- Power Source: This energizer is designed for 110-volt A/C plug-in operation. Connect only to a compatible power outlet.
- Installation Environment: Install the energizer in a dry, protected location, away from direct weather exposure.
- Children and Animals: Keep children and untrained animals away from the electric fence. Post warning signs on the fence if required by local regulations.
- Maintenance: Disconnect the energizer from the power source before performing any maintenance or repairs on the fence system.
3. Package Contents
Verify that all items are present in the package:
- Electric Fence Energizer (PE2 0.10 Joule model)
- 17 Gauge Spool Aluminum Wire (250 feet)
- Mounting Screws (quantity 2)
4. Setup and Installation
Follow these steps for proper installation of your electric fence energizer:
- Mounting the Unit: Mount the energizer unit on a suitable vertical support or wall material using the provided screws. A 3-inch (75 mm) flat-headed nail can also be used; hammer it in, allowing it to protrude by 3/8 inch (10 mm). Then, slide the unit onto the nail using the mounting hole on the back of the unit.
- Connecting the Ground Terminal: Connect the Fence ground terminal (green) to a separate ground system. This ground system must be at least 33 feet (10 meters) away from other ground systems (e.g., electric or telephone grounds) to avoid interference. Refer to the safety instructions for ground rod requirements.
- Connecting the Fence Output Terminal: Connect the Fence output terminal (red) to your fence line. Ensure all connections are secure.

Image 4.1: Detailed view of the energizer showing the pulse indicator light, green fence ground terminal, and red fence output terminal.

Image 4.2: Visual guide for mounting the unit and connecting the ground and fence lines. The diagram shows the energizer mounted on a wall, connected to ground rods and a multi-strand fence, with a horse interacting with the fence.

Image 4.3: An example of the electric fence energizer installed in an outdoor setting, demonstrating its use in a field with livestock.
5. Operating Instructions
Once installed, plug the energizer into a 110-volt A/C power outlet. The visible light indicator on the unit will illuminate, confirming that the energizer is working and sending pulses to the fence line.
The PE2 energizer provides an output voltage of up to 5 kV maximum, with 2.8 kV at 500 ohms, suitable for effective animal control.

Image 5.1: Examples of product application, including horses, sheep, donkeys, pigs, dogs, and chickens, illustrating the versatility of the electric fence system for different animals.
6. Maintenance
Regular maintenance ensures optimal performance and longevity of your electric fence energizer:
- Visual Inspection: Periodically inspect the energizer, fence line, and ground system for any visible damage, loose connections, or corrosion.
- Clear Vegetation: Keep the fence line clear of vegetation, as plants can draw power from the fence and reduce its effectiveness.
- Clean Terminals: Ensure the ground and fence terminals are clean and free of dirt or debris to maintain good conductivity.
- Weather Protection: While designed for outdoor use, protecting the energizer from extreme weather conditions (e.g., heavy rain, snow) can extend its lifespan.
7. Troubleshooting
If your electric fence system is not performing as expected, consider the following common issues and solutions:
| Problem | Possible Cause | Solution |
|---|---|---|
| Energizer light is off / No pulse | No power to the unit, faulty outlet, or internal issue. | Check power outlet with another device. Ensure the energizer is securely plugged in. If still no light, the unit may be faulty. |
| Weak or no shock on fence line | Poor grounding, short circuit on fence, vegetation contact, or damaged wire/connections. | Verify ground system integrity (sufficient ground rods, proper connection). Inspect fence line for shorts (e.g., wire touching posts, vegetation, or other conductive materials). Check all connections for tightness and corrosion. Use a fence tester to locate shorts. |
| Interference with other systems | Ground system too close to other electrical or telephone grounds. | Ensure the energizer's ground system is at least 33 feet (10 meters) away from other ground systems. |
| Physical damage to unit (e.g., cord detached) | Wear and tear or accidental damage. | Inspect the unit for physical damage. If the power cord or other components are compromised, discontinue use and contact customer support. |
8. Specifications
| Feature | Detail |
|---|---|
| Model | PE2 0.10 Joule |
| Input Voltage | 110V A/C |
| Output Voltage | Up to 5 kV max, 2.8 kV @ 500 ohms |
| Joules | 0.10 Joule |
| Package Dimensions | 11.54 x 5.71 x 3.58 inches |
| Weight | 2.36 Pounds |
| Manufacturer | folosem |
| Country of Origin | China |
9. Warranty and Support
For any further questions, technical assistance, or inquiries regarding appliance parts needs, please contact folosem customer support. Refer to your purchase documentation for specific warranty details and contact information.
Ask a question about this manual
Ask about setup, troubleshooting, compatibility, parts, safety, or missing instructions. Manuals+ will review the question and use this page’s manual context to help answer it.