1. Product Overview
The oceanside Mini Tracer Unit is designed for use with paintball and airsoft equipment, providing simulated fire effects and fluorescent bomb charging capabilities. It features advanced UV LED technology for enhanced visibility of tracer BBs and a motion sensor for automatic activation.

Figure 1: Oceanside Mini Tracer Unit, USB cable, and adapter.
2. Package Contents
Verify that all items listed below are present in your package:
- 1 x Mini Tracer Unit
- 1 x USB Cable
- 1 x Adapter (for 14mm CW thread)
- 1 x Storage Box
- 1 x User Manual (this document)
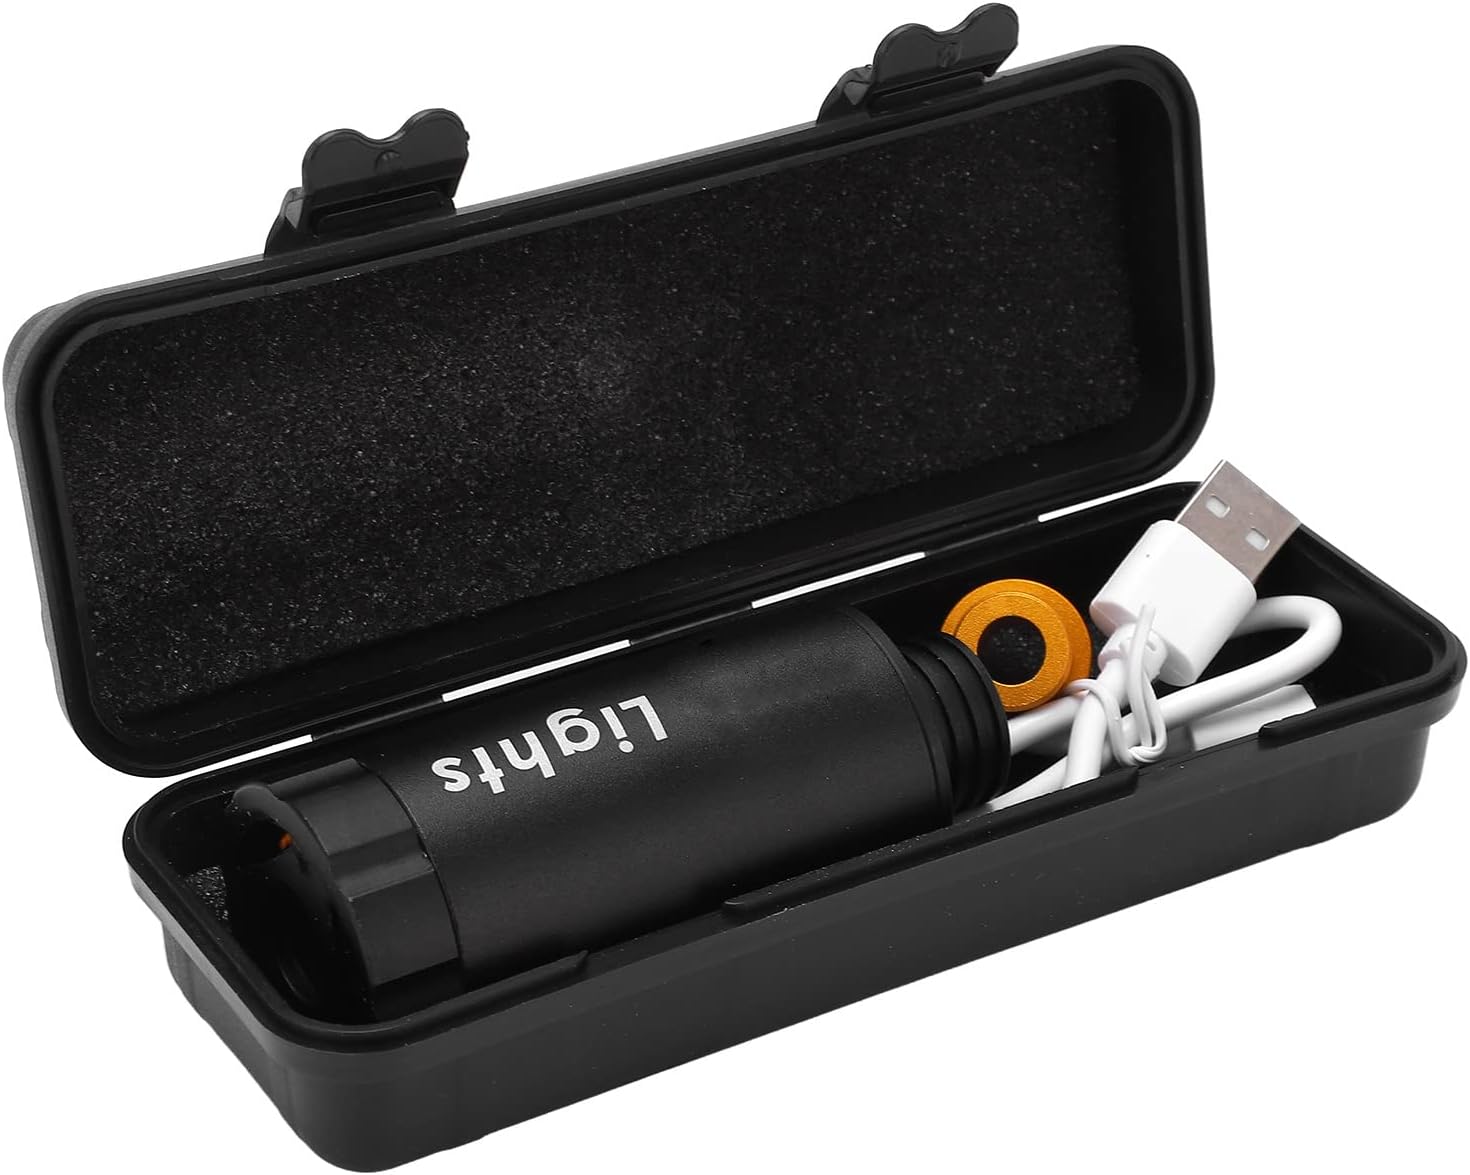
Figure 2: All components neatly packed within the storage box.
3. Specifications
| Item Type | Mini Tracer Unit |
| Material | Aluminum Alloy |
| Dimensions | Approx. 8 x 3.5 cm (3.15 x 1.38 in) |
| Weight | 4.6 ounces (approx. 130g) |
| Applicable Threads | 11mm Counter-Clockwise (CCW) and 14mm Clockwise (CW) |
| Power Supply | Built-in 300mAh Lithium Battery |
| Tracking Function | Up to 35 RPS (2100 RPM) |
| Technology | High power UV LED, Active Detection Induction, 9 Flash Light Sources |
4. Setup
4.1 Charging the Unit
The Mini Tracer Unit comes with a built-in lithium battery. Before first use, fully charge the unit using the provided USB cable. A full charge provides approximately 4 hours of continuous use. The unit features a low battery reminder function.
- Connect the small end of the USB cable to the charging port on the tracer unit.
- Connect the standard USB end of the cable to a compatible USB power source (e.g., computer USB port, USB wall adapter).
- Allow the unit to charge until the charging indicator light (if present) indicates a full charge.
4.2 Attaching to Equipment
The tracer unit is compatible with 11mm CCW (Counter-Clockwise) and 14mm CW (Clockwise) threaded barrels. Use the included adapter for 14mm CW compatibility if your equipment requires it.
- Identify the thread type of your equipment's barrel.
- If your barrel has a 14mm CW thread, screw the provided adapter onto the tracer unit first.
- Carefully screw the tracer unit (with or without adapter) onto the barrel of your paintball or airsoft equipment. Ensure it is securely fastened but do not overtighten.

Figure 3: Detail of the Mini Tracer Unit showing its threading.
5. Operating Instructions
The oceanside Mini Tracer Unit is designed for ease of use with automatic functions.
5.1 Power On/Off
The unit features a one-button control for power. Press and hold the power button (usually located near the charging port) for a few seconds to turn the unit on or off. A light indicator may confirm the power status.
5.2 Automatic Wake-Up and Tracking
The Mini Tracer Unit is equipped with an automatic wake-up function. Once powered on, it will automatically activate its flash function when it senses a projectile being launched through it. It can track up to 35 rounds per second (2100 RPM), ensuring consistent illumination of tracer BBs.
The unit utilizes high-power UV LED technology and active detection induction to illuminate fluorescent projectiles, creating a visible tracer effect. It is equipped with 9 mobile phone-level flash light sources for optimal performance.
6. Maintenance
To ensure the longevity and optimal performance of your oceanside Mini Tracer Unit, follow these general maintenance guidelines:
- Cleaning: Periodically wipe the exterior of the unit with a soft, dry cloth to remove dust and debris. Avoid using abrasive cleaners or solvents.
- Storage: When not in use, store the tracer unit in its provided storage box in a cool, dry place, away from direct sunlight and extreme temperatures.
- Battery Care: For extended storage, it is recommended to charge the built-in lithium battery to approximately 50% capacity every few months to maintain battery health.
- Inspection: Regularly inspect the threading for any signs of wear or damage. Ensure the unit is free from obstructions.
The unit is constructed from durable aluminum alloy, designed for high strength and wear resistance. Proper care will help maintain its condition and functionality.
7. Troubleshooting
This section provides solutions to common issues you might encounter with your Mini Tracer Unit.
| Problem | Possible Cause | Solution |
|---|---|---|
| Unit does not turn on. | Battery is depleted. | Charge the unit fully using the provided USB cable. |
| Tracer effect is weak or inconsistent. | Low battery; Non-fluorescent BBs used; Unit not properly aligned. | Ensure unit is fully charged. Use only fluorescent tracer BBs. Verify the unit is securely and correctly attached to the barrel. |
| Unit does not automatically activate. | Unit is off; Sensor obstructed; Projectile speed too low. | Ensure the unit is powered on. Check for any obstructions in the sensor area. Ensure projectiles are passing through the unit at sufficient speed. |
8. Warranty and Support
For information regarding warranty coverage, technical support, or service inquiries, please refer to the purchase documentation or contact oceanside customer service through the retailer where the product was purchased.
Note: Specific warranty terms and conditions may vary by region and retailer.