Important Safety Information
Read all instructions thoroughly before installing or operating this appliance. Failure to follow these instructions may result in electric shock, fire, or serious injury.
- Always ensure the disposal is connected to a properly grounded electrical outlet.
- Never place hands or foreign objects into the disposal opening.
- Always run cold water when operating the disposal and for a few seconds after turning it off.
- The unit is equipped with overload protection and a reset button for safety. Do not bypass these features.
- Do not dispose of flammable materials, caustic chemicals, or large non-food items.
Package Contents
Verify that all components are present and undamaged before beginning installation.
- Disposer Unit (American Standard 10-US-AS-5)
- 3-Bolt Mounting Flange Assembly
- Drain Elbow with Gasket
- Removable Splashguard
- Stainless Steel Stopper
- Pre-installed Power Cord (for plug-in models)

Image: Components included in the box, such as the disposer, removable splash guard, stainless steel stopper, flange with screws, and drain elbow with gasket.
Specifications
| Feature | Detail |
|---|---|
| Model Number | 10-US-AS-5 |
| Horsepower | 0.5 HP |
| Motor Type | Permanent Magnet Motor |
| Voltage | 110 Volts (AC) |
| Item Weight | 9.4 pounds |
| Product Dimensions (L x W x H) | 6.3 x 6.3 x 13 inches |
| Style | Continuous Feed |
| Grinding Components | Stainless Steel |
| Mounting System | 3-Bolt |
| Included Components | 3-Bolt Mounting Flange, Disposer, Elbow Flange and Elbow, Removable Splashguard |

Image: A diagram showing the dimensions of the American Standard AS-5 garbage disposal, including overall height (13 inches), diameter (6.3 inches), cord length (34 inches), mount height (2 inches), dishwasher connection (7/8 inch), drain outlet (1.5 inches), and flange width (4.5 inches.
Setup and Installation
Pre-Installation Checklist
- Ensure power to the sink area is disconnected at the circuit breaker.
- Gather necessary tools: screwdriver, plumber's putty, adjustable wrench, pliers, safety glasses.
- Confirm your sink opening is compatible with a 3-bolt mounting system.
Installation Steps (General Guide)
These steps provide a general overview. Refer to the detailed diagram and local plumbing codes for specific requirements.
- Remove Old Disposal (if applicable): Disconnect power, plumbing connections, and mounting hardware from the existing unit.
- Install Mounting Assembly: Apply a bead of plumber's putty around the underside edge of the sink flange. Insert the flange into the sink drain opening. From below the sink, secure the fiber gasket, backup flange, and mounting ring. Tighten the three mounting bolts evenly.
- Connect Dishwasher Drain (if applicable): If connecting a dishwasher, remove the knockout plug from the disposal's dishwasher inlet using a screwdriver and hammer. Connect the dishwasher drain hose to this inlet.
- Connect Drain Elbow: Attach the drain elbow to the disposal unit using the provided flange and bolts. Then, connect the other end of the drain elbow to your household drain pipe.
- Electrical Connection: If using the pre-installed power cord, plug it into a grounded 110V AC outlet. If hardwiring, remove the power cord and connect the disposal's wiring to your household electrical supply according to local electrical codes. Ensure proper grounding.
- Attach Disposal Unit: Lift the disposal unit and align the three mounting lugs on the disposal with the corresponding ramps on the mounting ring. Twist the disposal unit clockwise until it locks firmly into place.
- Test for Leaks: Turn on the cold water and check all connections for any signs of leaks.

Image: An exploded view of the American Standard AS-5 garbage disposal, highlighting key components like the 3-bolt mount, laser sharp cutting ring, balanced turntable, pre-installed power cord, dishwasher hookup, stainless steel grinding components, and permanent magnet motor.
Operating Instructions
Daily Use
- Turn on a medium stream of cold water.
- Flip the disposal switch to the ON position.
- Slowly feed food waste into the disposal opening. Do not overload the unit.
- Allow the disposal to run until all waste is ground and only the sound of water and the motor is heard.
- Turn off the disposal switch, then turn off the cold water after a few seconds to ensure the drain line is thoroughly flushed.
Acceptable Food Waste
This disposal is designed to efficiently grind a wide range of common food waste items:
- Fruit and vegetable scraps (e.g., apple cores, citrus peels, celery, potato peels)
- Small chicken and fish bones
- Cooked meat scraps
- Coffee grounds
Unacceptable Items (Do NOT put into disposal)
To prevent damage to the disposal and plumbing system, avoid disposing of the following:
- Large or hard bones (e.g., beef, pork)
- Fibrous materials (e.g., corn husks, artichokes, onion skins in large quantities)
- Grease, fats, or oils (these can solidify and clog pipes)
- Glass, metal, plastic, rubber, or other non-food items
- Harsh chemicals or drain cleaners

Image: Various food scraps, including apple cores, citrus peels, celery, and small bones, being fed into the American Standard AS-5 garbage disposal, illustrating its grinding capability.
Maintenance
Cleaning the Disposal
Regular cleaning helps maintain optimal performance and prevents odors.
- Regular Flushing: Always run cold water for a few seconds after turning off the disposal to flush the grinding chamber and drain lines.
- Deep Cleaning: Grind small amounts of ice cubes to help clean the grinding chamber. For freshening, grind citrus peels (lemon, orange) with cold water.
- Removable Splash Guard: The splash guard can be removed for thorough cleaning. Simply pull it out from the sink opening. Clean it with soap and water, then reinsert.
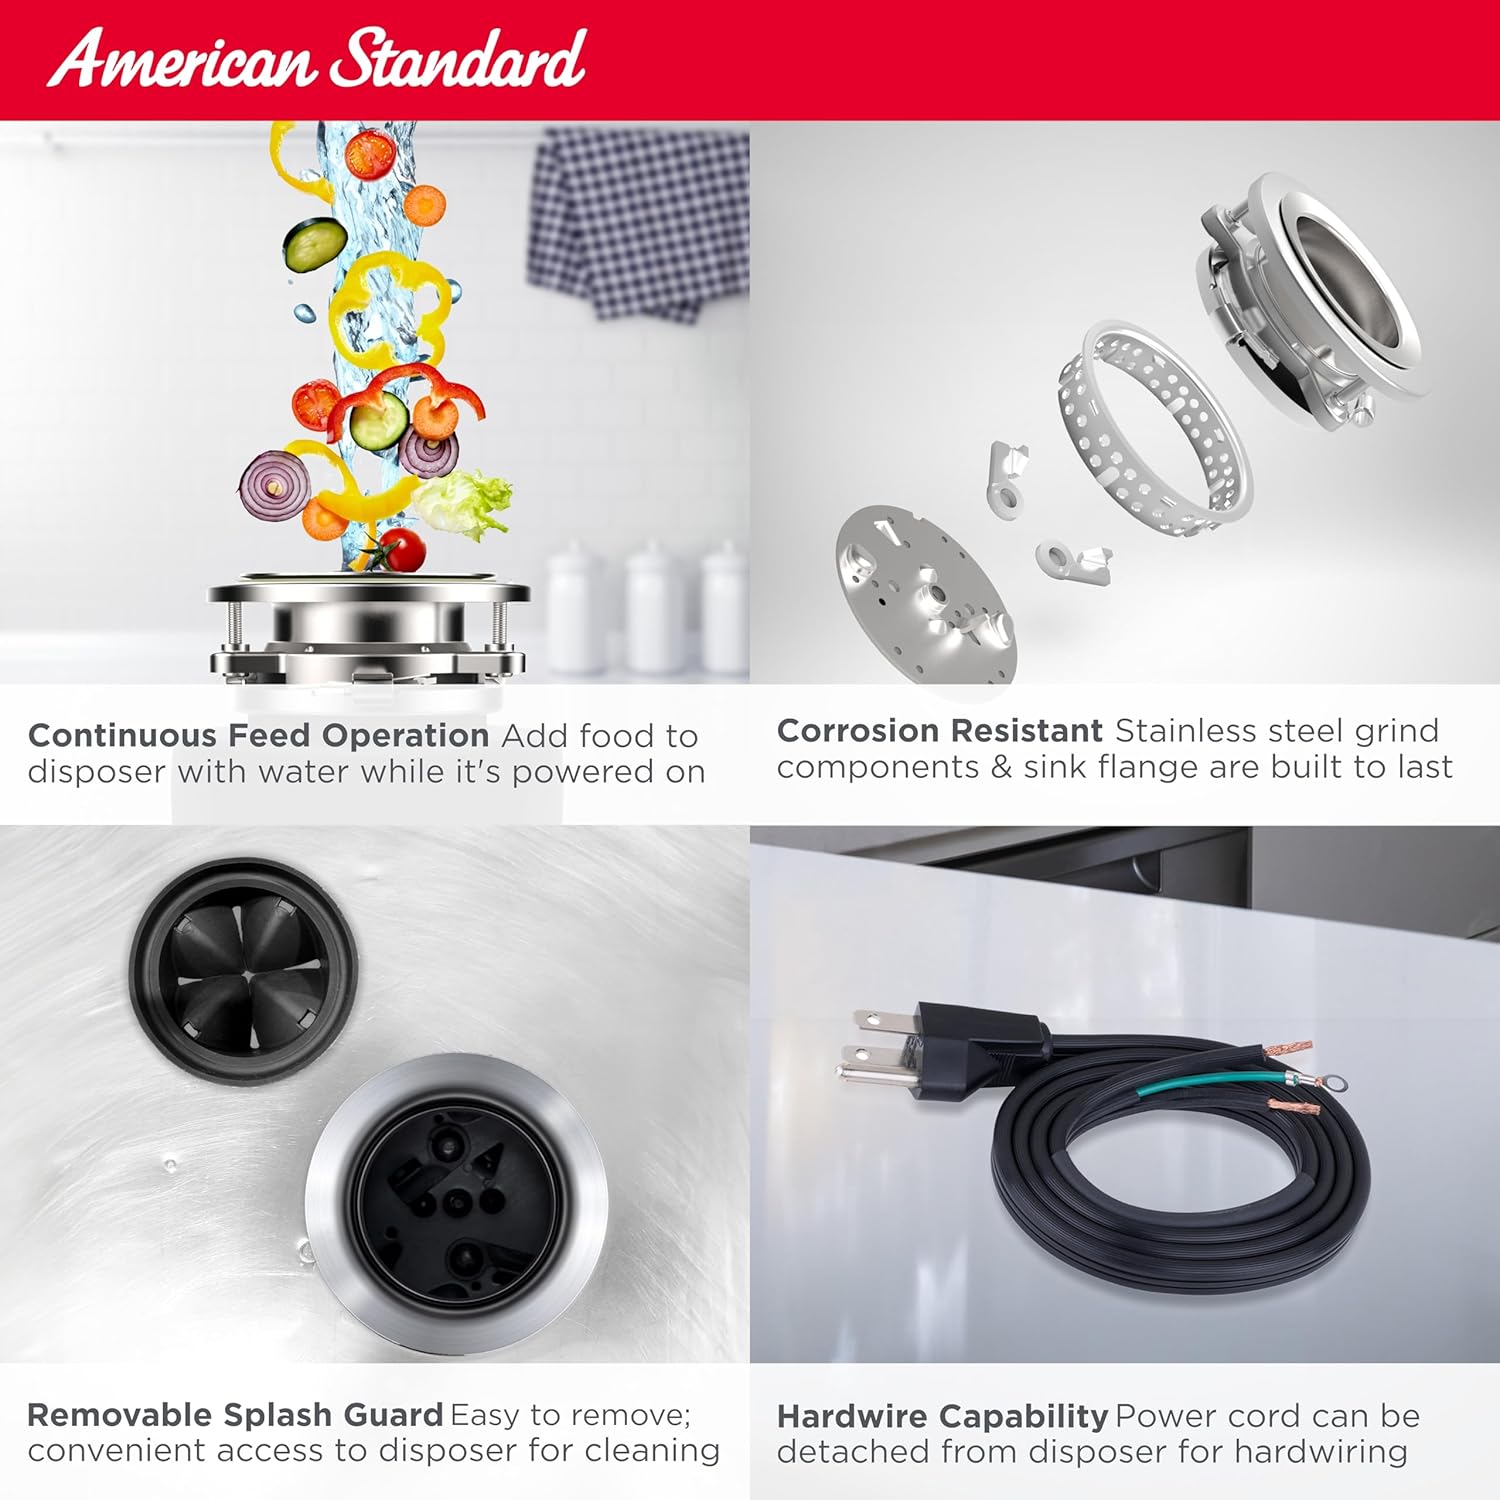
Image: A split image showing continuous feed operation with food and water, and the removable splash guard for easy cleaning.
Troubleshooting
If your disposal is not functioning correctly, refer to the following common issues and solutions.
Disposal Not Starting
- Check Power: Ensure the unit is properly plugged into a working outlet. Check your household circuit breaker and reset if it has tripped.
- Reset Button: Locate the red reset button on the bottom of the disposal unit. Press it firmly. If it trips repeatedly, there may be an internal issue requiring professional service.
Disposal Humming but Not Grinding
- This usually indicates an object is jammed in the grinding chamber.
- IMPORTANT: Disconnect Power: Turn off the power to the disposal at the circuit breaker before proceeding.
- Clear Jam: Use a flashlight to look into the drain opening. Carefully use tongs or pliers to remove any visible object. NEVER use your hand.
- Reset: Once the object is removed, press the reset button on the bottom of the disposal. Restore power and test the unit.
Leaks
- Check all plumbing connections (drain elbow, dishwasher connection) for tightness. Tighten any loose connections.
- Inspect the sink flange for proper sealing with plumber's putty. If the seal is compromised, it may need to be re-sealed.
Odors
- Follow the cleaning instructions provided in the Maintenance section (ice, citrus peels).
- Ensure sufficient cold water is used during and after each operation to thoroughly flush food particles.
Warranty and Customer Support
American Standard products are manufactured to high-quality standards and are backed by a manufacturer's warranty. For specific warranty details, please refer to the documentation included with your purchase or visit the official American Standard website.
For technical assistance, troubleshooting beyond this manual, or to inquire about replacement parts, please contact American Standard customer support. Keep your proof of purchase and model number (10-US-AS-5) readily available when contacting support.
You can typically find contact information on the American Standard website or within your product packaging.


